Q: I want to automatically import Excel spreadsheets sent to me by colleagues via Email into my SQL Server or PostgreSQL database. How should I do it?
A: Yes. Here's an interesting demonstration that shows how to import data from an Excel attachment in an email into a database and then reply to the sender with an email informing them of the number of records imported. You can also customize this demonstration to meet your specific needs.
Tips: In this demonstration, Excel data is imported into a PostgreSQL database. The system also supports other types of databases, including SQL Server, MySQL, Oracle, and Informix.
Step 1: Download and install SQLMessenger. Click here to download.
Step 2: Click here to download the demo task config file. After downloading, import it into your SQLMessenger system.
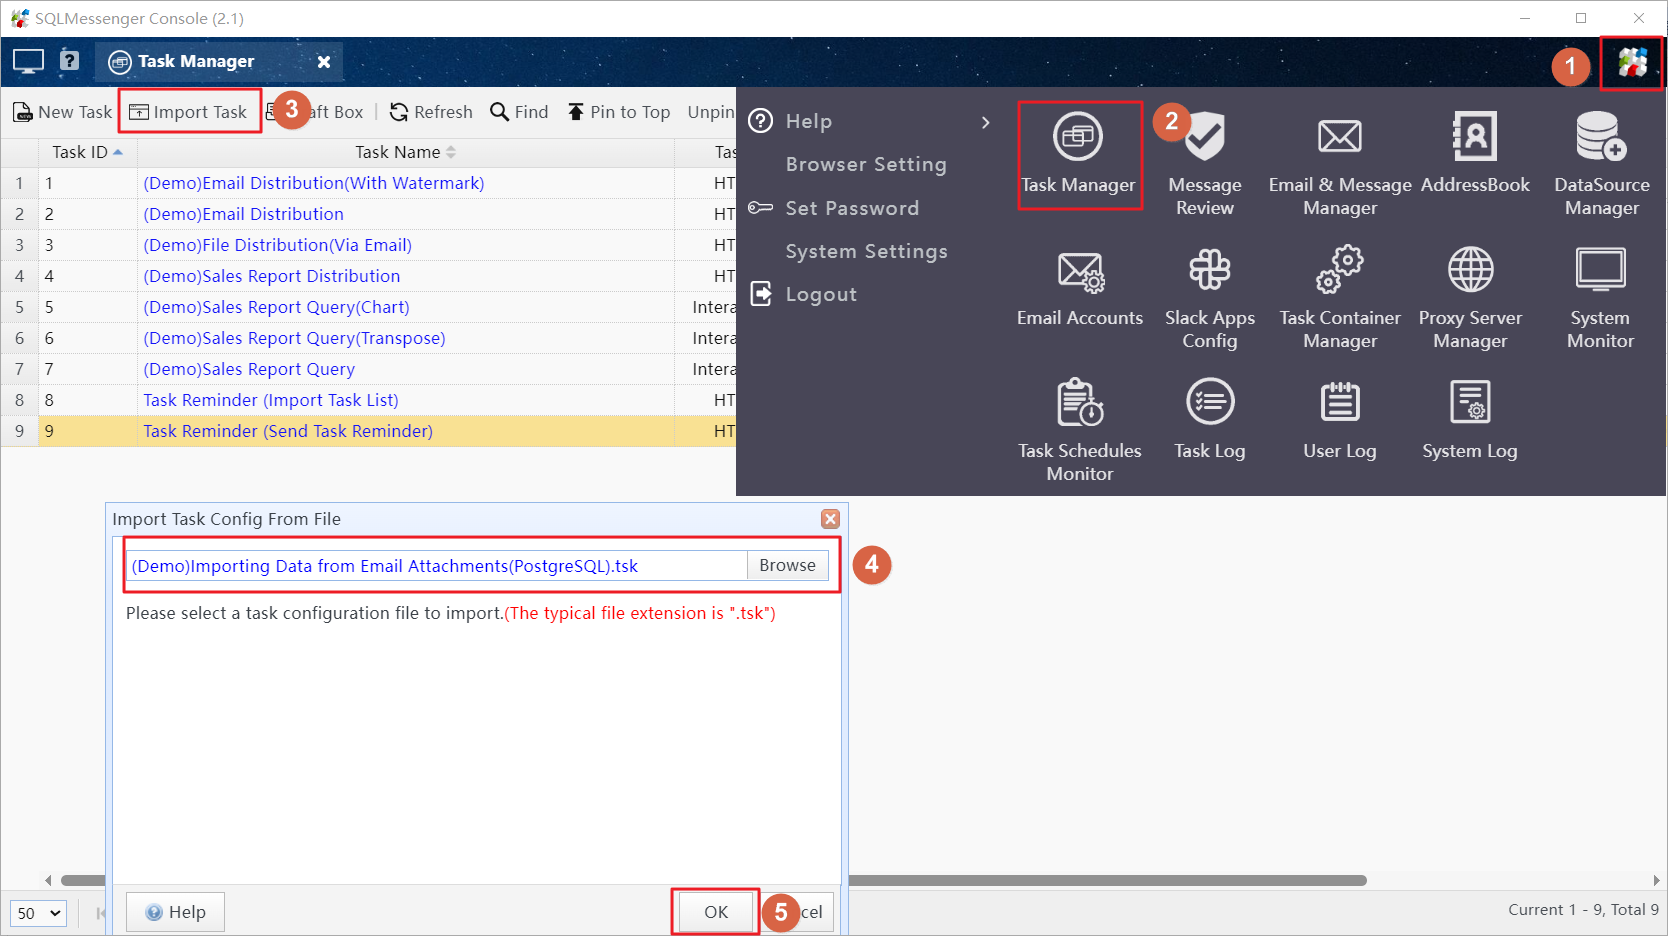
Choose the database to import the attachment data into. If you don't have your own PostgreSQL database, you can simply select the "Default Data Source".
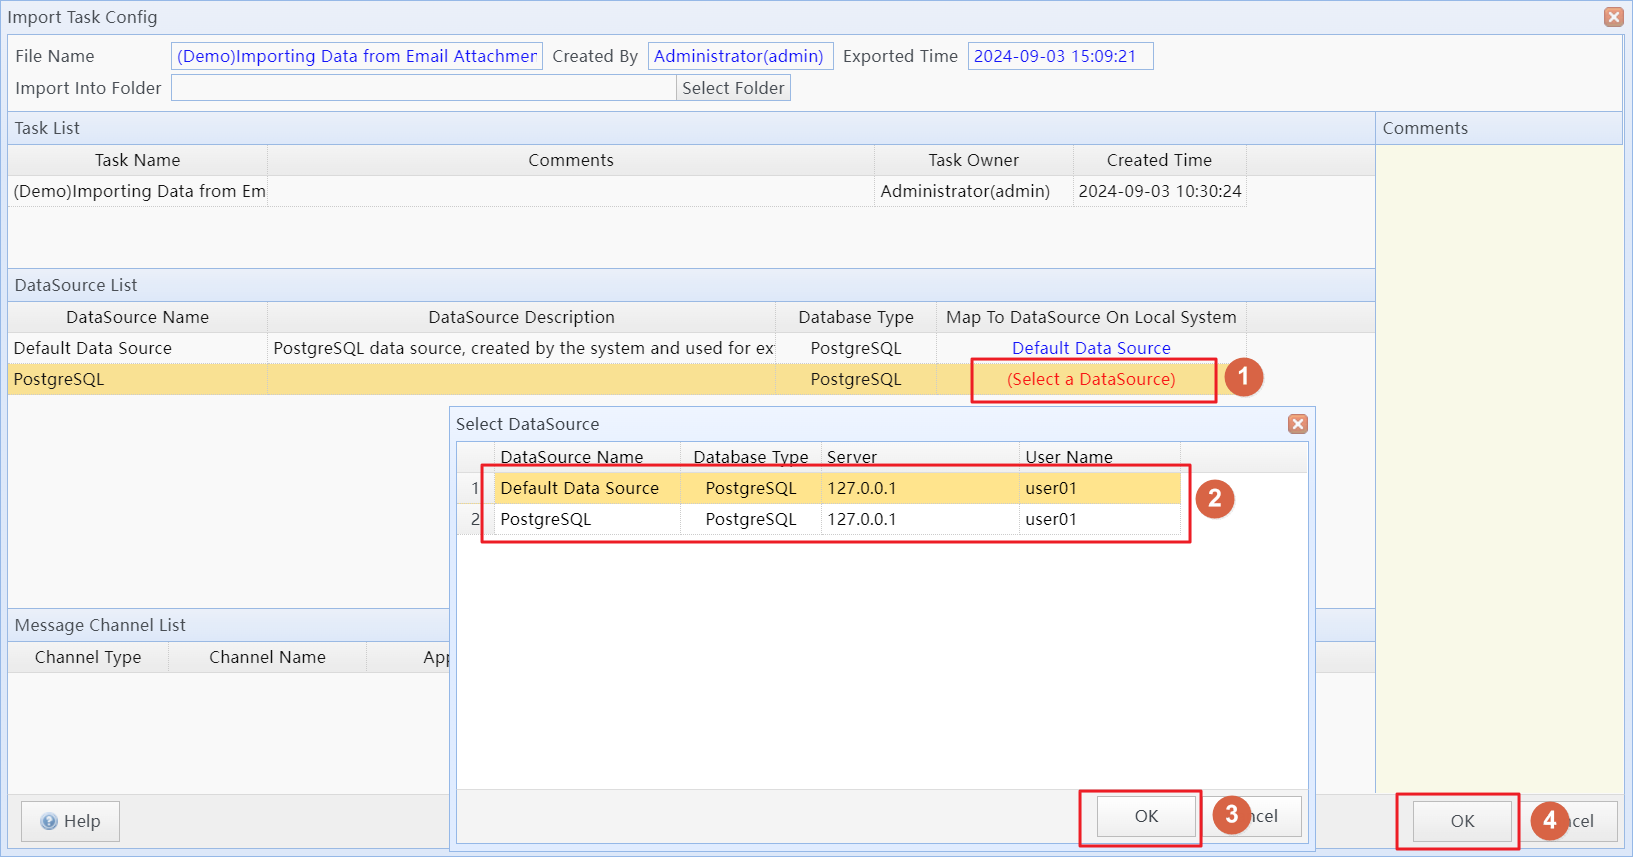
Choose the database to import the attachment data into
Note: When the task runs, it will create a table named "t_sales_demo_sqlmessenger" in the database to store the imported data.
In the task list, select the imported tasks, right-click, and click the "Enable selected tasks" menu item to enable the imported task.
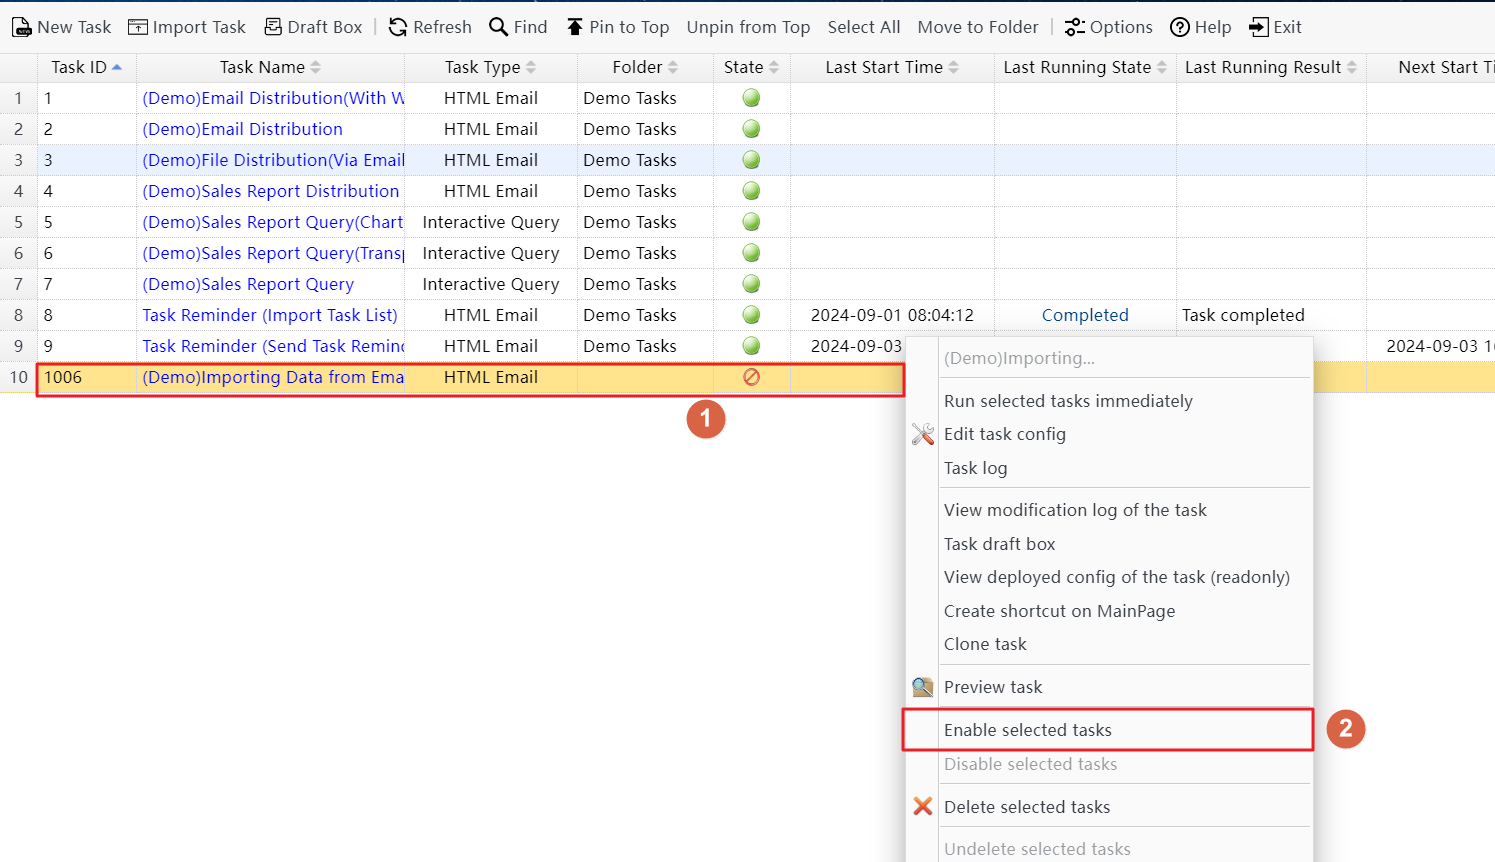
Enable the imported task
Step 3: Add an email account in SQLMessenger, enable the email receiving function, and set up the tasks to be triggered when emails are received.
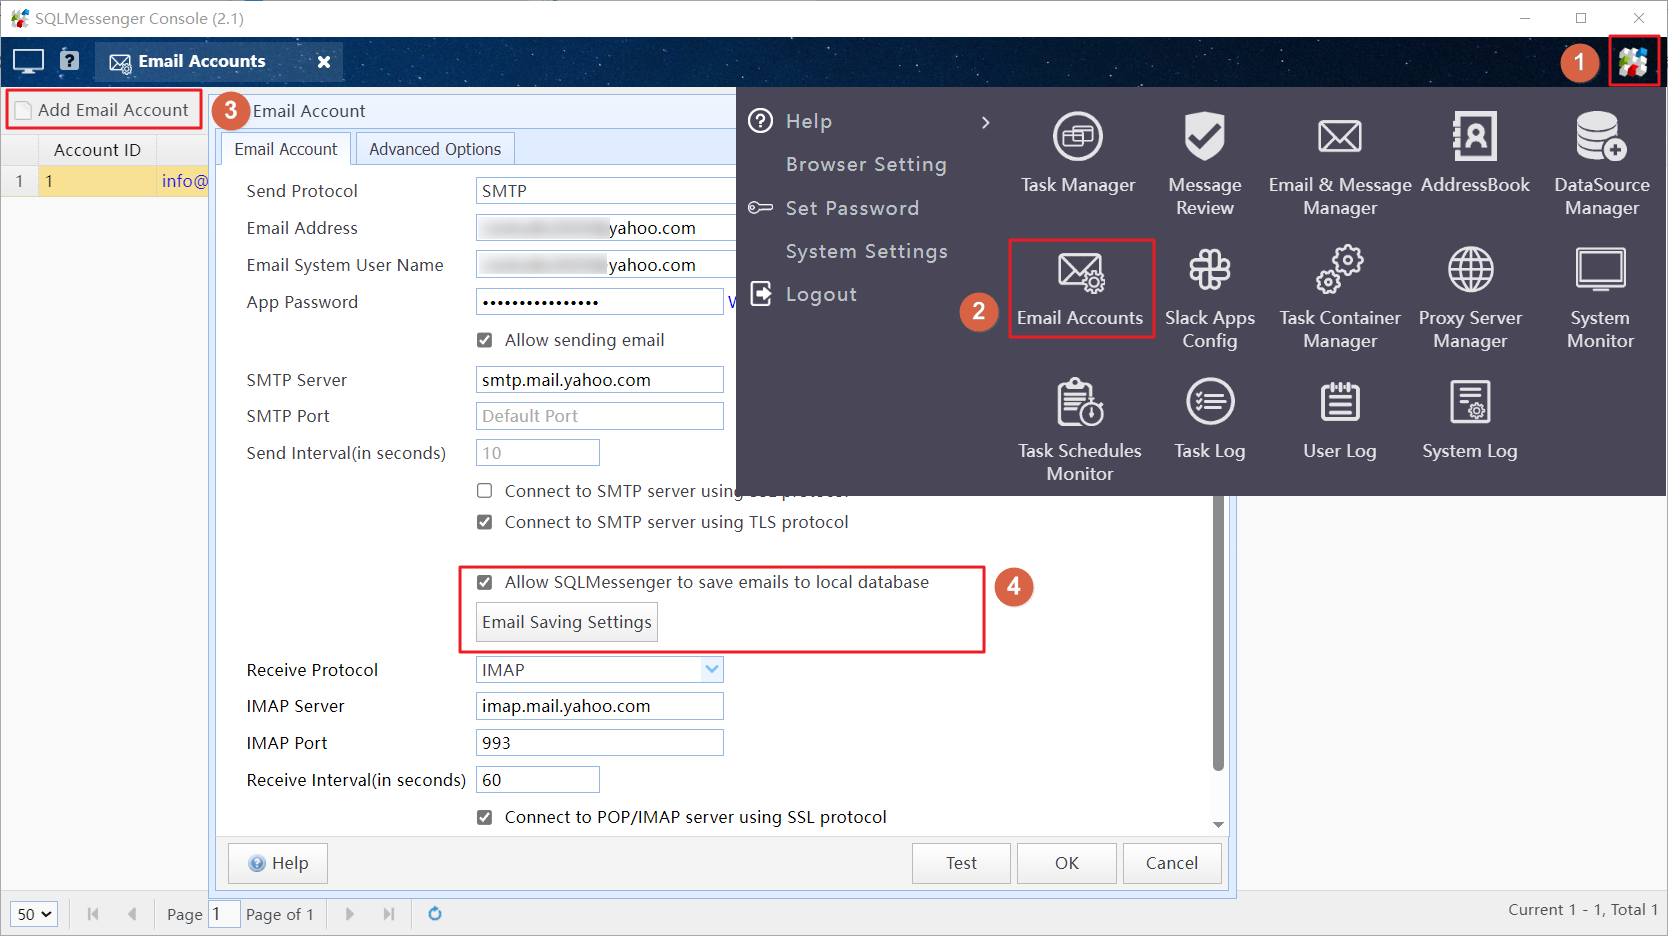
Check the "Allow SQLMessenger to save emails to local database" option. Then click "Email Saving Settings" and click the "Select Tasks" button to pick the tasks that should be triggered when an email is received.
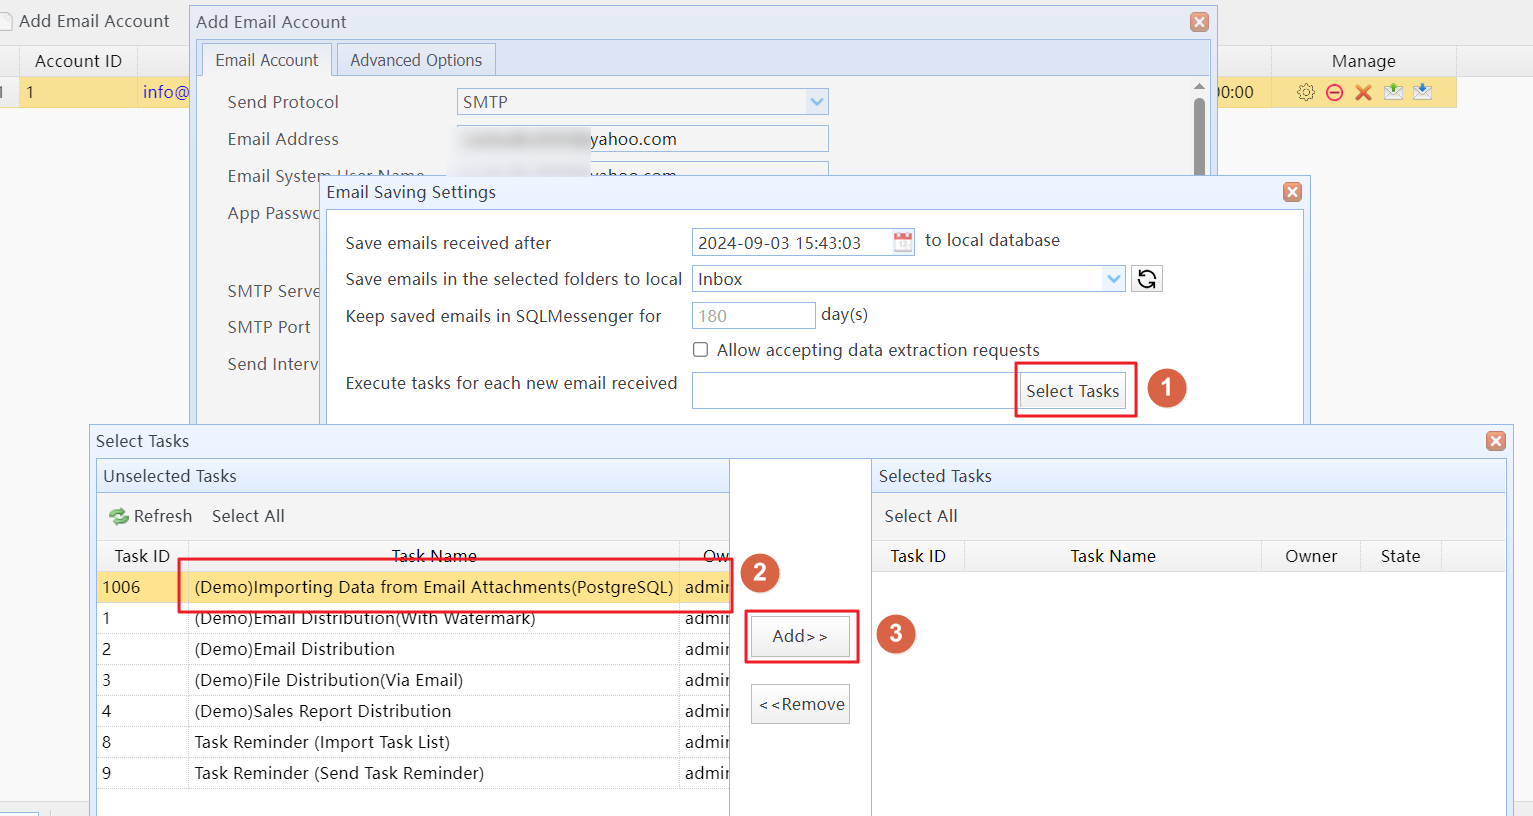
Choose the tasks to be triggered when an email is received
At this point, the system is set up and ready to use.
Now, click here to download the Excel data file. After downloading, use a different email account to send this Excel file as an attachment to the configured email account above. Make sure not to change the name of the Excel data file.
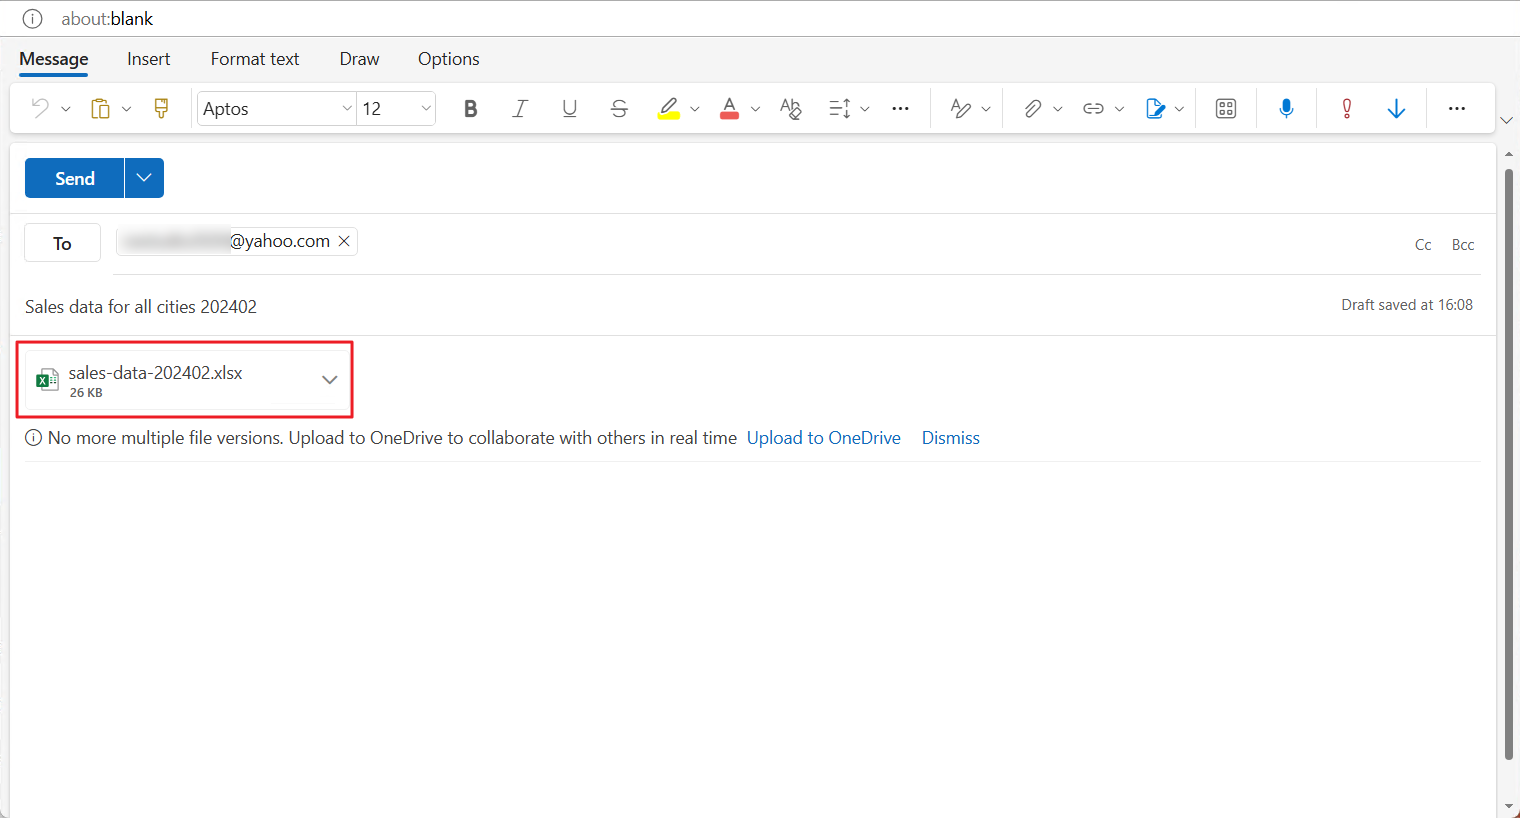
Send an email with the Excel data file as an attachment to the email account configured in Step 3
When the system receives this email, it will import the data from the Excel attachment into the "t_sales_demo_sqlmessenger" table in the database and send a reply email.
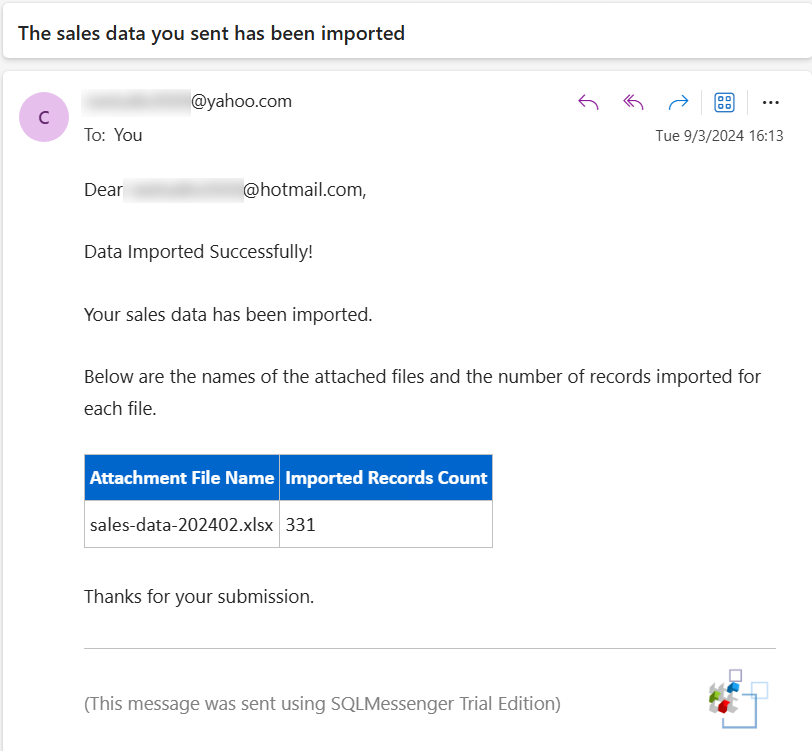
The email sent by the system to the sender
You can use another demo task to query the imported data.
Click here to download the task file, then import it into SQLMessenger (the import method is the same as in Step 2). After the task importing is complete, run the task, and you will see the following interface. You can see the Excel data that has been imported into the database on this interface.
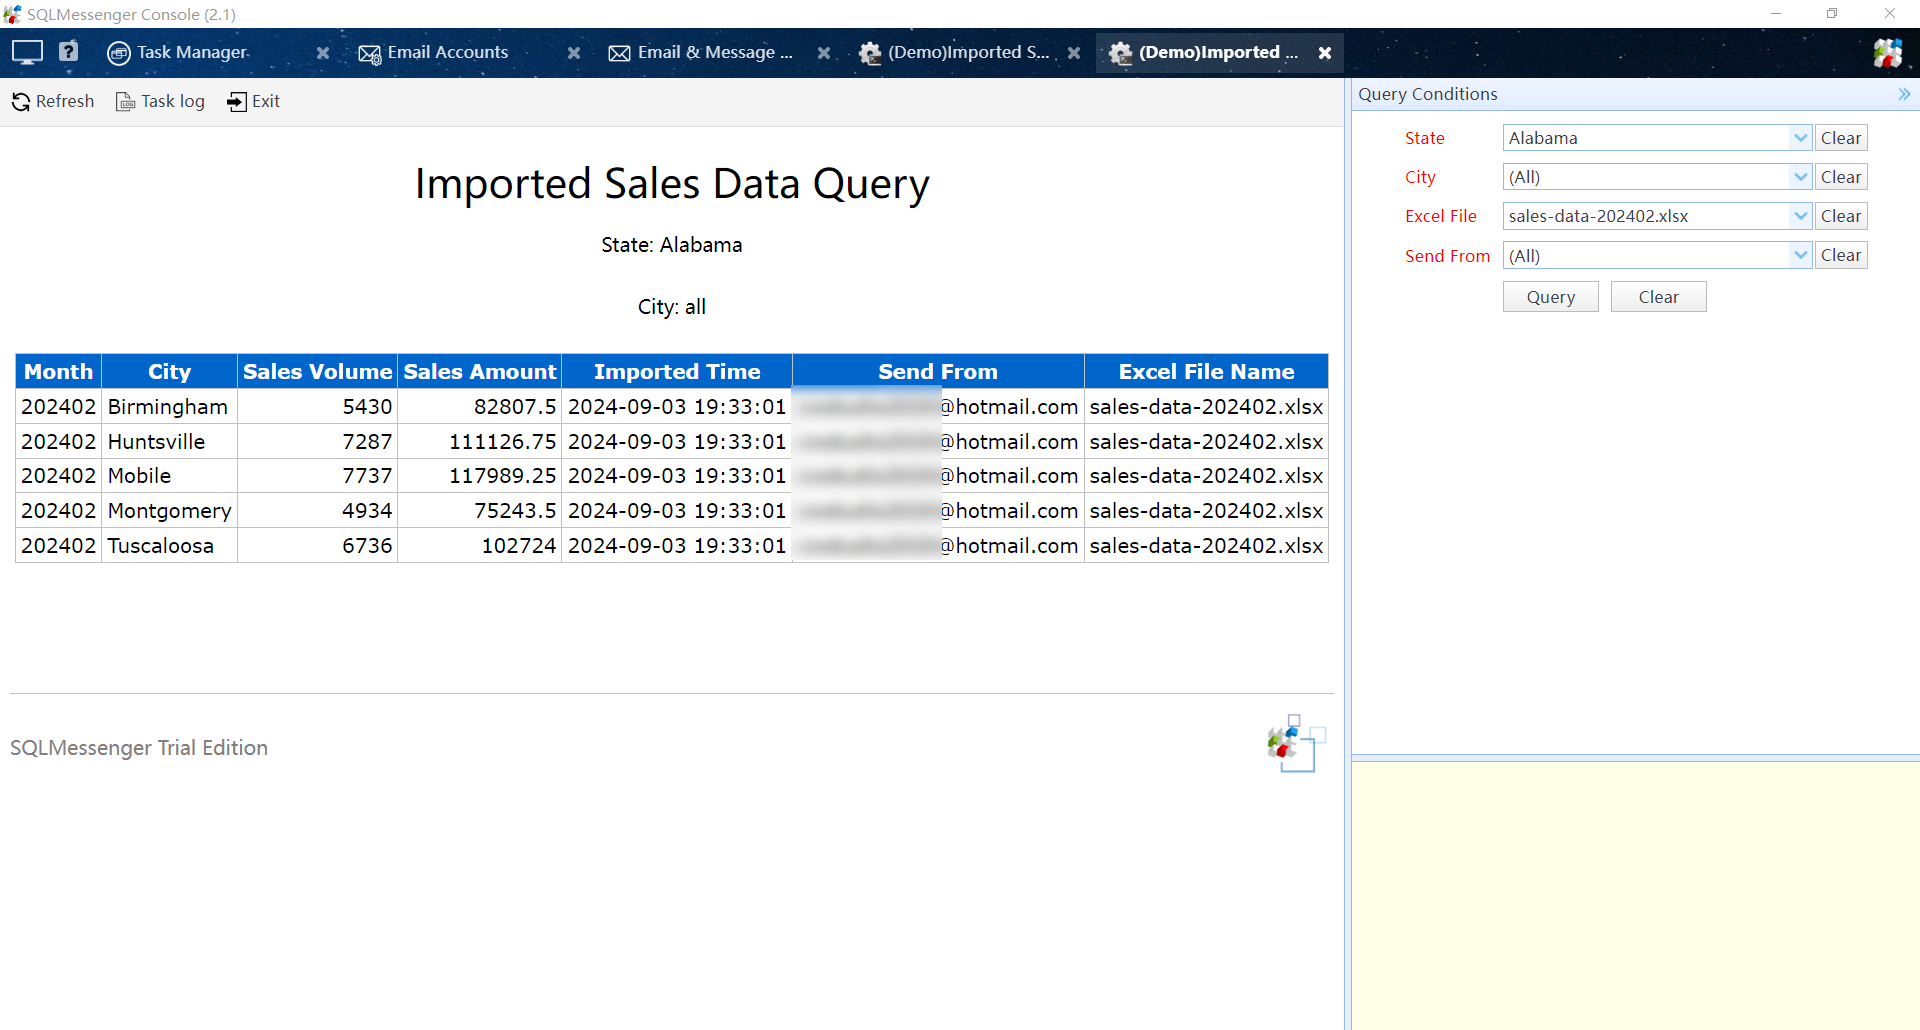
Imported data query interface
Note
If SQLMessenger did not receive the email you sent, please check if your email was placed in the spam folder by the mail server.
In an Excel file, only the first sheet will be imported. Therefore, the data to be imported must be saved in the first sheet. The first row of this sheet should be the header row, followed by the data rows.