- Overview
- 1. Edit Recipient List
- 2. Create a Report Task and Enable the "Information Distribute" Option
- 3. Set Email Body and Query Statement
- 4. Configure Recipients
- 5. Test the Task
- 6. Set Execution Schedule for the Task
- FAQ
- Technical Support
Overview
Tired of manually compiling and distributing branch sales reports that take hours each day? This document details how to automatically query the sales performance reports of 20 branches every morning and send the reports individually to the recipients of each branch.
Alex maintains an email list of branch managers, and each day he needs to query the sales performance report for every branch and send the reports individually to each respective branch manager.
The reports Alex needs to send every day
1. Edit Recipient List
Edit the recipient list in an Excel spreadsheet. The list includes the recipient's email address and the statistical ID of their branch.
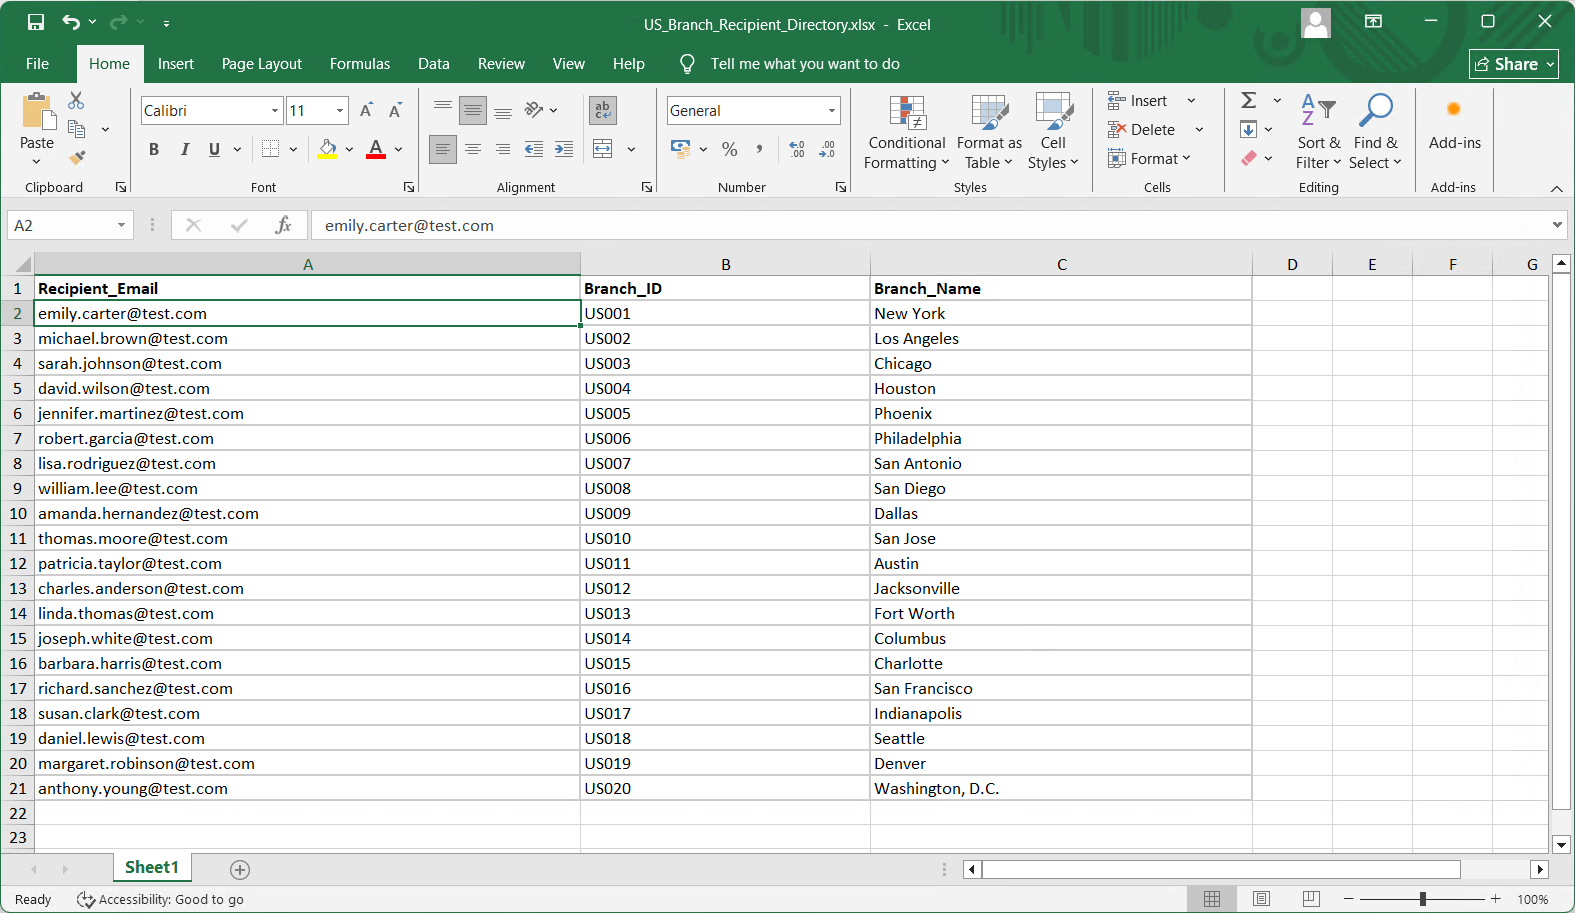
Recipient List
Tips:
(1) The recipient list must be placed in the first sheet of the Excel spreadsheet, with the first row as the header row and rows 2 and below as data rows.
(2) You can also save the recipient list in a database table and read it from this table when the task runs in the future.
2. Create a Report Task and Enable the "Information Distribute" Option
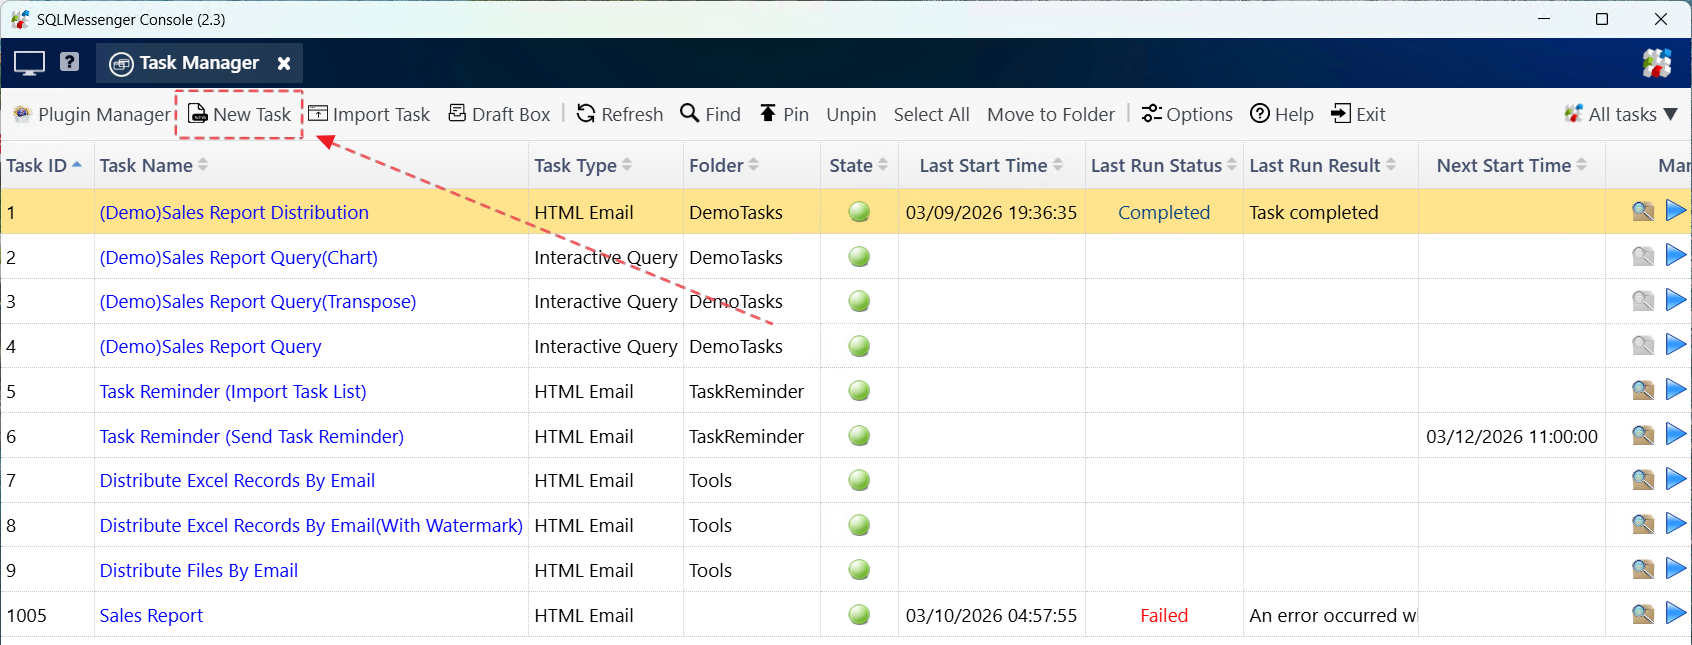
Step 1: Create a report task in SQLMessenger.
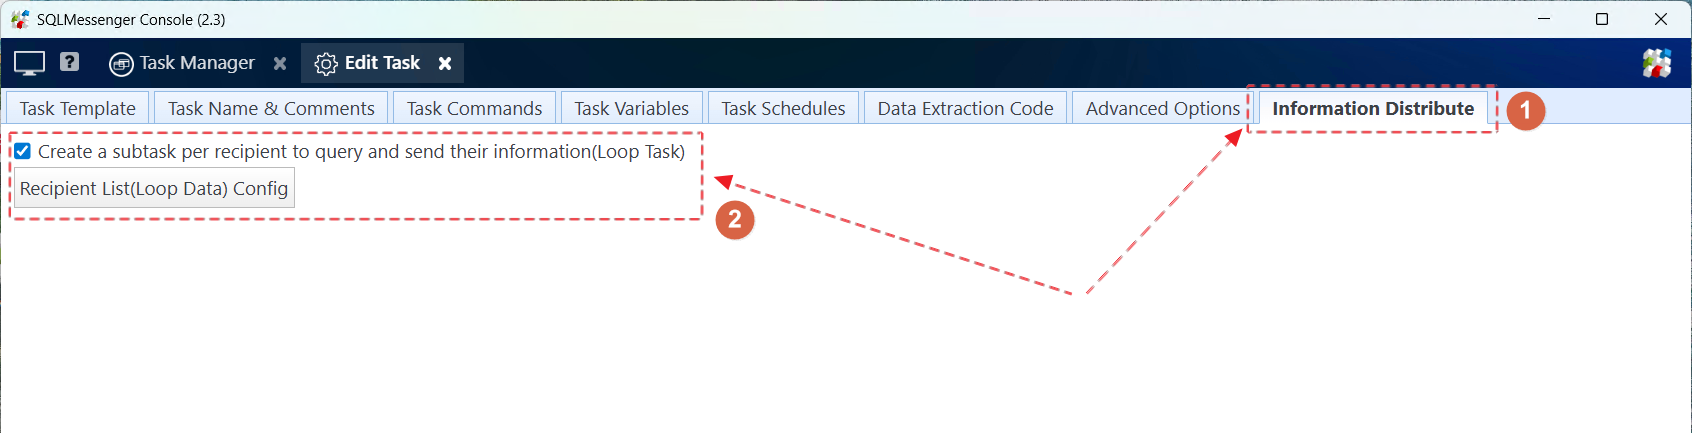
Step 2: Switch to the "Information Distribute" page, check "Create a subtask per recipient to query and send their information", then click the "Recipient List(Loop Data) Config" button.
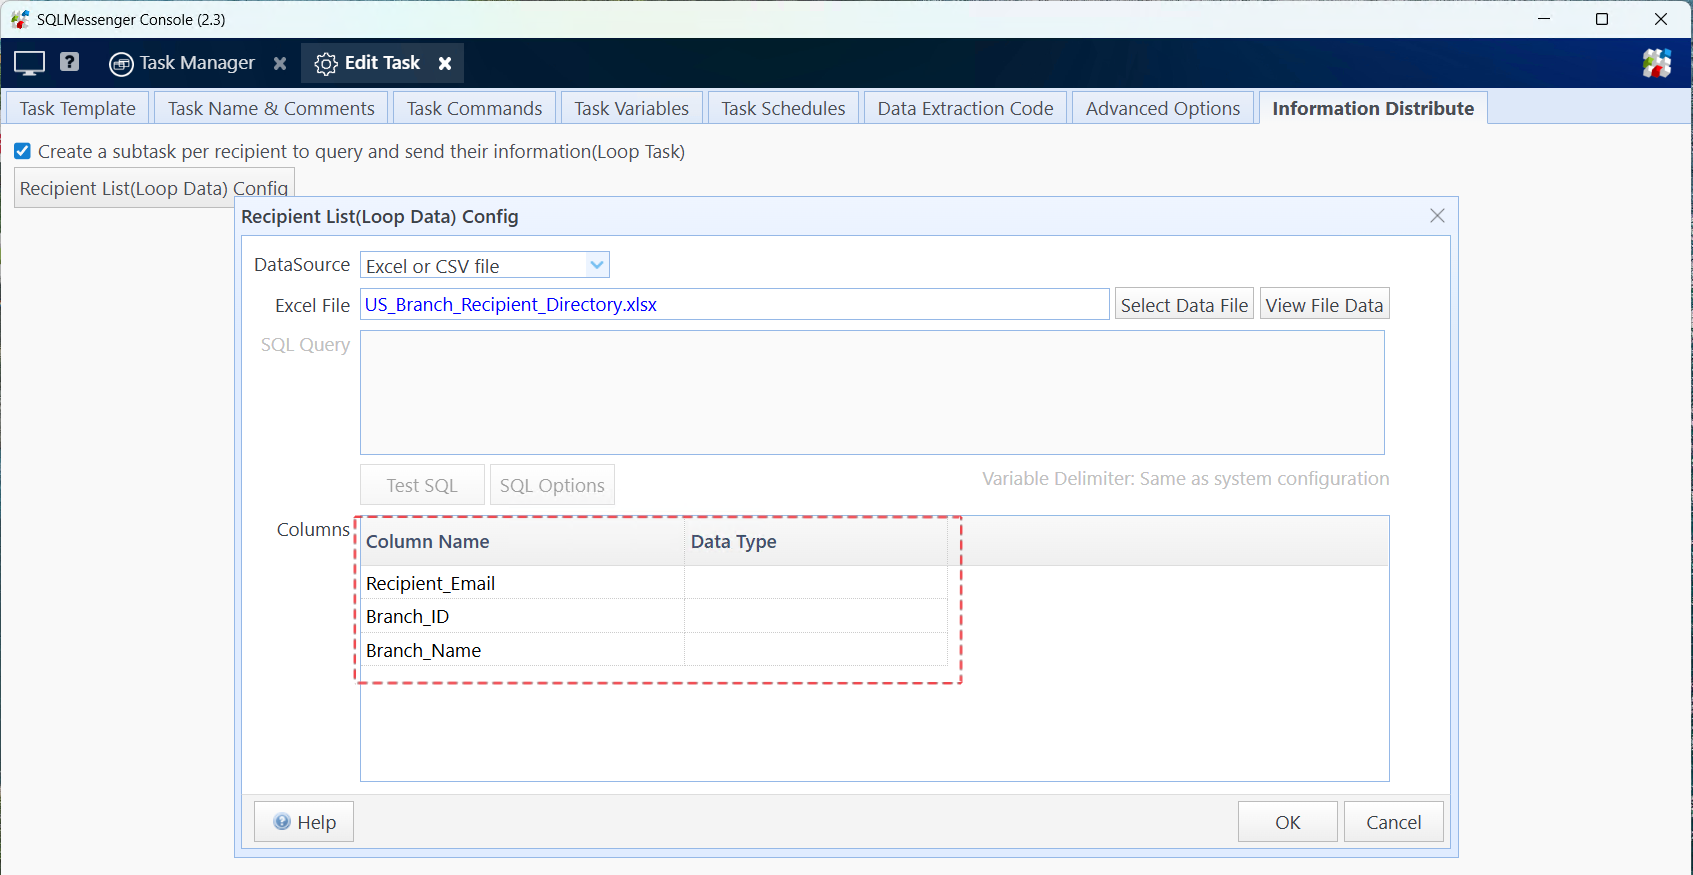
Step 3: Click "Select Data File", then select the recipient list file edited in Part 1.
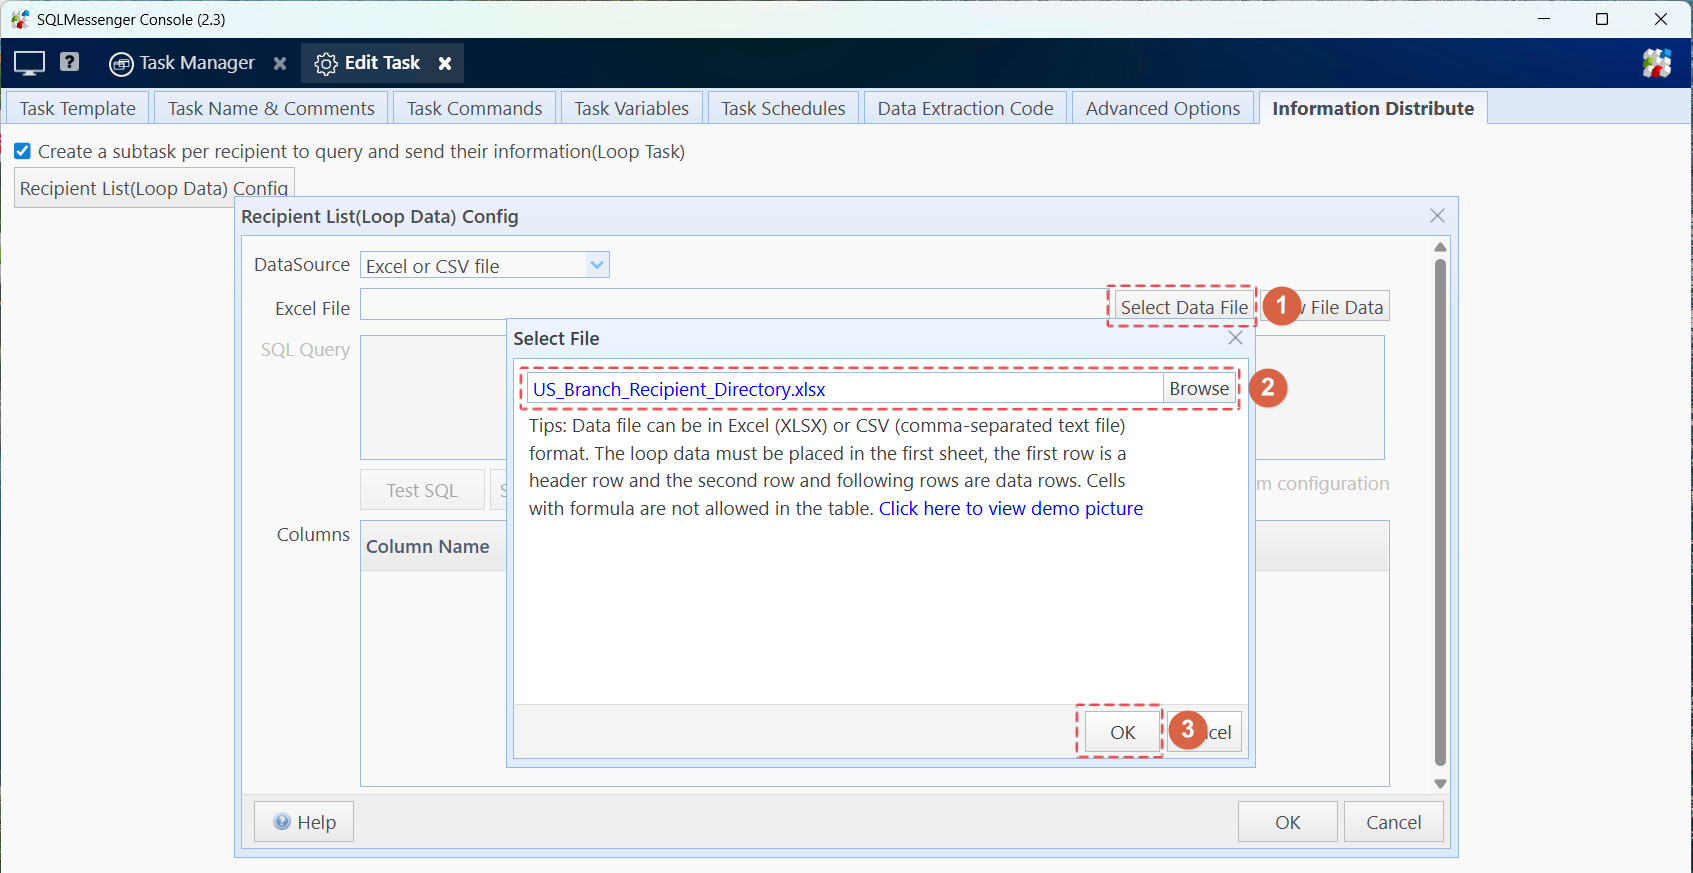
At this point, SQLMessenger will import the recipient list into the system and display the field list of the recipient table at the bottom of the interface.
Tips:
After modifying the recipient table in the future, you must re-import the table here. You can also store the recipient list in a database.
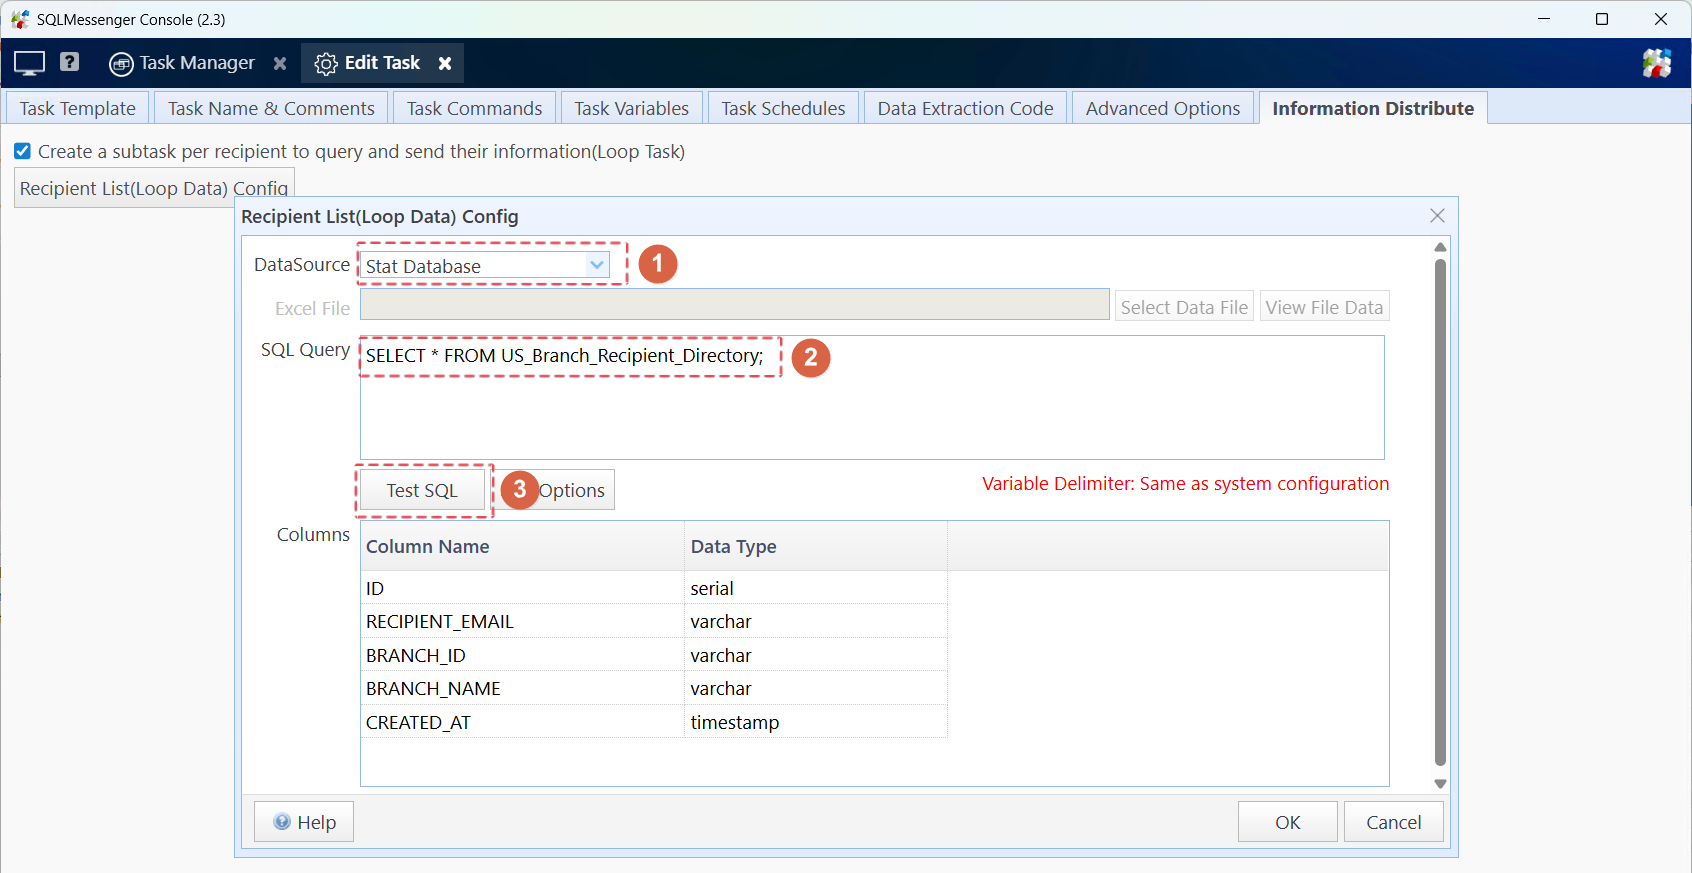
If storing the recipient list in a database, configure it according to the following steps:
Step 1: After opening the "Recipient List(Loop Data) Config" dialog box, select the data source where the recipient list is located, enter the SQL statement to query the recipient list, then click the "Test SQL" button. The system will run the SQL statement and retrieve the SQL field list.
Tips:
(1) In the future, you only need to maintain the recipient list in the database.
(2) For detailed information about data source configuration, please refer to SQLMessenger User Manual - Data Source Management.
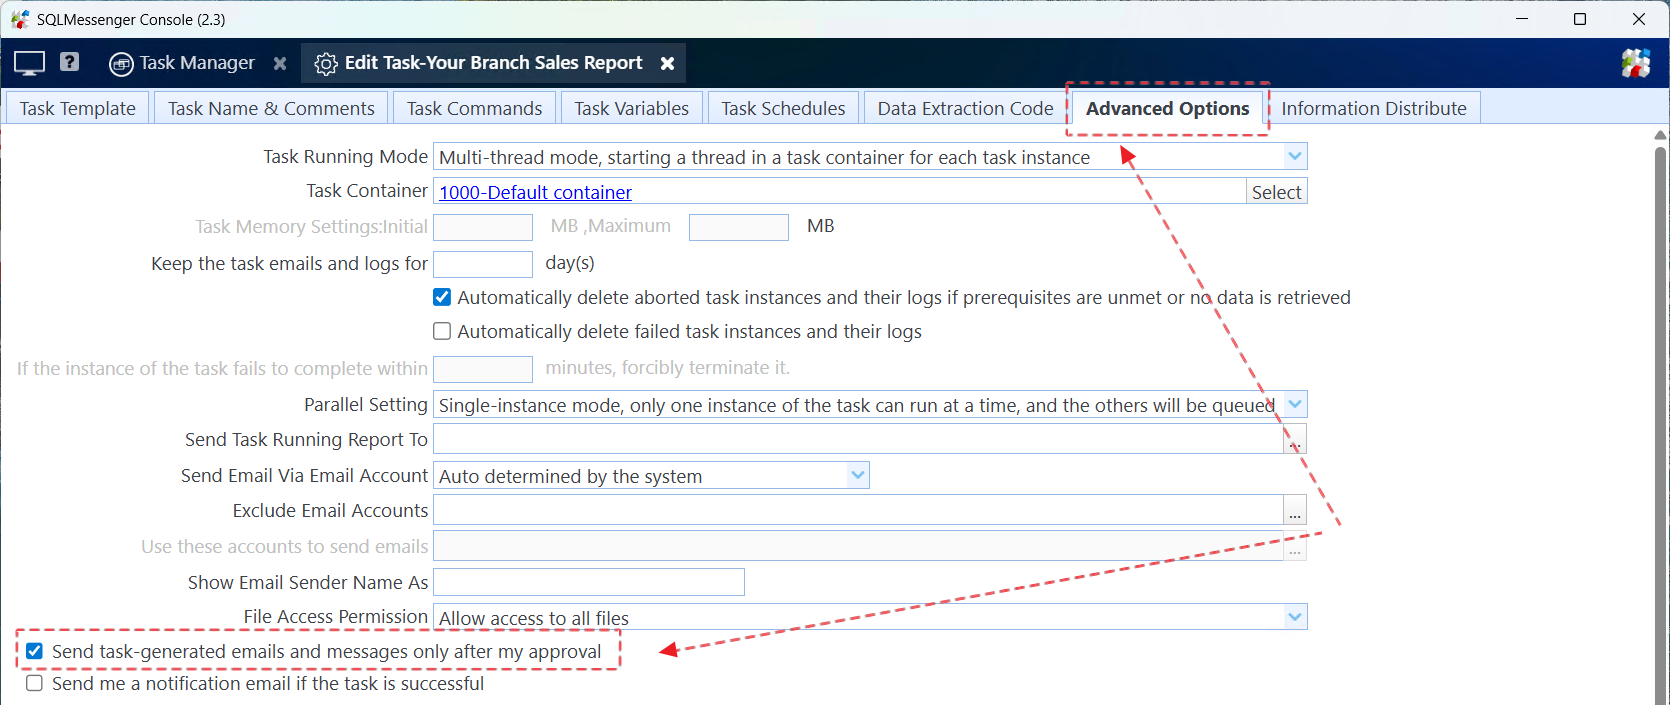
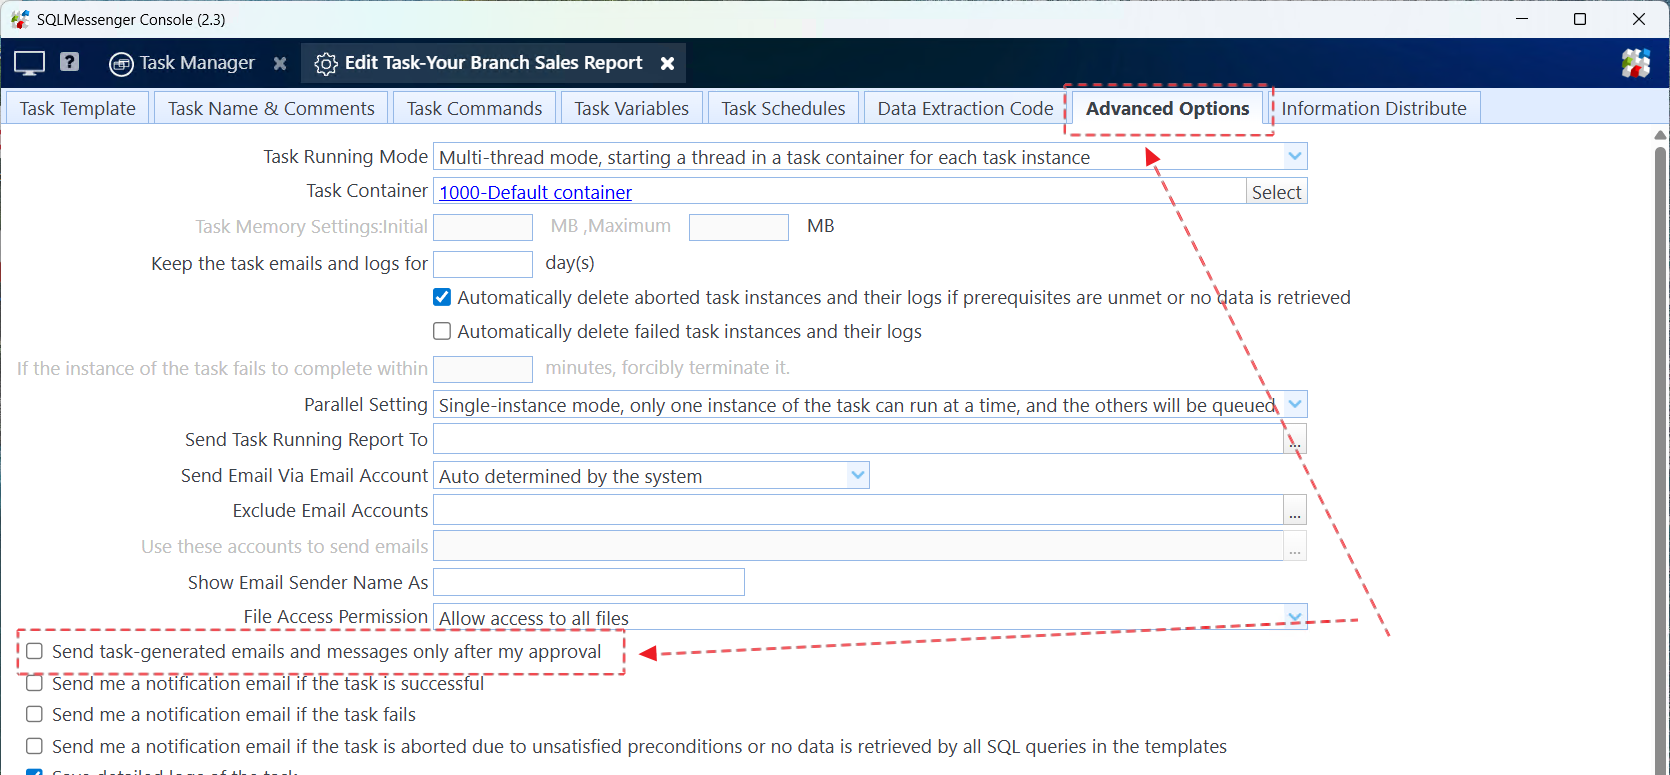
Before the task is fully tested, to avoid sending invalid emails accidentally during testing, you can check "Send task-generated emails and messages only after my approval", and uncheck this option after the task is tested successfully.
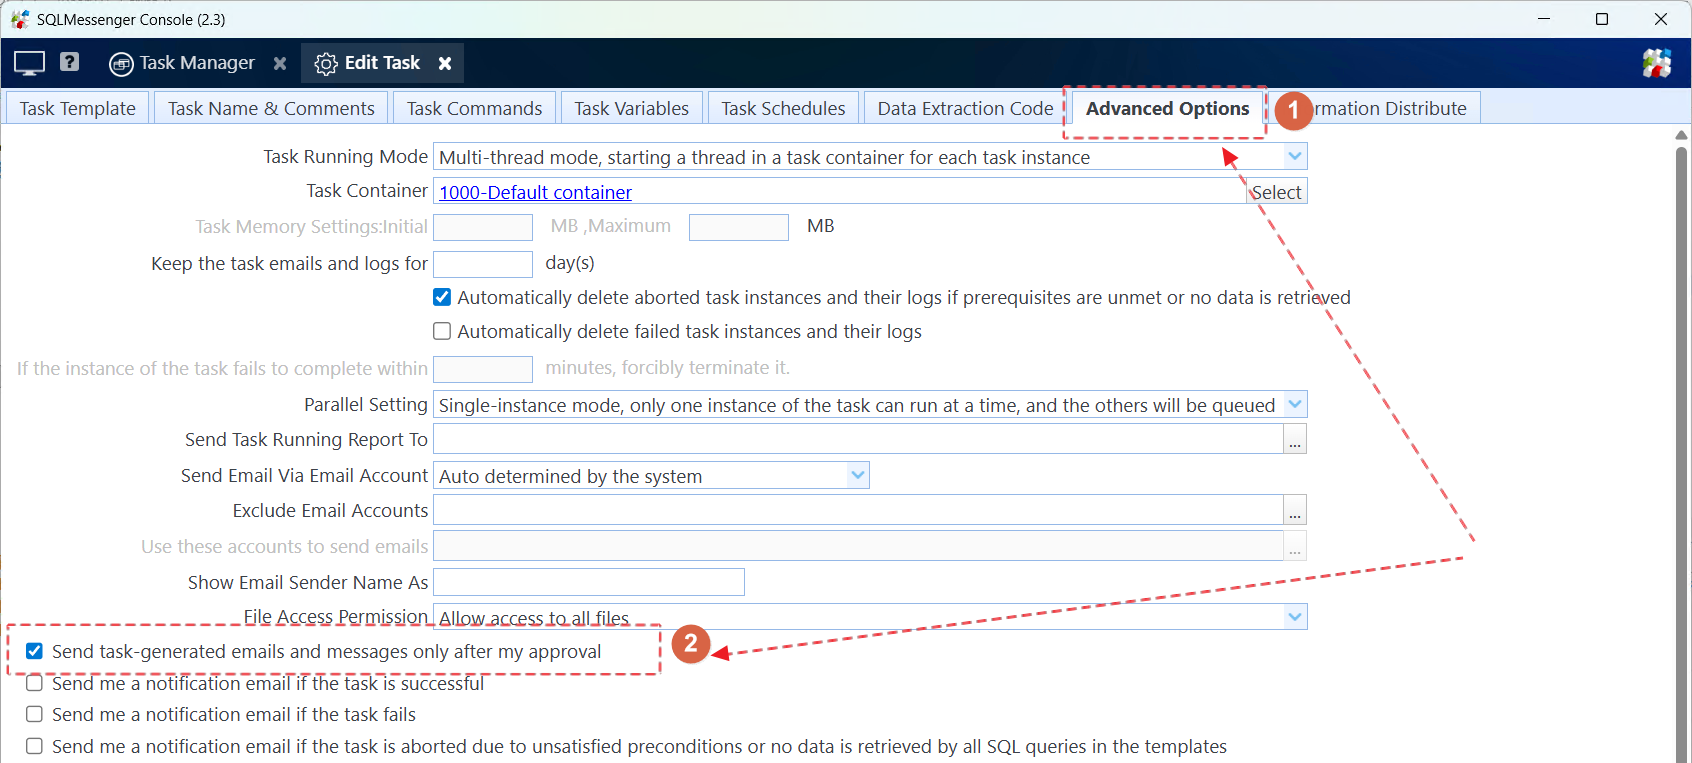
Check "Send task-generated emails and messages only after my approval"
For detailed explanation of "Send task-generated emails and messages only after my approval", please refer to SQLMessenger User Manual - Message Review
3. Set Email Body and Query Statement
Set the query statement of the report in the task. Here we display the report in the body of the email.
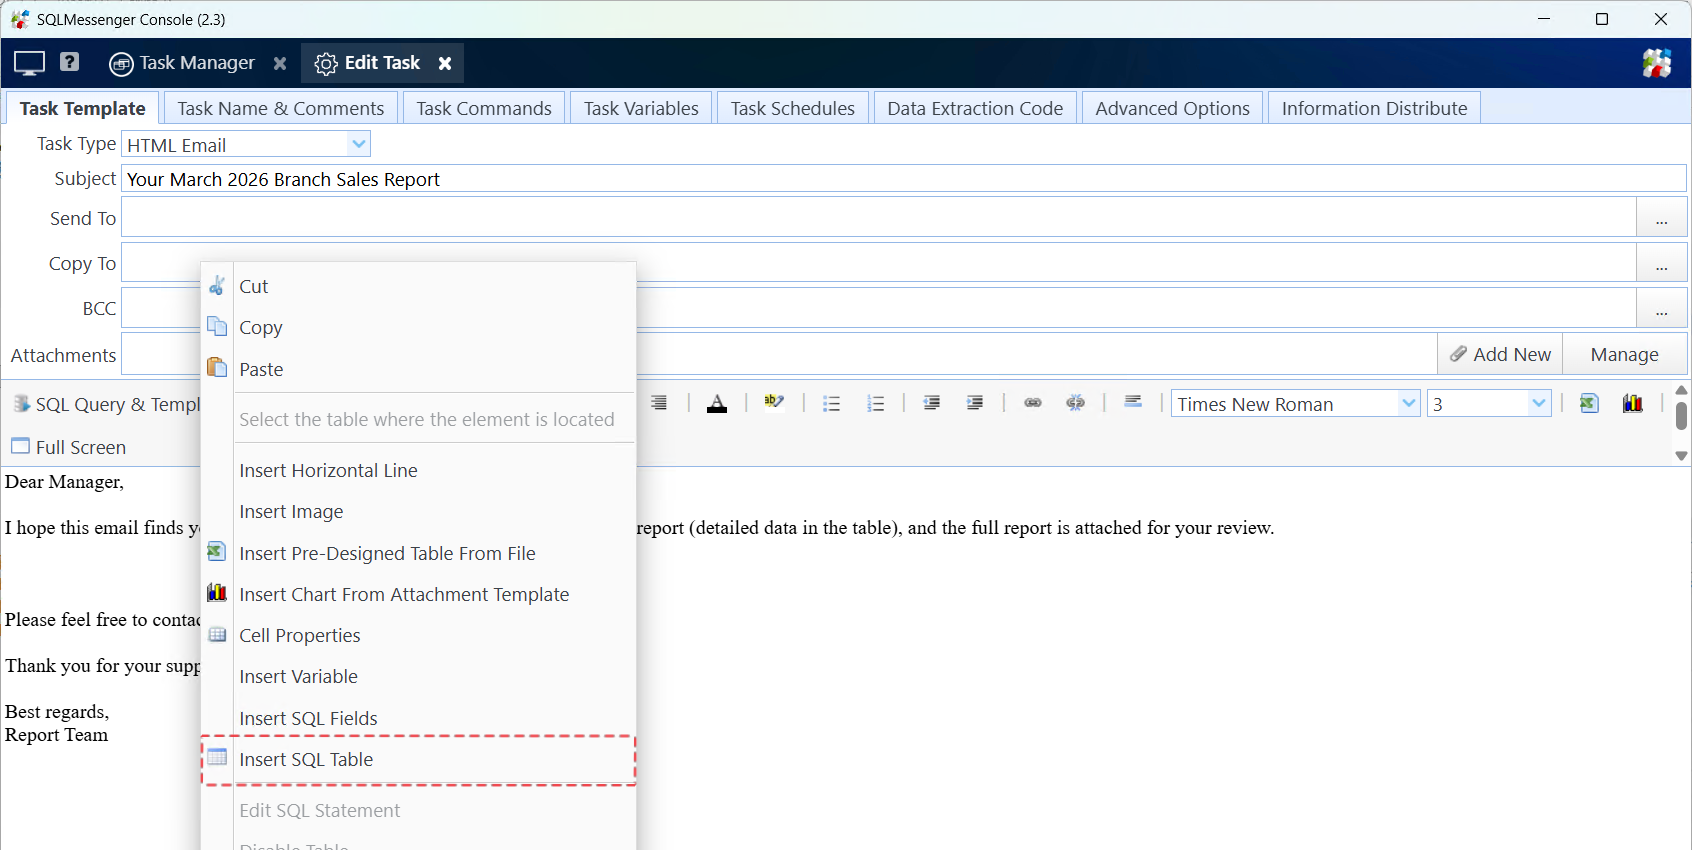
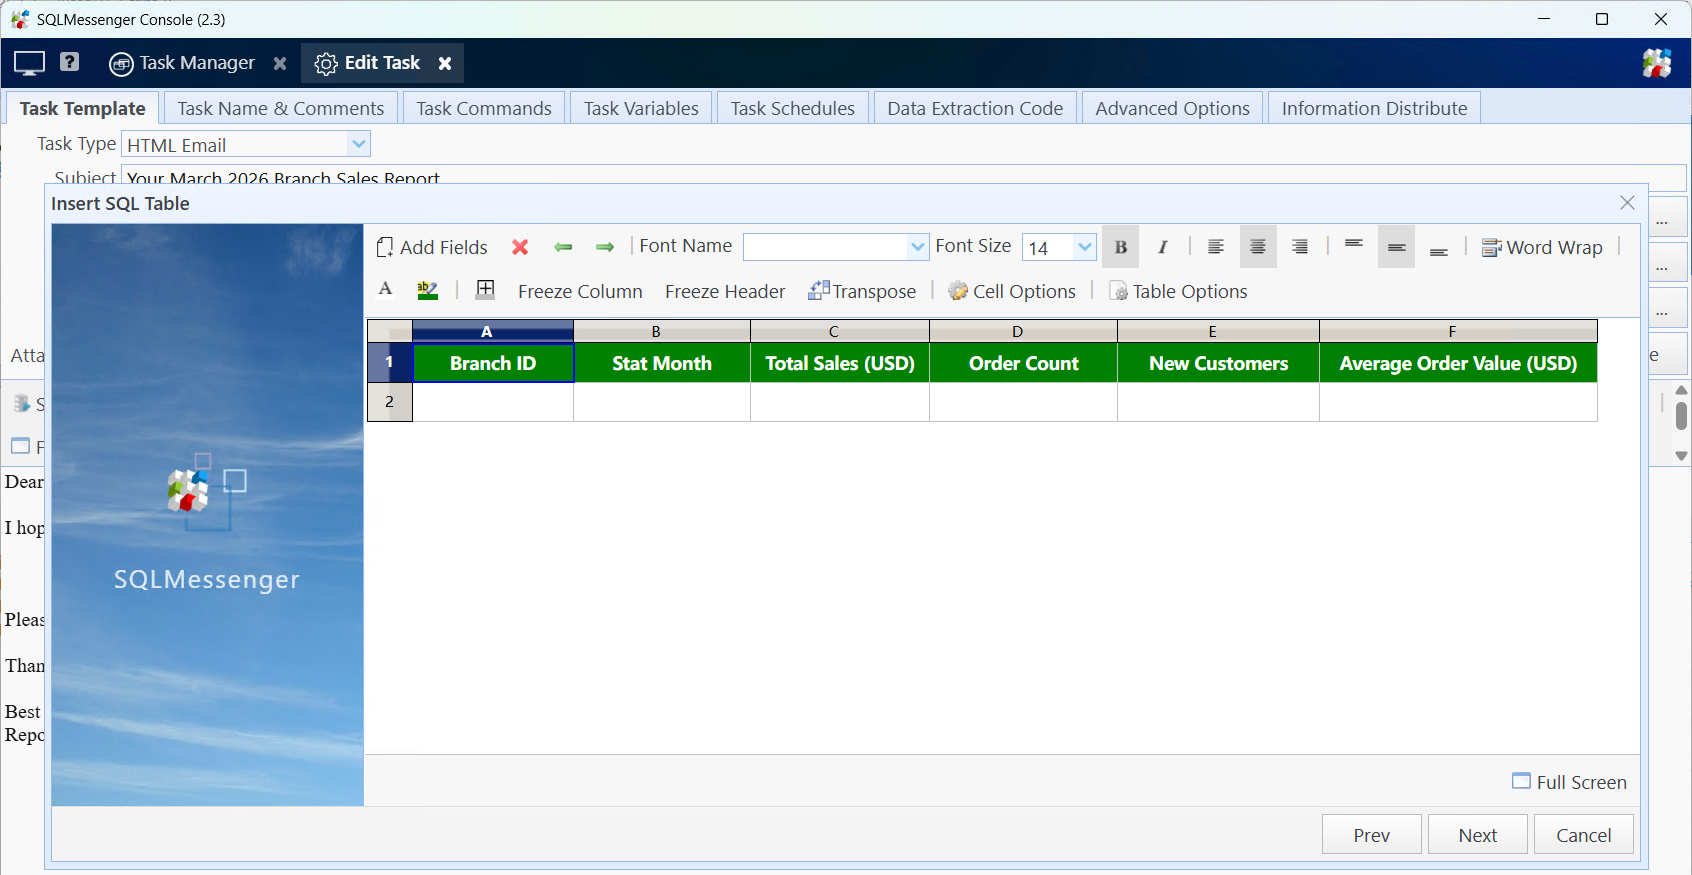
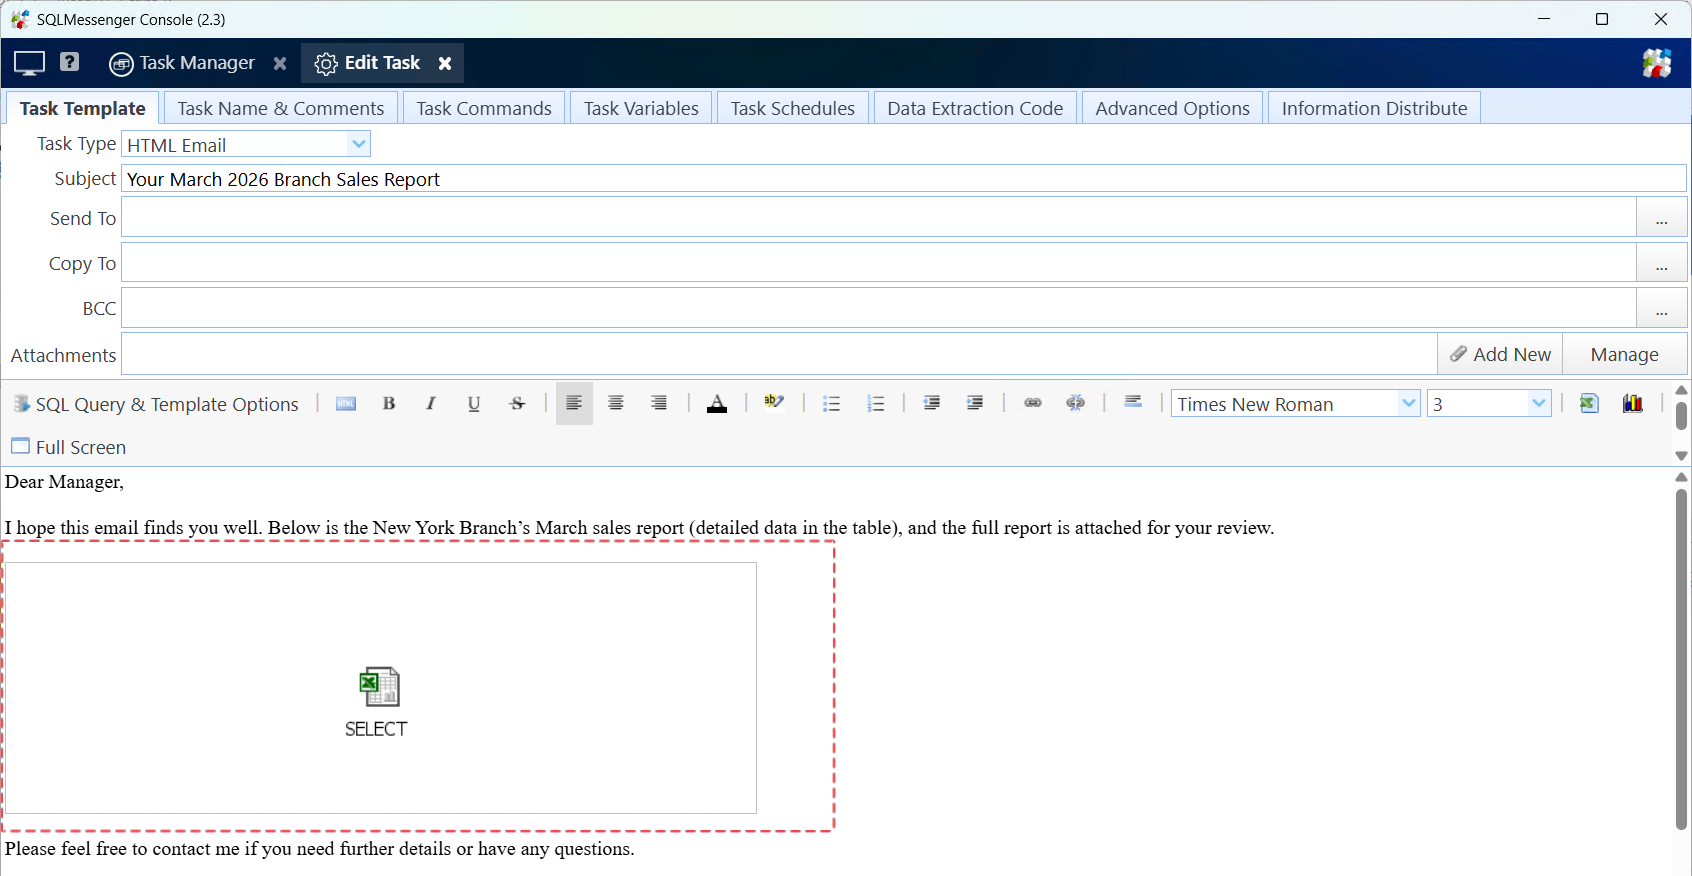
Step 1: Edit the email body template, right-click at the position where the statistical table is to be displayed in the body, then click "Insert SQL Table".
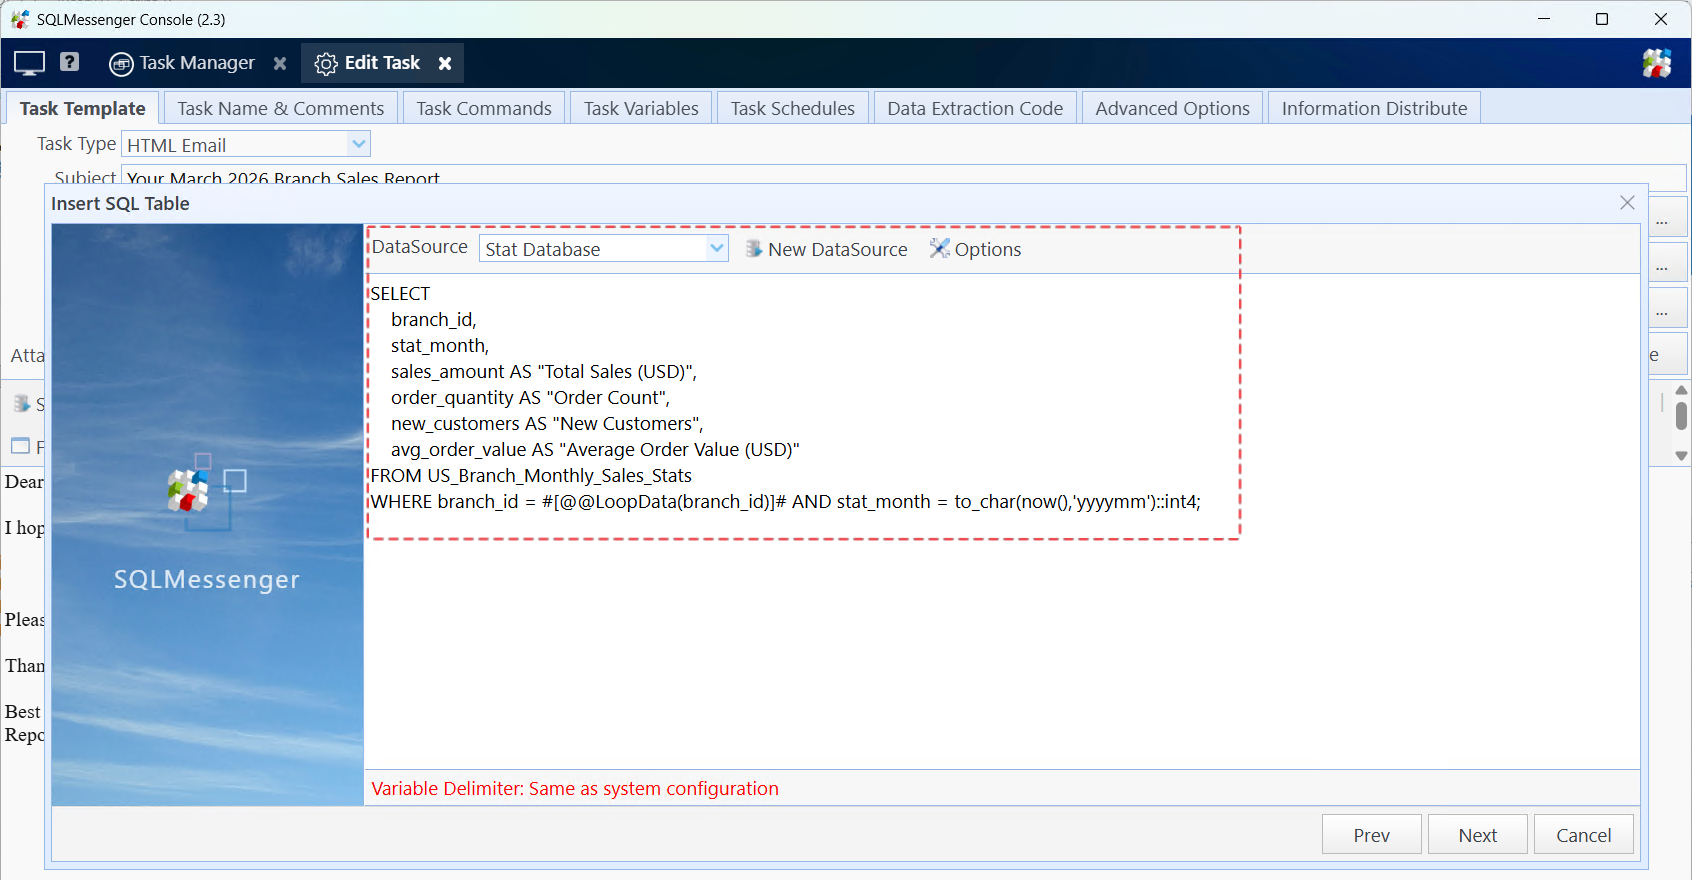
Step 2: Select the report data source and enter the query statement.
Note: When setting the report query statement here, modify the query condition to use the "branch_id" field in the recipient list as the query condition.
For example, the original query statement is as follows:
stat_month,
sales_amount AS "Total Sales (USD)",
order_quantity AS "Order Count",
new_customers AS "New Customers",
avg_order_value AS "Average Order Value (USD)"
FROM us_branch_monthly_sales_stats
WHERE branch_id = 'US001' --Branch ID to query
AND stat_month = To_char(Now(), 'yyyymm') :: int4;
When configuring in the task, modify the query condition after "branch_id" to branch_id = #[@@LoopData(branch_id)]#, which means using the value of the branch_id field in the recipient list as the query condition. The modified query statement is as follows:
stat_month,
sales_amount AS "Total Sales (USD)",
order_quantity AS "Order Count",
new_customers AS "New Customers",
avg_order_value AS "Average Order Value (USD)"
FROM us_branch_monthly_sales_stats
WHERE branch_id = #[@@LoopData(branch_id)]# --Branch ID to query
AND stat_month = To_char(Now(), 'yyyymm') :: int4;
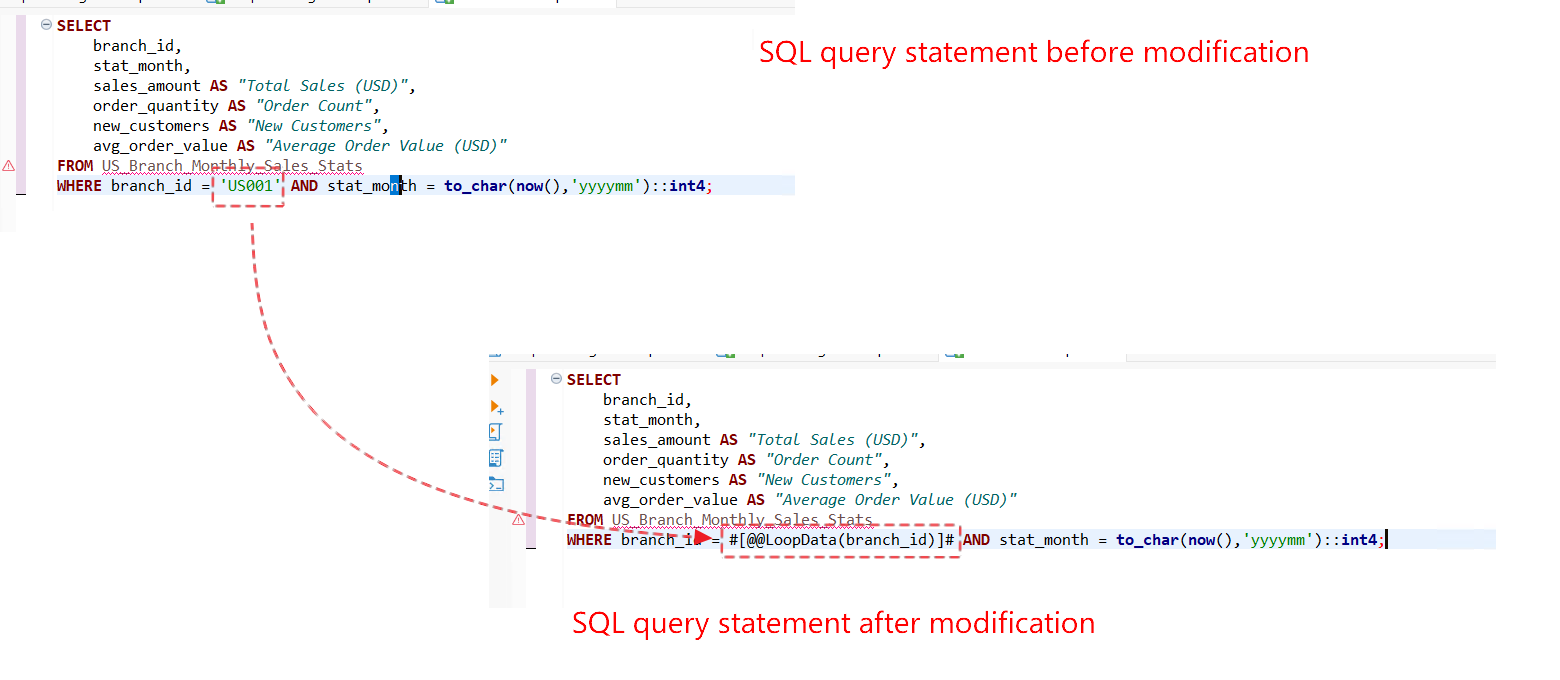
SQL statements before and after modification
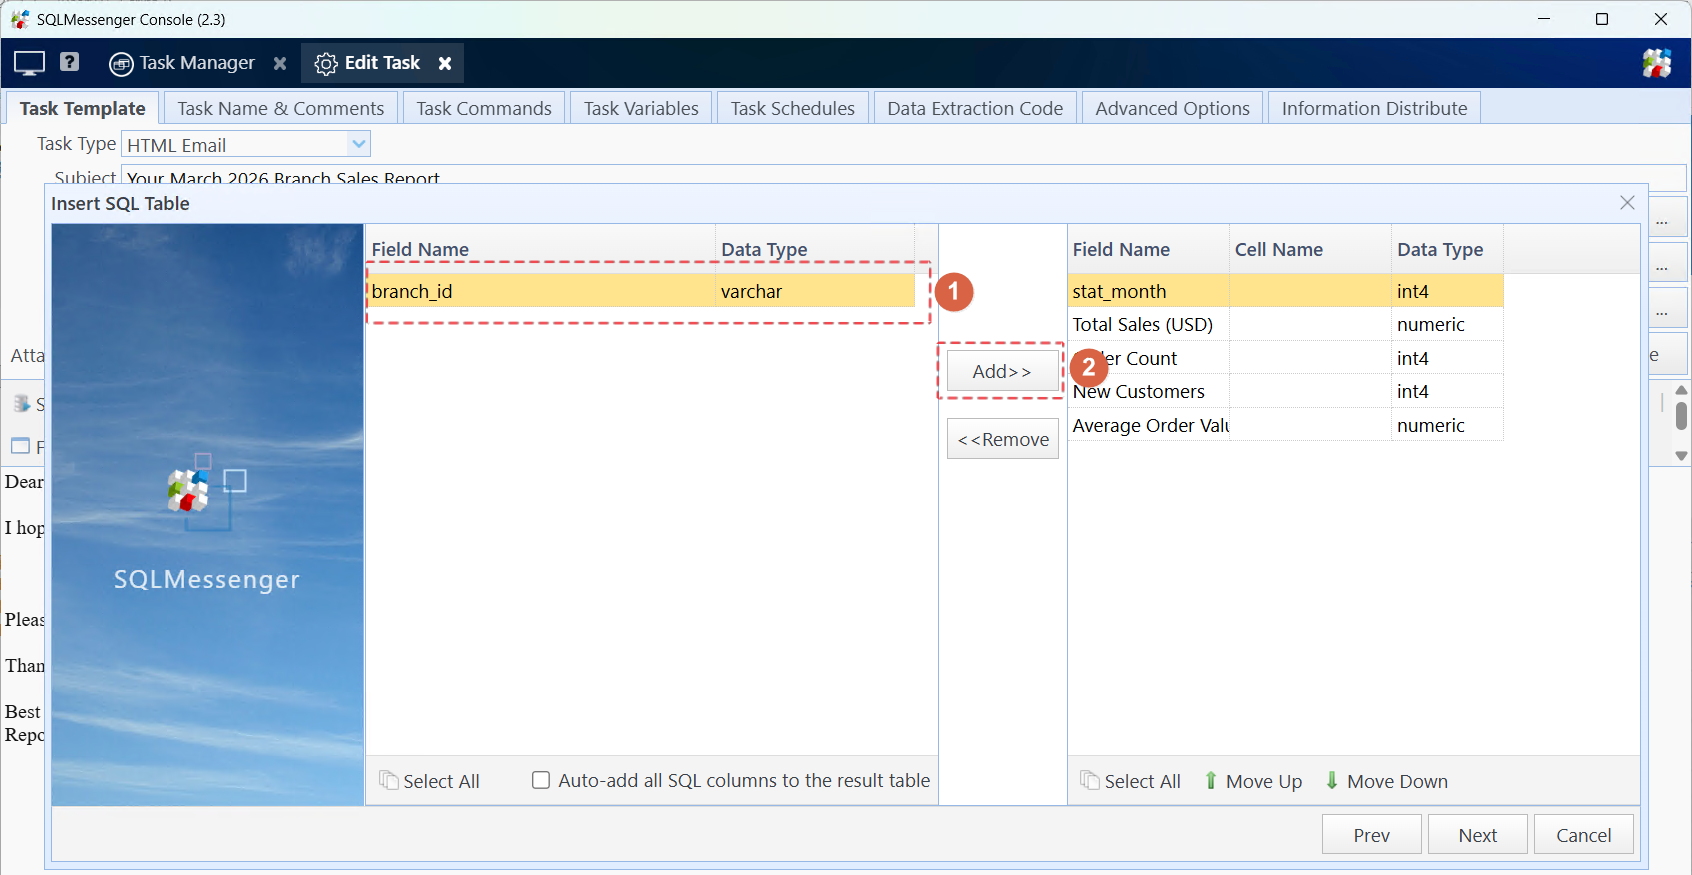
Step 3: Click "Next", the system will run this statement and retrieve the SQL field list. After the SQL statement is executed, select the fields to be displayed in the body from the left list and add them to the right list. Then click "Next".
Step 4: Set the table style in the table designer, then click "Next".
After the wizard is completed, a table placeholder icon will be displayed in the body. To modify the query statement or table format, double-click this icon to open the table editor.
4. Configure Recipients
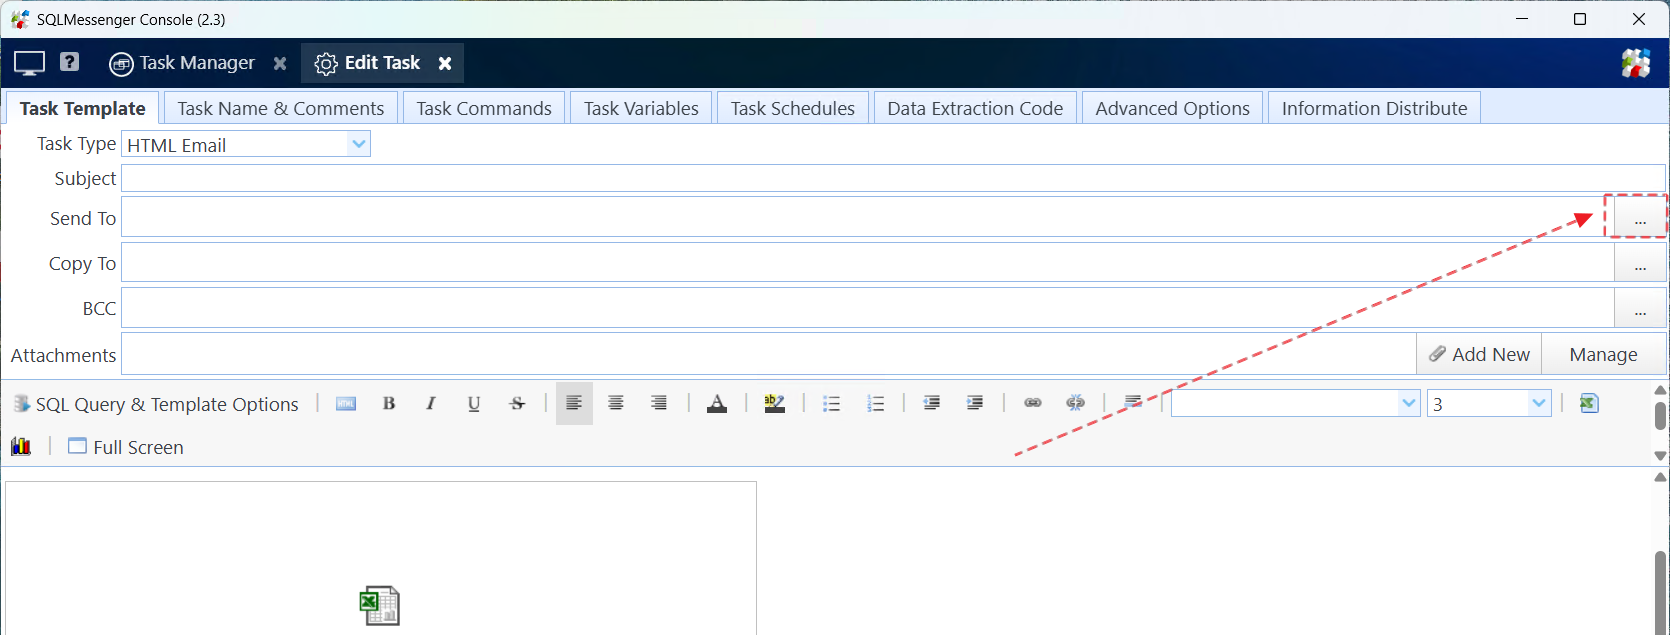
Step 1: Click the button to the right of "SendTo" to open the "Select Recipients" dialog box.
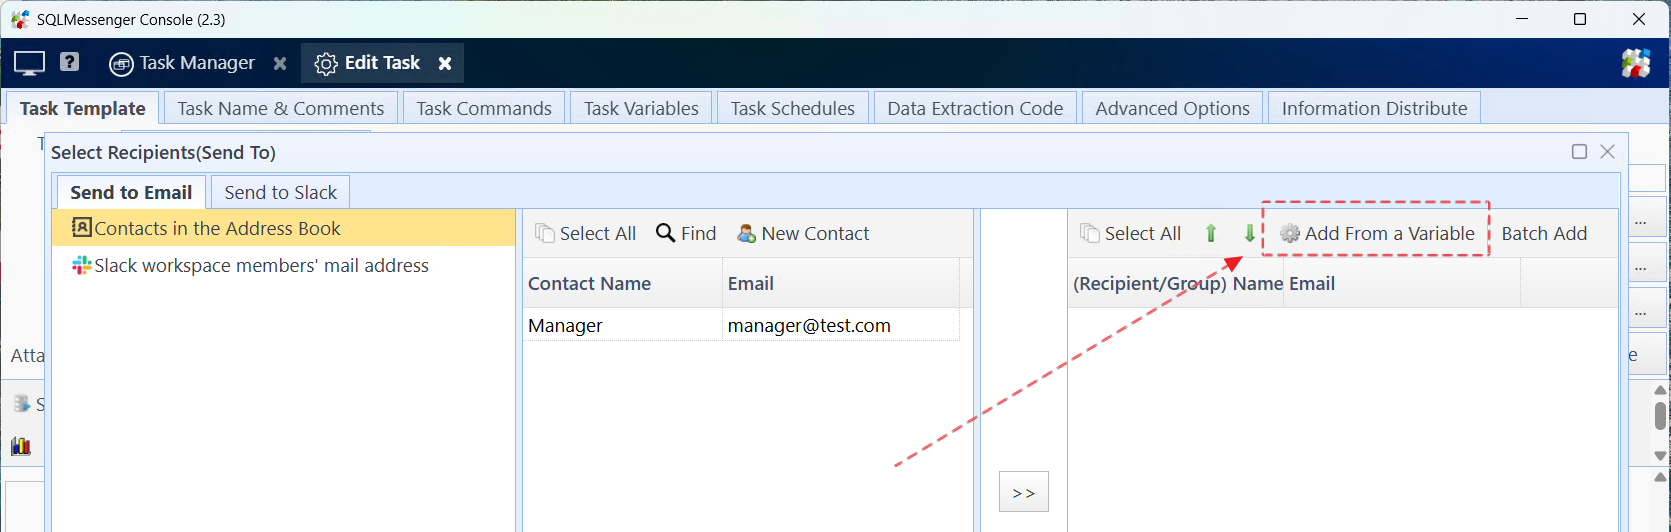
Step 2: Click "Add From a Variable".
Step 3: Switch to the "Variable/Function Comment" page, find "LoopData" and click the button to the right of this entry.
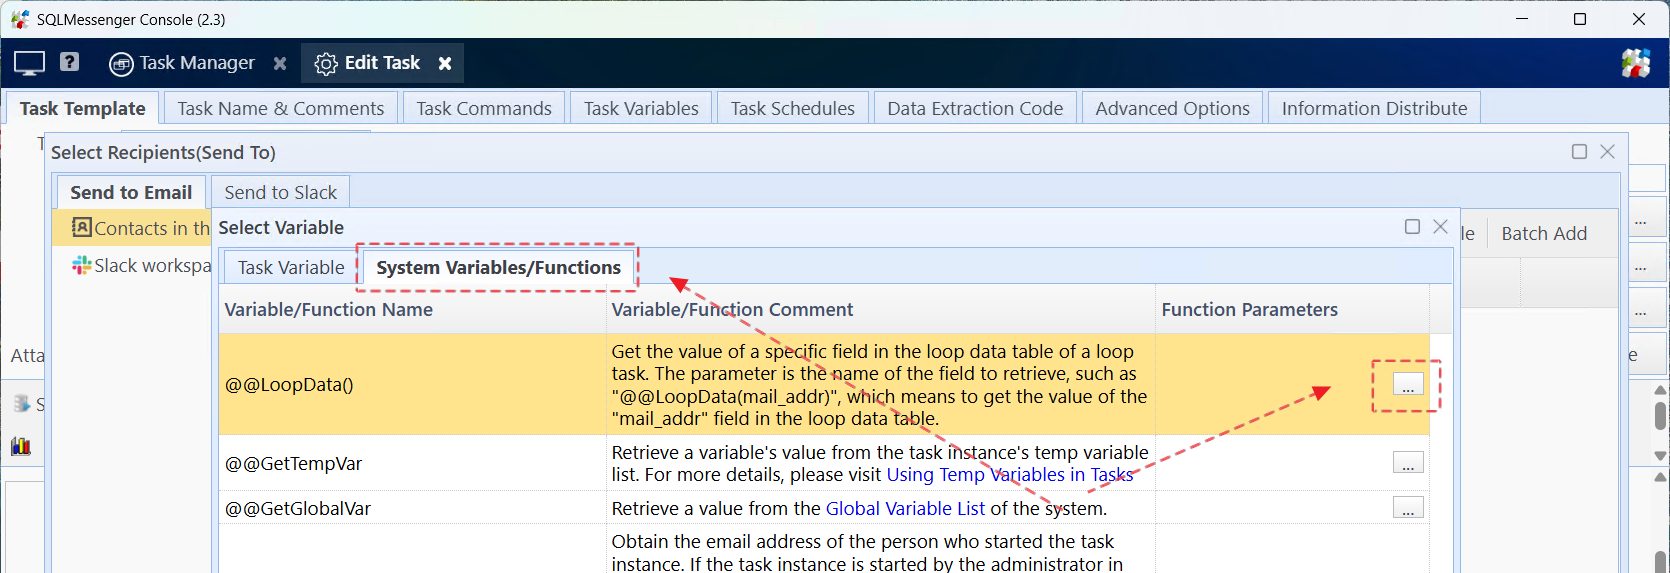
Step 4: Select "Recipient_Email" in "Field Name", which means using the "Recipient_Email" field in the recipient list as the recipient's email address. Then click "OK" to return to the task configuration interface.

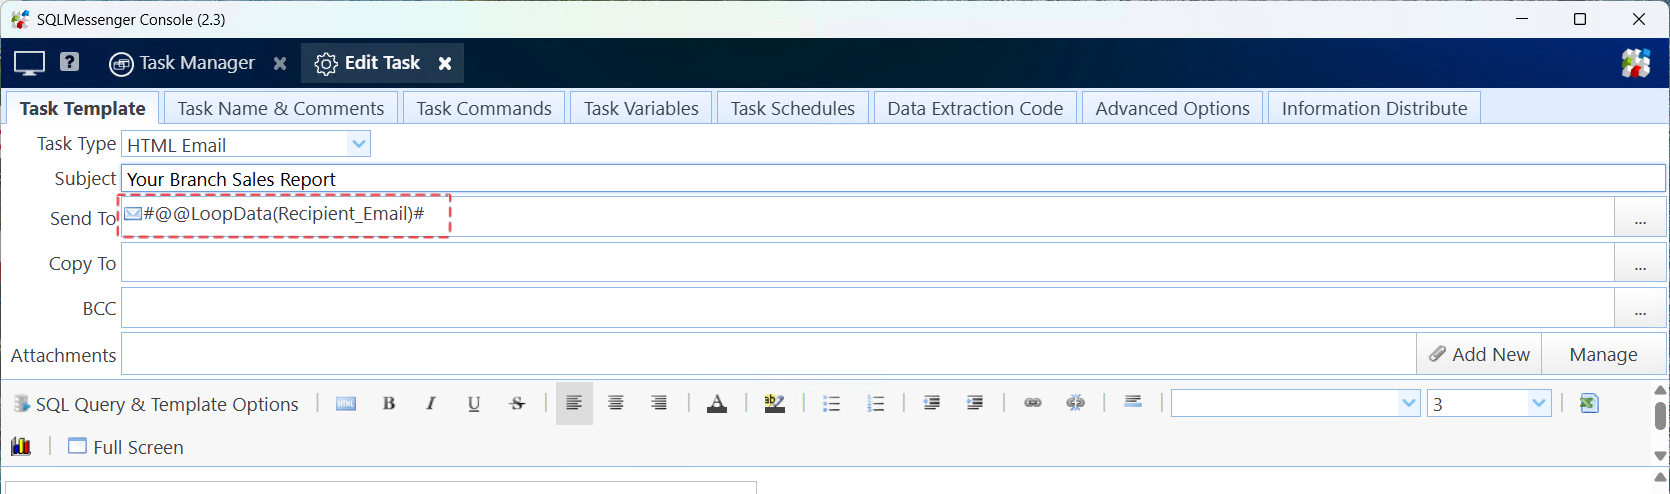
Configured "SendTo"
5. Test the Task
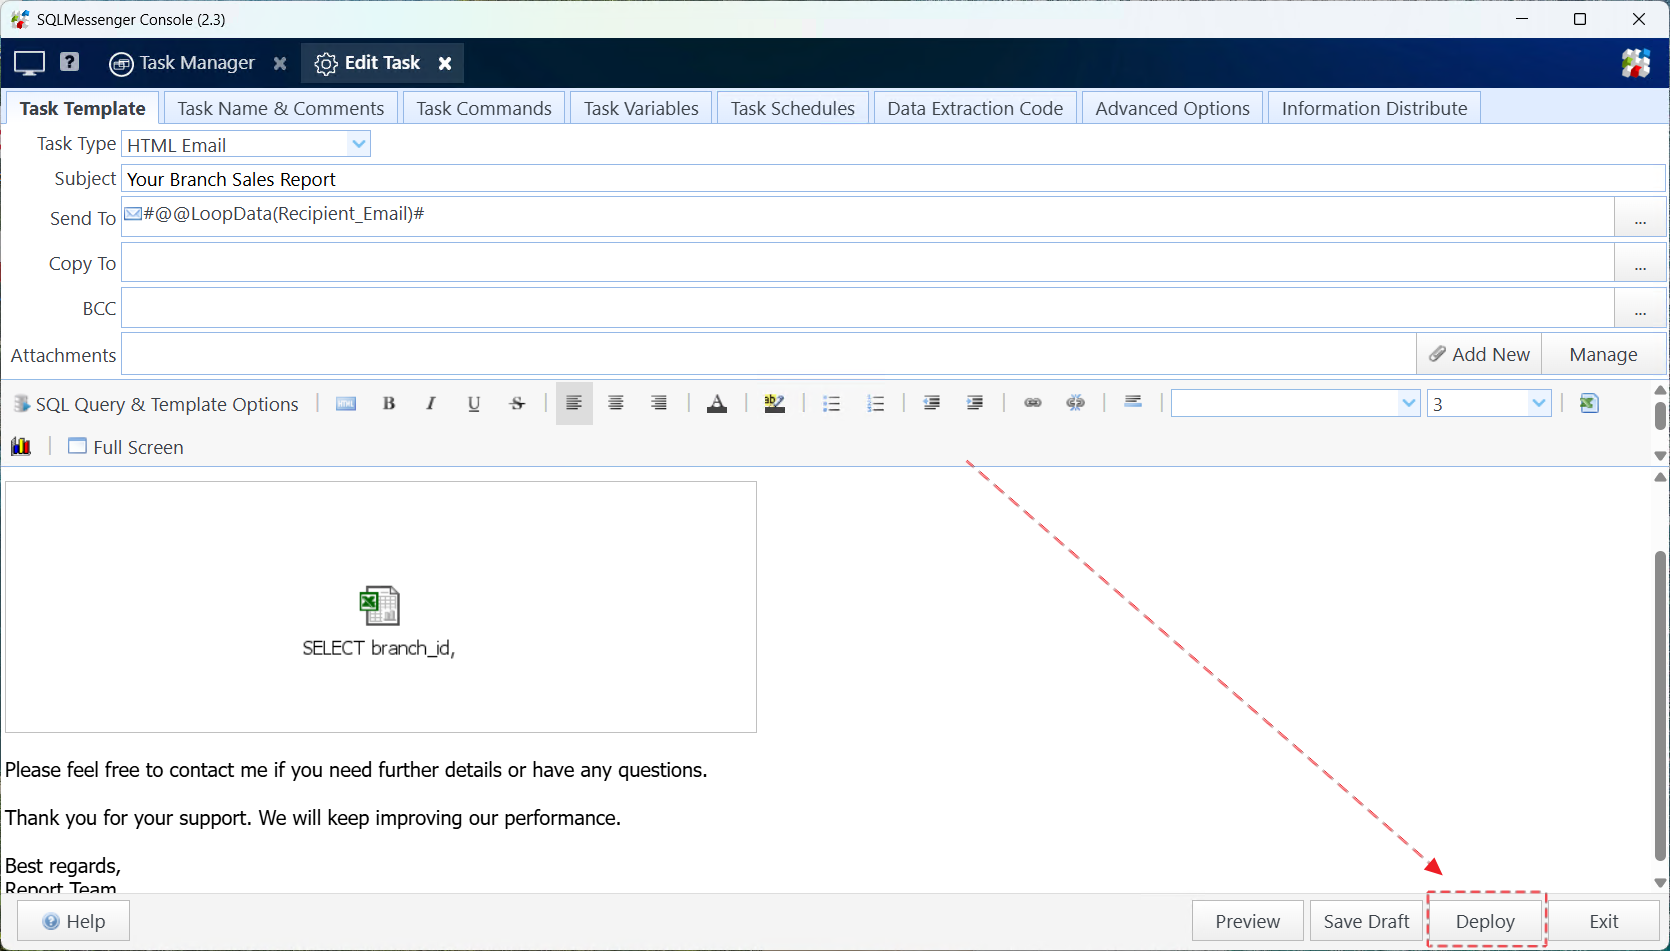
Step 1: After configuring the task, click "Deploy" to make the new configuration take effect.
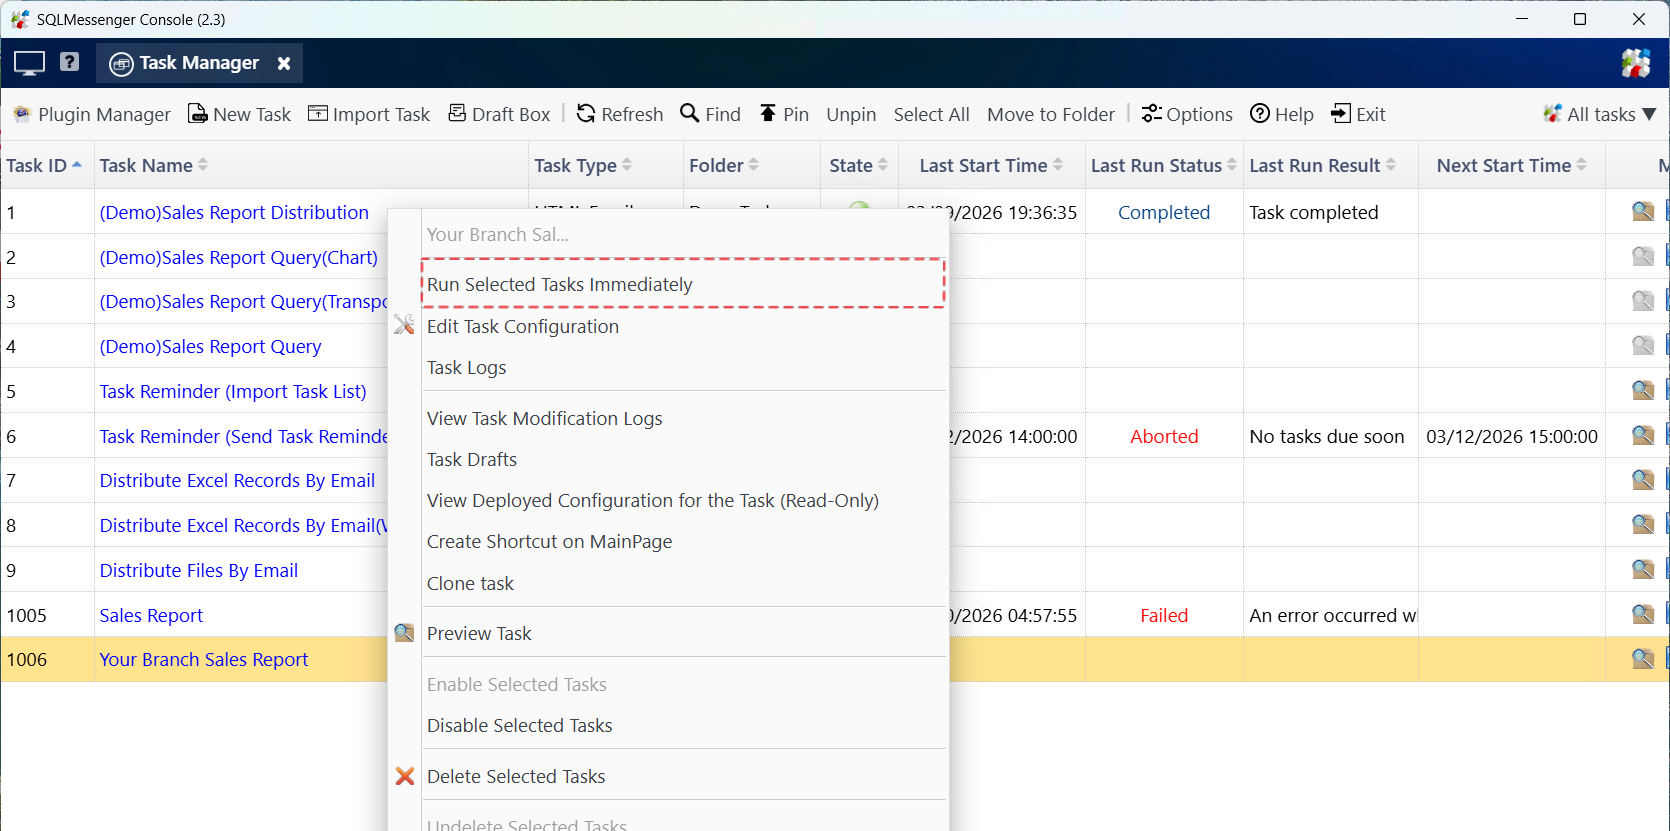
Step 2: Right-click the task in the task list, then click "Run Selected Tasks Immediately".
Note:
(1) Before testing the task, please check the task configuration to ensure that you have enabled the "Send task-generated emails and messages only after my approval" option for the task.
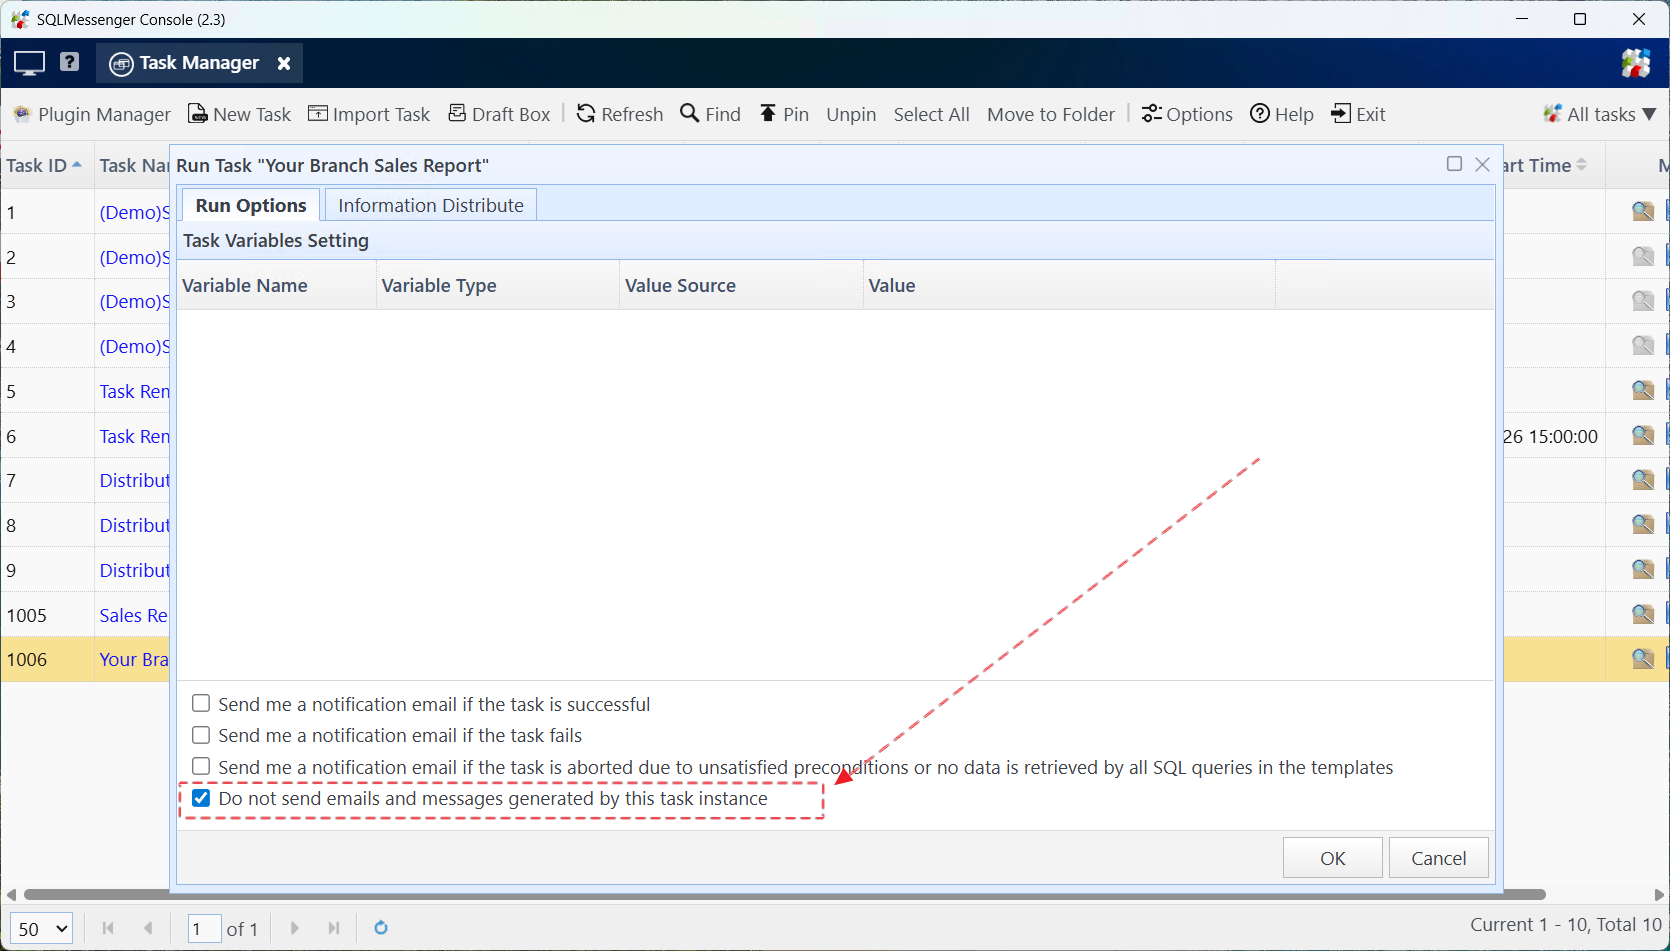
(2) You can also check "Do not send emails and messages generated by this task instance" when manually executing the task. This way, the system will not send the test emails generated by this task.
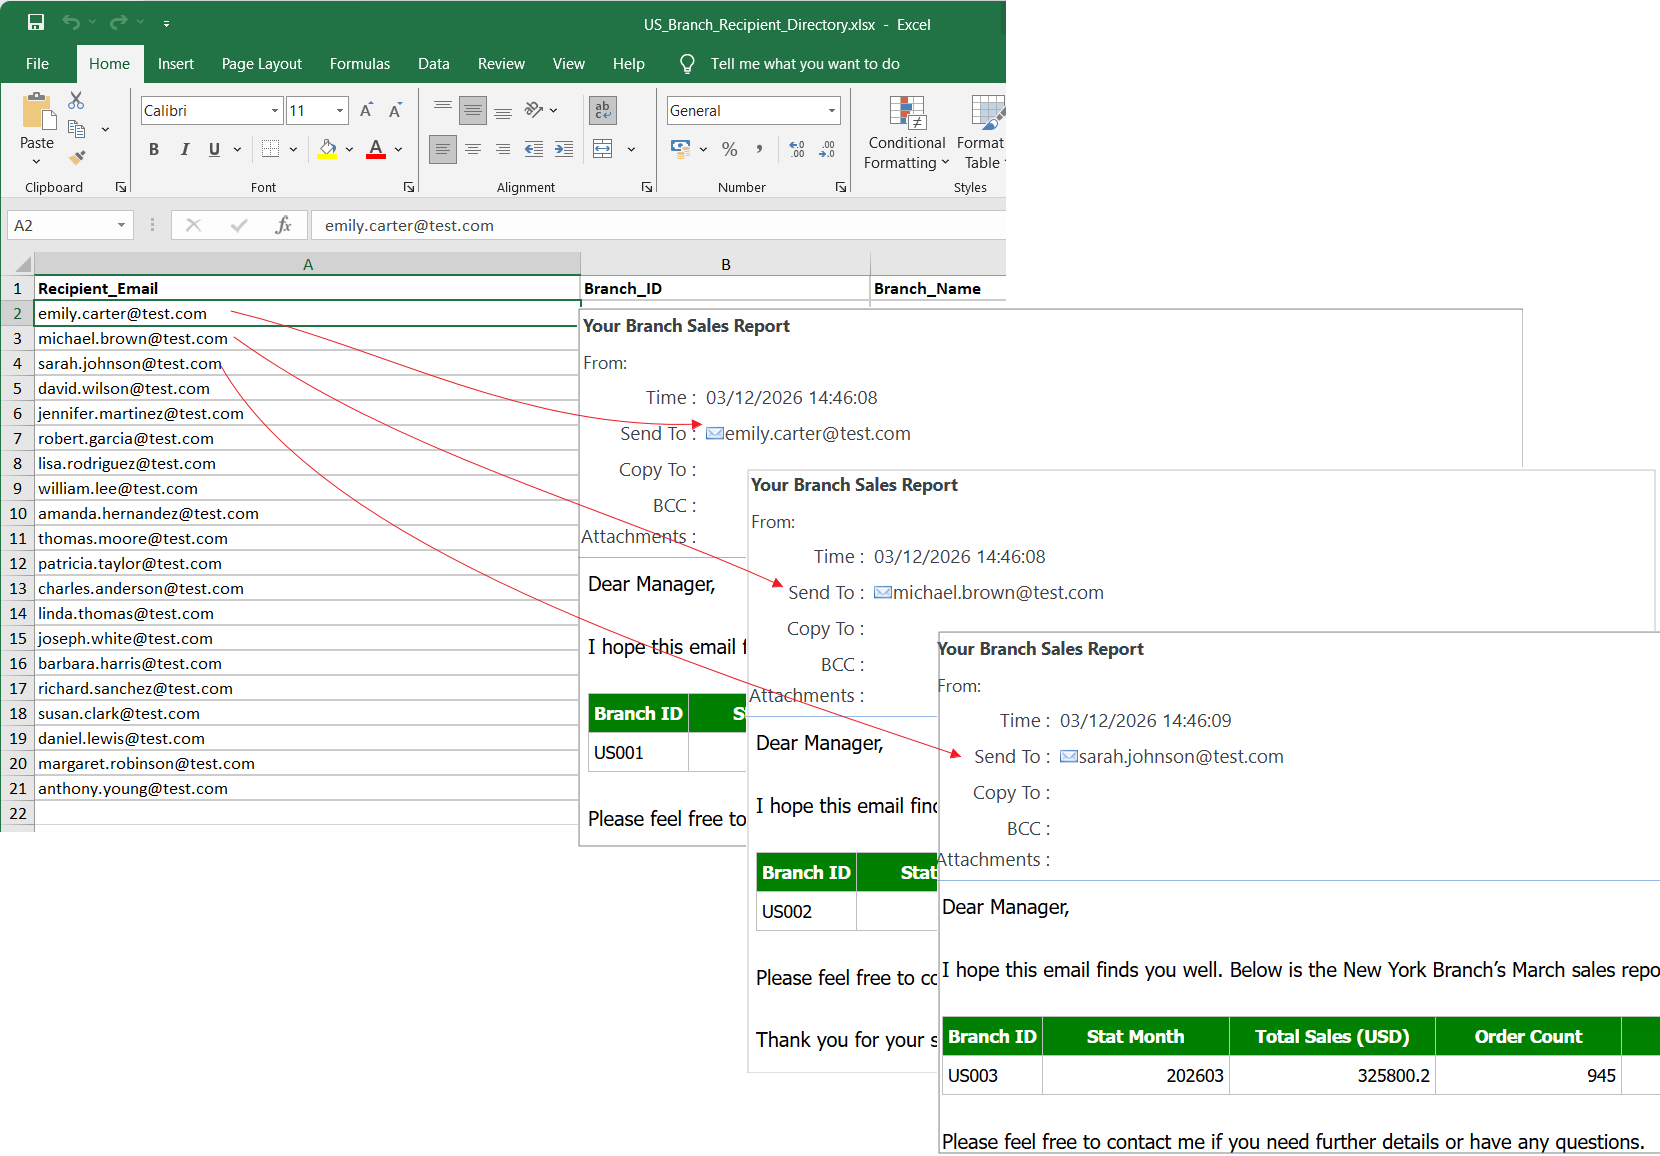
Step 3: After the task is completed, the system will generate a report email for each recipient. You can check whether the email content is consistent with expectations on the interface.
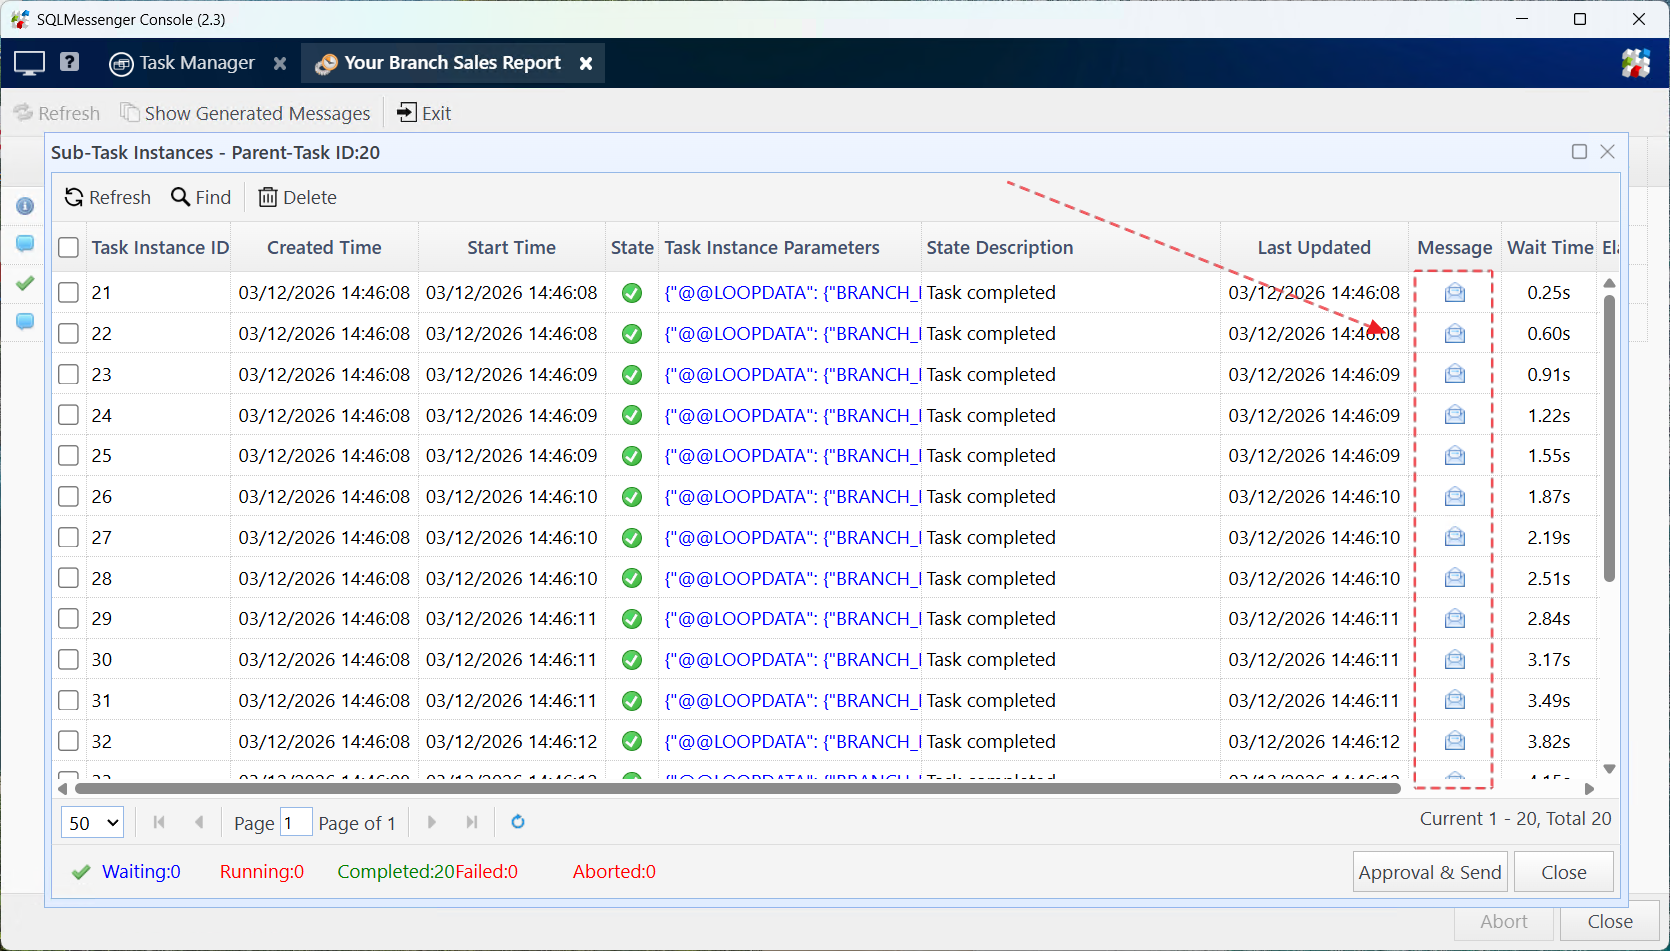
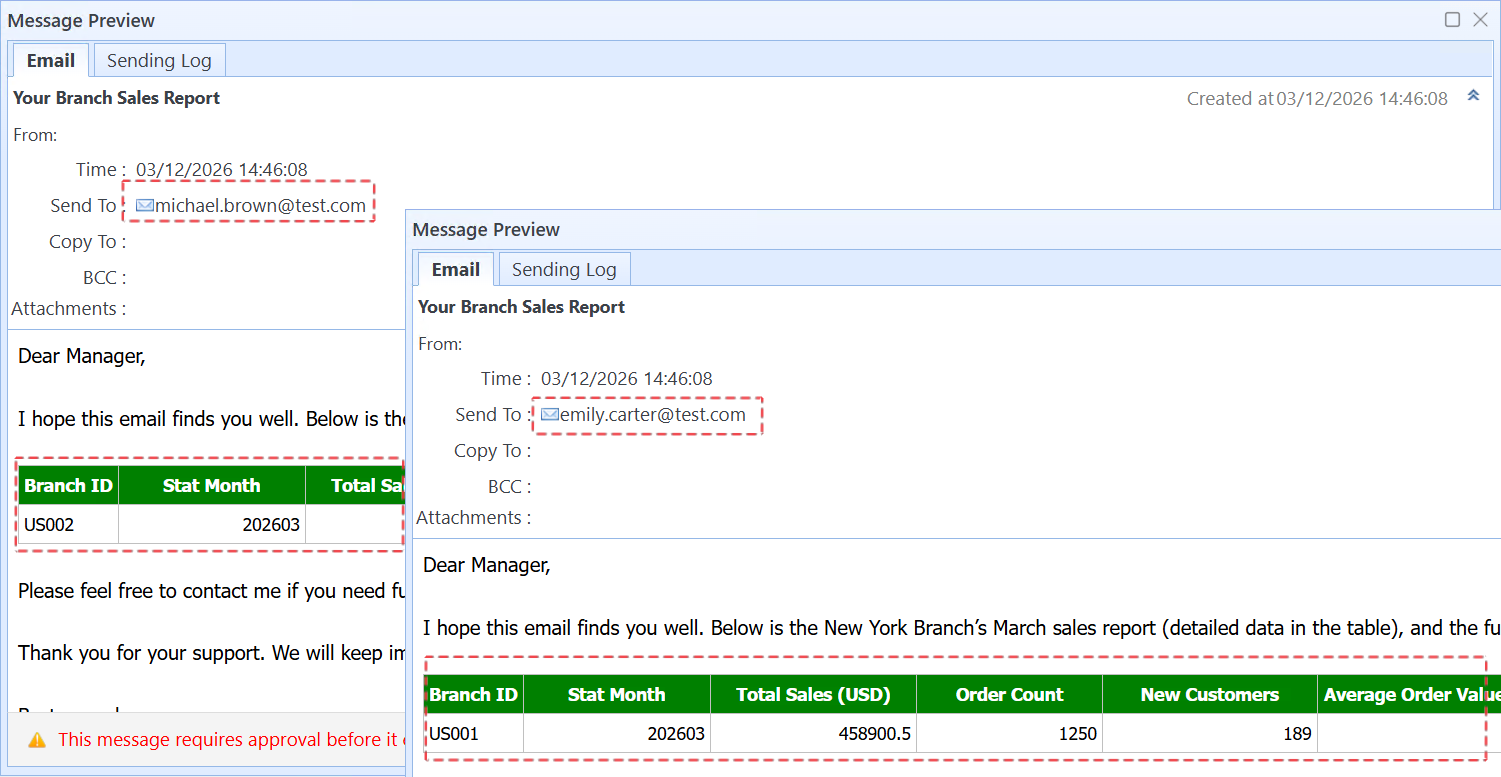
The system generates an email for each recipient
6. Set Execution Schedule for the Task
After the task is tested successfully, you need to add an execution schedule for the task, and the system will automatically run the task according to the configuration of the execution schedule.
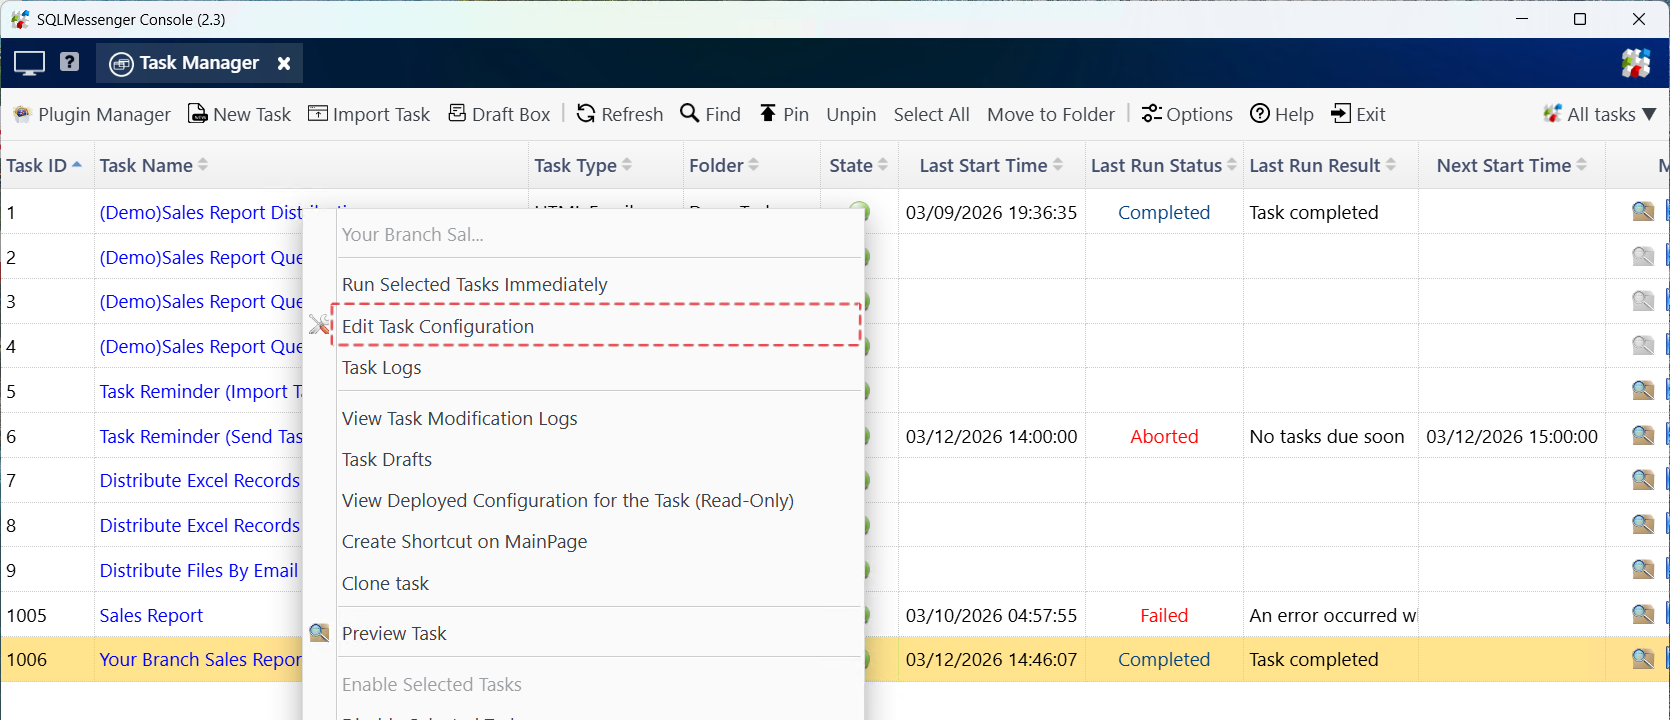
Step 1: Right-click the task in the task list, then click "Edit Task Configuration".
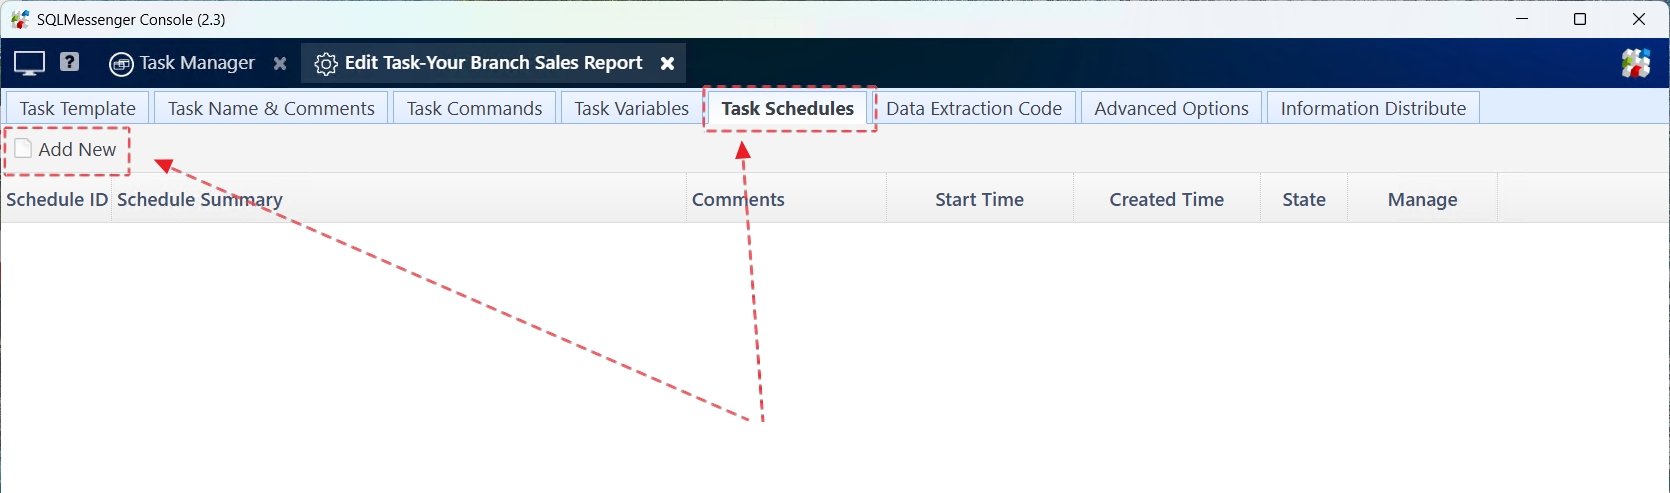
Step 2: Switch to the "Task Schedules" page, then click the "Add New" button.
Step 3: Set the start time and interval of the execution schedule, then click "OK".
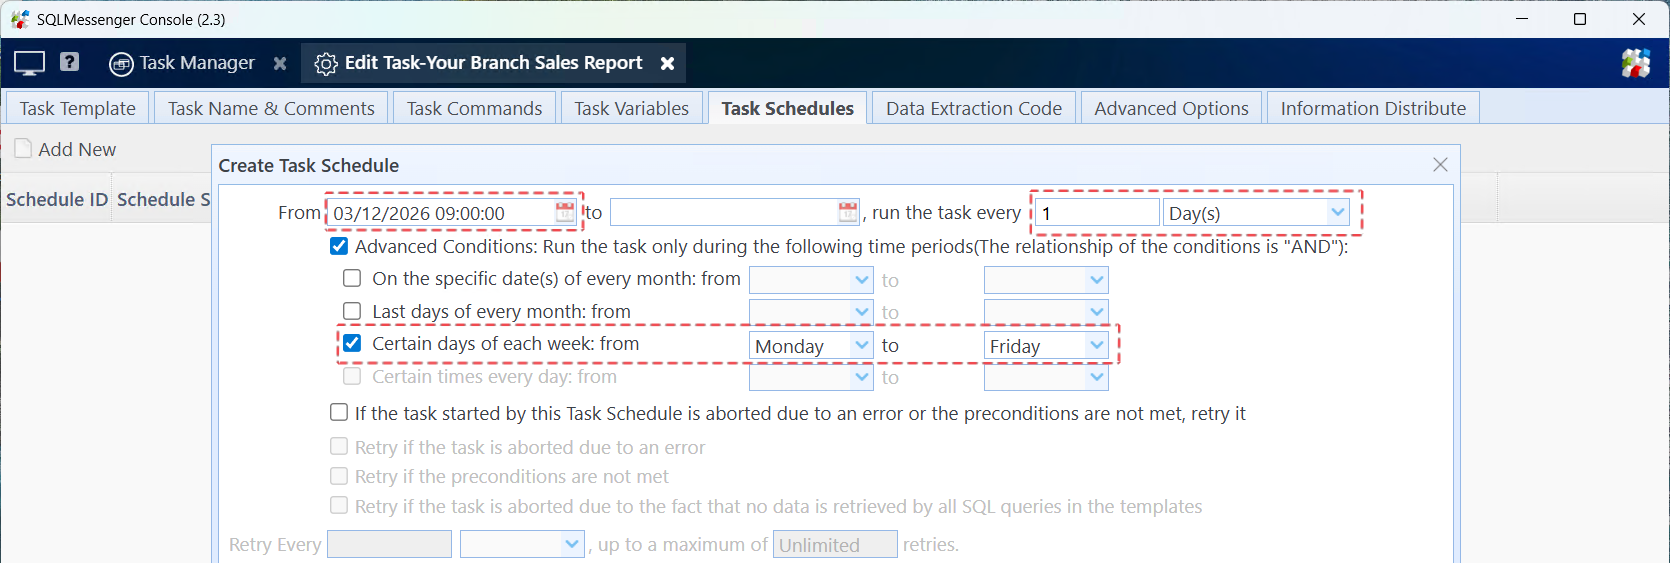
The configuration in the figure means running this task at 9 AM from Monday to Friday every week.
Tips:
(1) You can add multiple execution schedules for a task to run the task automatically at different times.
(2) For detailed information about execution schedules, please refer to SQLMessenger User Manual - Using Task Schedules.
If you previously selected "Send task-generated emails and messages only after my approval", you can uncheck this option to achieve automatic email sending (no manual approval required).
Step 4: After modifying the task, click "Deploy" to make the new configuration take effect.

After the task is deployed, you can see the next run time of the task in the task list.
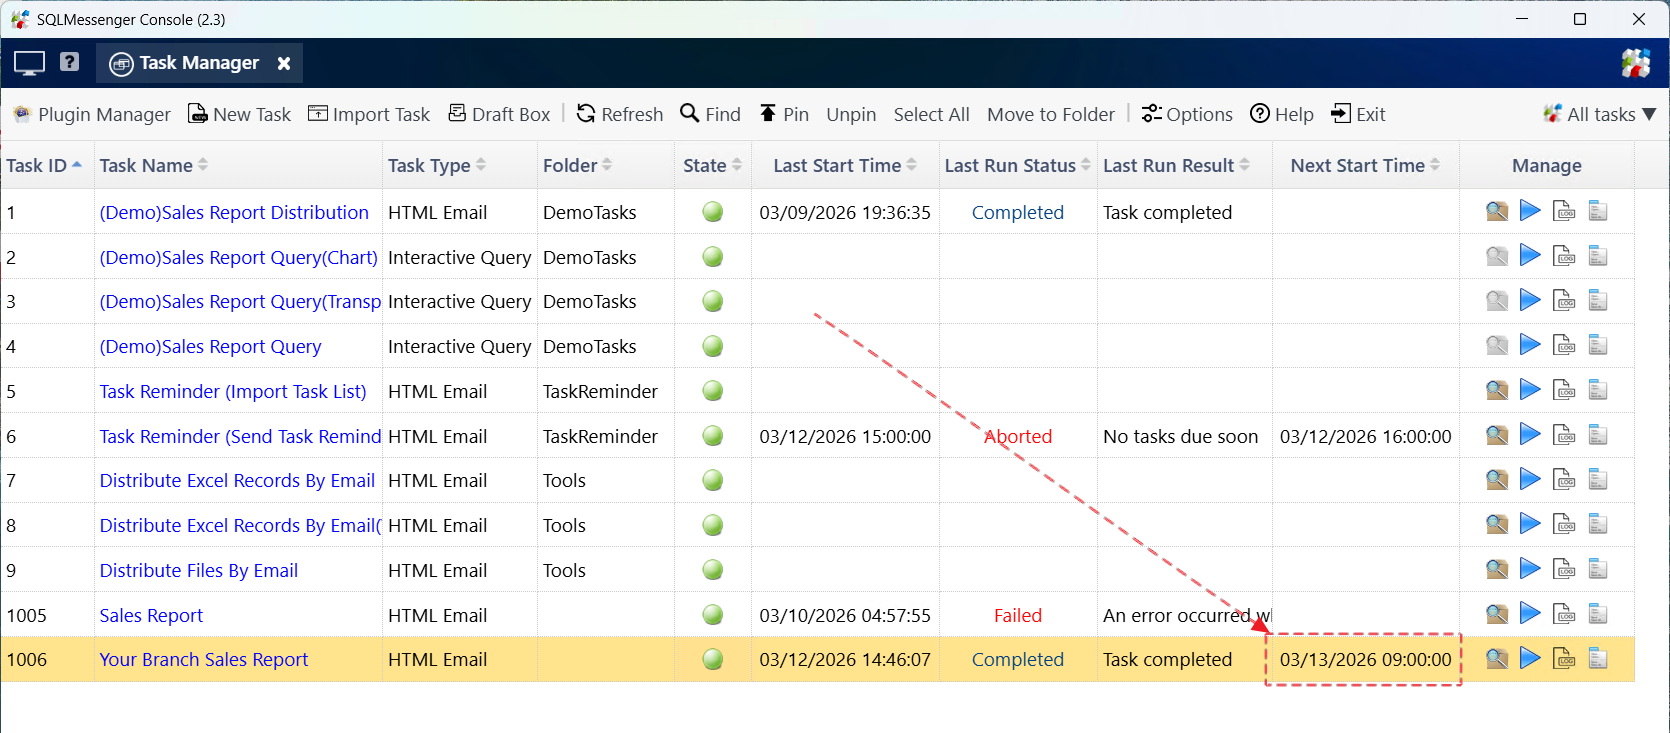
The next run time of the task is displayed in the task list
FAQ
Can I add an Excel spreadsheet attachment to the task?
Yes. When adding an attachment, you also need to modify the query condition of the SQL statement.
My report is not such a simple table but an Excel template designed by us. Can I make SQLMessenger generate reports in the format of my template?
Yes. You can use the "Custom Attachment Template" to achieve this function. SQLMessenger can fill the SQL query results into the specified spreadsheet according to your configuration. For detailed methods, please refer to How to Auto-Fill SQL Query Results into a Custom Excel Template.
I want the task to run at 9 AM and 5 PM every day. Can this be achieved?
Yes. You can add multiple execution schedules for a task to run the task at different times.
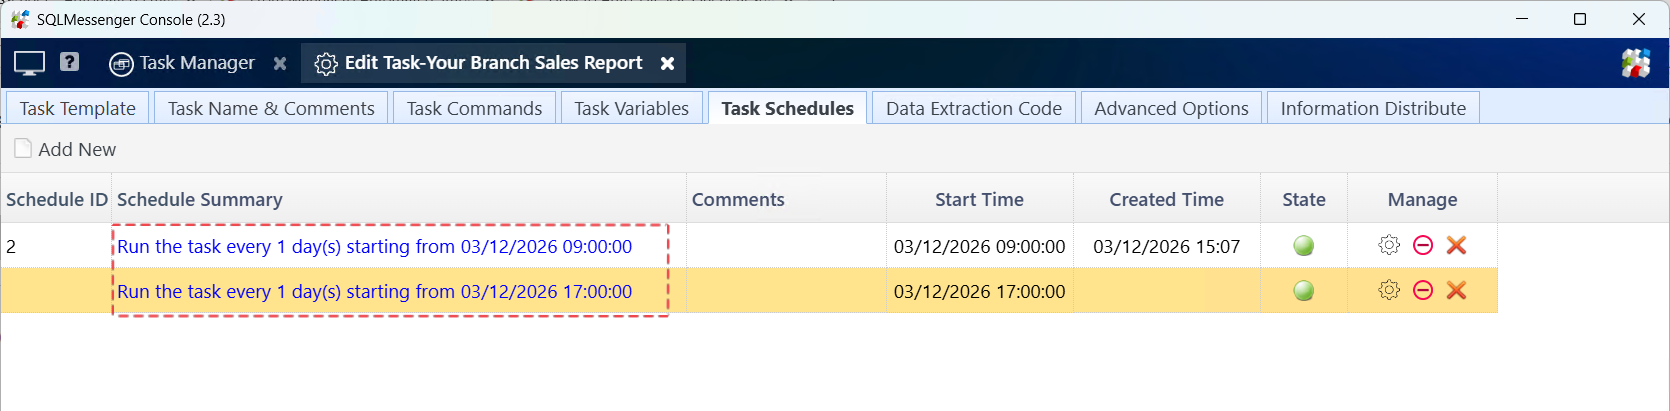
Run the task at different times
If you run into any issues while using SQLMessenger, feel free to contact us for technical support.