1 About Order Monitoring System
I have many orders stored in my CRM database. I need to frequently (possibly daily or weekly) query the orders that are about to expire and send them to different people for handling. Different orders need to be sent to different people. How should I build an order monitoring system to automate this task?
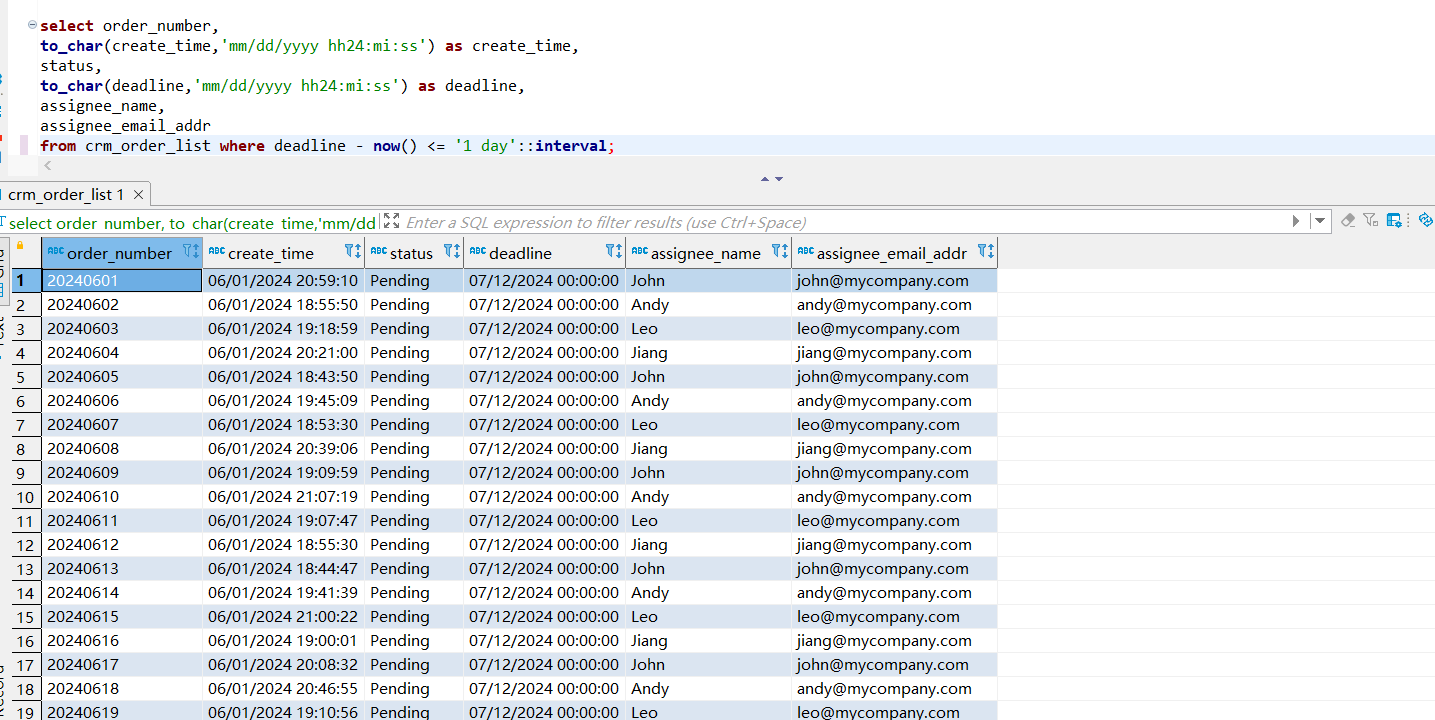
Here is my query result:
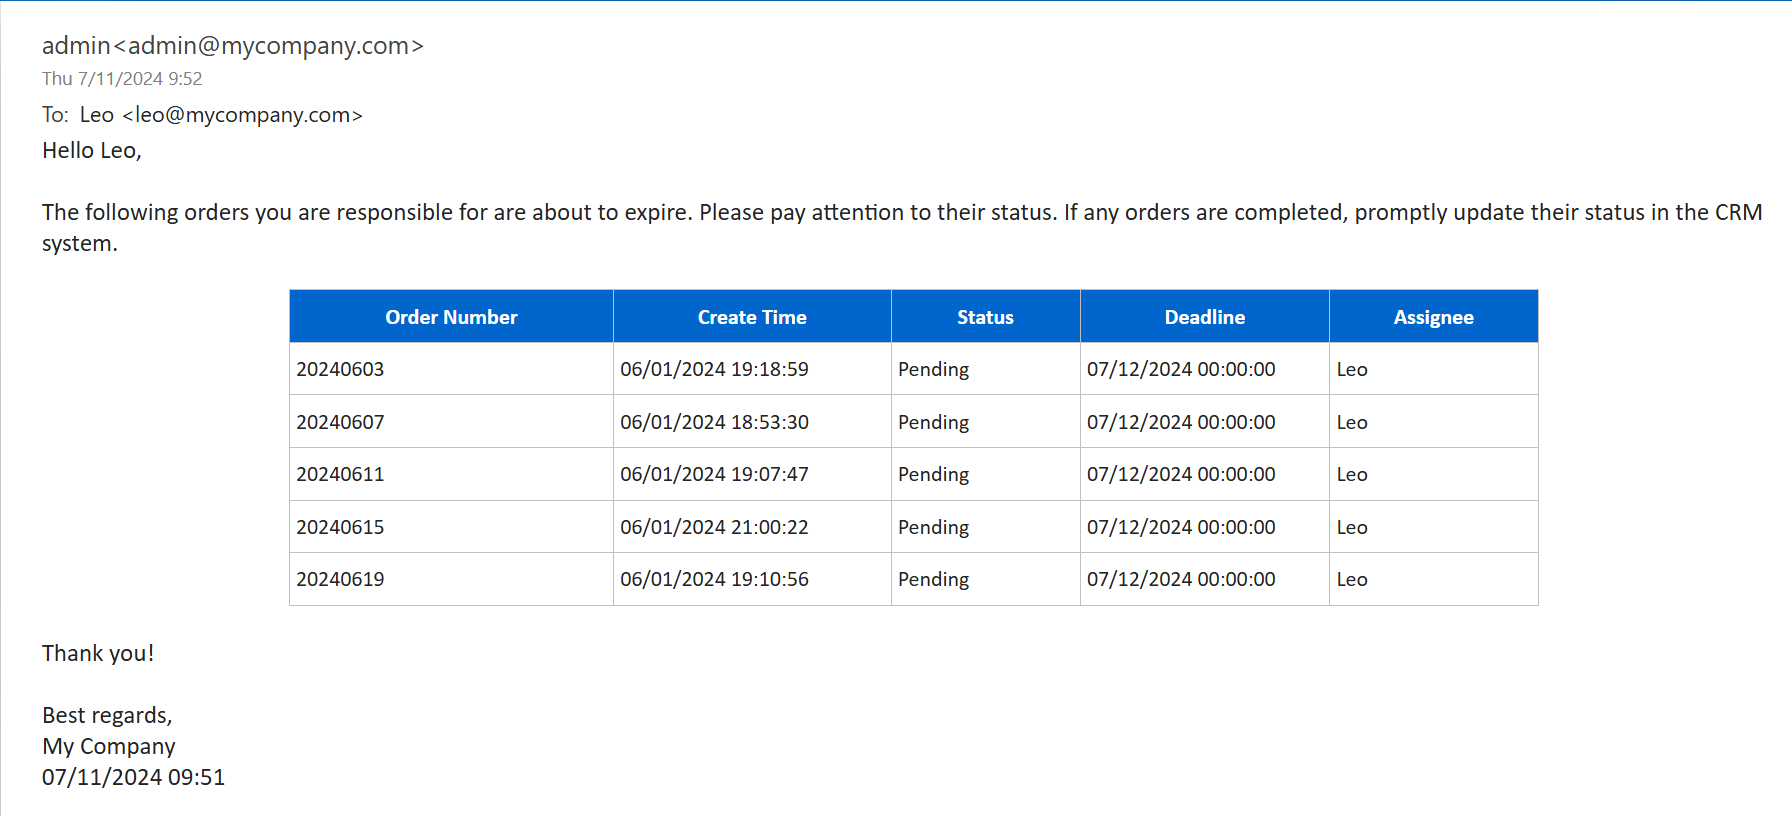
The format requirements for the emails I send out are as follows:
You can use the "Information Distribute" feature of SQLMessenger to accomplish this task. Please follow the steps below to configure it in SQLMessenger.
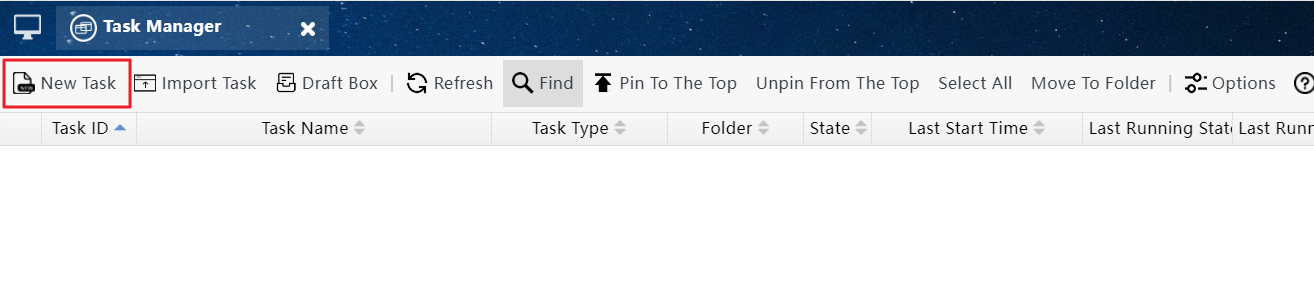
Step1: In the Task Manager of the SQLMessenger console, click the "New Task" button to create a new task.
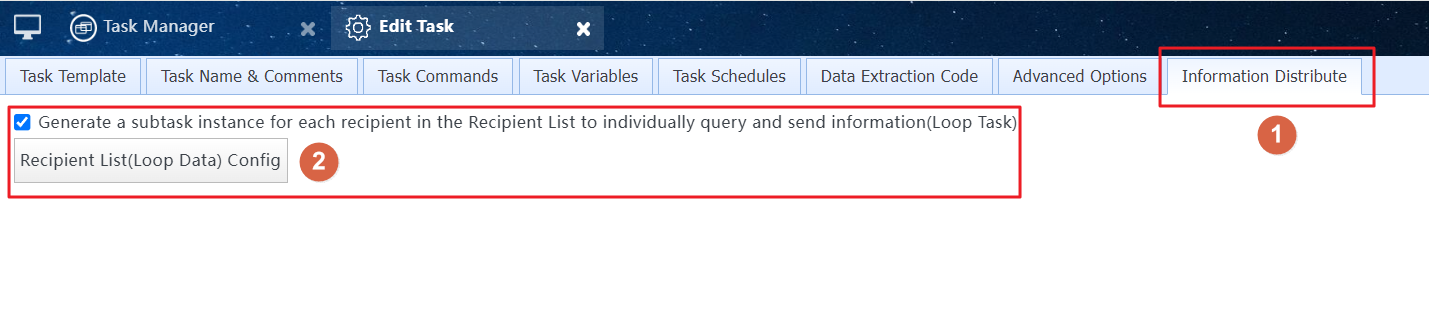
Step2: In the Task Editor, click the "Information Distribute" tab, check the "Loop Task" option, and click the "Recipient List (Loop Data) Config" button.
Step3: Select the data source, enter the SQL statement that queries the email list to be sent, then click the "Test" button. After testing is complete, click "OK."
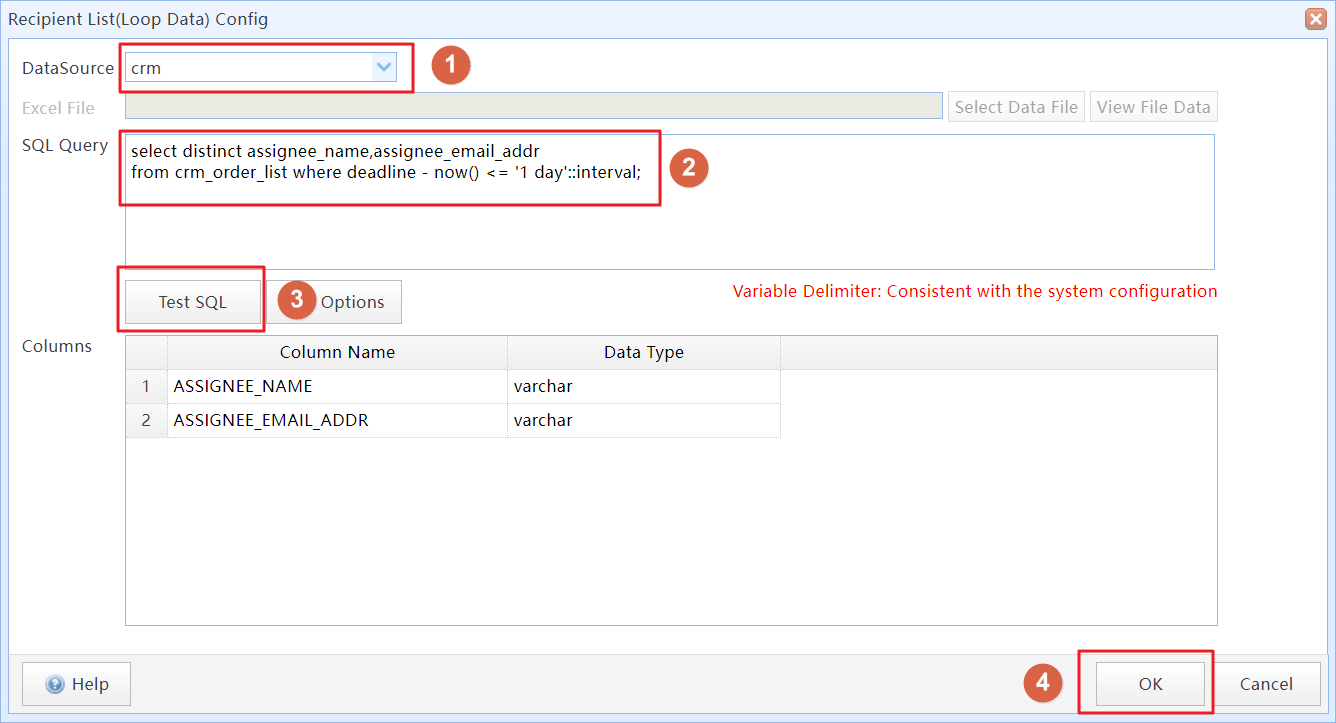
Note: The query statement here should simply retrieve the email list and ensure that email addresses are unique.
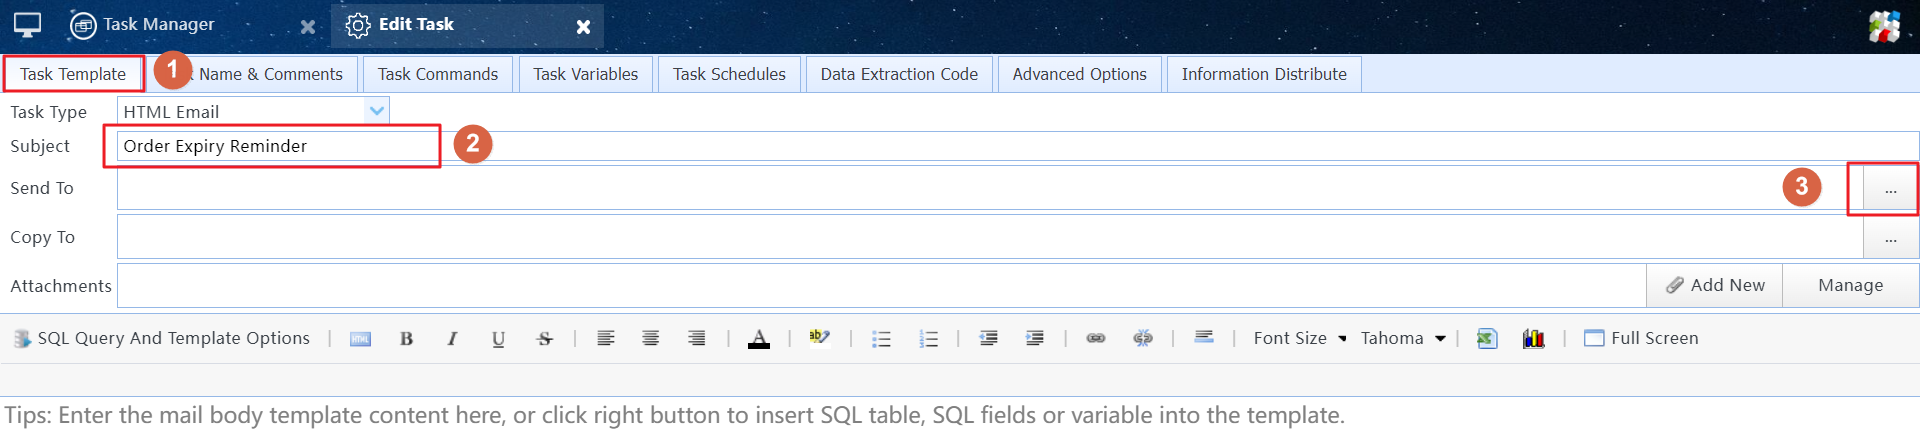
Step4: Click on the "Task Template" tab, enter the email subject. Click the button on the right side of "Send To" to select the email recipients.
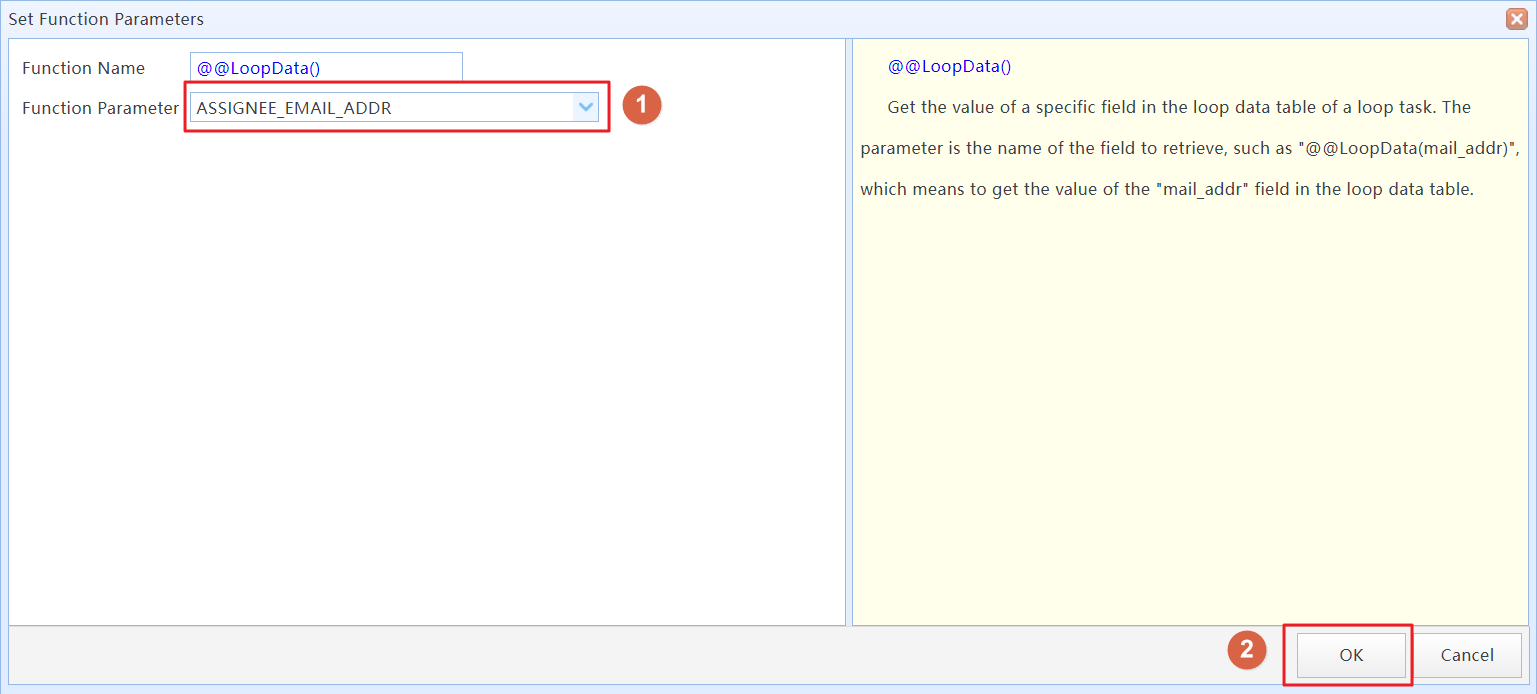
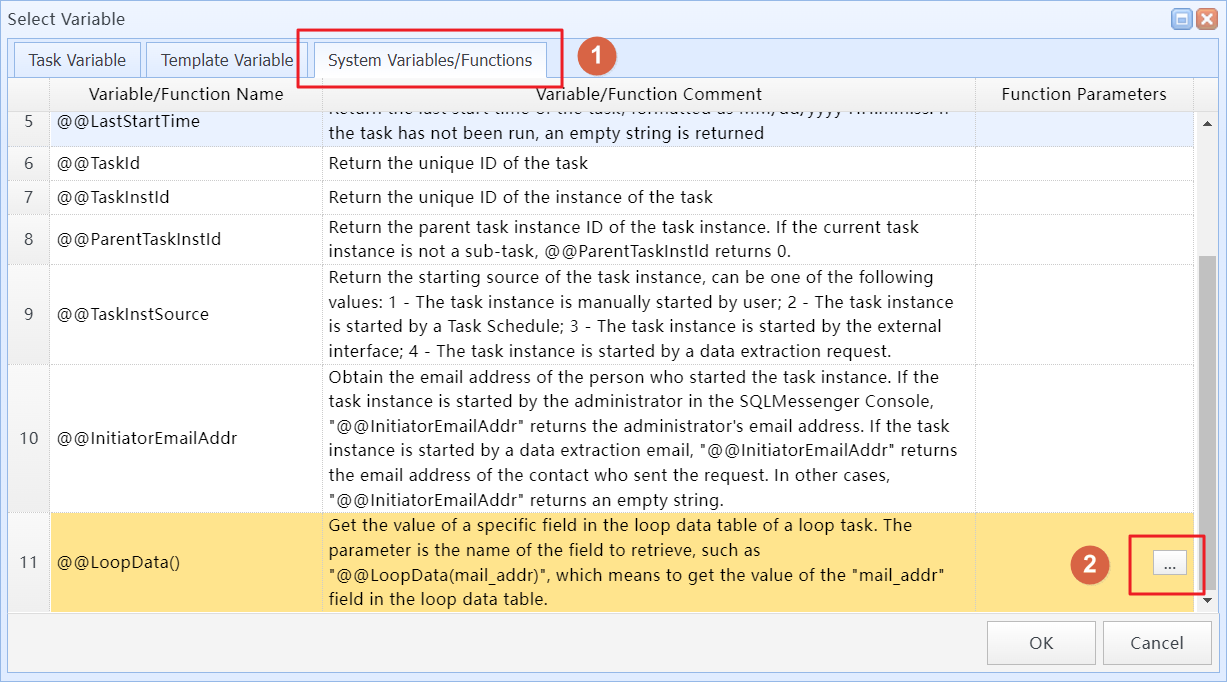
Step5: Click the "From A Variable" button, then go to the "System Variables/Functions" tab, locate @@LoopData(), and click the button on the right of the entry.
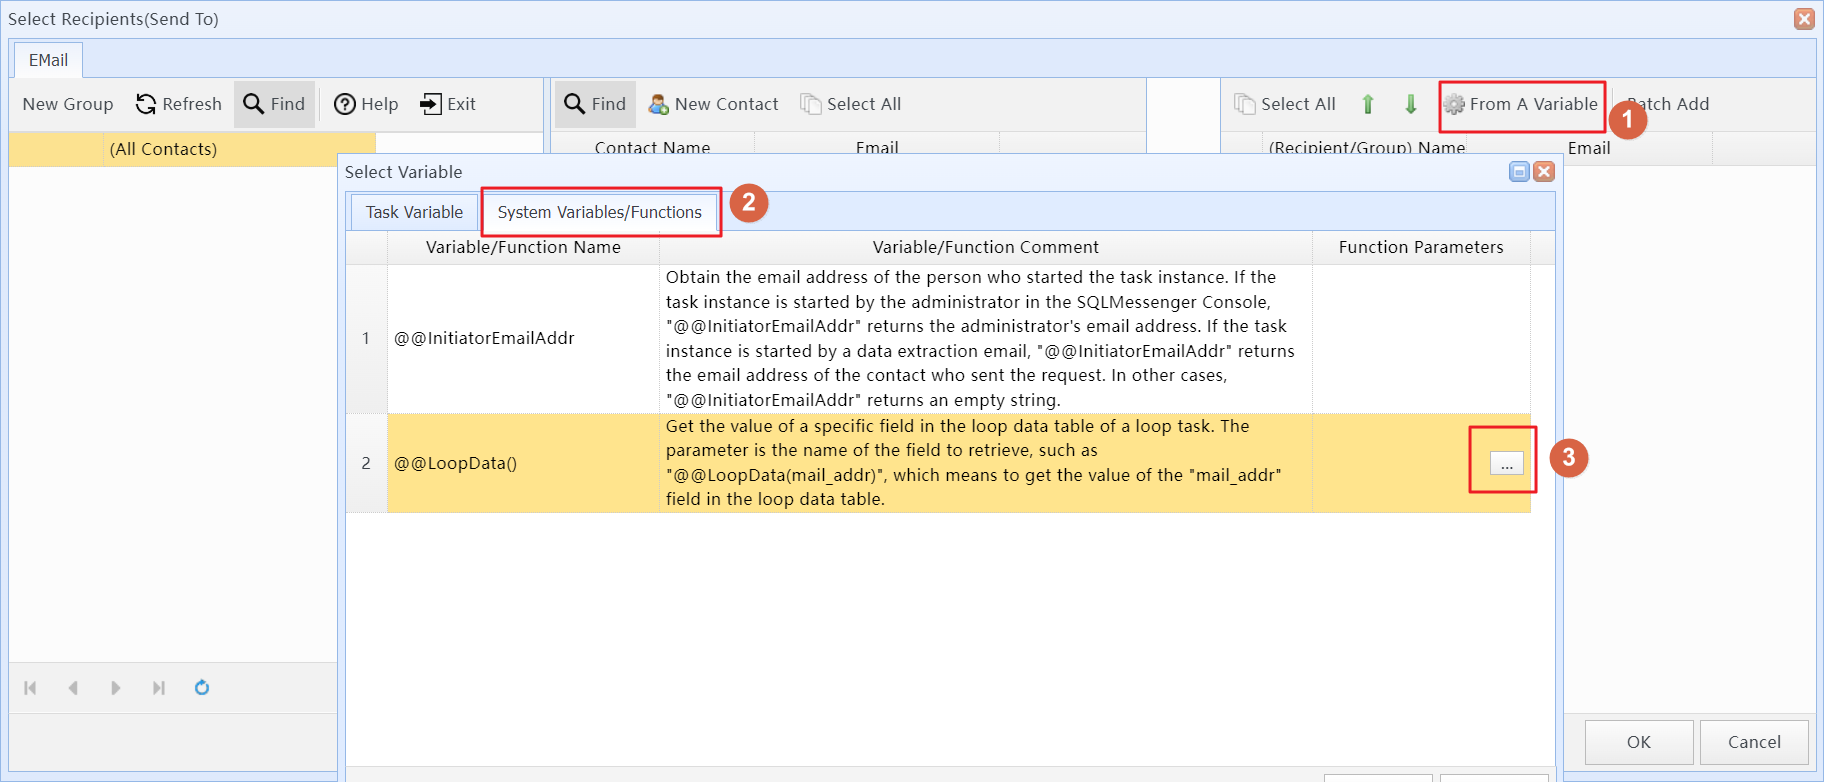
Step6: In the "Function Parameter," select "ASSIGNEE_EMAIL_ADDR," then click "OK" repeatedly to return.
Tips: Choosing "ASSIGNEE_EMAIL_ADDR" here means using the field from the SQL query entered earlier as the email address for recipients.
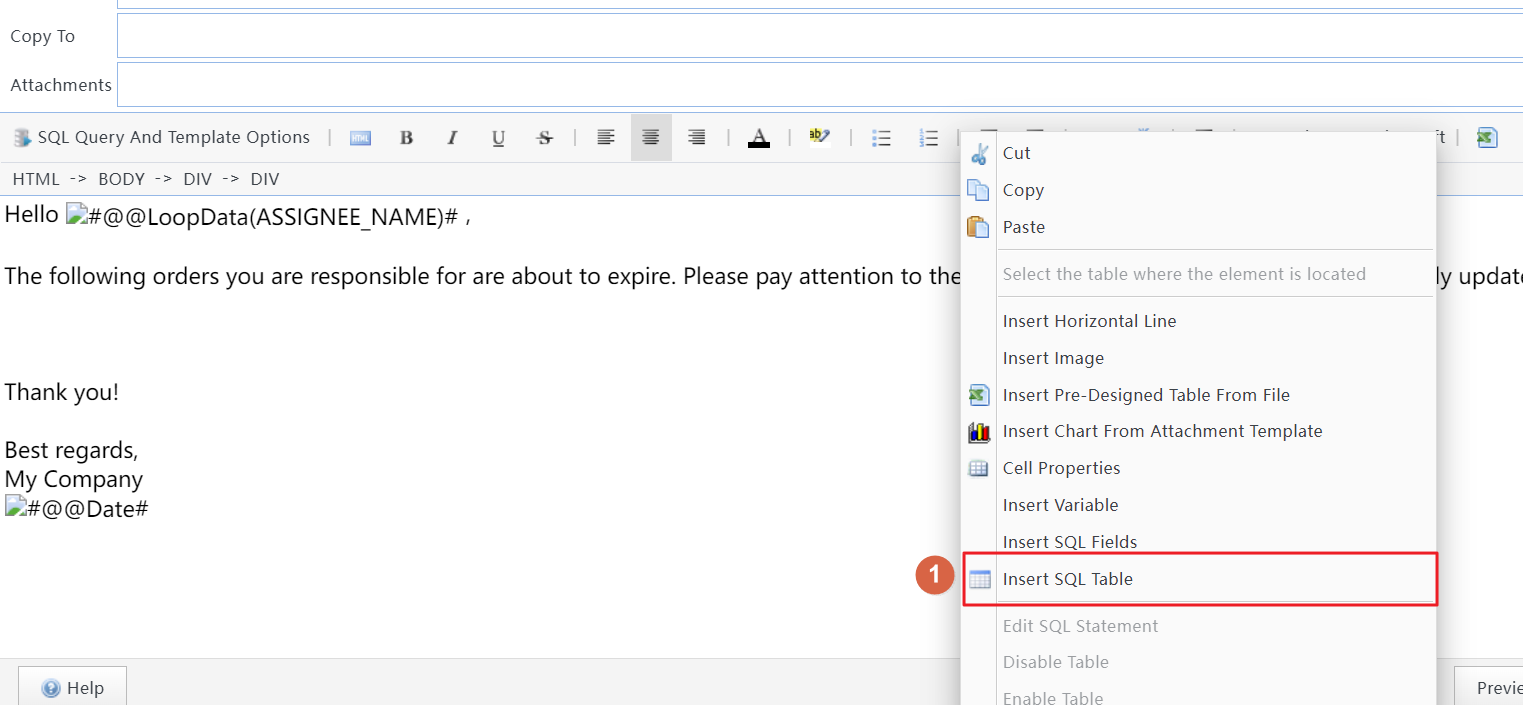
Step7: In the body template editor, enter the email body template. During the input process, you can right-click at the position where the recipient's name should appear, and select the "Insert Variable" menu item.
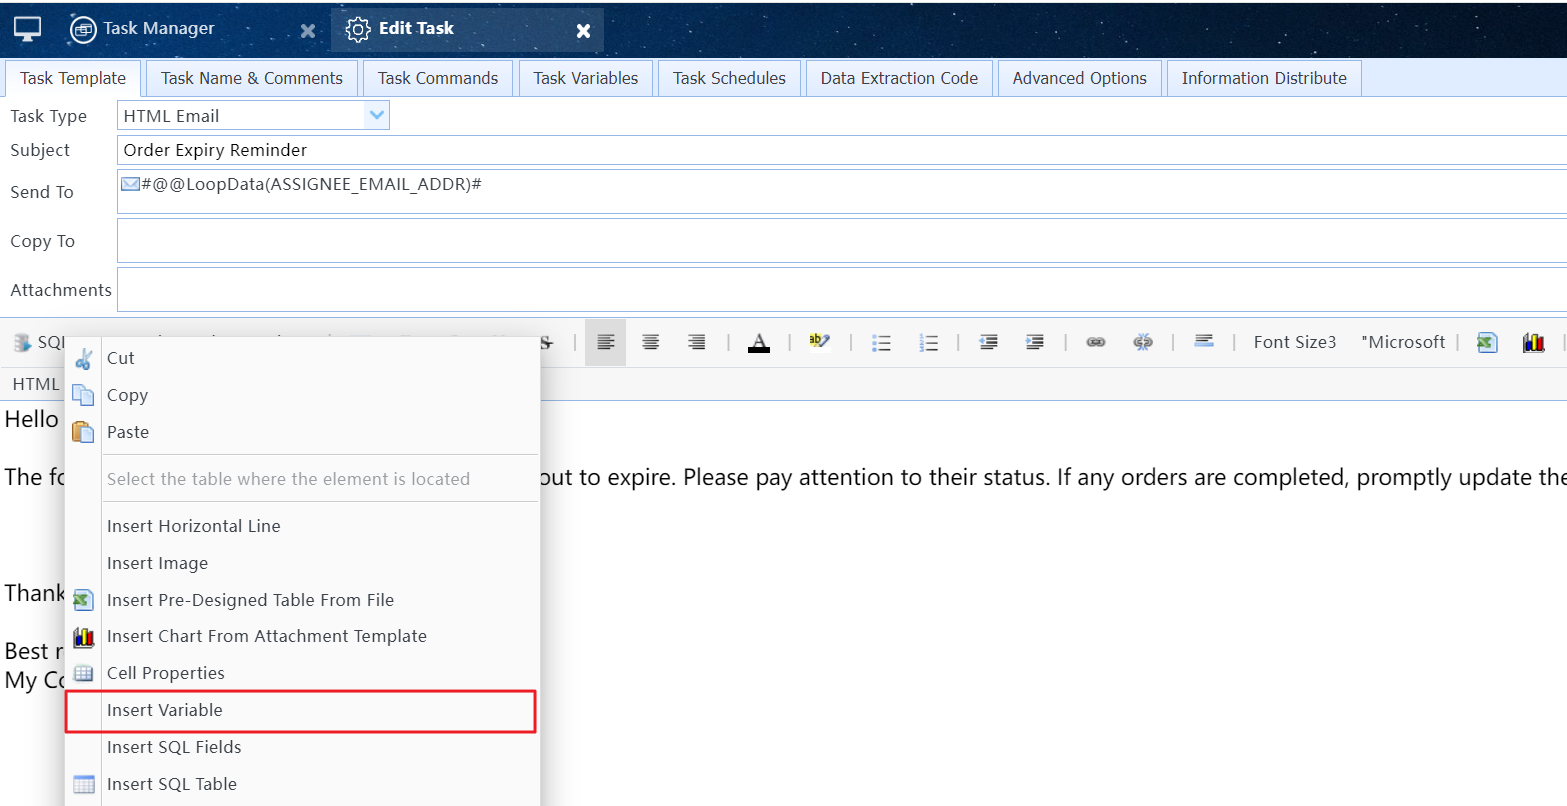
Step8: In the "System Variables/Functions" tab, locate "@@LoopData()" and click the button on the right side of the item.
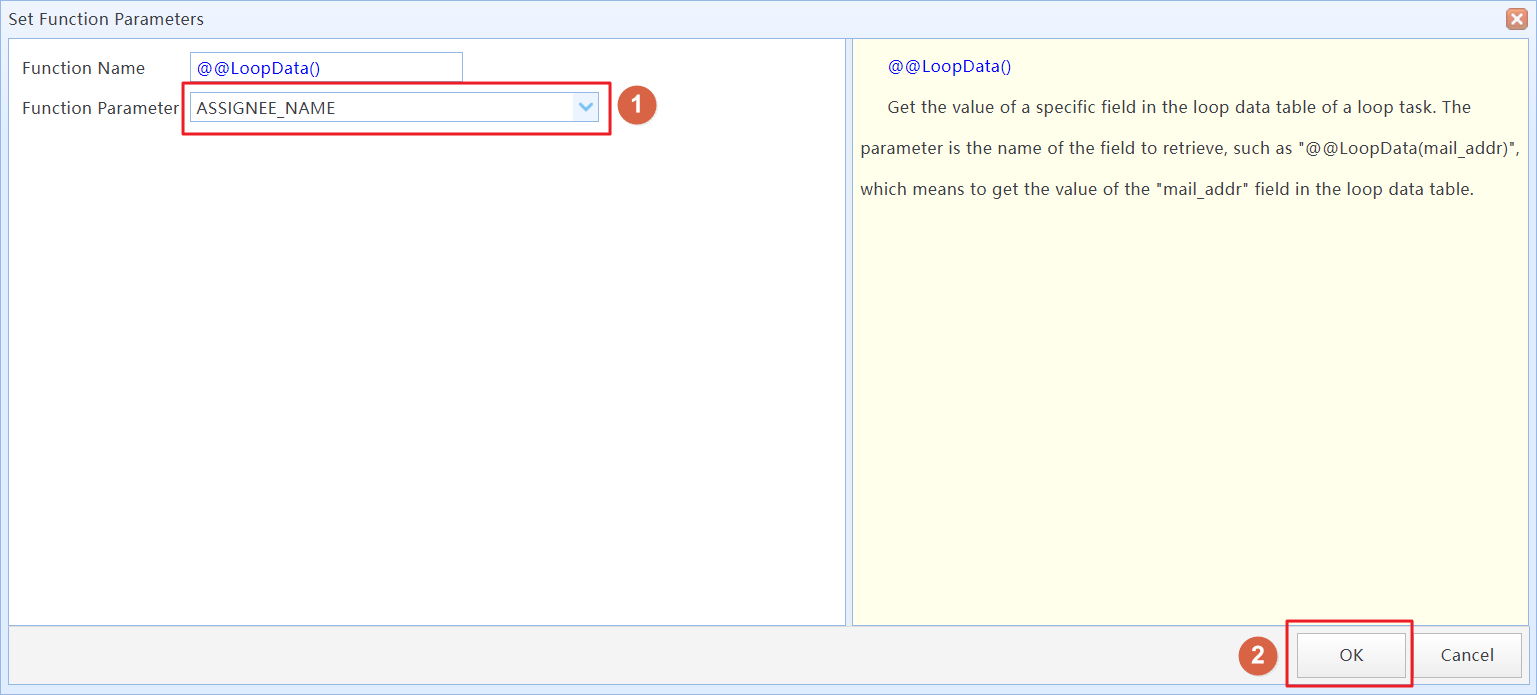
Step9: In the "Function Parameter," select "ASSIGNEE_NAME," indicating that the value of the ASSIGNEE_NAME field from the SQL query entered earlier will be displayed here.
Tips: You can use the same method to display the date of task execution at the end of the email. In the "System Variables/Functions" tab, select the "@@Date" variable.
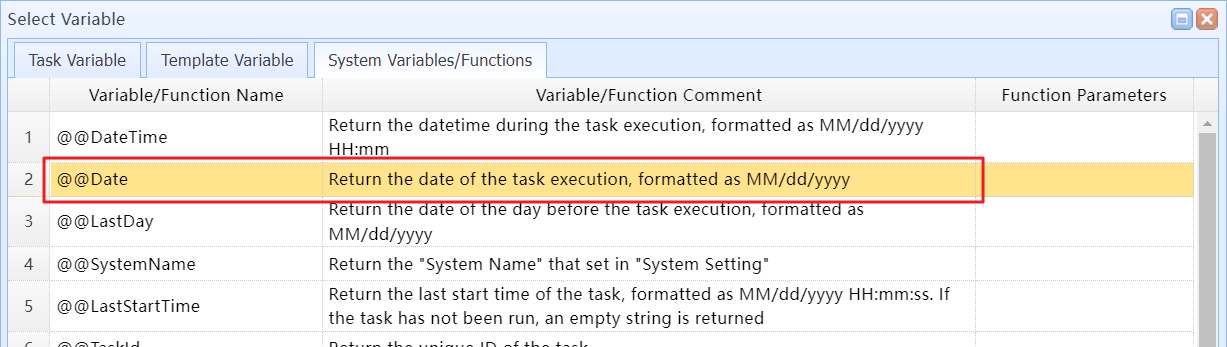
Insert the "@@Date" variable at the end of the email to display the date of task execution
Step10: In the body template, right-click where you want to display the table and select the "Insert SQL Table" menu item.
Step11: In the wizard, select the data source and input the query for the list of orders to be sent. Make sure to modify the SQL statement's query conditions accordingly here.
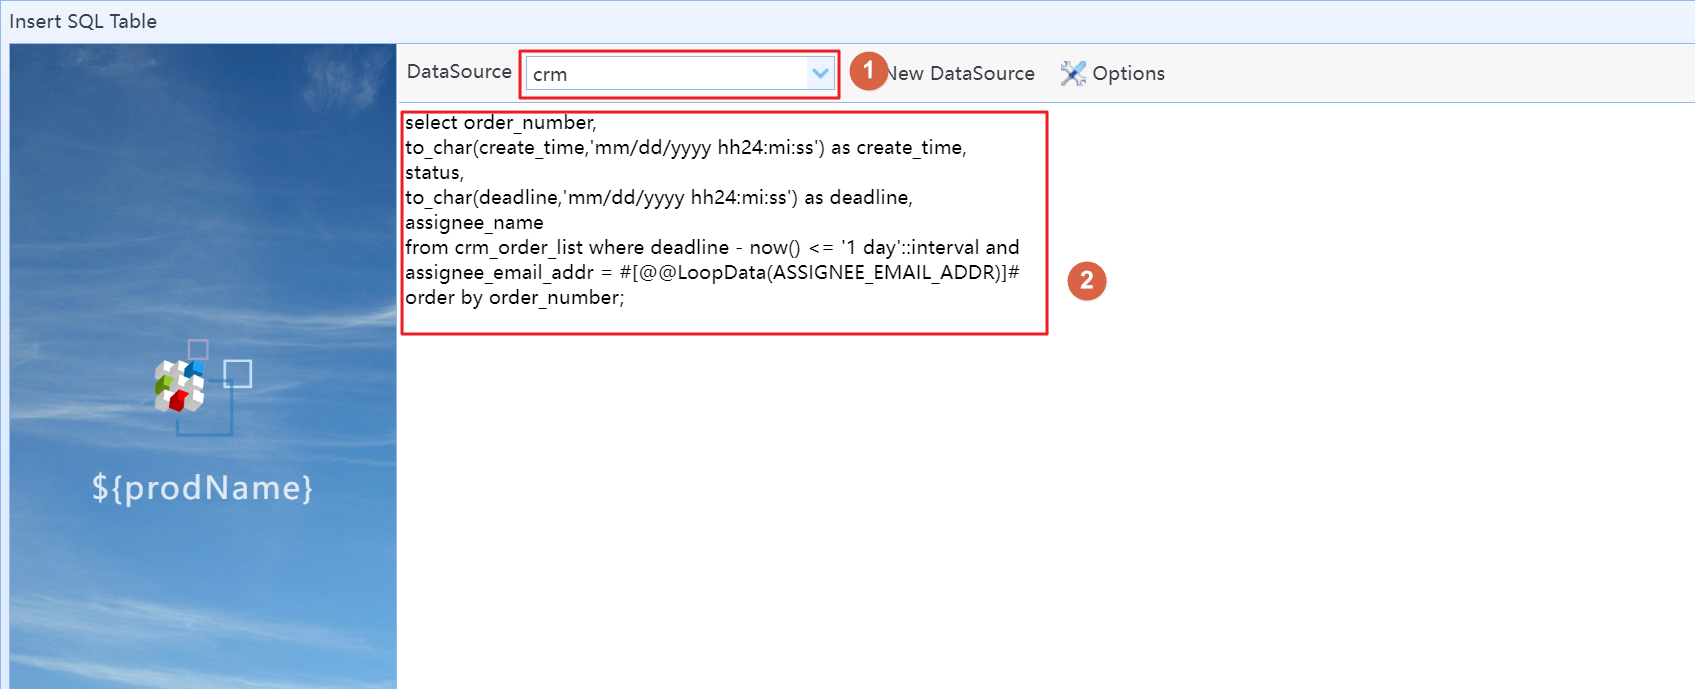
Note: Here, the SQL query conditions need to be modified to retrieve orders assigned to one handler. The modified SQL statement is as follows:
SELECT order_number,To_char(create_time,'mm/dd/yyyy hh24:mi:ss') AS create_time,
status,
To_char(deadline,'mm/dd/yyyy hh24:mi:ss') AS deadline,
assignee_name
FROM crm_order_list
WHERE deadline - Now() <= '1 day'::interval
/*Here, using the @@LoopData(ASSIGNEE_EMAIL_ADDR) variable as a query condition means using the "ASSIGNEE_EMAIL_ADDR" field from the SQL statement entered earlier to query this SQL statement.*/
AND assignee_email_addr =#[@@LoopData(ASSIGNEE_EMAIL_ADDR)]#
ORDER BY order_number;
After entering the statement, click "Next." The system will execute this SQL statement and retrieve the list of fields returned by the statement.
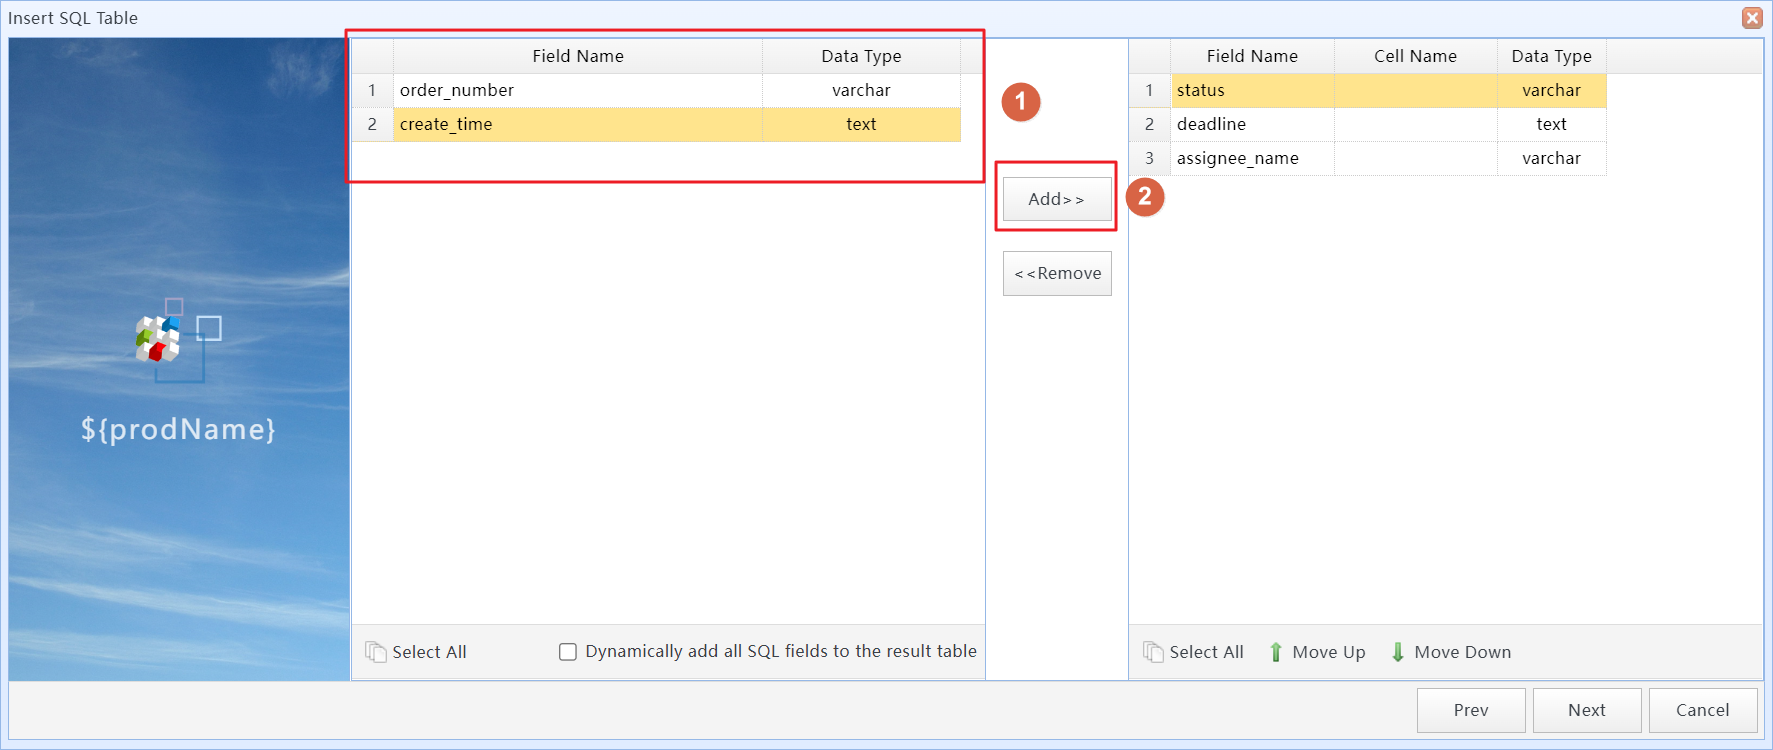
Step12: In the wizard, select the fields to display in the table and add them to the list on the right.
Step13: After clicking "Next," you can configure the table's format settings here.
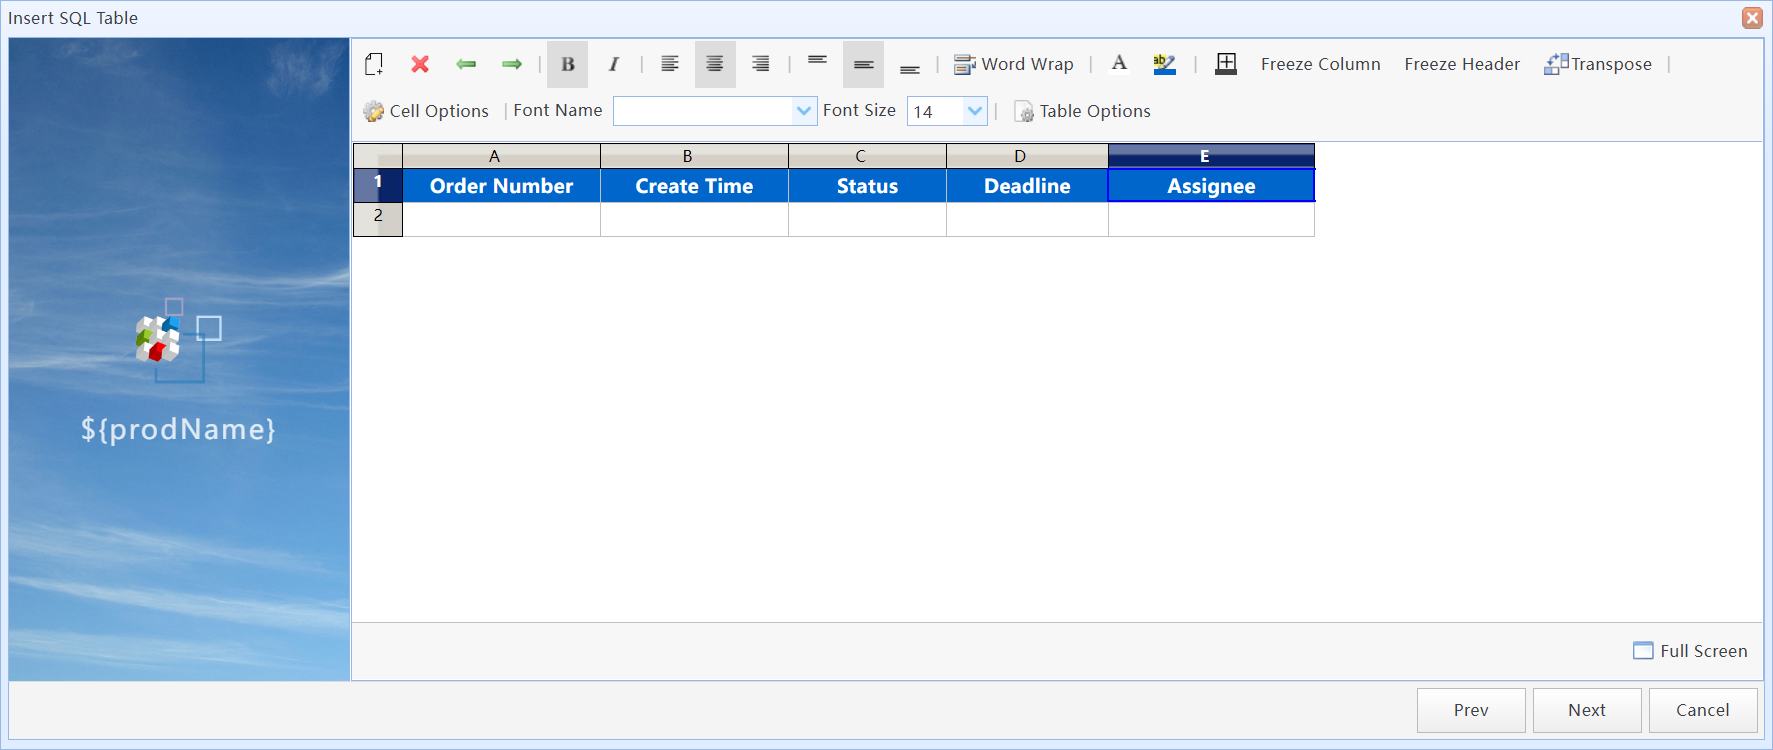
Tips: You can modify column names, adjust column widths, and set table colors here.
After completing the setup, click "Next," and the system will display a table icon in the body template. Double-click on this icon to edit its contents.
Step14: Click on the "Task Schedules" tab in the task editor, then click the "Add New" button to add a schedule for the task.
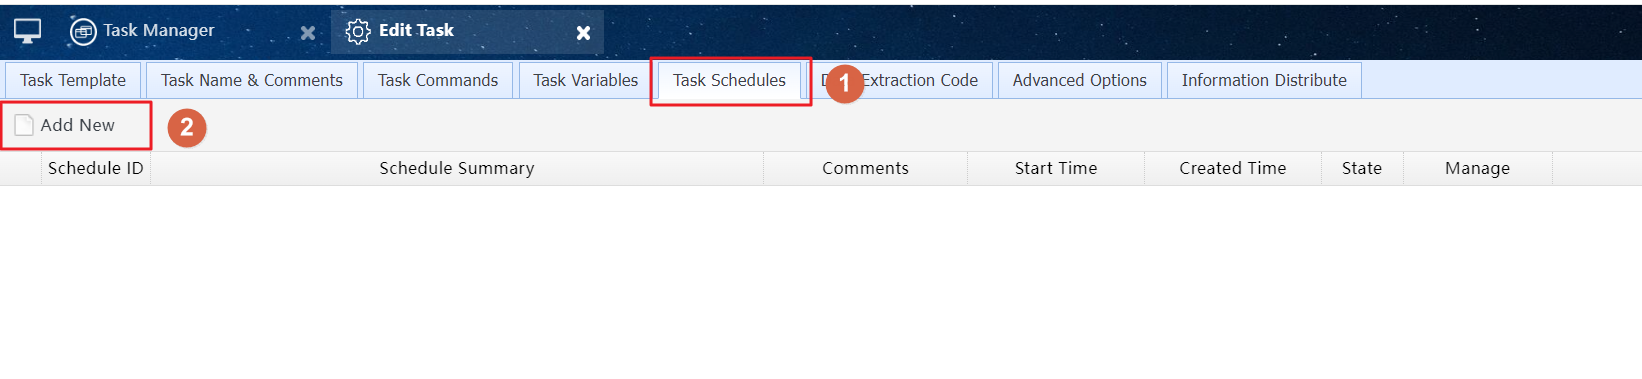
Step15: Set the start time and interval for the Task Schedule. Here, configure the task to run at 10 AM every Monday to Friday.
The task configuration is complete. Click the "Deploy" button to activate the new task configuration. The system will then automatically run the task at the specified time, querying each employee's orders that are about to expire and sending them directly to their respective email addresses.
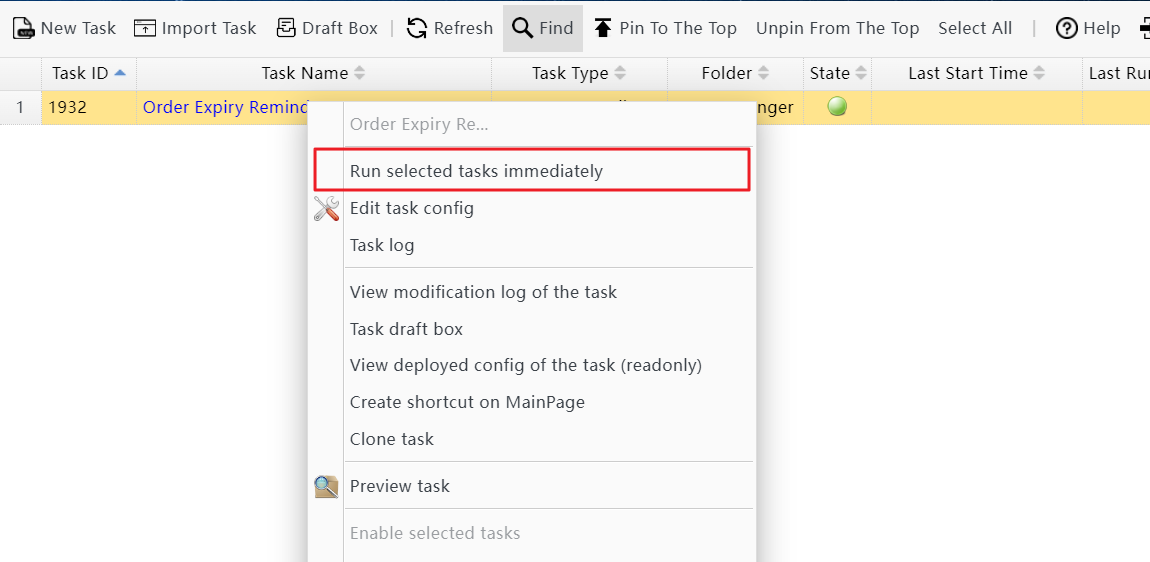
If you want to preview the task's execution results beforehand, you can right-click on the task in the task list and select "Run selected tasks immediately" to manually start the task.
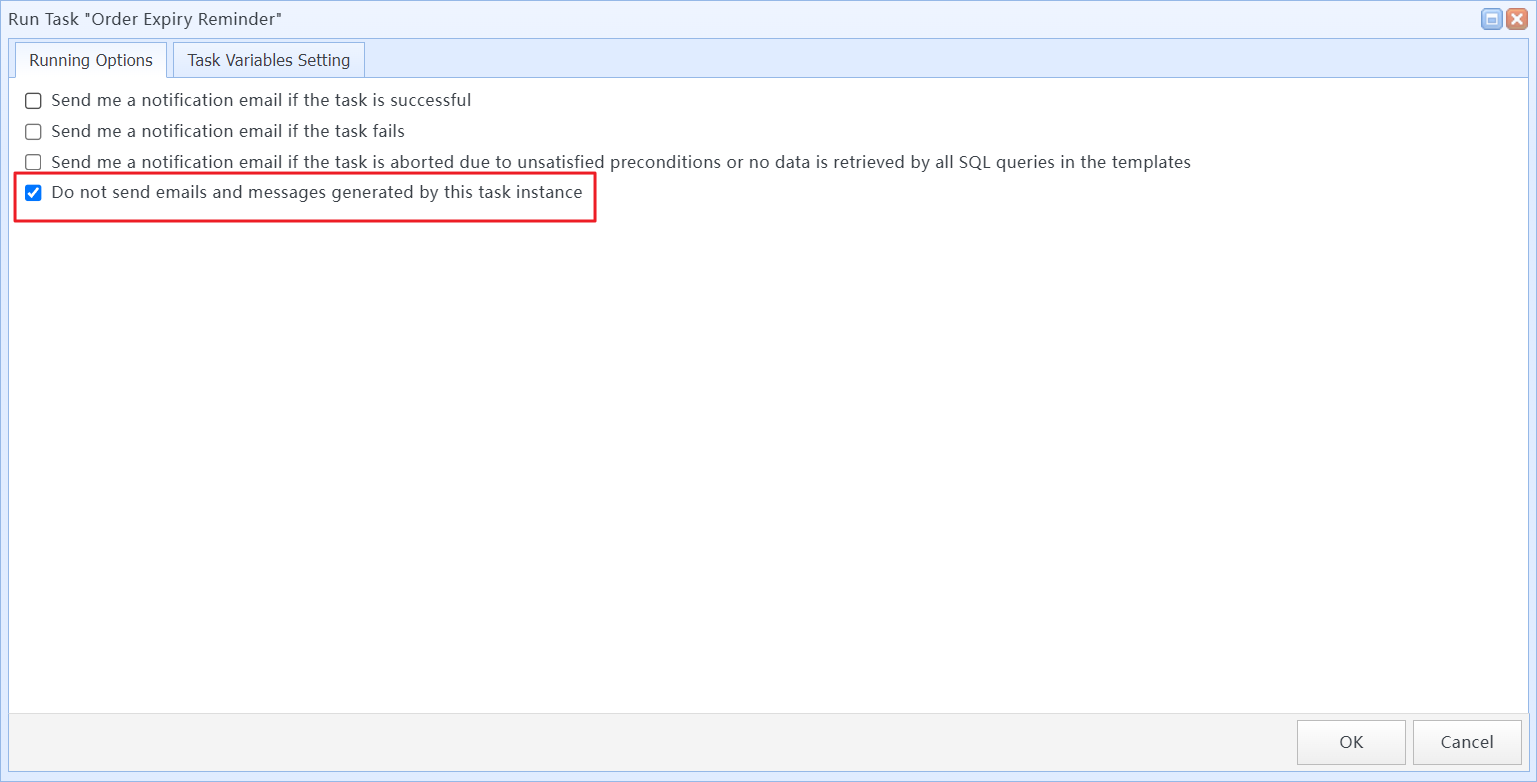
In the "Run Task" dialog, you can select the option "Do not send emails and messages generated by this task instance." This way, the system will only execute the task without sending any emails generated by it.
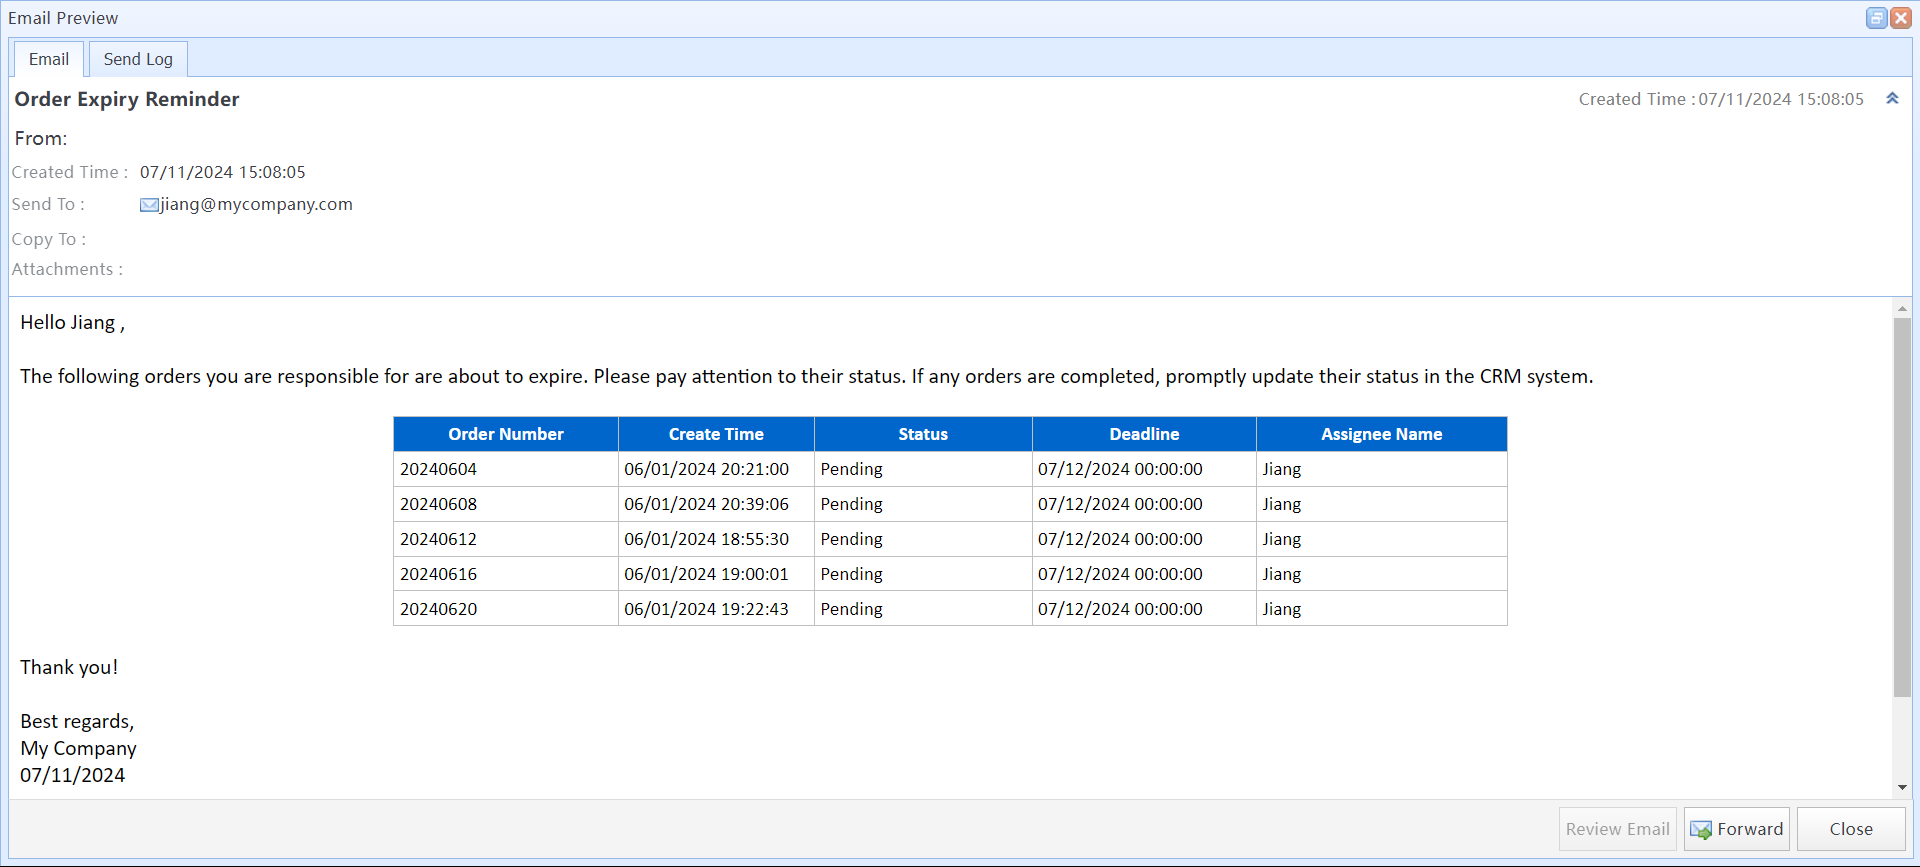
The following image is one of the emails generated after task execution:
3 Q&A
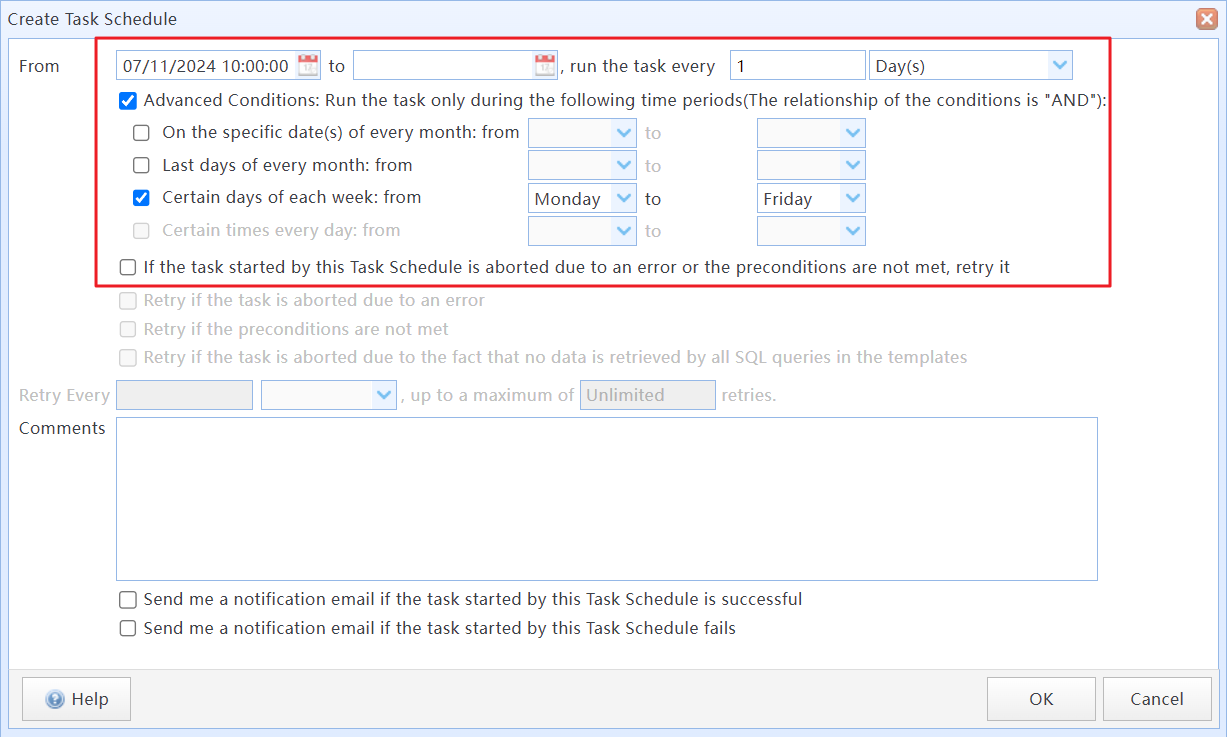
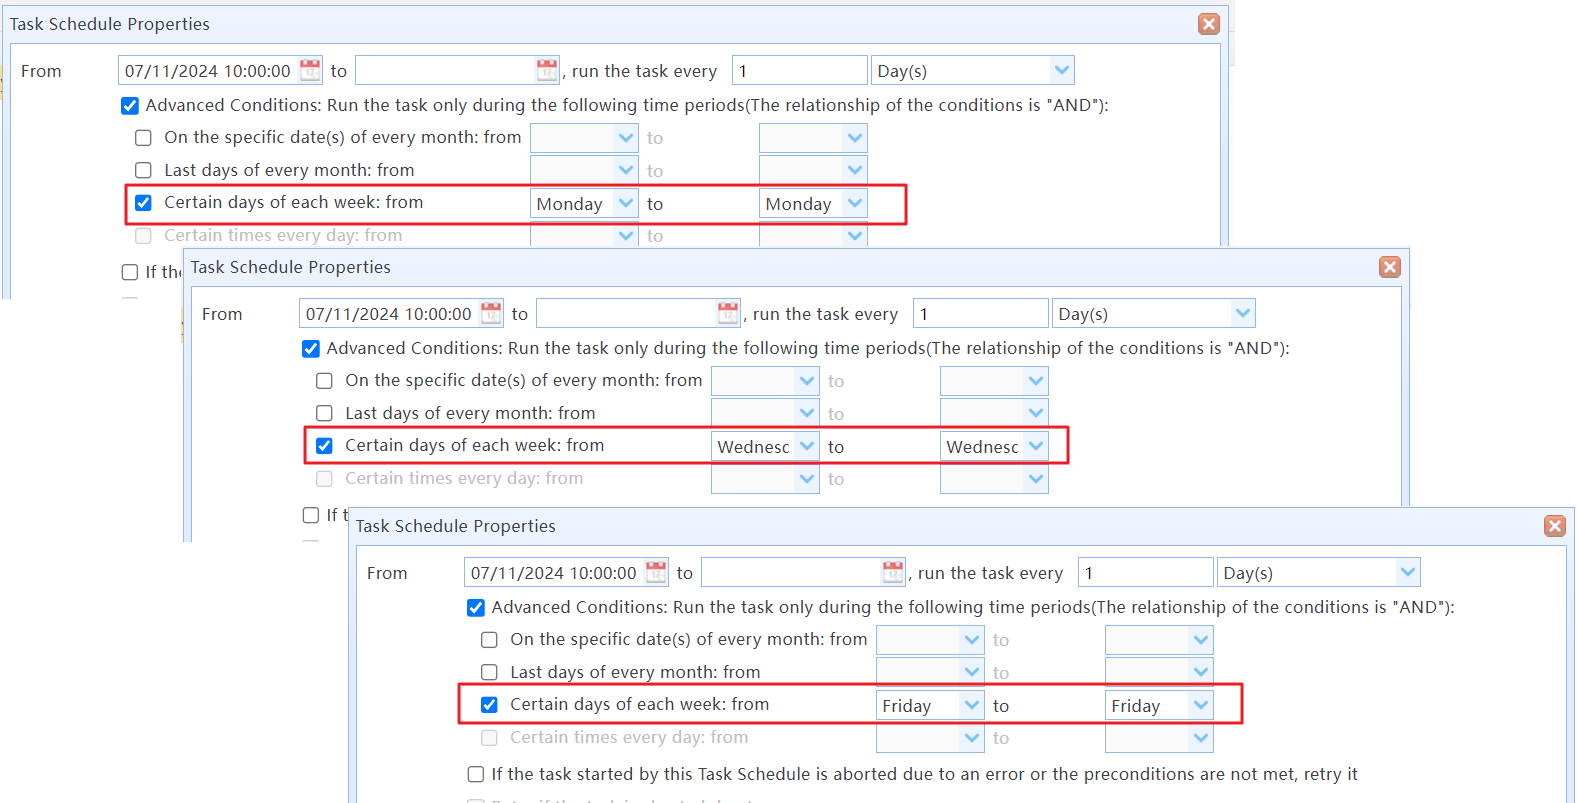
Q: If I want to execute the task on Monday, Wednesday, and Friday each week, how should I configure it?
A: A task can have multiple schedules. You can add multiple schedules to the task, like the following:
Q: What is the difference between the SQL statement entered in Step 3 and the SQL statement entered later?
A: The SQL statement entered in the Step 3 is used to query the email list to be sent, with the system executing the task for each record. The SQL statement entered later is used to query a list of orders with overdue deadlines for an email address, and the system adds the order list to the email body for sending.
Q: Can the list of orders be sent as an Excel spreadsheet attachment in the email?
A: Yes. You can add a "Dynamic Attachment File" attachment template for the task and set up the SQL statement to query the list of orders in the template.
Q: Can the date of the email be displayed in the email subject?
A: Yes, you can modify the email subject to: "Order Expiry Reminder#@@Date#", the system will replace #@@Date# with the current date when executing the task.
Using Information Distribution Task, Designing Body Template, Using Variables in Tasks, Using Task Schedules