1. Configuring Mail Types
The system scans the subject of each incoming email for the keywords you configured and determines the email type based on those keywords. Once the email type is identified, the system processes the email according to your configuration.
Follow the steps below to configure the mail types.
Step 1: In MailAttachmentBot Manager, click Email Type Config, and then click Add Email Type to open the Edit Mail Type dialog box.

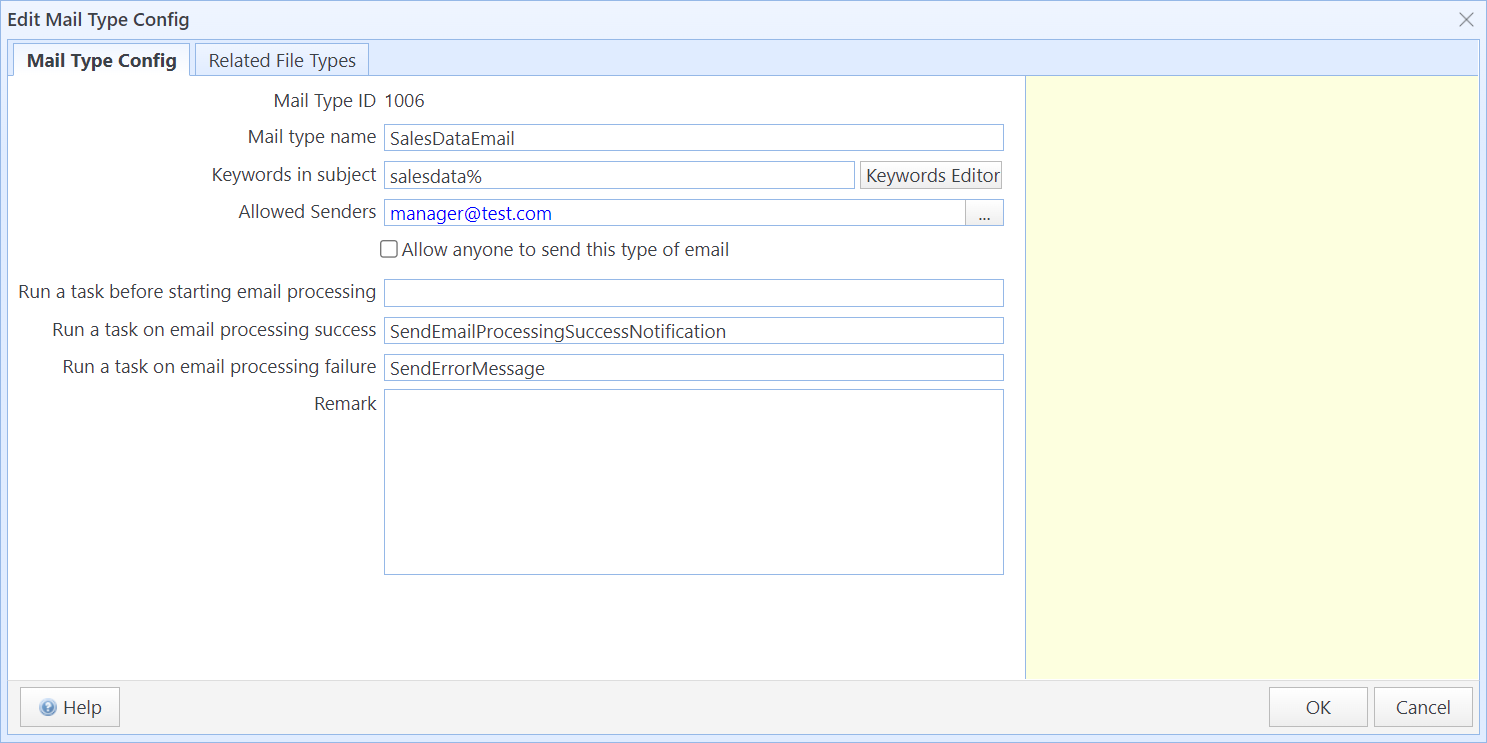
Edit Mail Type Config dialog box
In this dialog box:
Mail Type Name |
Enter the name of the email type. The mail type name must be unique. |
Keywords in Subject |
Enter the keywords that will appear in the subject of this type of email, case-insensitive. When an incoming email contains this keywords in the subject, the system will classify the email as this type and process it accordingly. The keyword format adheres to the wildcard syntax of PostgreSQL’s LIKE statement (e.g., '%' for any string, '_' for a single character). For example: If the keyword is "%abc%" and the email subject contains "abc", it will be classified as this type of email. If the keyword is "abc%" and the email subject starts with "abc", it will be classified as this type of email. Visit https://www.sqlmessenger.com/manual/plugin-2-keyword-format.htm for detailed specifications of the keywords format. For more information about the LIKE statement in PostgreSQL, see https://www.postgresql.org/docs/current/functions-matching.html#FUNCTIONS-LIKE |
Allowed Senders |
Specifies the email addresses that are allowed to send emails of this type. After determining the email type, the system checks whether the sender's address is in the Allowed Senders list. Only emails sent from addresses in this list will be processed. You can add multiple email addresses to the Allowed Senders list. |
Allow anyone to send this type of email |
If this option is selected, emails of this type from any address will be processed. Otherwise, only emails from addresses listed in Allowed Senders will be processed. |
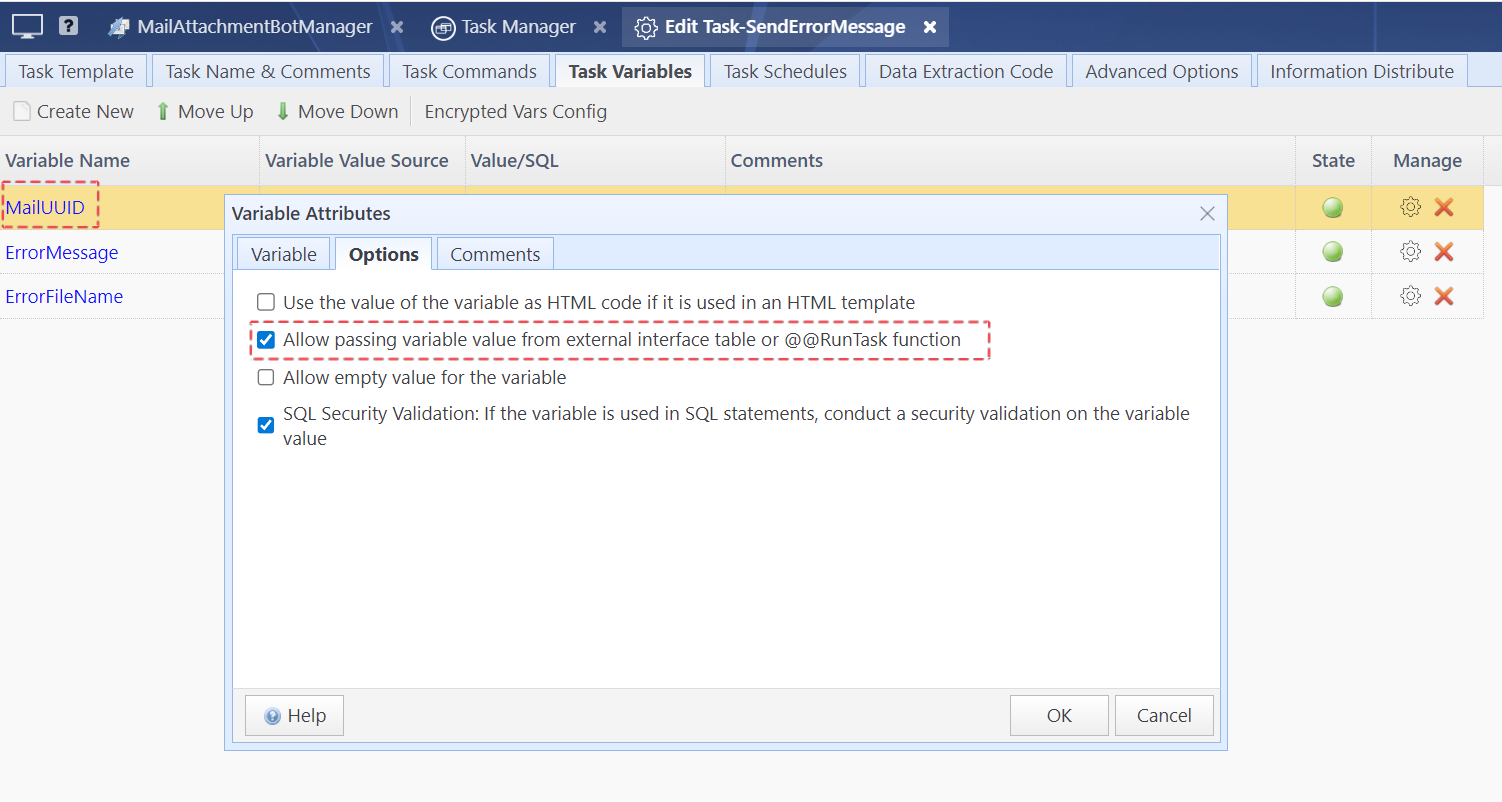
Run a Task Before Starting Email Processing |
You can enter a task name here. The system will execute this task before processing emails of this type. If the task fails, email processing will be aborted. This task can include your own criteria to inspect the email, such as checking whether the sender has included duplicate attachments. The task must be of type “HTML Email” or “Text Email”, and its status must be set to Enabled. When the system executes the task, it will pass MailUUID and the email type (MailType) to your task. Therefore, your task must include variables named MailUUID and MailType, and the option “Allow passing variable value from external interface table or @@RunTask function” must be enabled for both variables on the variable options page.
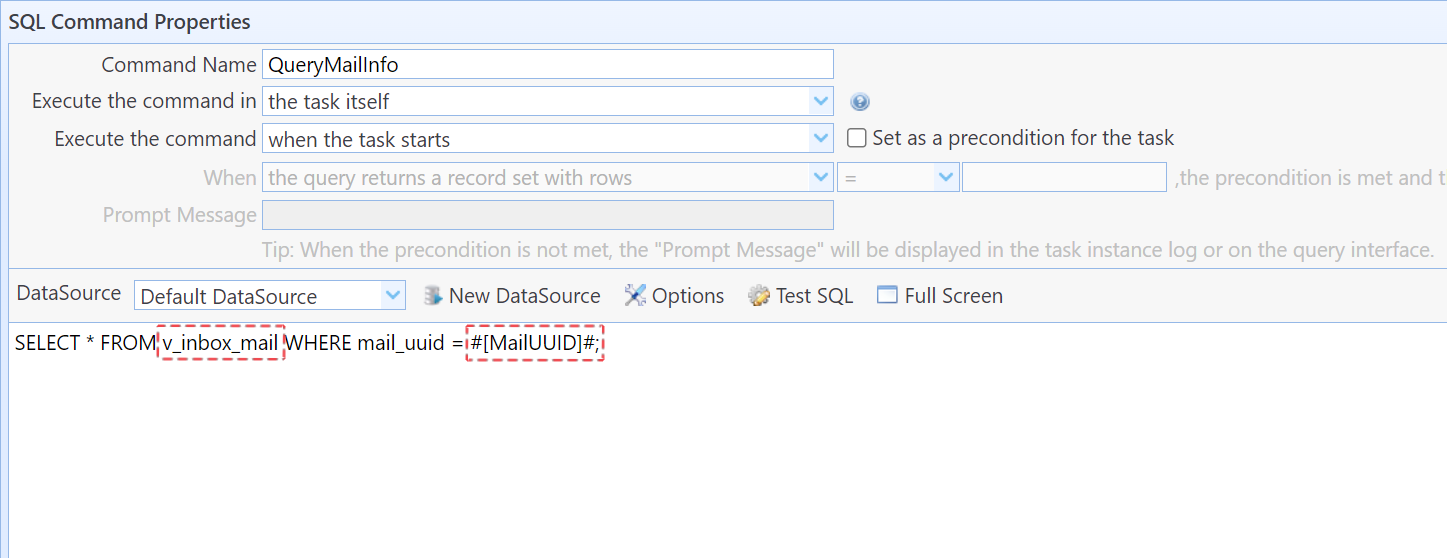
You can use the passed MailUUID in your task to query detailed information of the email in the v_inbox_mail view.
|
Run a Task on Email Processing Success |
You can enter a task name here. When email processing succeeds, the system will execute this task. You can perform operations within this task, such as processing imported data or notifying the sender of the email's processing outcome. By default, the system executes the "SendEmailProcessingSuccessNotification" task to inform the sender that the email has been successfully processed. The task must be of type “HTML Email” or “Text Email”, and its status must be set to Enabled. When the system executes the task you have set, it will pass the MailUUID and the email type to your task. Therefore, your task must include variables named MailUUID and MailType, and you must check the option "Allow passing variable value from external interface table or @@RunTask function" on the variable options page for both variables. You can use the passed MailUUID in your task to query the detailed information of the email to be processed in the v_inbox_mail view. If "Run Task on Email Processing Success" is empty, the system will not start any additional tasks when email processing succeeds. |
Run a Task on Email Processing Failure |
You can enter a task name here. When email processing succeeds, the system will execute this task. You can perform operations within this task, such as processing imported data or notifying the sender of the email's processing outcome. By default, the system executes the "SendEmailProcessingSuccessNotification" task to inform the sender that the email has been successfully processed. The task must be of type “HTML Email” or “Text Email”, and its status must be set to Enabled. When the system executes the task you have set, it will pass the MailUUID and the email type to your task. Therefore, your task must include variables named MailUUID and MailType, and you must check the option "Allow passing variable value from external interface table or @@RunTask function" on the variable options page for both variables. You can use the passed MailUUID in your task to query the detailed information of the email to be processed in the v_inbox_mail view. If "Run a Task on Email Processing Success" is left blank, the system will not start any additional tasks when email processing succeeds. |
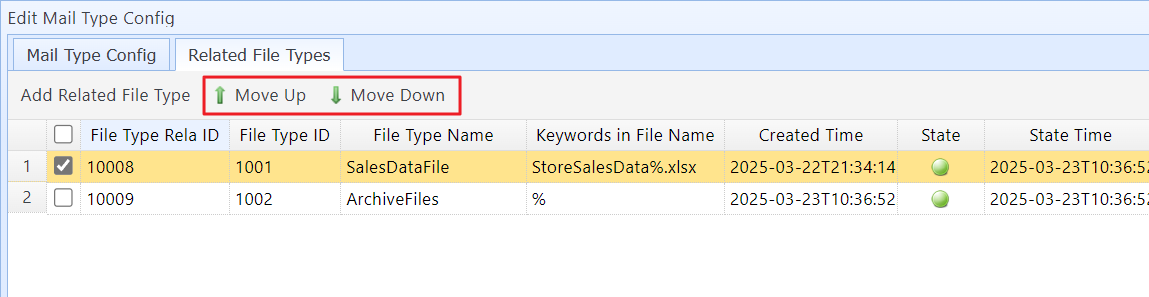
Related File Types |
You can specify which file types are associated with this email type. During email processing, the system first determines the email type based on the subject keyword. It then checks the attachment names using the keywords defined in the Related File Types configuration to determine the attachment type and how it should be processed. |
2. Configuring the Relationship Between Mail Types and File Types
You can specify the list of related file types for each mail type in Mail Type Config. During email processing, the system first determines the email type based on the subject keyword. It then checks the attachment names using the keywords defined in Related File Types to determine the attachment’s file type.
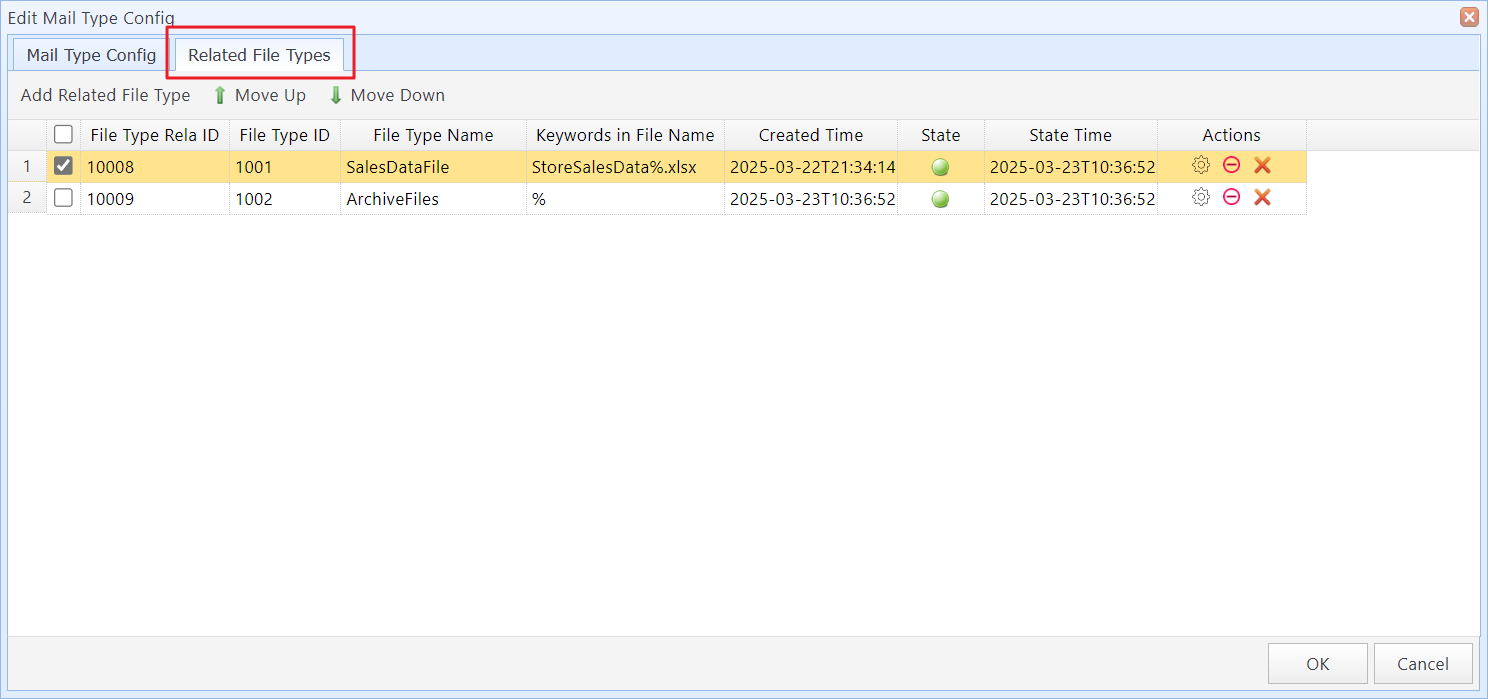
When matching file name keywords, the system will prioritize records that appear earlier in the list. To change the priority order, select the records you want to move and click the "Move Up" or "Move Down" button.
To add a record, click the "Add Related File Type" button, and the system will open the "Edit Mail Type Related File Type" dialog box.
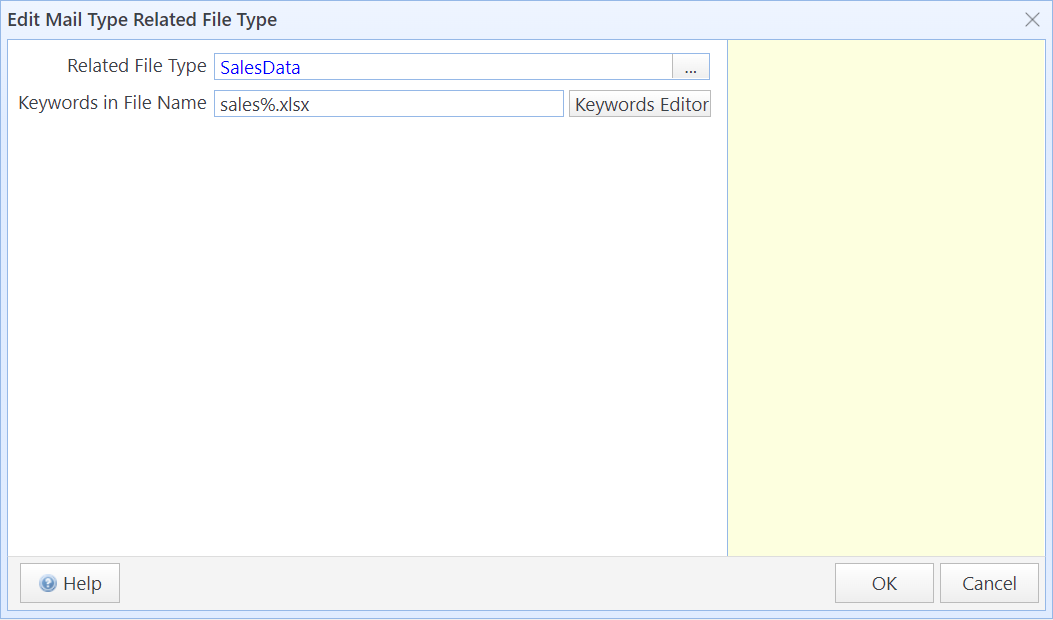
In this dialog box:
Related File Type |
Select the file types to be added to this mail type. |
Keywords in File Name |
Enter the keywords for the attachment file name. The system determines the attachment type by searching for these keywords in the file name and processes the file accordingly. The formatting of "Keywords in Subject" follows the PostgreSQL LIKE statement and is case-insensitive. For example: If the keyword is "%aaabbbccc%", and the file name contains "aaabbbccc", it will be classified as this attachment type. If the keyword is "aaabbbccc%", and the file name starts with "aaabbbccc", it will be classified as this attachment type. If "Keywords in Subject" is left blank, this relationship will be ignored. Visit https://www.sqlmessenger.com/manual/plugin-2-keyword-format.htm for detailed specifications of the keywords format. For more information about the LIKE statement in PostgreSQL, see https://www.postgresql.org/docs/current/functions-matching.html#FUNCTIONS-LIKE |
3. Setting Mail Type Priority
When determining the mail type, the system matches keywords based on the priority order of the mail types.
Mail types with higher priority are matched first.
Example:
Suppose you have the following mail types:

In this case, if the subject of a received email is SalesReport, the system will first match %Sales% and classify the email as the SalesData type, which may not be the intended classification.
To resolve this issue, adjust the priority of the mail types:
Step 1: Click the Priority Setting button.

Step 2: Select the RegionSalesReport entry then click Move Up.
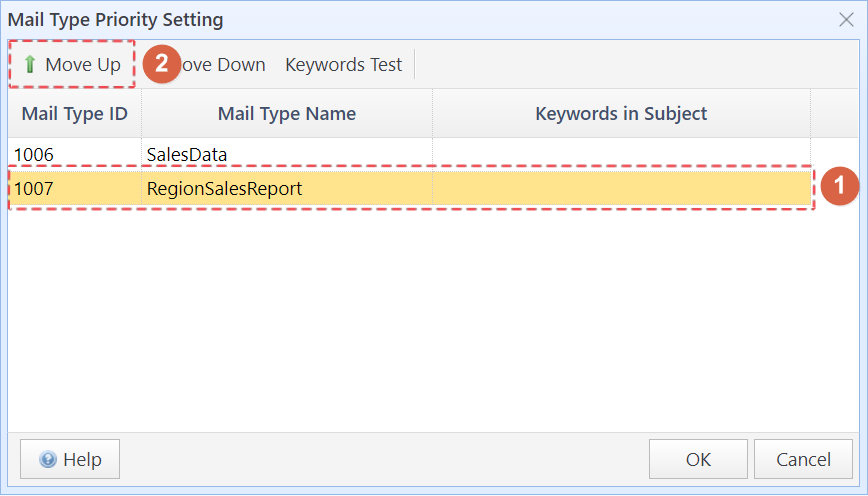
Step 3: Click OK to save the priority configuration.

After reprocessing the email, the system will correctly determine the mail type.
4. Configuring Monitored Email Accounts
After configuring the email types, you need to specify which mailboxes MailAttachmentBot should monitor and process incoming emails from.
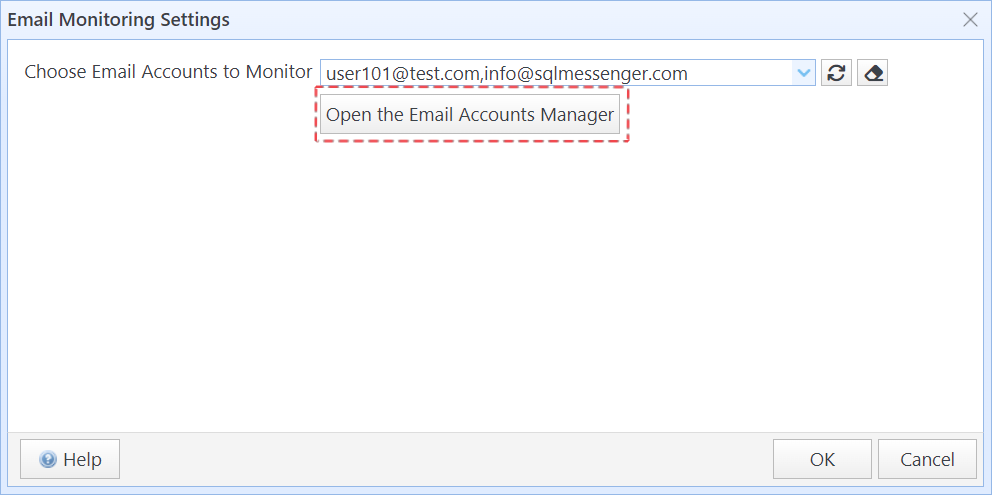
Click "Email Monitoring Settings", and then select the mailbox you want to monitor from the list.
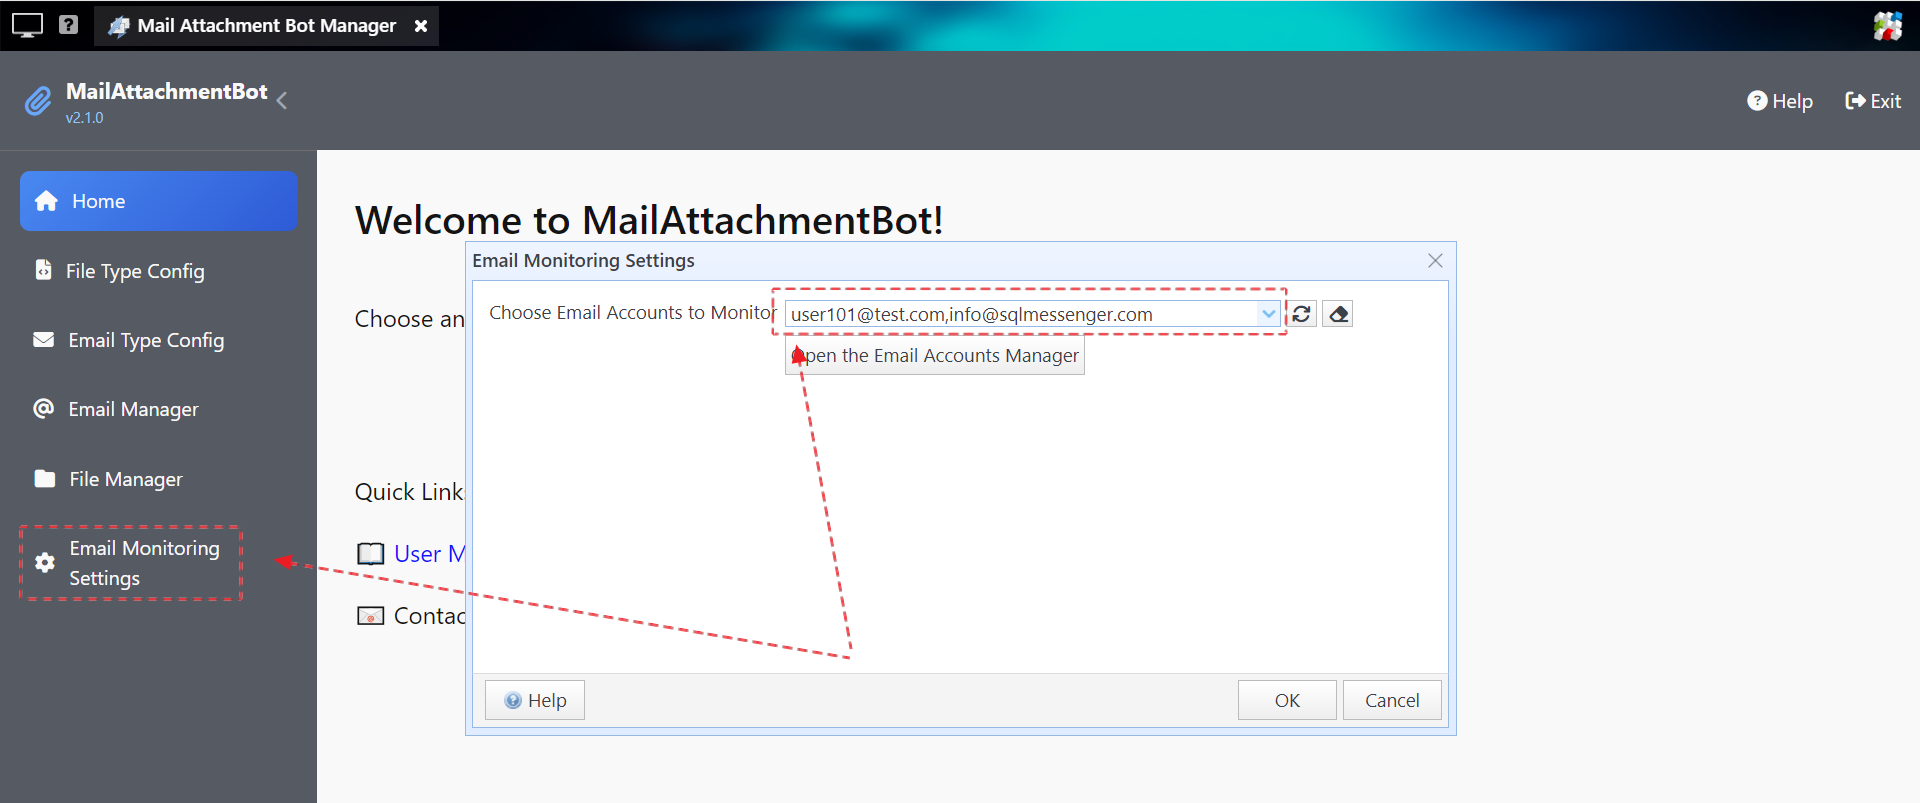
If the mailbox you want is not listed, click "Open the Email Accounts Manager".
In the Email Accounts Manager, add your mailbox. When adding the account, make sure to enable the "Allow SQLMessenger to receive emails" option.
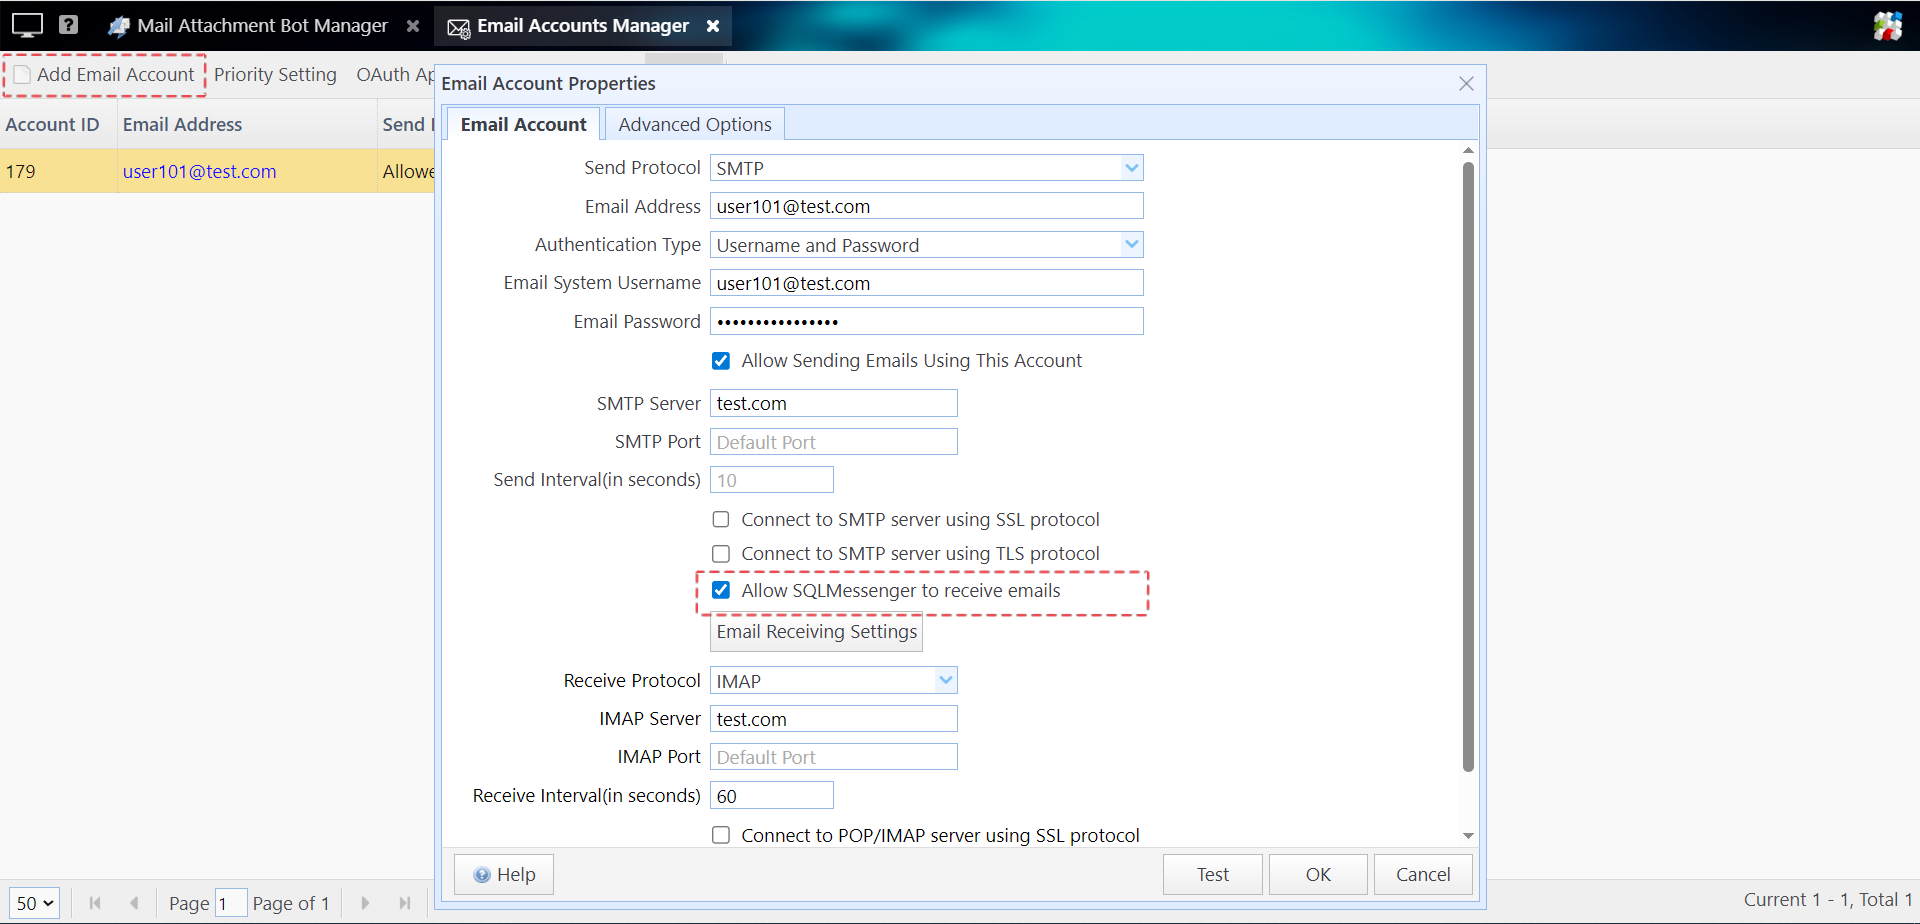
For instructions on configuring the email account, please refer to the Adding an Email Account chapter in the SQLMessenger manual.