Email Account Management
- 1. Overview
- 2. Managing Email Accounts
- 3. Adding Email Accounts
- 4. Email Account Priority Settings
- 5. Email Account Management Toolbar
- 6. Gmail, Yahoo Mail, Outlook & Hotmail Account Configuration
- 6.1 Create a Gmail App Password
- 6.2 Create a Yahoo App Password
- 6.3 Configure OAuth2 Authentication for Outlook & Hotmail Accounts
- 7. Receive Emails and Save to Local Database
- 7.1 Incoming Mail Settings
- 7.2 Location of Attachments
1. Overview
After installing SQLMessenger, you must configure email accounts to enable email sending. SQLMessenger uses these accounts to deliver emails generated by report tasks.
SQLMessenger supports sending emails through most standard SMTP servers, including Gmail, Outlook, Hotmail, and Yahoo Mail. It also supports retrieving emails from POP3 and IMAP servers.
You can configure multiple email accounts and set their priority order.
Note: Depending on your system configuration, SQLMessenger may frequently connect to email servers for sending and receiving messages. To avoid interfering with your work email, do not use your work account as the sending account. Instead, create dedicated email accounts for SQLMessenger.
2. Managing Email Accounts
Click the Email Account Manager icon in the MainMenu to open the Email Account Manager.
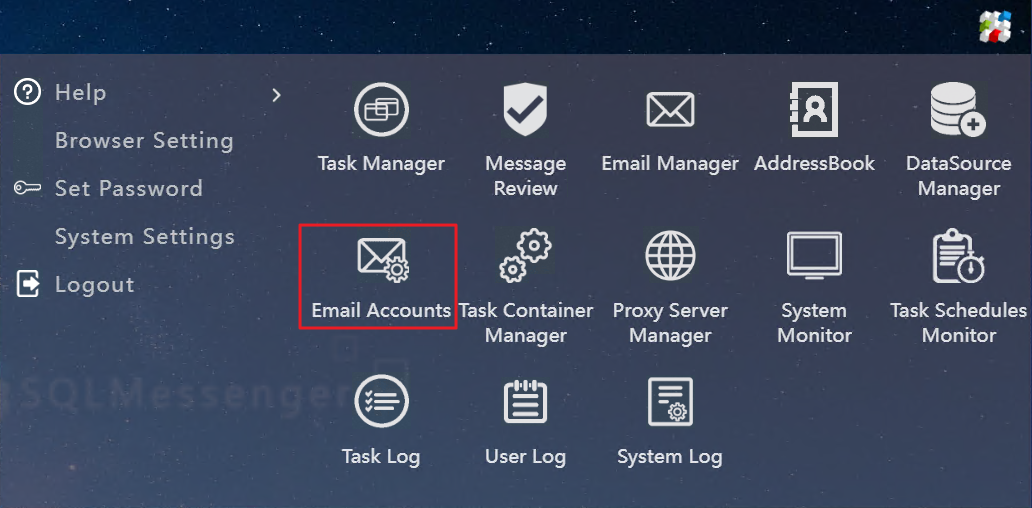
Click the Email Account Manager icon in the MainMenu

Email Account Manager
In the Email Account Manager, you can add new email accounts, edit, disable, or delete existing ones.
3. Adding Email Accounts
Click the Add Email Account button in the Email Account Manager to open the Email Account Configuration dialog.
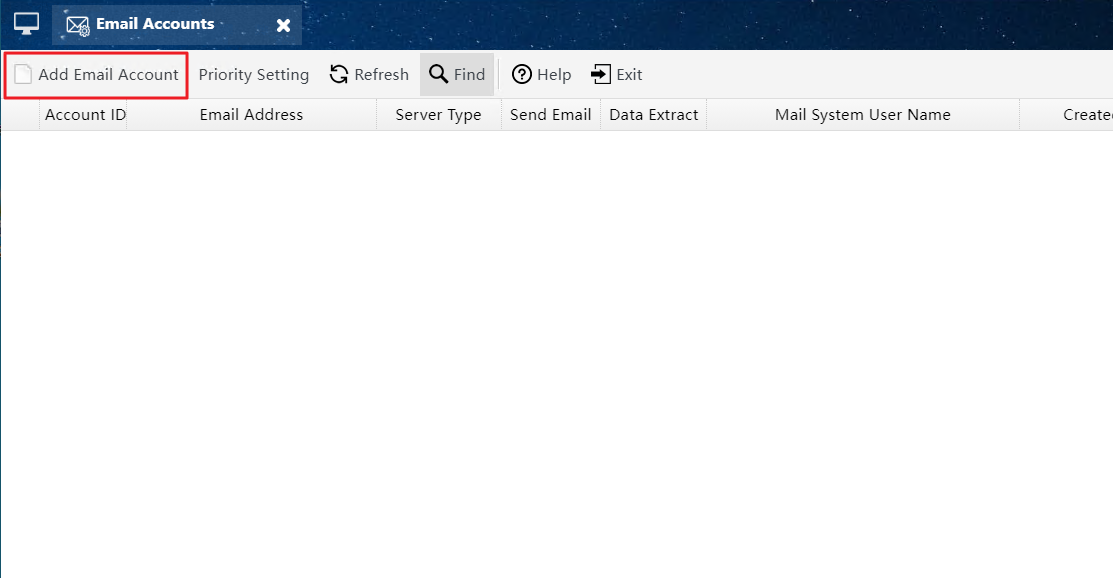
Click the Add Email Account button to open the Email Account Configuration dialog

The email account configuration dialog
In this dialog:
| Outgoing Protocol | Select the server protocol to use for sending emails. |
| Email Address | Enter the email account address (e.g., test@sqlmessenger.com). |
| Authentication Type |
Set the login authentication type for the account. SQLMessenger supports the following types:
|
| Mail Username | Enter the username for the email account on the mail server. This is usually the same as your email address. |
| Password | Enter the password for the email account on the mail server. If you use Gmail or Yahoo Mail, enter your App Password here instead of your regular account password. |
For SMTP protocol:
| Allow outgoing emails | Select this checkbox to allow the system to use this account to send emails. |
| SMTP Server |
Enter the domain name or IP address of the SMTP server. The system automatically populates the SMTP server address for popular email services (Gmail, Outlook, Hotmail, Yahoo Mail). |
| SMTP Port | SMTP service port of the mail server. If left blank, the system uses the default SMTP port. The default port is 25, or 465 when SSL is enabled. |
| Send Interval (seconds) | Interval for sending emails, in seconds. By default, the system checks for and sends new emails every 10 seconds. |
| Use SSL for SMTP |
Select whether to use SSL to connect to the SMTP server for secure communication. This option requires support from your mail server. The system automatically enables this option for popular email services (Gmail, Outlook, Hotmail, Yahoo Mail). |
| Use TLS for SMTP |
Select whether to use TLS to connect to the SMTP server for secure communication. This option requires support from your mail server. The system automatically enables this option for popular email services (Gmail, Outlook, Hotmail, Yahoo Mail). |
| Allow incoming email |
Select whether to allow SQLMessenger to retrieve emails from this account. If enabled, SQLMessenger reads emails from the Inbox folder and stores them in its local PostgreSQL database. |
| Incoming Protocol |
If Allow incoming email is selected, specify the protocol for receiving emails. Available options: POP3 or IMAP. The system automatically selects the retrieval protocol for popular email services (Gmail, Outlook, Hotmail, Yahoo Mail). |
| POP3/IMAP Server |
If Allow incoming email is selected, enter the POP3 or IMAP server address for your email service. The system automatically populates the POP3/IMAP server address for popular email services (Gmail, Outlook, Hotmail, Yahoo Mail). |
| POP3/IMAP Port |
If Allow incoming email is selected, enter the POP3 or IMAP server port for your email service. If left blank, the system uses the default POP3/IMAP port. |
| Check Interval (seconds) |
If Allow incoming email is selected, set the interval for retrieving emails in seconds. The system checks for new emails periodically. By default, it checks every 180 seconds. |
| Use SSL for POP/IMAP |
Select whether to use SSL/TLS to connect to the POP3/IMAP server for secure communication. This option requires support from your mail server. The system automatically enables this option for popular email services (Gmail, Outlook, Hotmail, Yahoo Mail). |
| Disable this account |
Select whether to disable this account. If disabled, the system suspends sending and receiving emails for this account. |
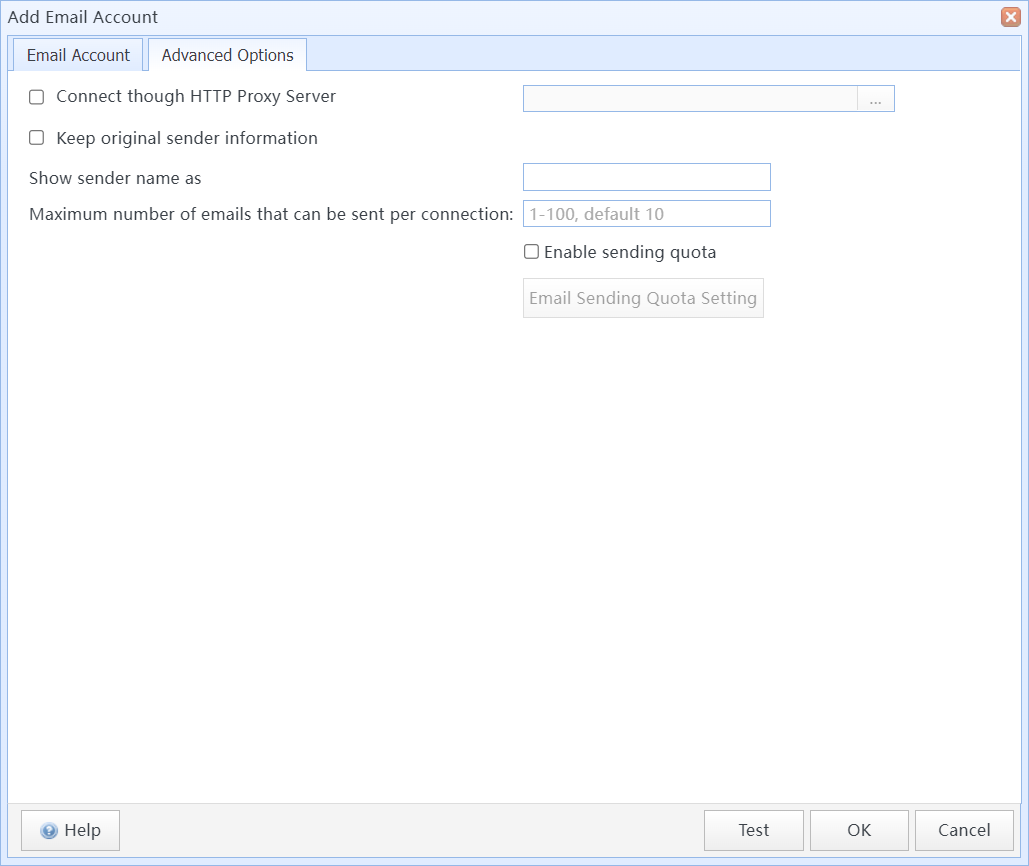
Email Account Configuration dialog (Advanced Options)
Advanced Options:
| Connect through HTTP Proxy | (SMTP only) Select whether to connect to the mail server through an HTTP proxy server. |
| Preserve original sender info | (SMTP only) Some email services do not allow custom sender names. Select this option to preserve the original sender name and prevent emails from being rejected by the server. |
| Display sender name as | (SMTP only) When Preserve original sender info is not selected, you can specify a custom sender display name for emails sent from this account. This name appears as the sender when recipients view the emails. |
| Max emails per SMTP connection | Set the maximum number of emails sent per SMTP connection. If the number of emails exceeds this limit, the system disconnects from the server and sends remaining emails in the next connection. |
| Enable outgoing mail quota |
Set the maximum number of emails that can be sent from this account within a specified time period. If the sent count exceeds the limit within the period, the system pauses sending from this account until the next period starts.
|
| Real-time email retrieval using IMAP IDLE mode (requires server support) | Use a persistent IMAP connection to monitor your inbox and retrieve new emails in real time. This reduces retrieval latency, but requires support from your mail server. |

4. Email Account Priority Settings
When multiple email accounts are configured in the system, you can set their priority order. When sending emails, the system uses the highest-priority account first. If sending fails with the highest-priority account, the system sequentially tries lower-priority accounts.
Click the Priority Setting button on the Email Account Manager toolbar to open the Priority Setting dialog.
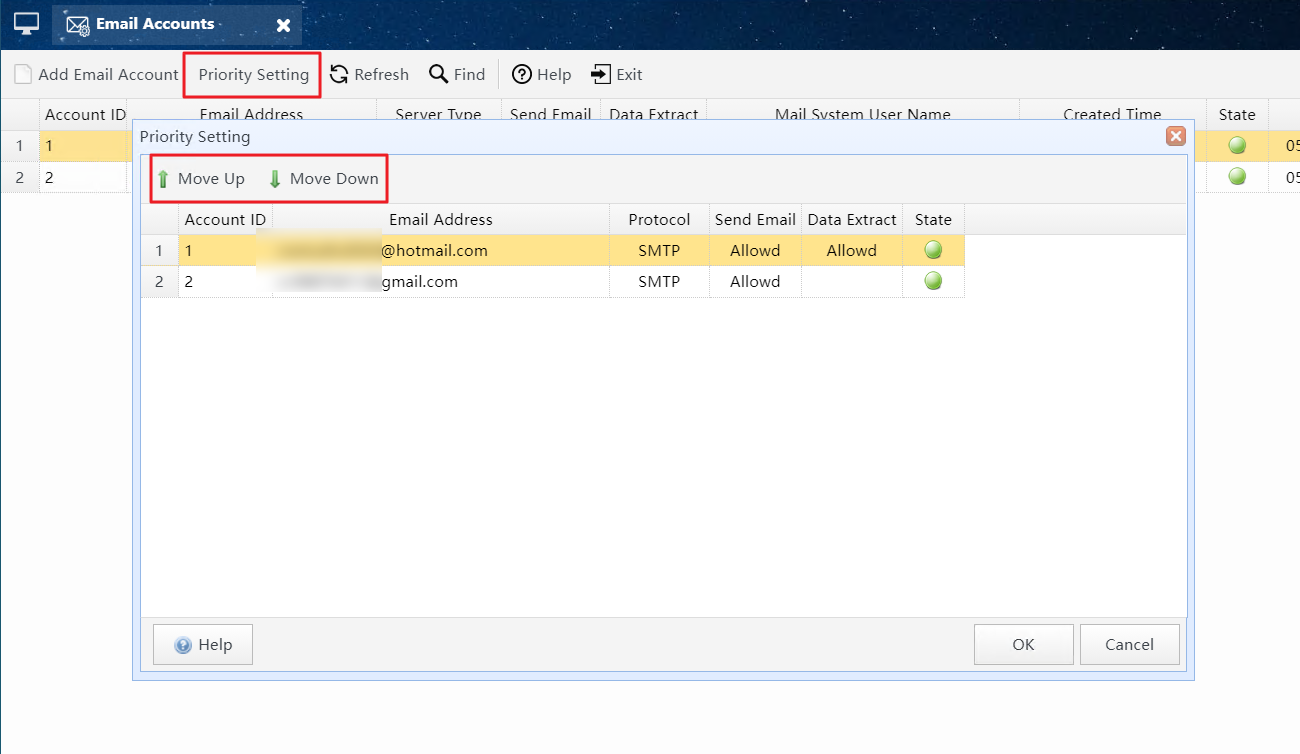
Click the Priority Setting button to open the Priority Setting dialog
Select the account you want to adjust, then click Move Up or Move Down to change its priority.
Accounts at the top of the list have higher priority; accounts at the bottom have lower priority.
After adjusting the order, click OK to save your settings.
5. Email Account Management Toolbar
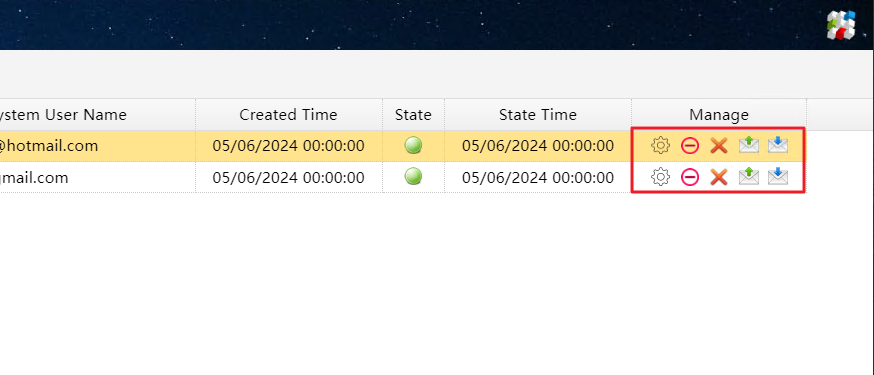
Email Account Management Toolbar
 |
Click to open the email account configuration dialog and modify account settings. |
 / /  |
Click to disable or enable the email account. When disabled, the system suspends sending and receiving emails for this account. |
 |
Click to delete the email account. |
 |
Click to view sending logs for this email account. |
 |
Click to view receiving logs for this email account. |
6. Gmail, Yahoo Mail, Outlook & Hotmail Account Configuration
Unlike other email services, Gmail, Yahoo Mail, Outlook, and Hotmail require you to enter an App Password as the login password for the account, instead of your regular Google, Yahoo, or Microsoft account password.
6.1 Create a Gmail App Password
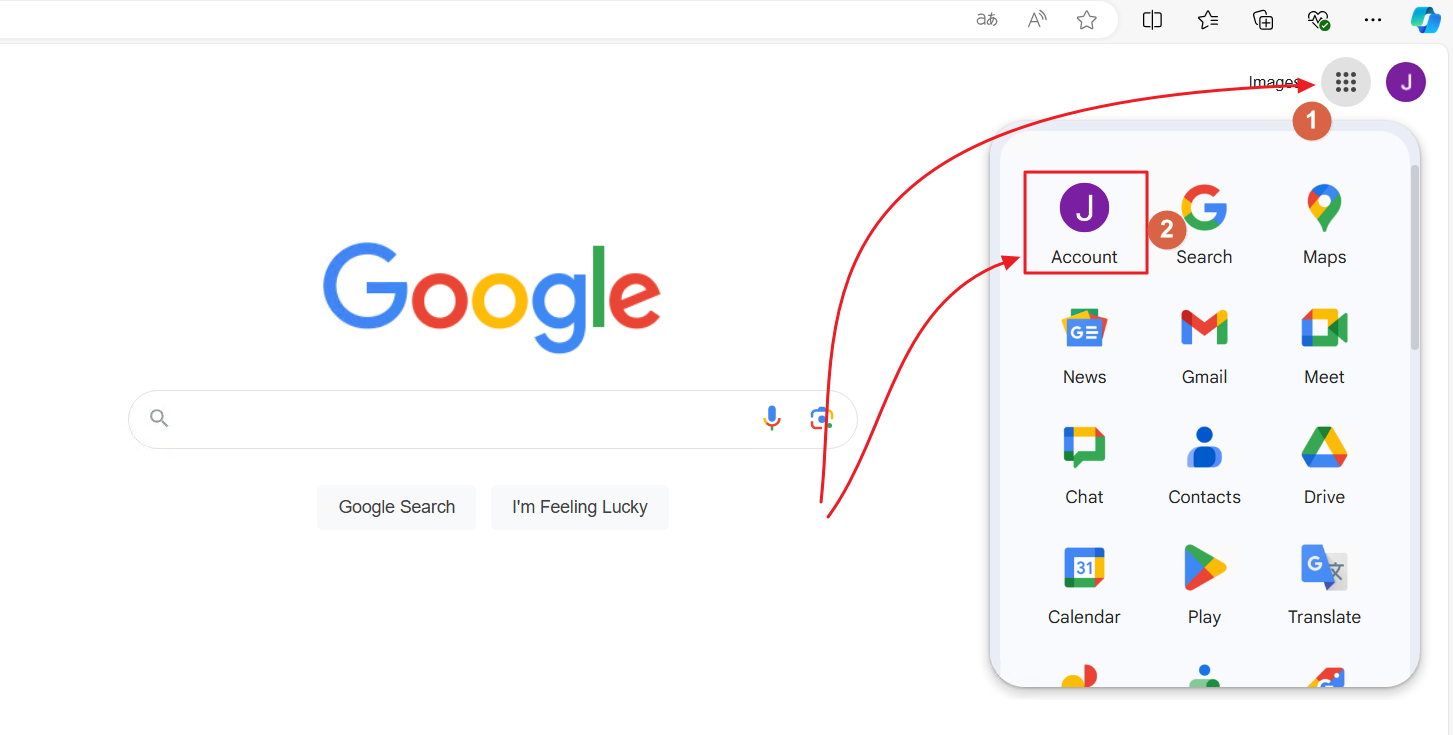
Step 1: Log in to your Google Account, then click your account icon in the Google menu.
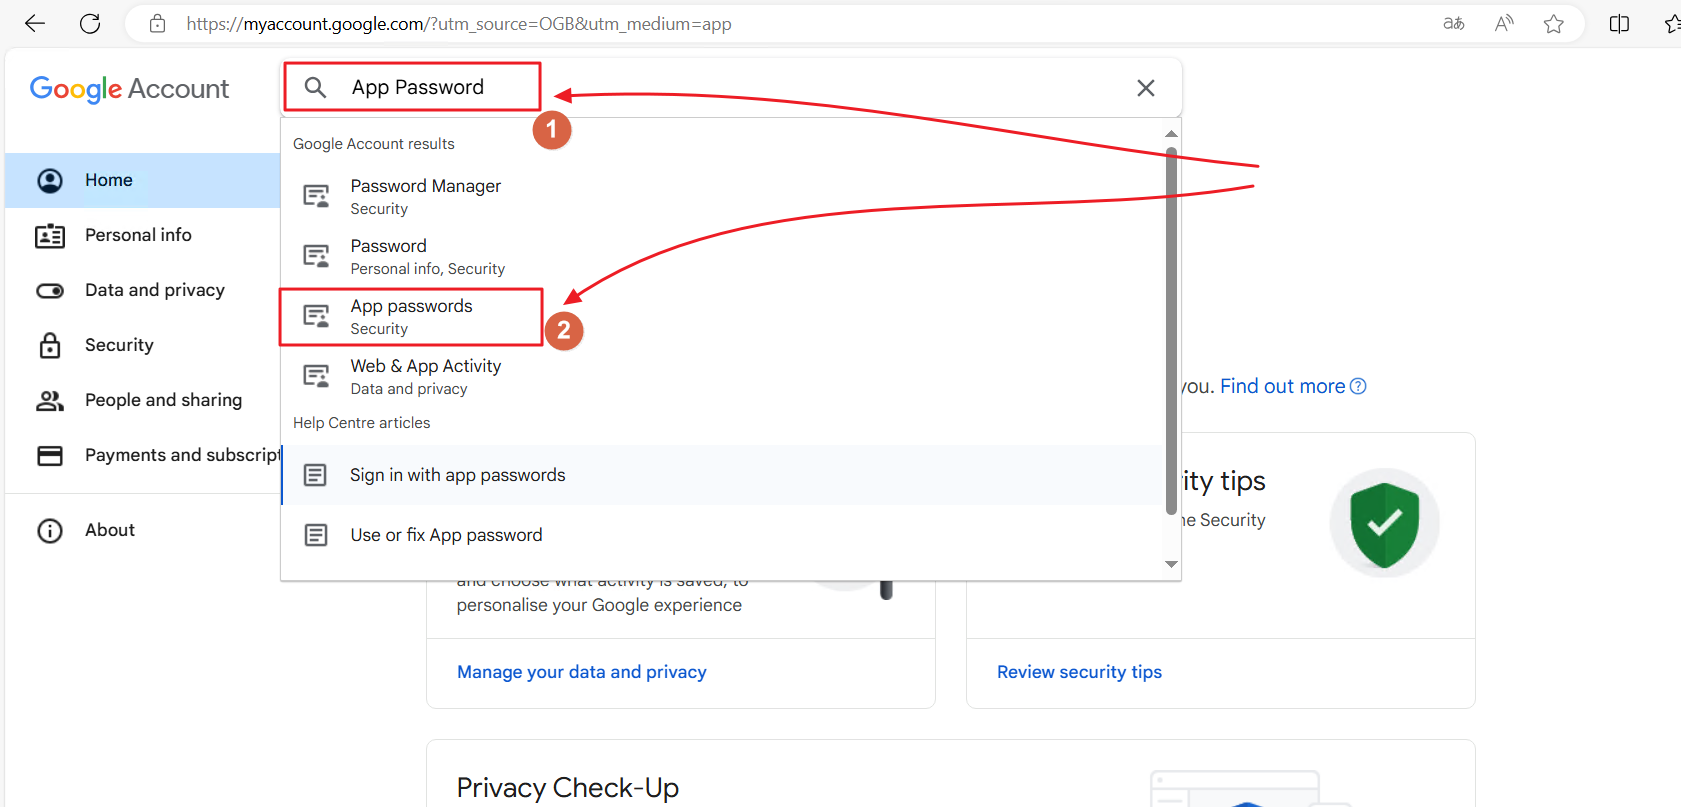
Step 2: Enter App Password in the Google Account search field, then select the App Passwords option under Security.
Step 3: Enter an App name for the new App Password, then click the Create button.
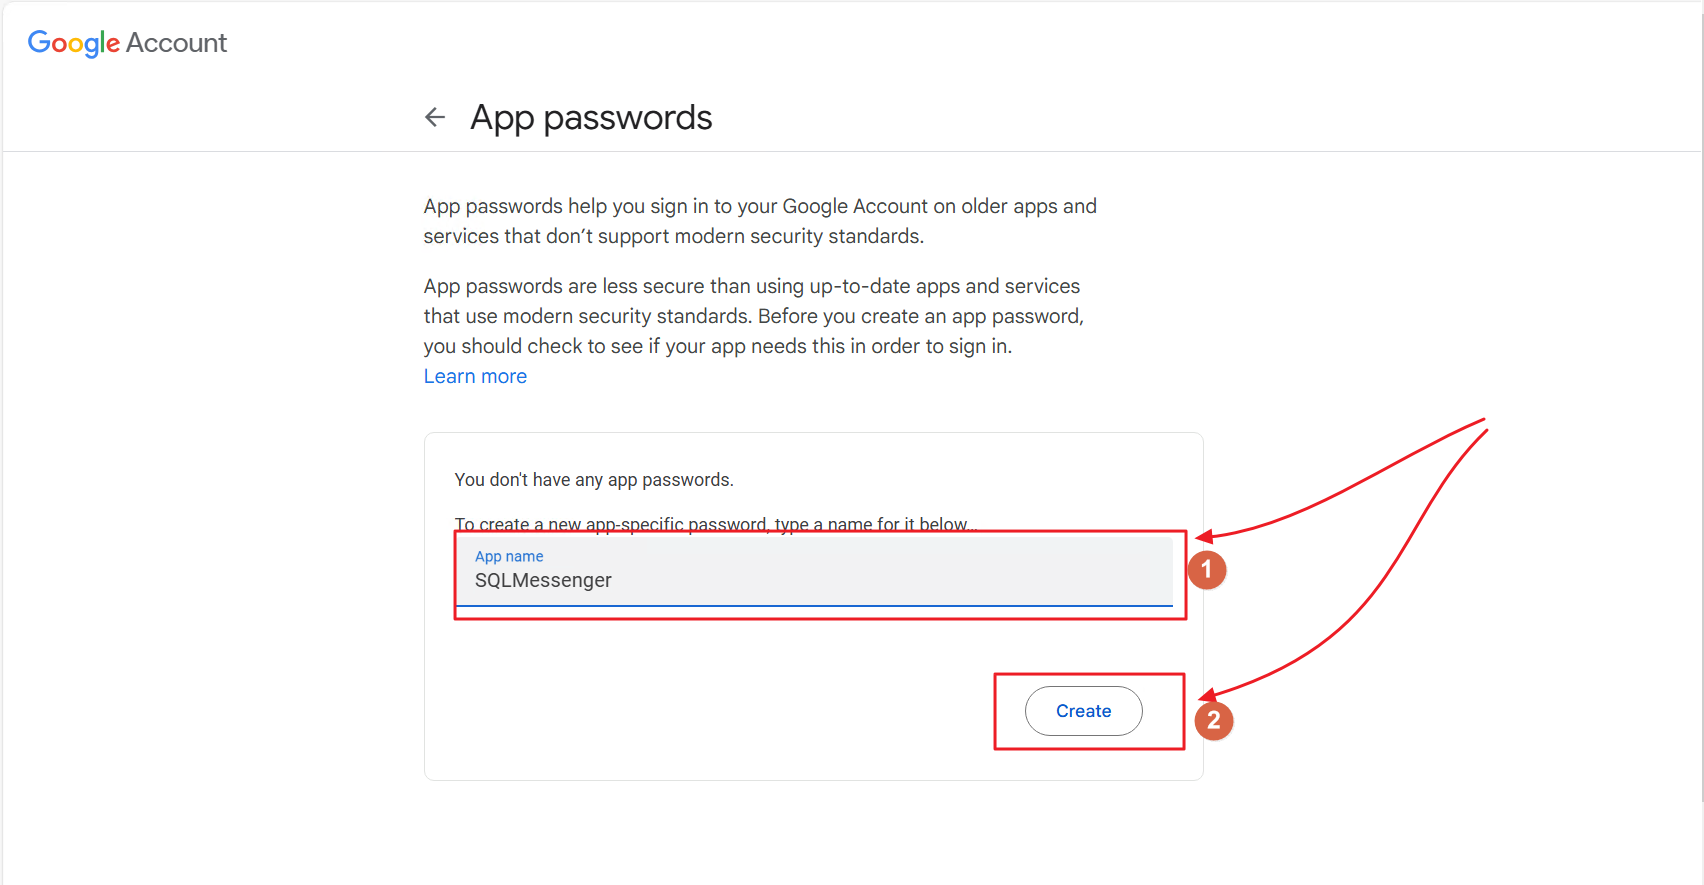
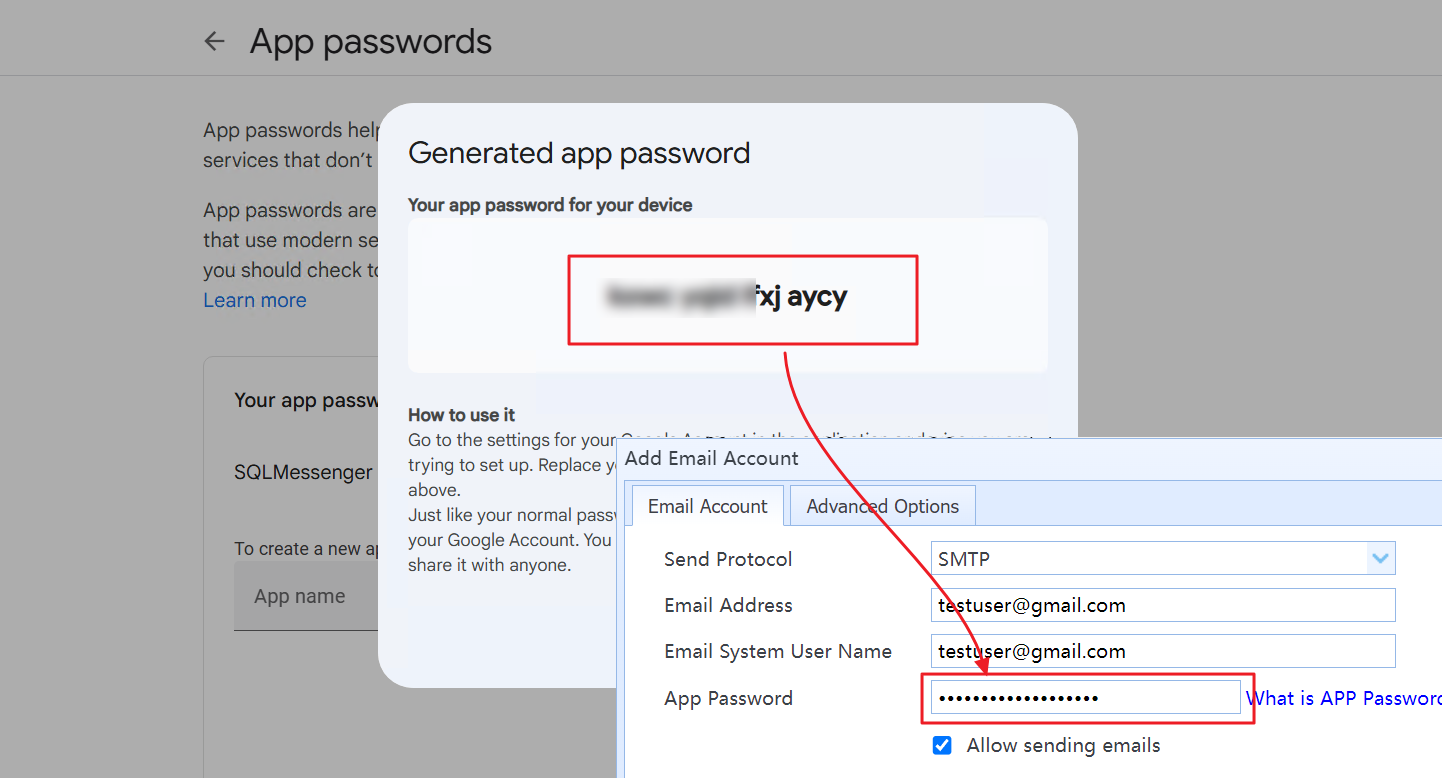
Step 4: After your App Password is created, Google will display it on the screen. Enter this password in the App Password field in SQLMessenger.
6.2 Create a Yahoo App Password
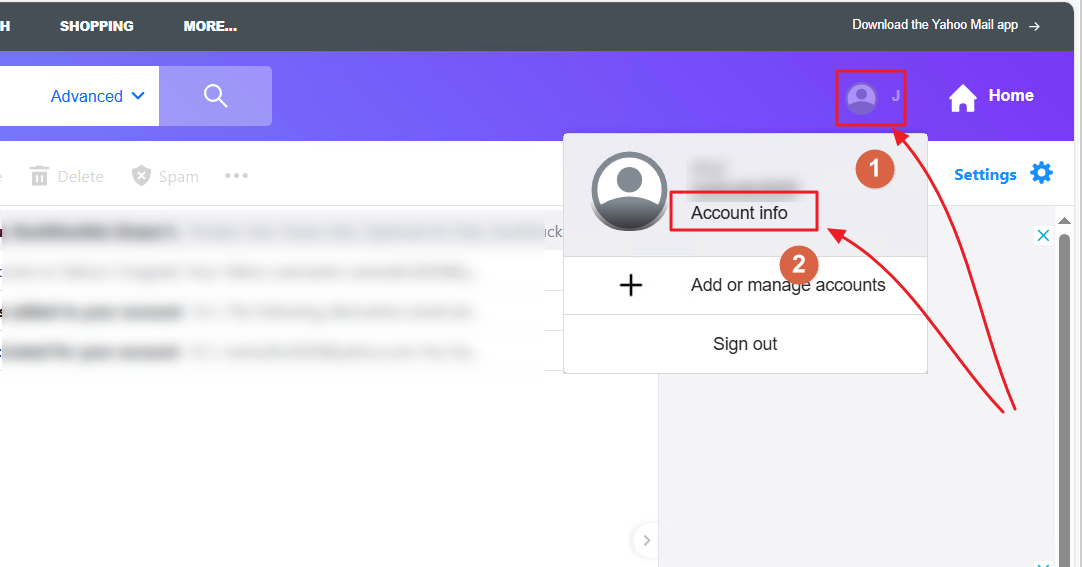
Step 1: Log in to Yahoo Mail in your browser, then click the Account Info icon.
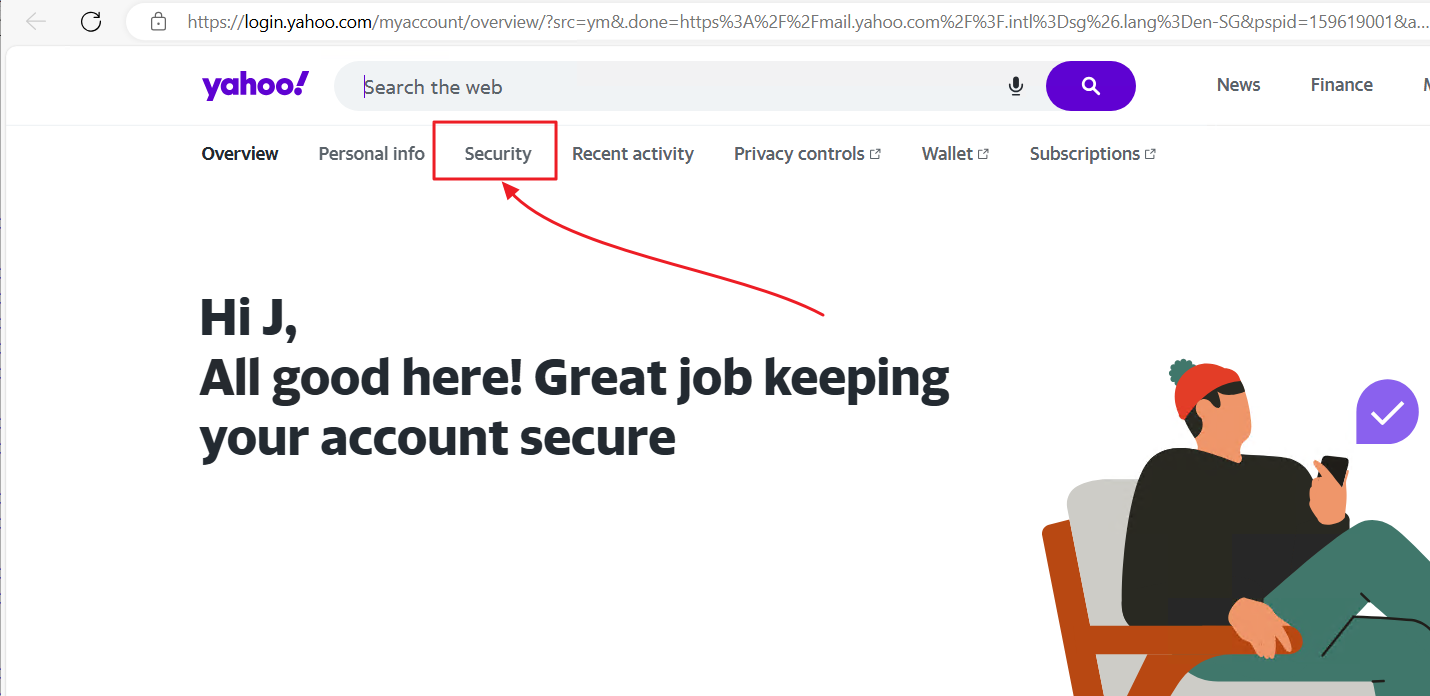
Step 2: Click Security on the account settings page.
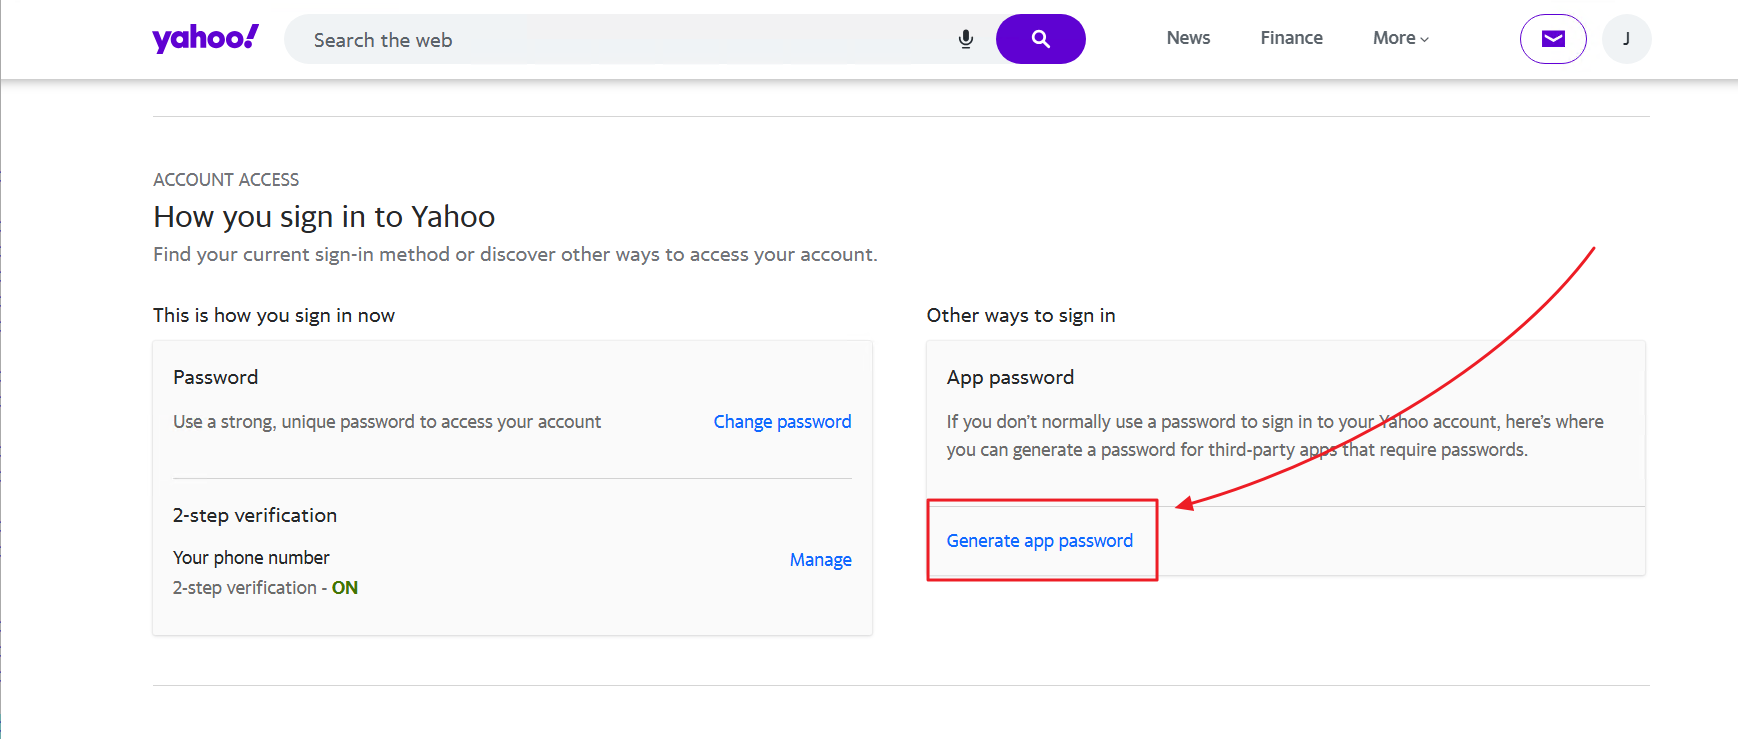
Step 3: Find App Passwords and click Generate App Password.
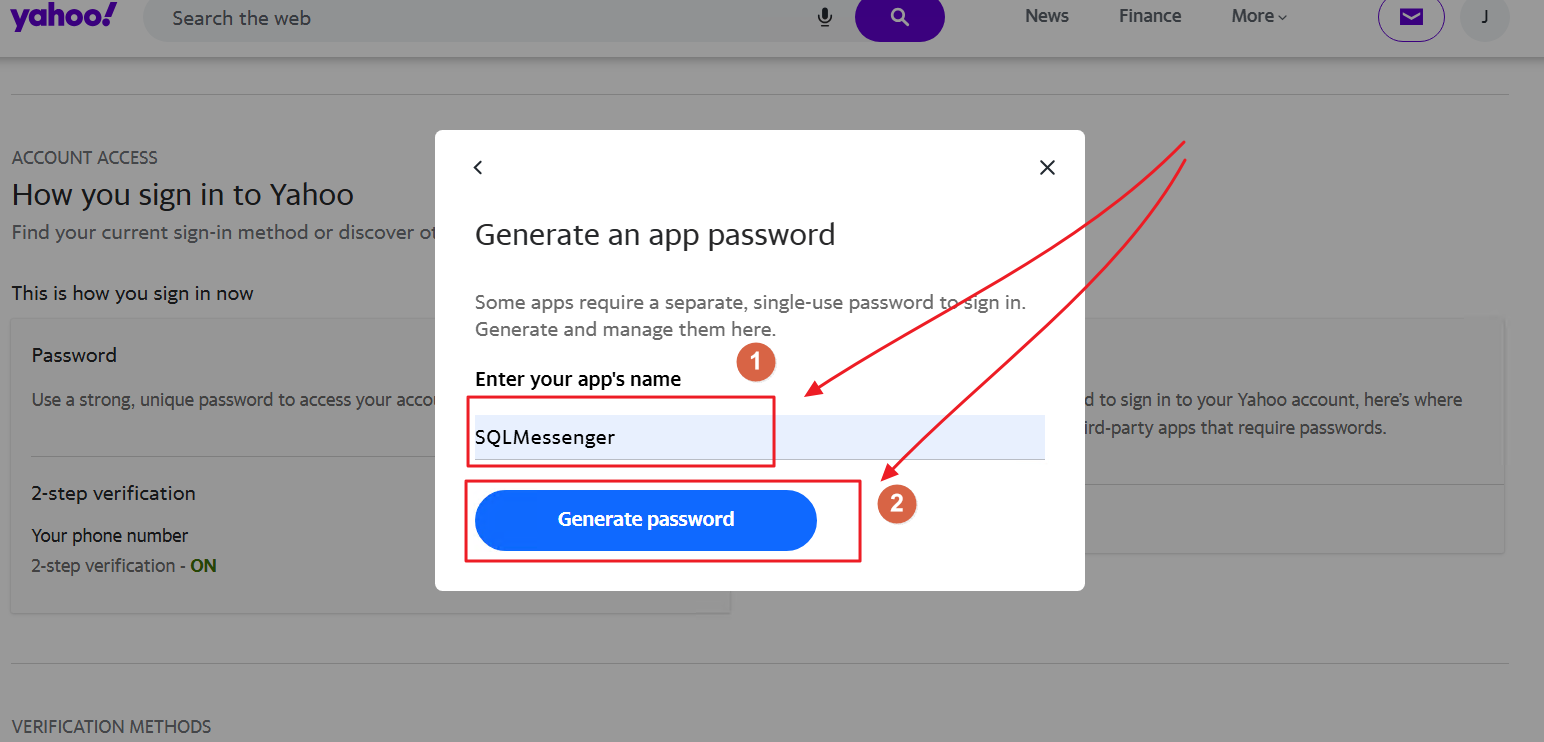
Step 4: Enter an App name, then click Generate Password.
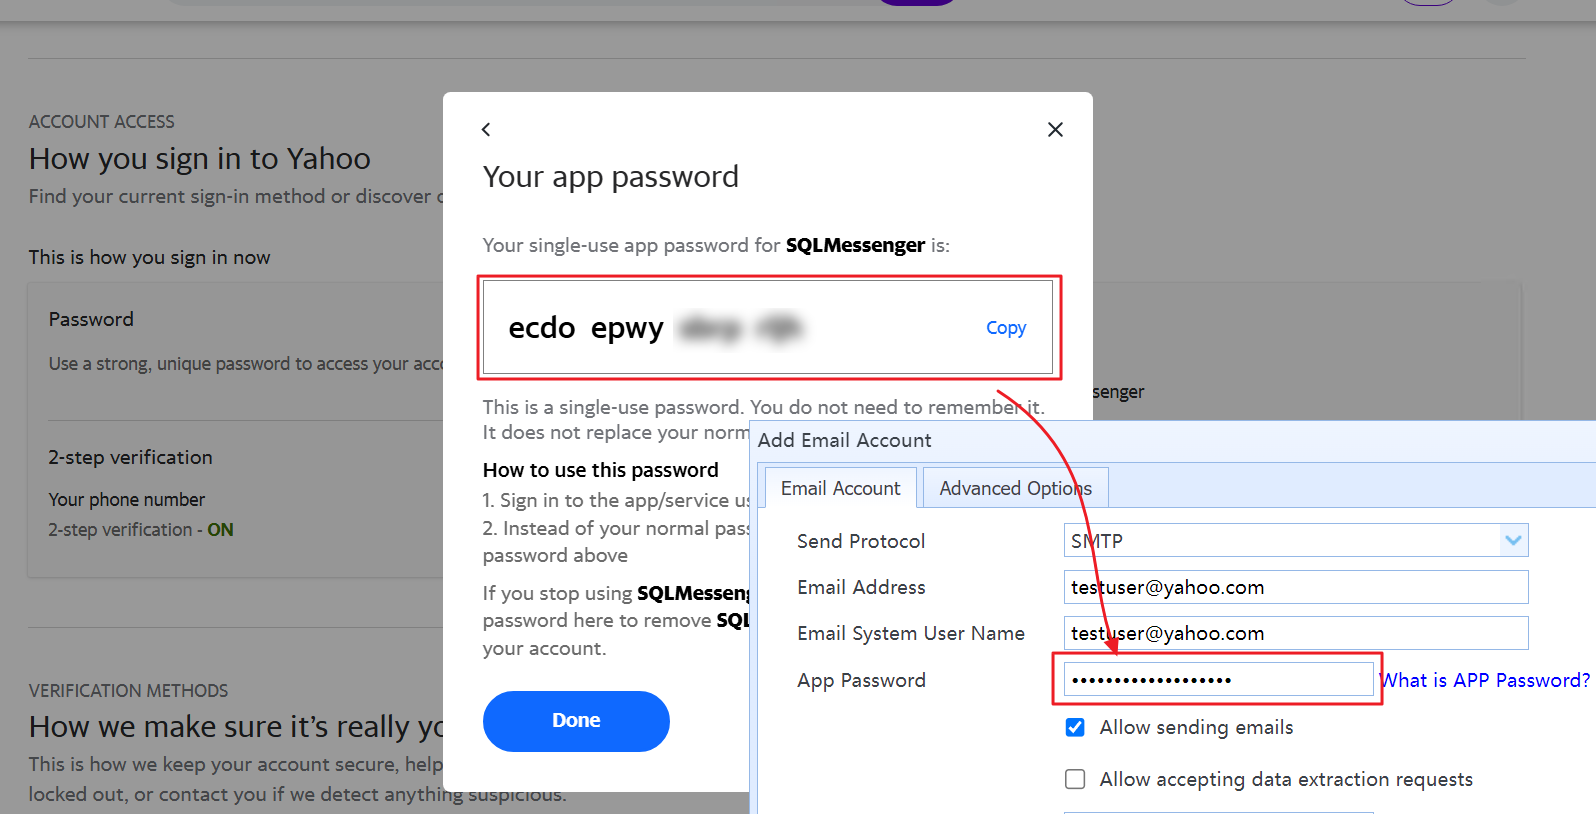
Step 5: After your password is generated, Yahoo will display it on the screen. Enter this password in the App Password field in SQLMessenger.
6.3 Configure OAuth2 Authentication for Outlook & Hotmail Accounts
Microsoft email accounts such as Outlook.com and Hotmail.com require the OAuth2 authentication method to log in. Follow these steps to configure it:
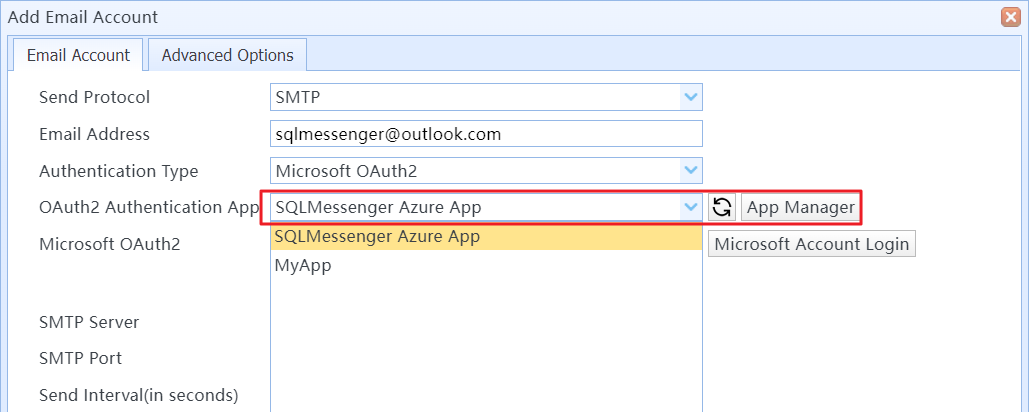
Step 1: Set the account’s Authentication Type to Microsoft OAuth2.

Step 2: Select an app for OAuth2 authentication. If you do not have your own app, you can choose the SQLMessenger Azure App provided by the SQLMessenger developer. If you have created your own app in Azure, click App Manager to add your app to SQLMessenger, then select it as your login app.
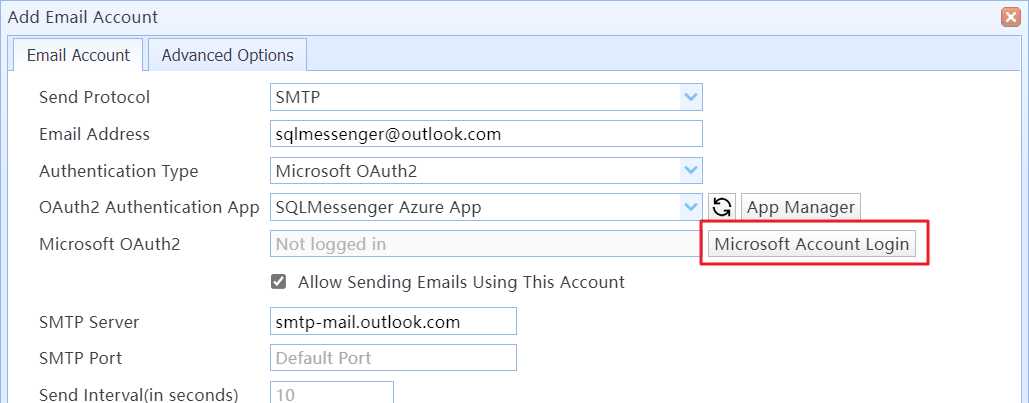
Step 3: Click the Microsoft Account Login button to open the Microsoft login page in your browser, then sign in with your Microsoft account credentials. The Microsoft account you use must match the email account you are configuring.
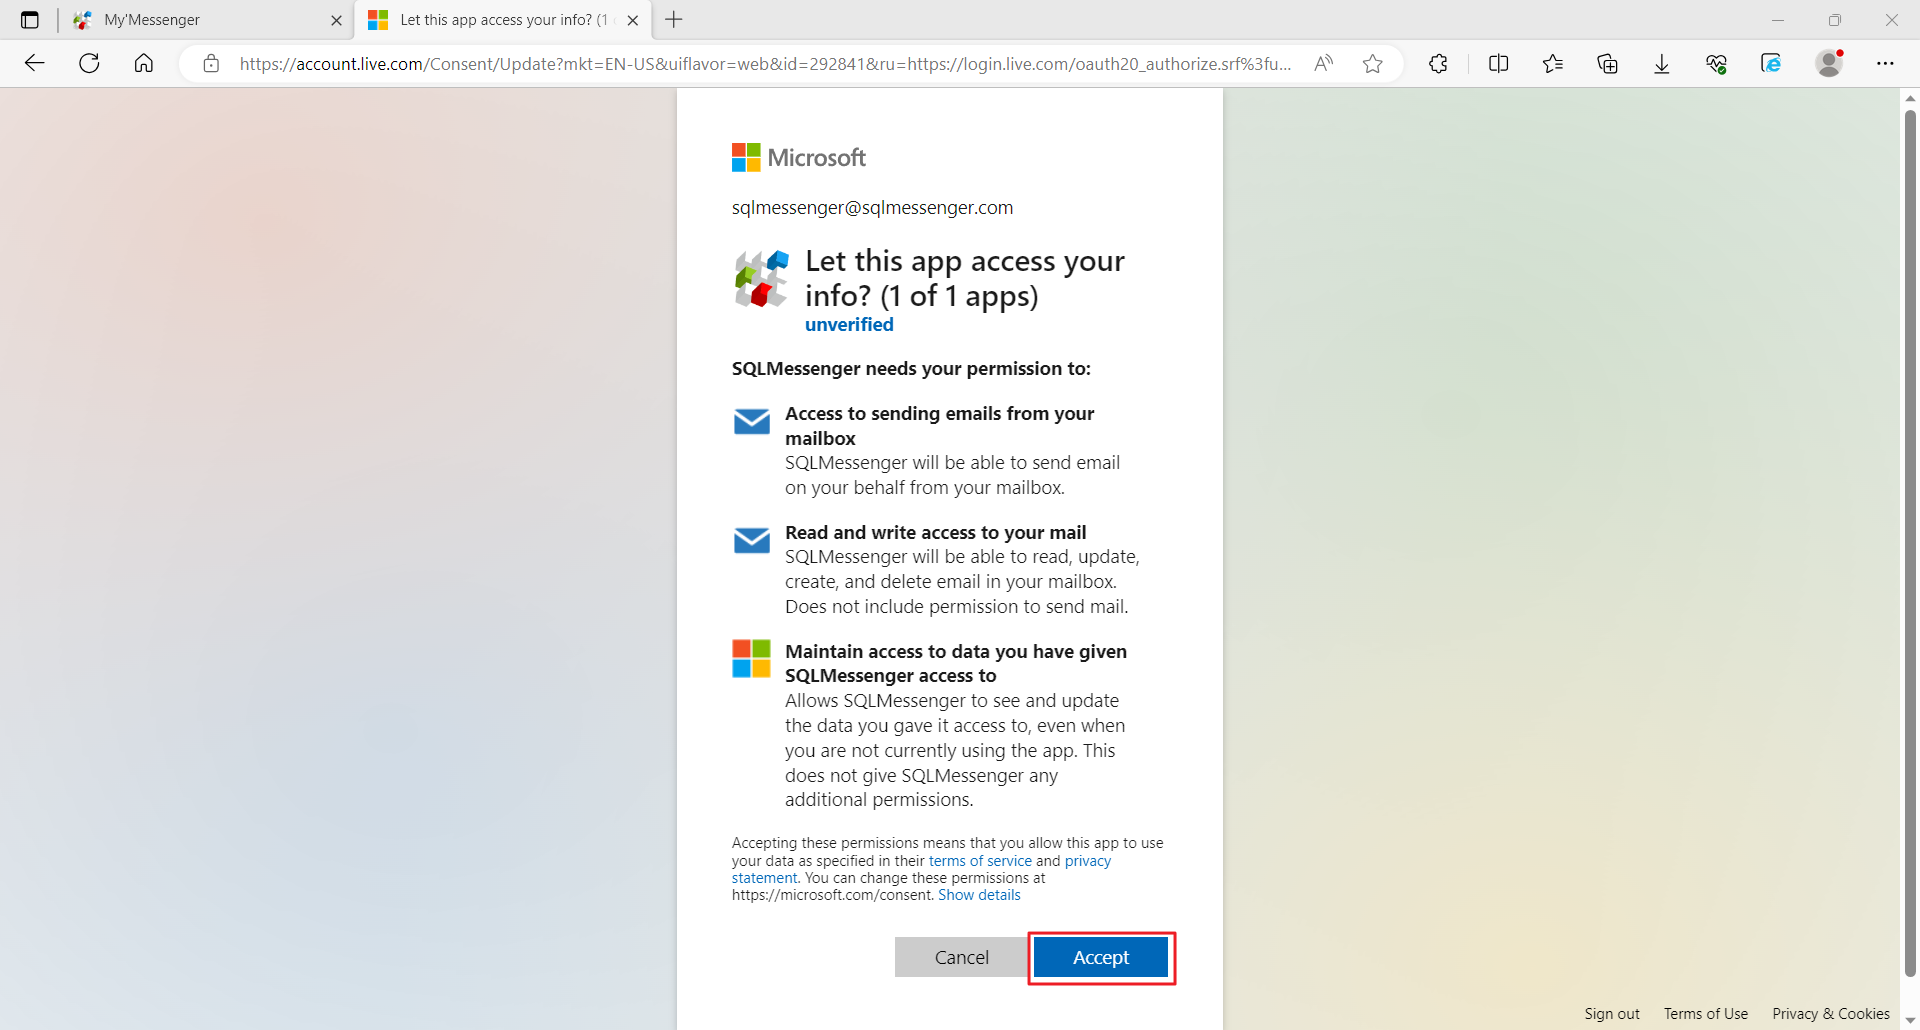
Step 4: When prompted to grant API permissions after logging in, click the Accept button.
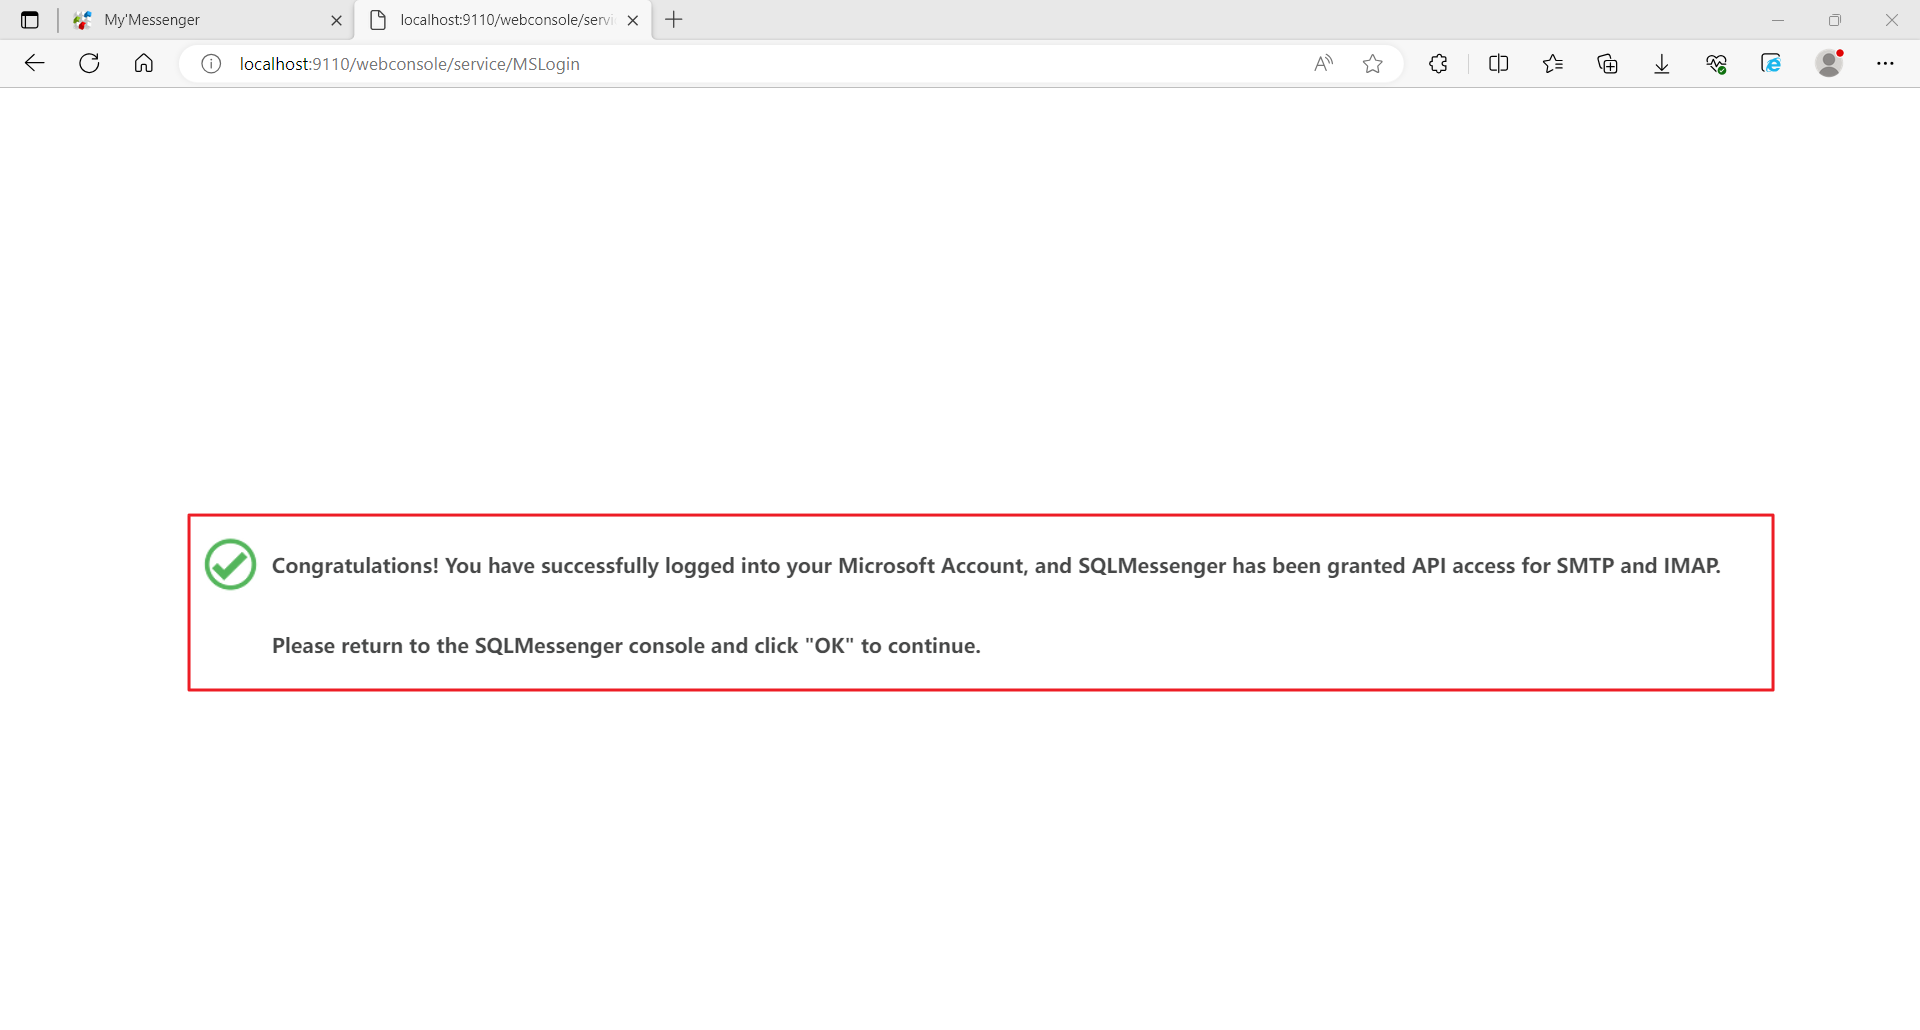
Step 5: When your browser shows the success message, your login is complete. Return to the SQLMessenger console to continue configuring your email account.
After a successful OAuth2 login, Microsoft OAuth2 will show as Authorized. If you change your OAuth2 app settings later, you must click the Microsoft Account Login button to re-authenticate your Microsoft account.

7. Receive Emails and Save to Local Database
SQLMessenger 2.1 and later allow you to save emails to a local database.
SQLMessenger 2.1 and later support retrieving emails from mail servers and saving them to a local database.
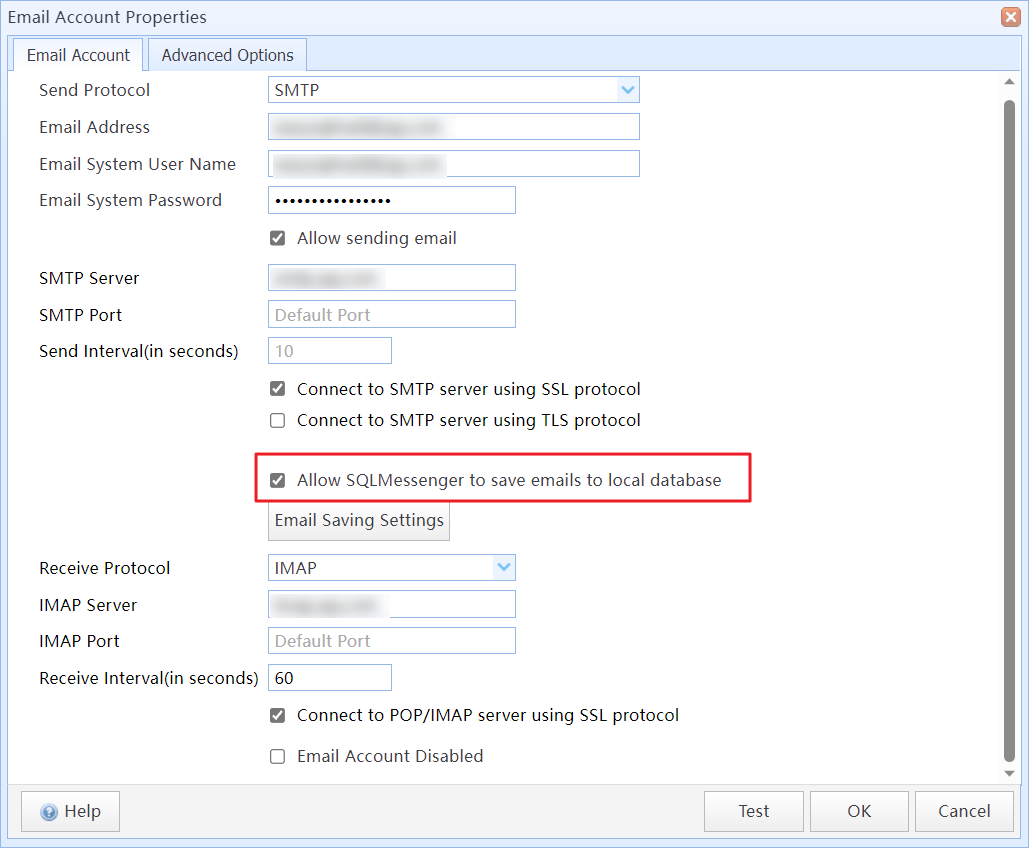
Select the Allow incoming email option in the email account configuration dialog
When this option is enabled, SQLMessenger periodically retrieves emails from the mail server and saves them to tables in the built-in PostgreSQL database. You can access email data through the v_inbox_mail and v_inbox_mail_content views in the Default data source.
Field descriptions for these views are as follows:
v_inbox_mail: Stores summary information of incoming emails.
| inbox_mail_id | long int | Unique email ID generated by SQLMessenger. |
| mail_acct_id | int | ID of the email account that received the message, generated by SQLMessenger. |
| mail_acct_addr | text | Email address of the receiving account. |
| message_id | text | Unique Message ID assigned by the mail server. |
| from_addr | text | Sender’s email address. |
| reply_to | text | Reply-to address specified by the sender. |
| folder_name | text | Name of the email folder on the mail server. |
| received_time | datetime | Time the email was received by the mail server. |
| send_to | text | List of primary recipients. |
| copy_to | text | List of CC (carbon copy) recipients. |
| bcc_to | text | List of BCC (blind carbon copy) recipients. |
| mail_size | long int | Size of the email message. |
| sent_date | datetime | Time the email was sent by the sender. |
| subject | text | Email subject line. |
| create_time | datetime | Time when SQLMessenger retrieved and saved the email. |
| state | char(1) | Email status in SQLMessenger. A = Active; X = Deleted |
| state_time | datetime | Time when the email status was last changed. |
v_inbox_mail_content: Stores email body content and attachment information.
| mail_content_id | long int | Unique content record ID generated by SQLMessenger. |
| inbox_mail_id | long int | Associated email ID linking to the v_inbox_mail view. |
| content_type | text | Type of stored content. |
| html_content | text | Stores the HTML formatted email body when the content type is TEXT/HTML. |
| text_content | text | Stores the plain text email body. |
| file_name | text | Stores the attachment filename when the content type is attachment. |
| file_size | long int |
Stores the content size in bytes for plain text or HTML email content. For attachments, stores the file size in bytes. |
| file_uuid | text | Stores the unique UUID of the attachment file. This UUID can be used to locate the file on local disk. |
| comments | text | Records exception details if any error occurs while processing email content or attachments. For example, if an attachment exceeds the allowed size limit, SQLMessenger skips downloading it and logs the reason here. |
7.1 Incoming Mail Settings
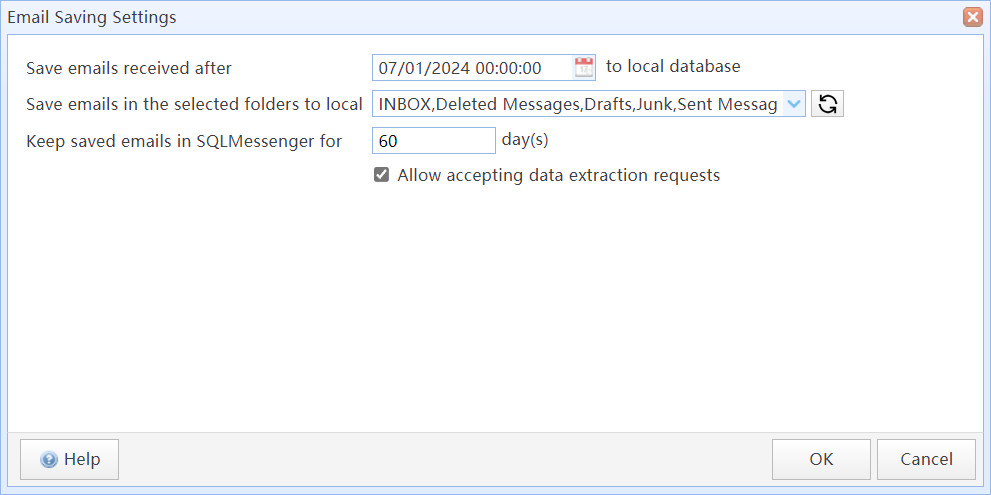
Configure email saving options
In this dialog:
| Save emails received after xxx to the local database | SQLMessenger saves only emails received from the specified time onward. By default, it saves emails starting from the moment Allow SQLMessenger to save emails to local database is first enabled. You can adjust this time point to import and save historical emails. |
| Read emails from selected folders | Specify which mail folders to retrieve and save emails from. By default, SQLMessenger only saves emails from the Inbox folder. |
| Keep incoming emails in SQLMessenger for xxx days | Set the retention period for emails stored in the local database. The default is 365 days. After this period, expired email records are automatically deleted from the local database; this does not affect the original emails on the mail server. |
| Allow accepting data extraction requests |
Set whether to allow data extraction requests to use this email account. |
| Run tasks for new incoming email |
Configure tasks to be triggered when new emails arrive. These tasks can automatically process incoming email messages. |
7.2 Location of Attachments
After SQLMessenger retrieves an email attachment, it assigns a UUID (unique identifier) to the file and saves it in the arch\inbox directory under the SQLMessenger installation folder. The subfolder structure is based on the email receipt time.
For example: If an email has an ID (inbox_mail_id in the v_inbox_mail view) of 6173 and was received at 12:34:55 on 08/18/2024 (create_time in the v_inbox_mail view), its attachment will be stored in: SQLMessenger\arch\inbox\20240818\6173
The attachment filename is the file_uuid value from the v_inbox_mail_content view plus the original file extension.
For example: If the file_uuid is <b423ecdc38dd52f8166506349c5ff853> and the original filename is Report.xlsx, SQLMessenger will save the file as: SQLMessenger\arch\inbox\20240818\6173\b423ecdc38dd52f8166506349c5ff853.xlsx