- 1. Introduction
- 2. Installing the Image Distribution Tool
- 3. Distributing Images Using the Image Distribution Tool
- FAQ
1. Introduction
Q: I am a teaching assistant for a university course. I need to send unique images individually to approximately 100 students. Each student receives a distinct image file, and images must be embedded directly in the email body instead of being sent as attachments. I maintain a list containing student email addresses, email subjects, and corresponding image filenames. Can SQLMessenger help me automate this bulk distribution?
A: Yes, this workflow is fully supported. SQLMessenger provides a dedicated task to automate this scenario. This document walks you through the complete setup and distribution steps.
2. Installing the Image Distribution Tool
Before first-time use, install the Image Distribution Tool by following the steps below.
Step 1: Click here to download the installation file for the Image Distribution Tool.
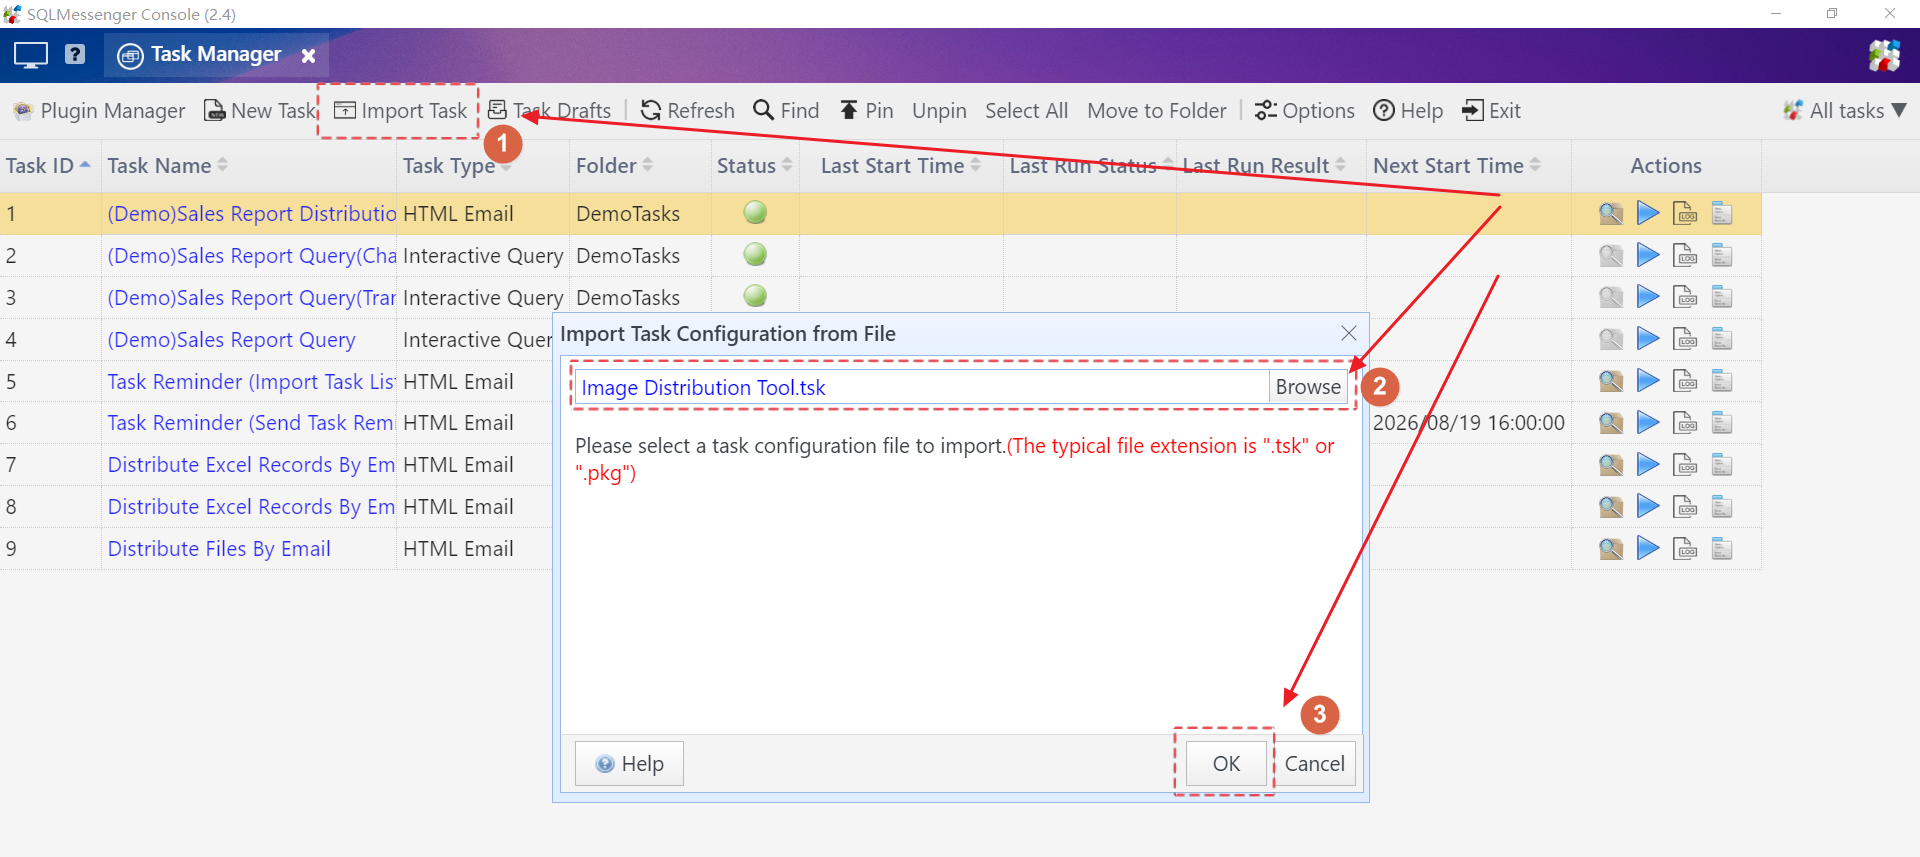
Step 2: Open Task Manager within the SQLMessenger console. Click the Import Task button on the toolbar, select the installation file downloaded in Step 1, then click OK.
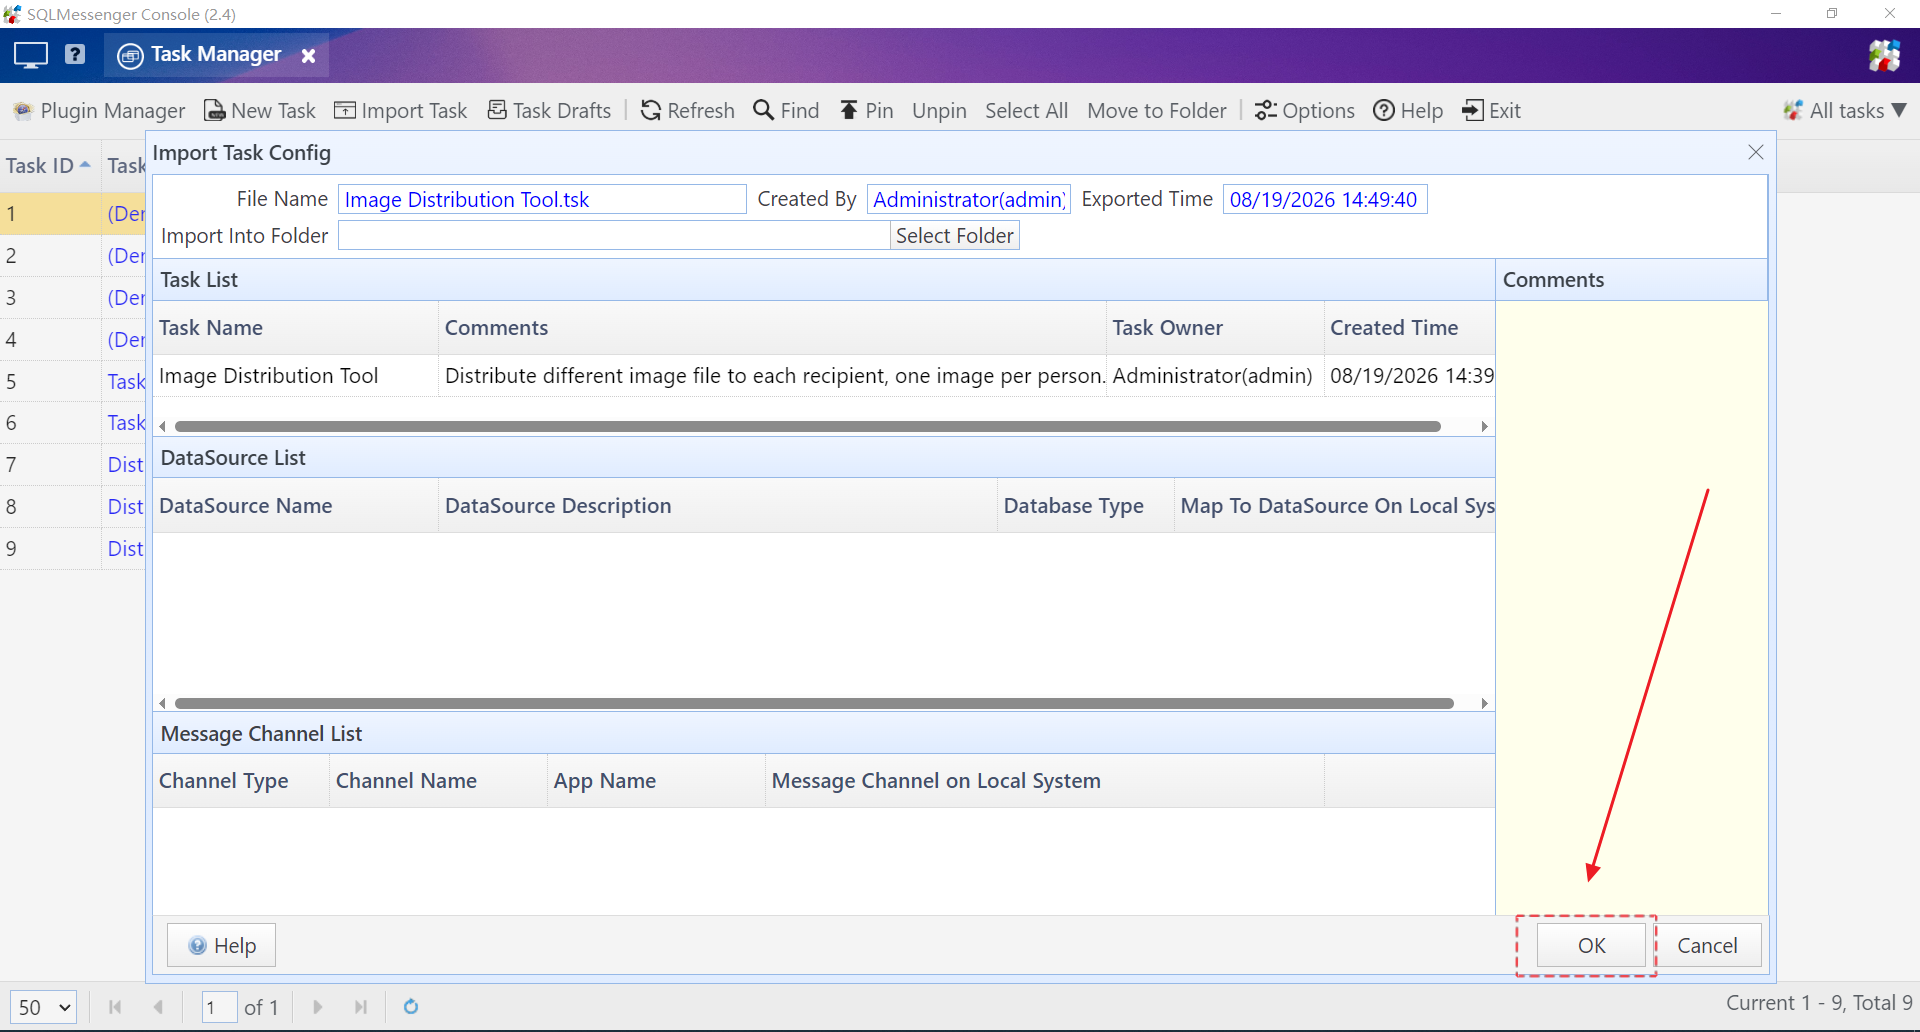
Step 3: Click OK in the Import Task Config dialog. SQLMessenger will then install the Image Distribution Tool into the system.
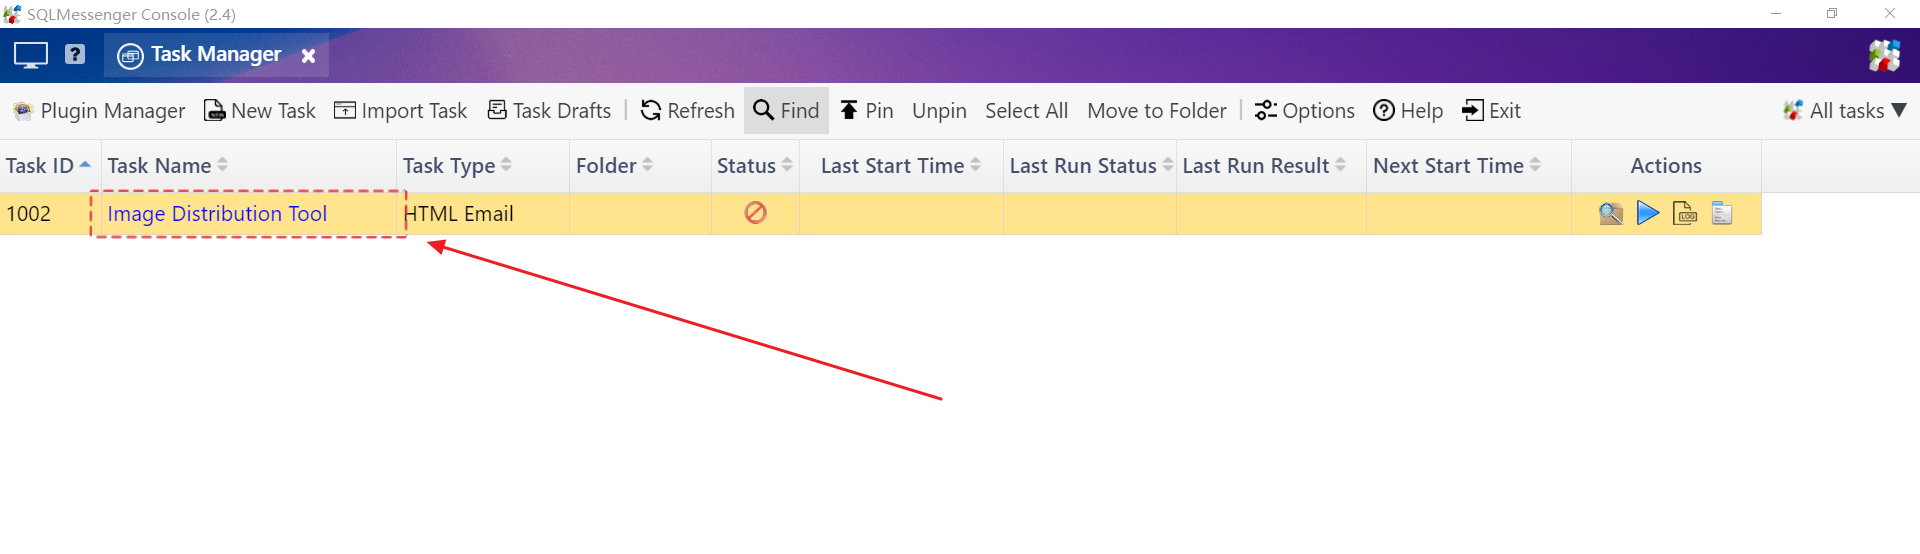
Step 4: After successful installation, you will see a task named Image Distribution Tool in the task list.
3. Distributing Images Using the Image Distribution Tool
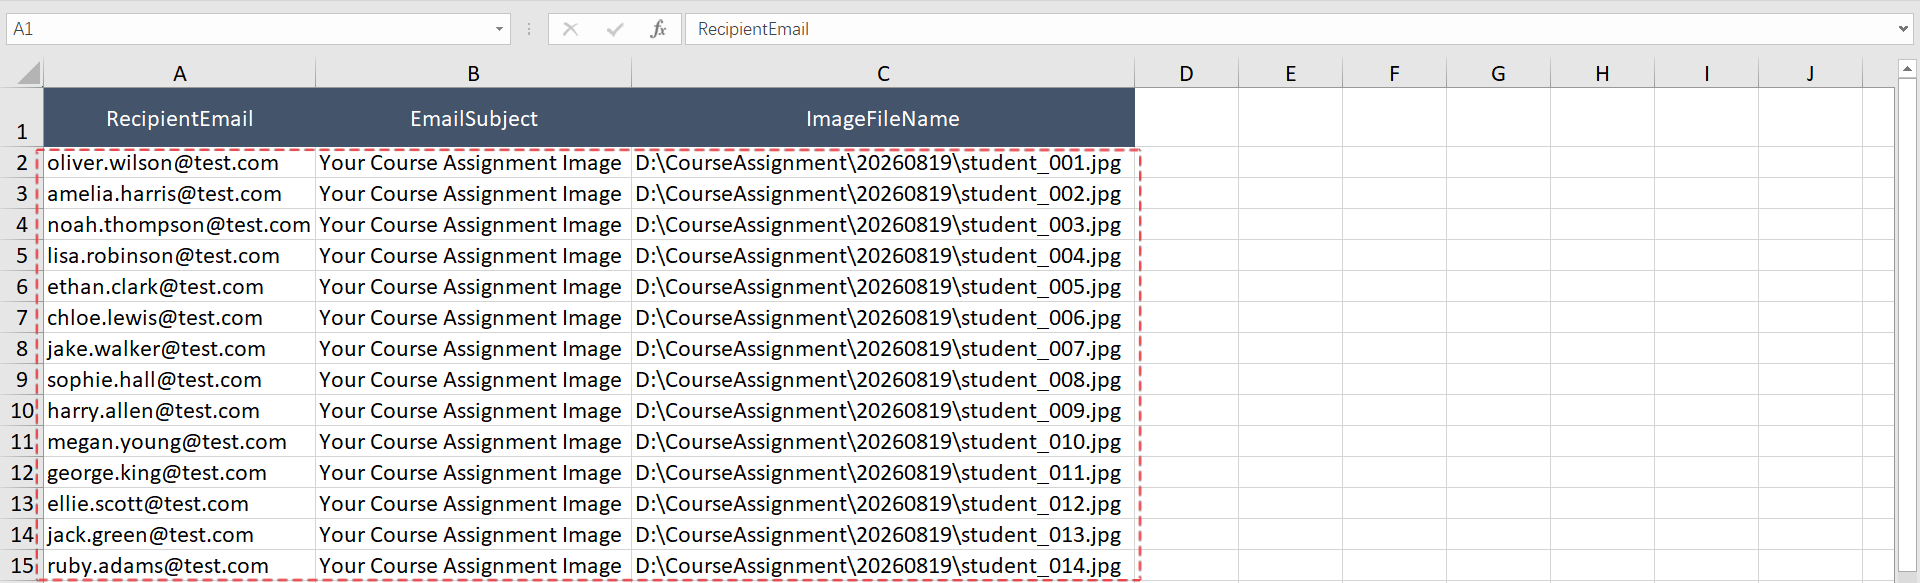
Step 1: Before starting image distribution, fill in recipient email addresses, email subjects and corresponding image filenames in Image_Distribution_List.xlsx. Click here to download Image_Distribution_List.xlsx.
Step 2: In SQLMessenger’s Task Manager, click Image Distribution Tool to open its runtime interface.

Step 3: Click Report Distribution, then click the Import Recipient List button.
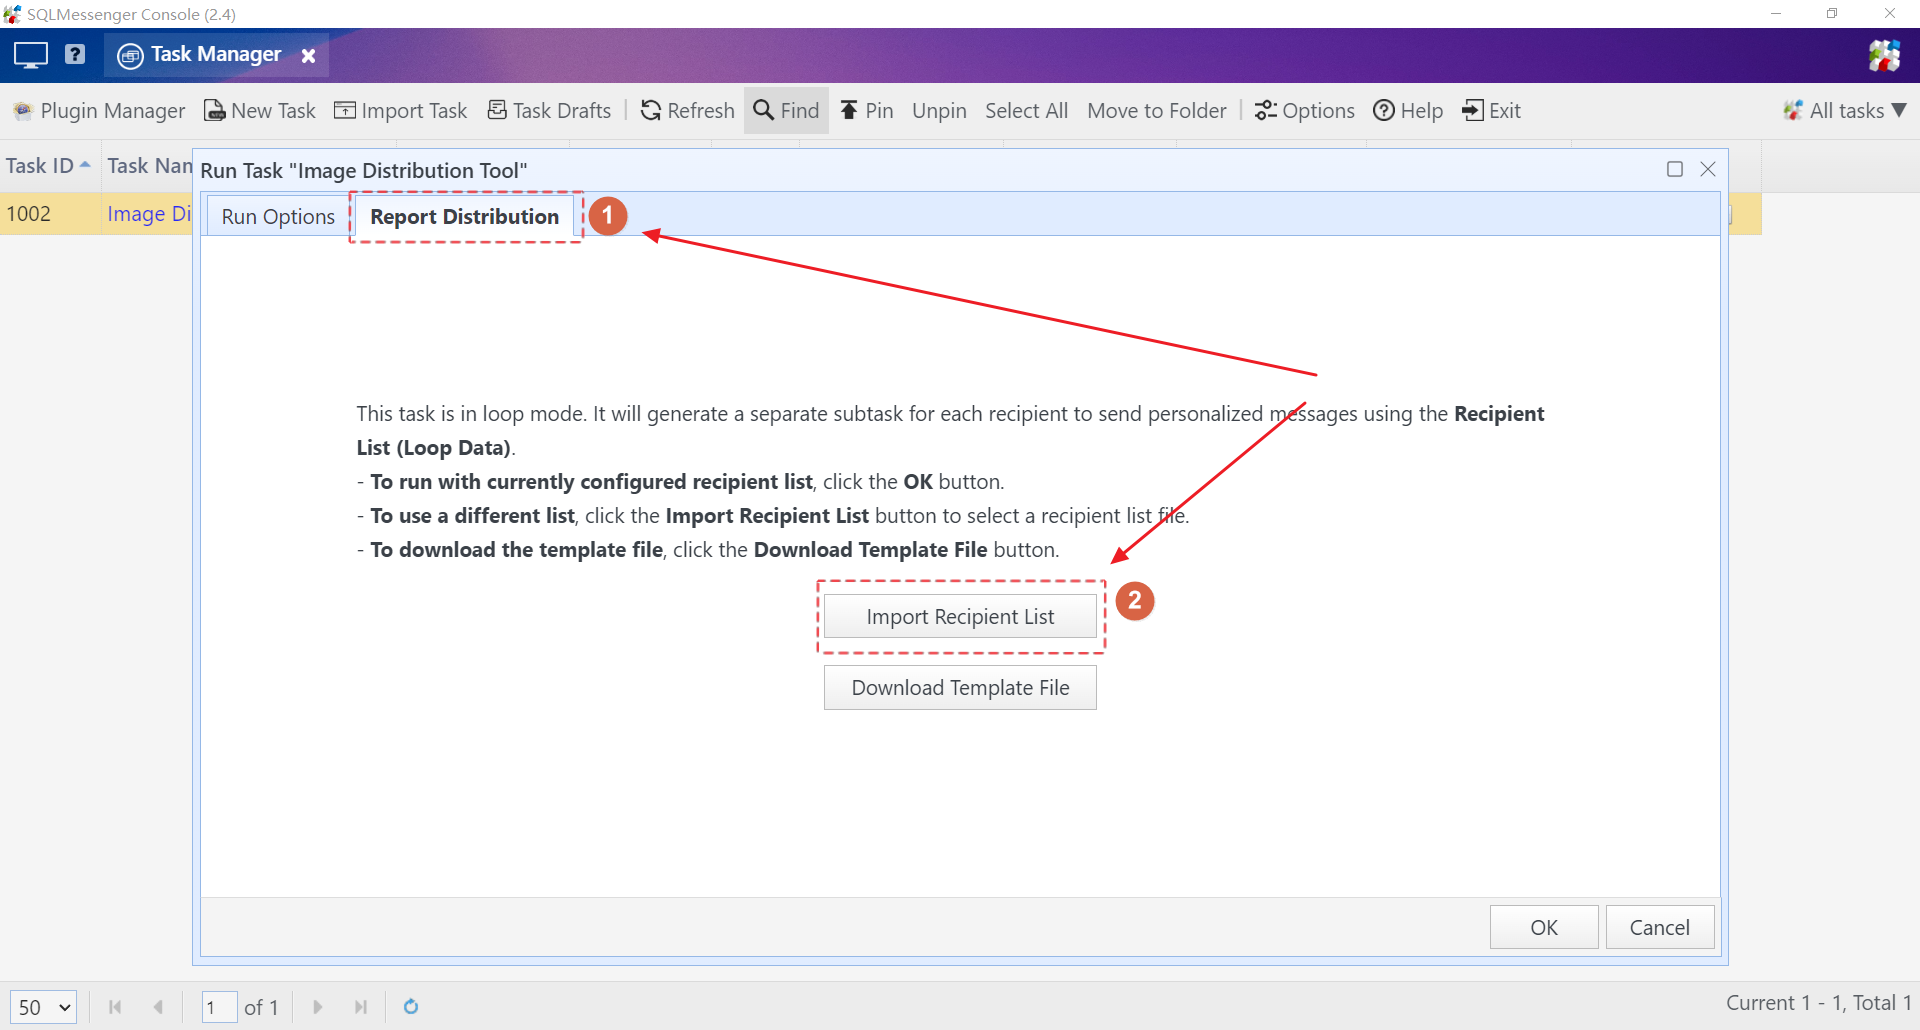
Step 4: Select the completed recipient list spreadsheet prepared in Step 1, then click OK.
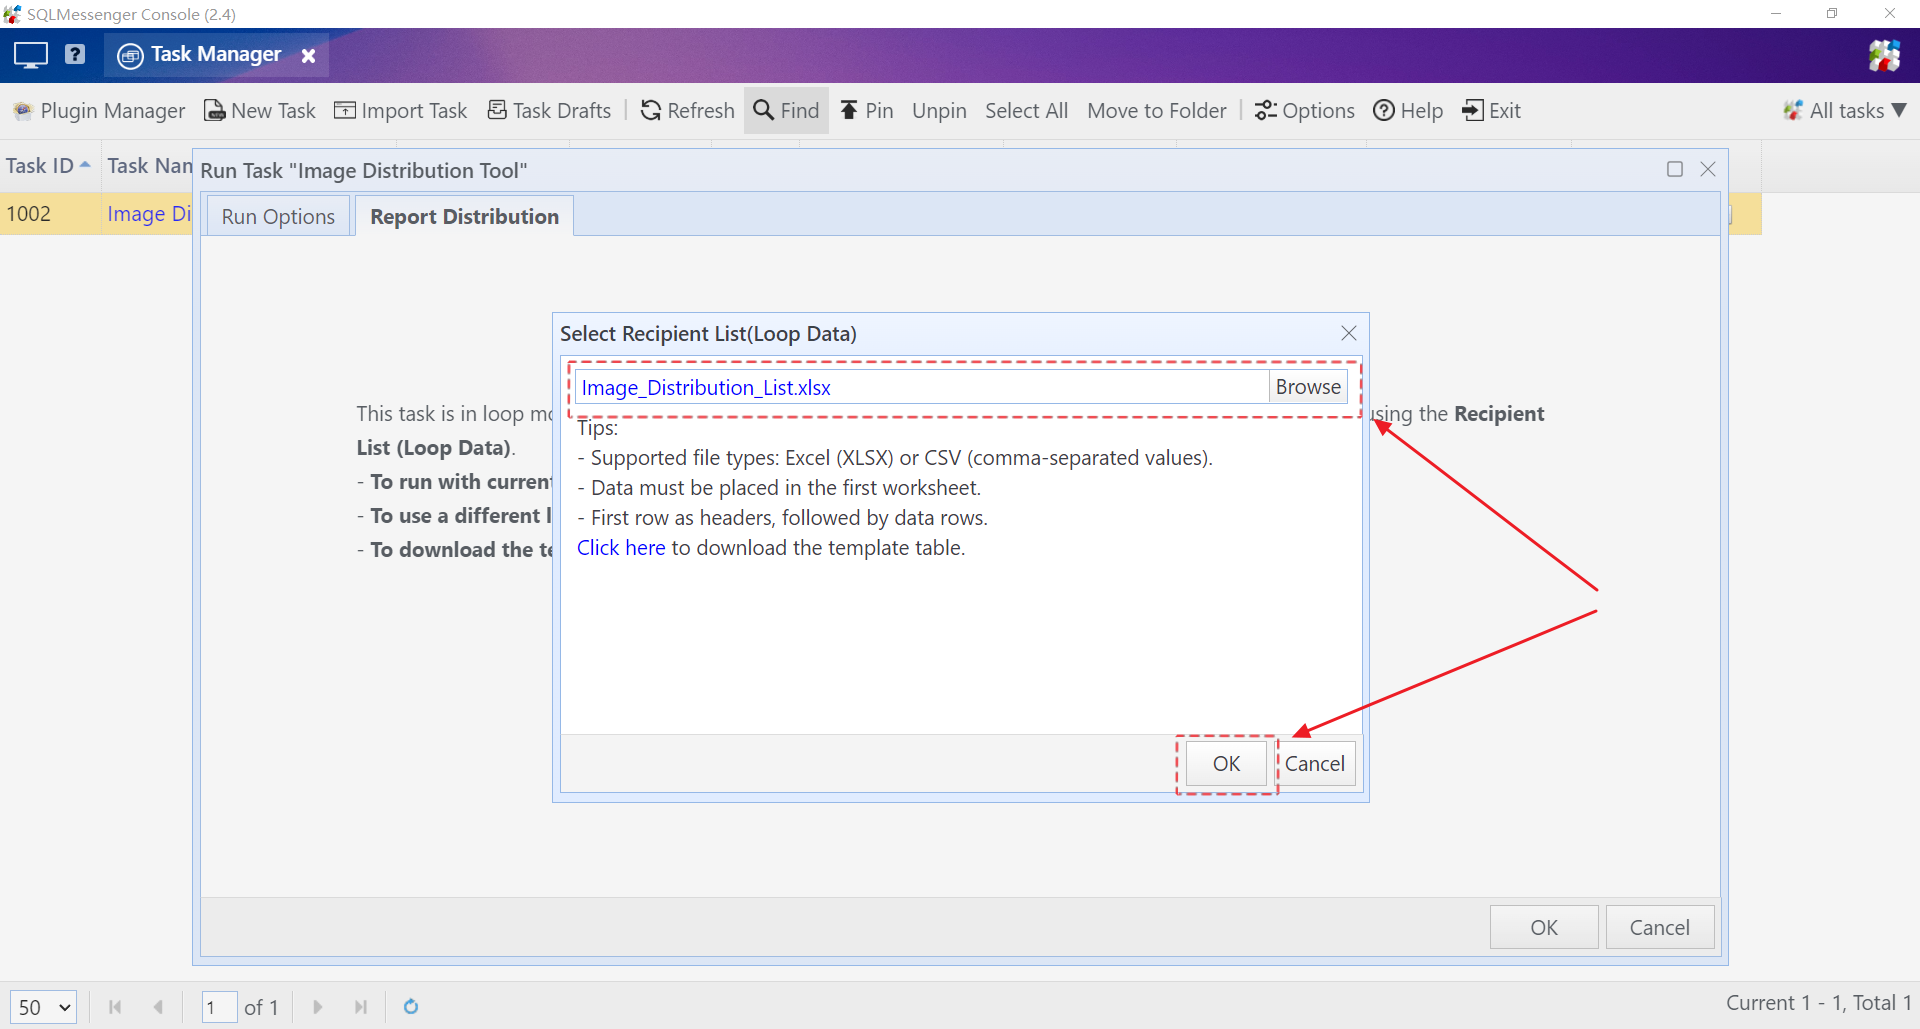
The system reads the spreadsheet file and displays its data on screen. Review the data; once verified correct, click the OK button, and the system will begin generating emails.
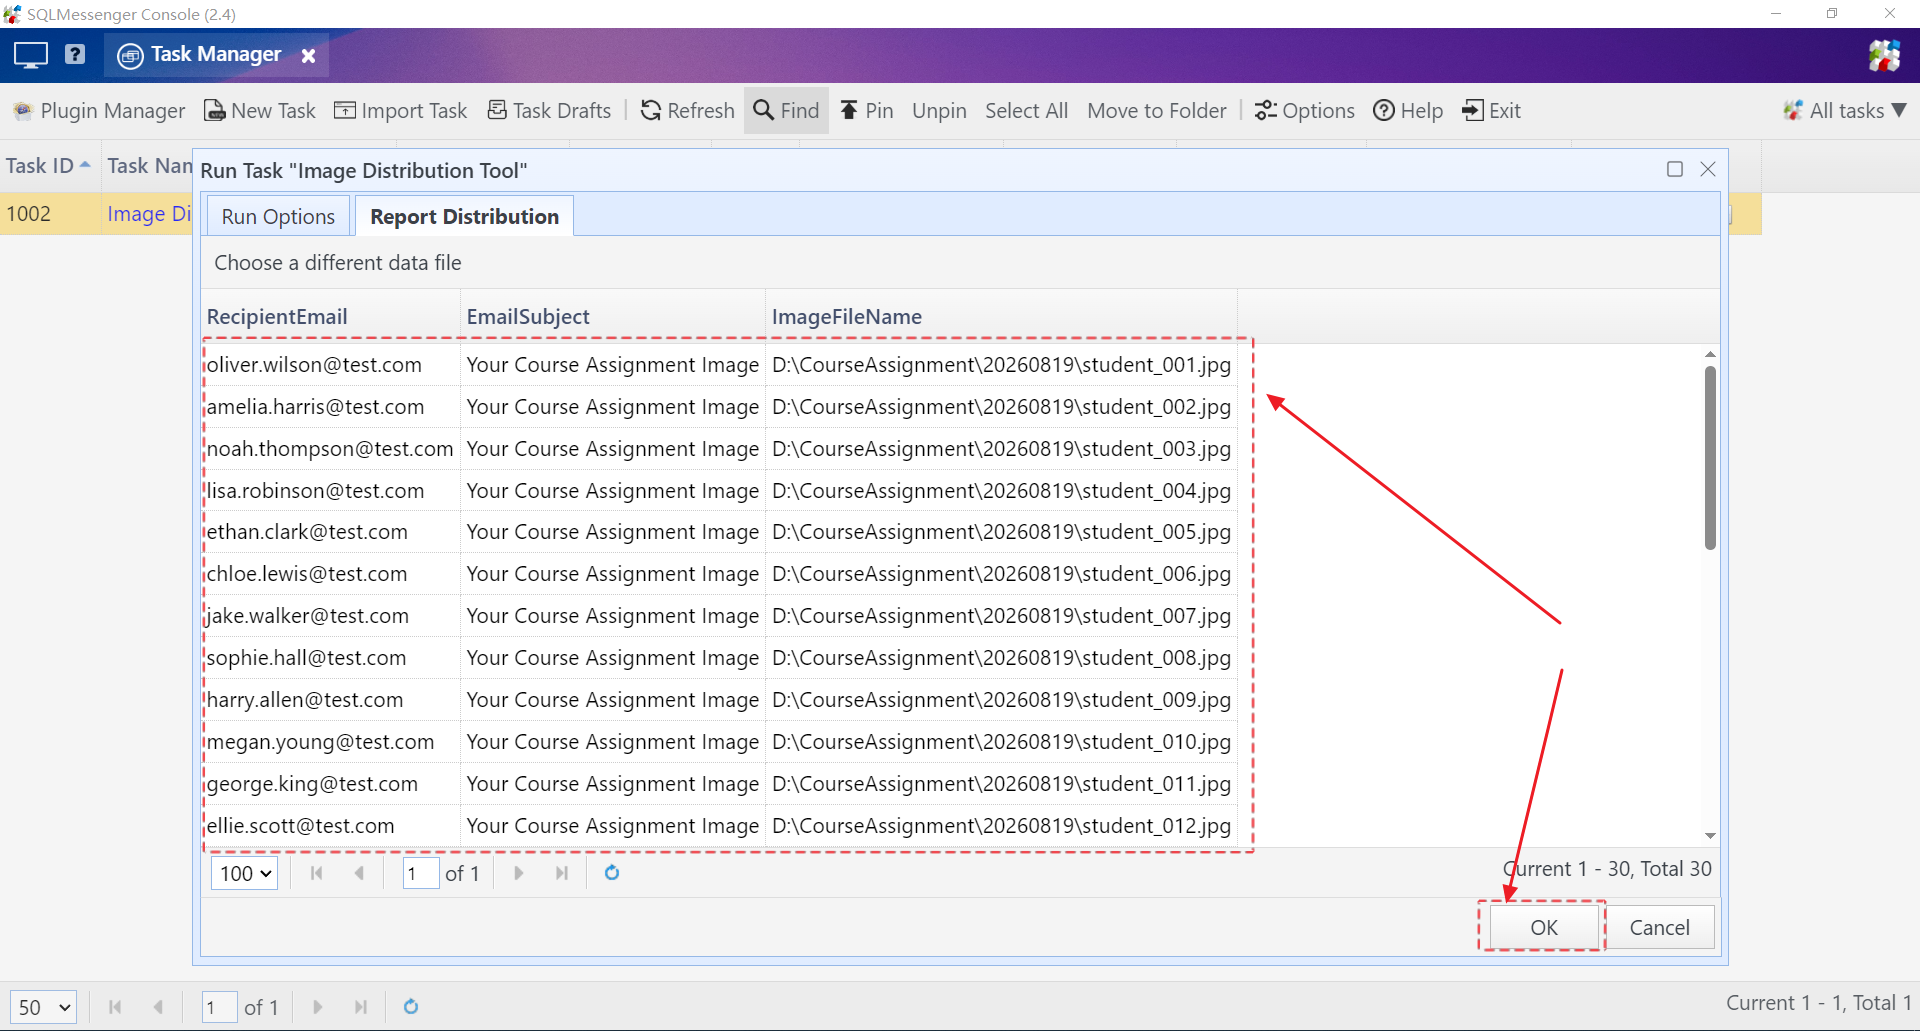
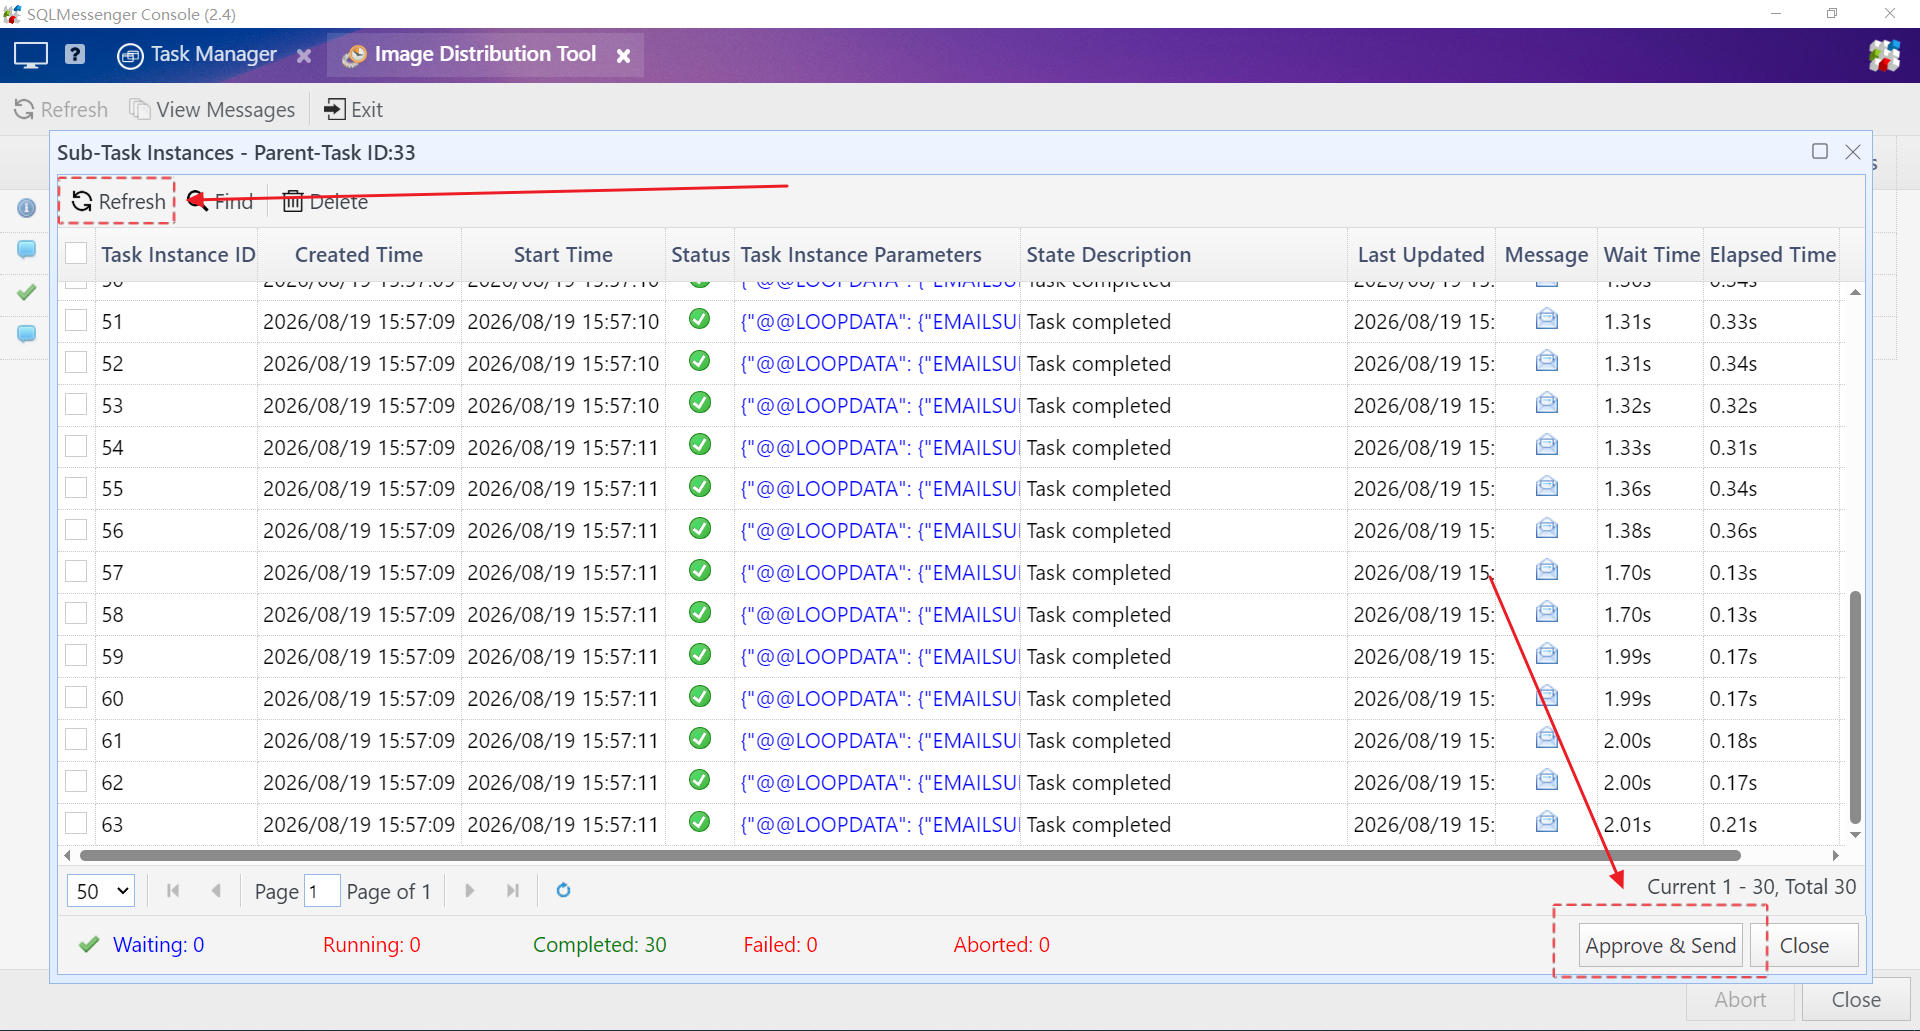
After email generation finishes, click the mail icon on the interface to verify email content.
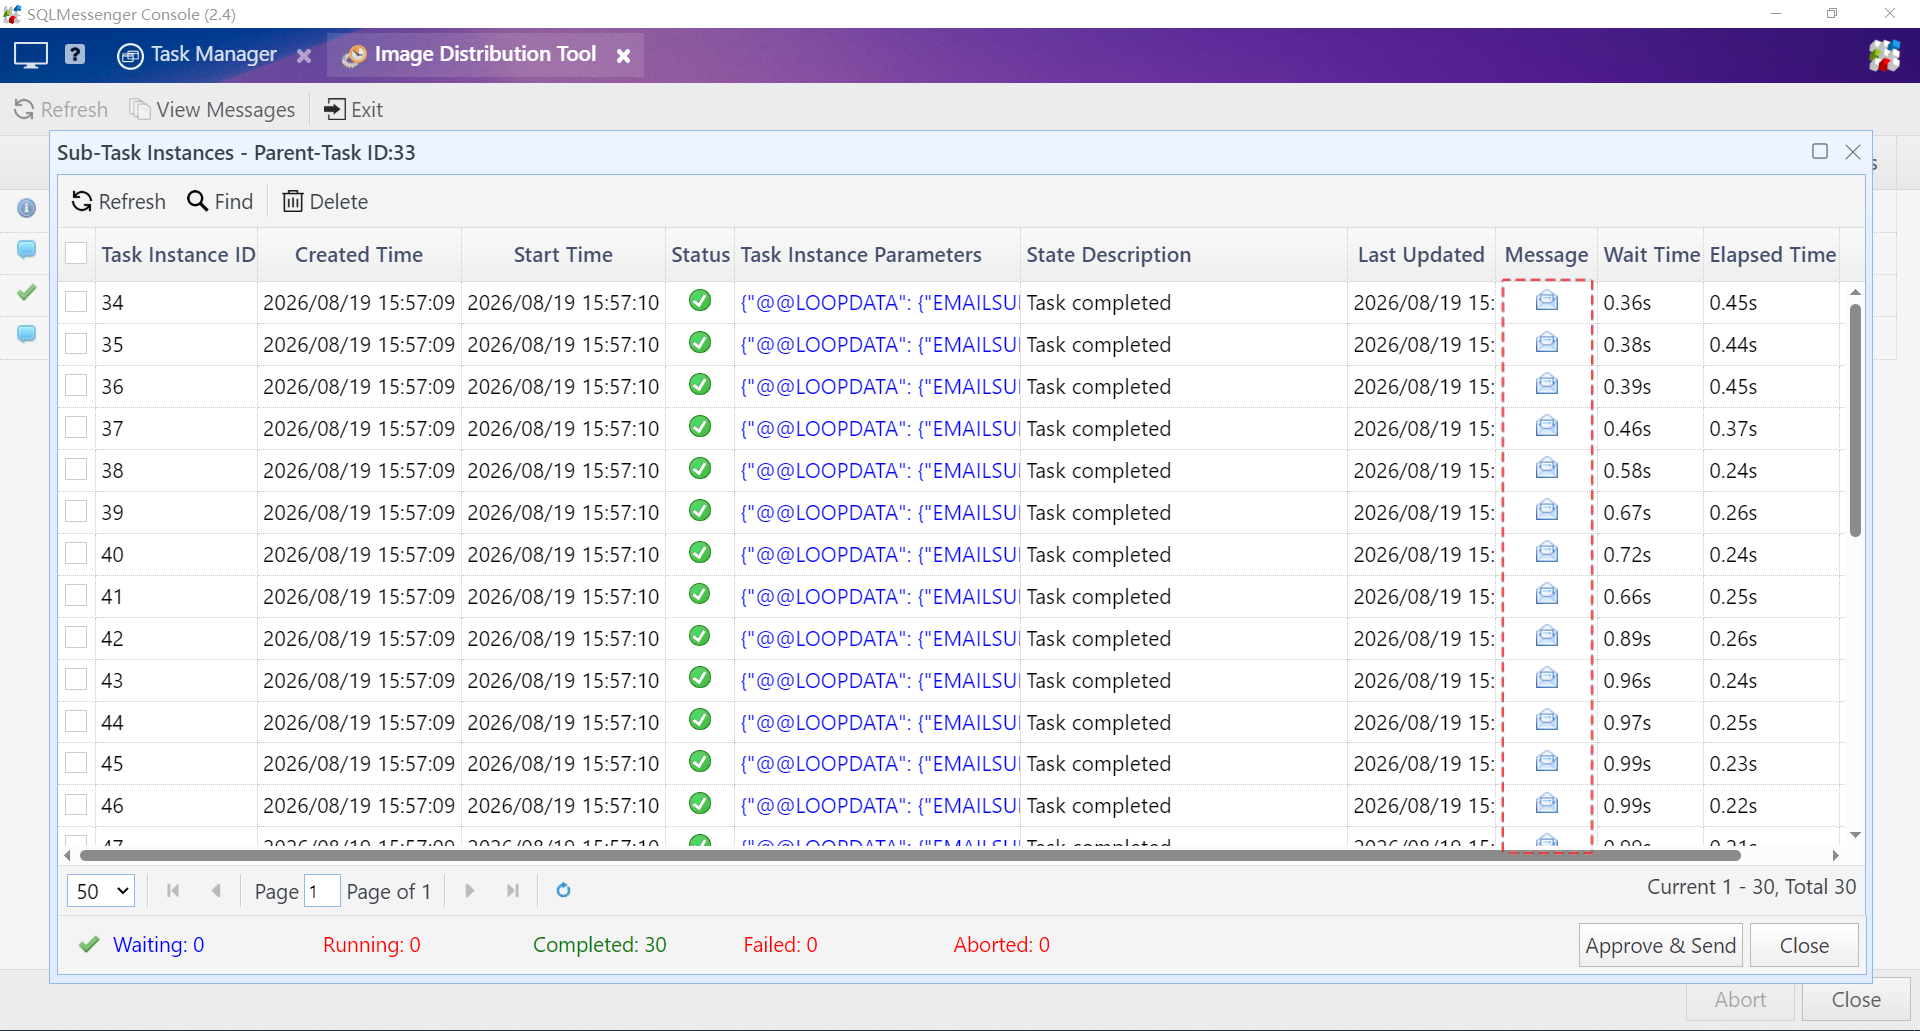
Step 5: Once email content is confirmed correct, click the Approve & Send button. (If this button is not visible, click the Refresh button at the top left and retry.)
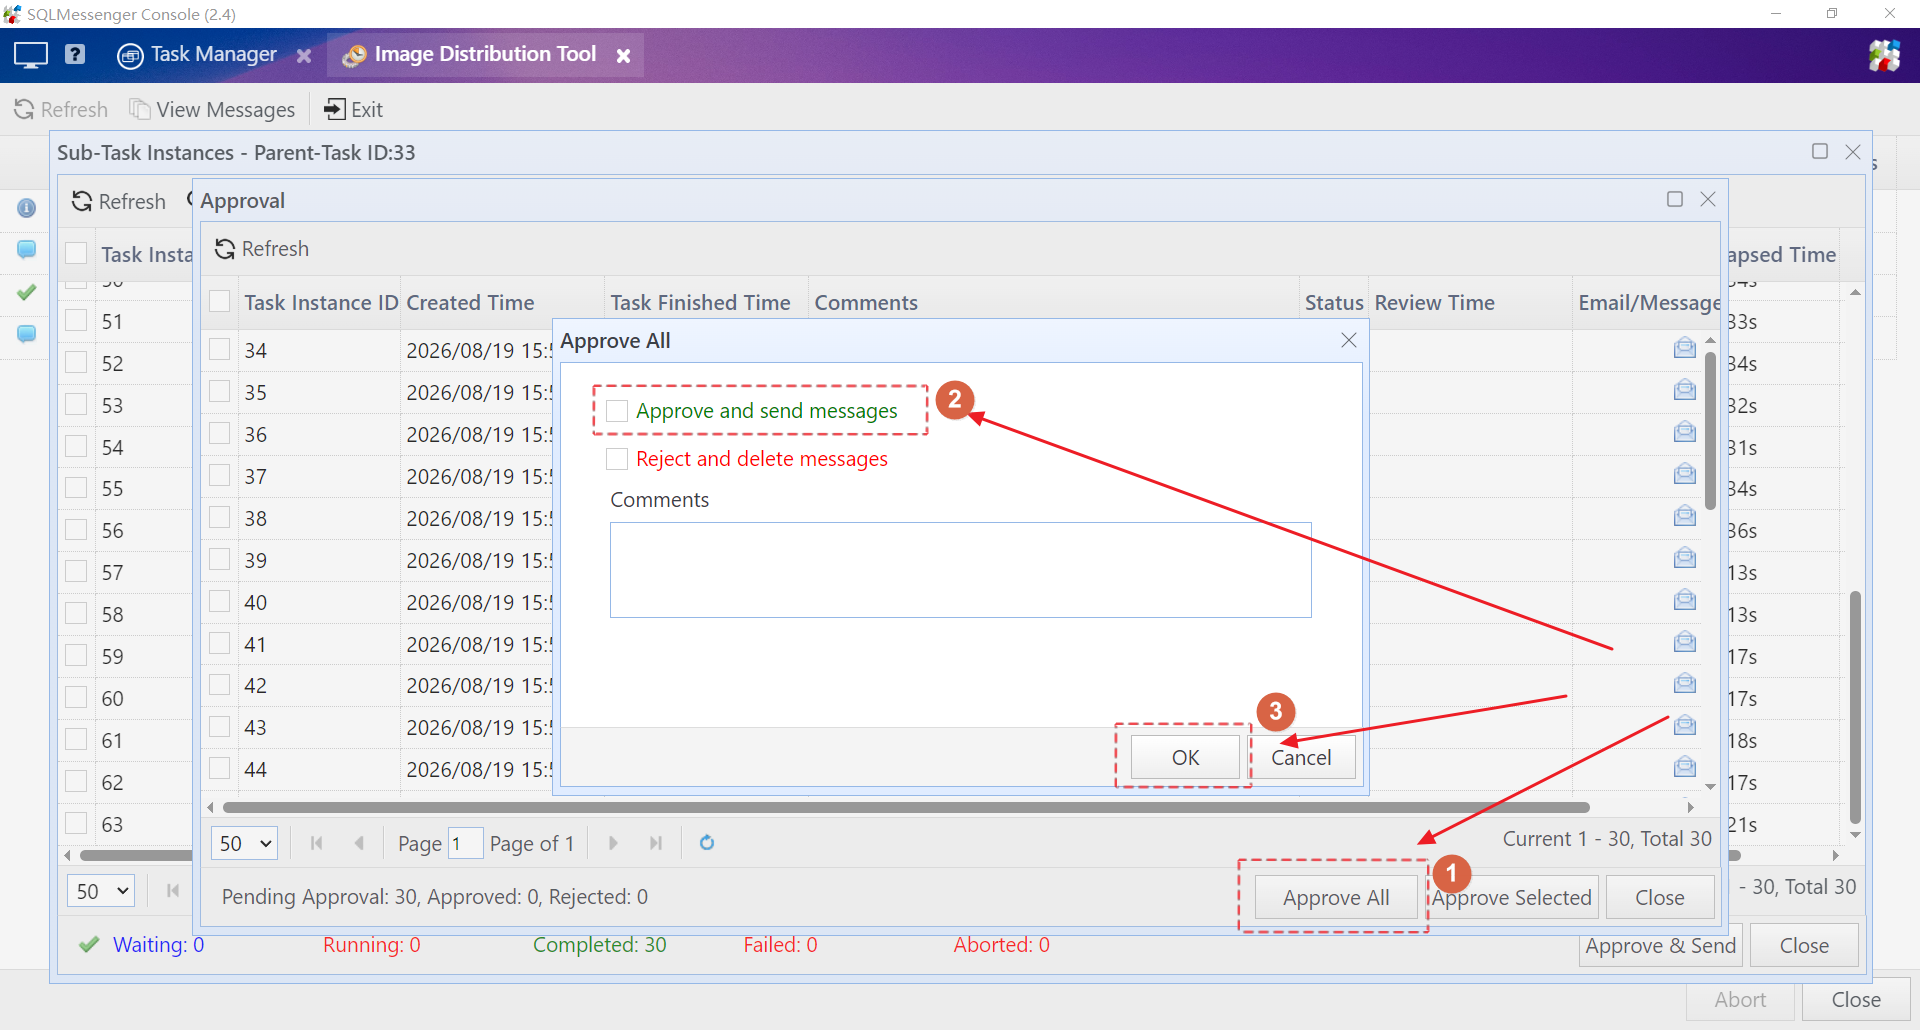
Step 6: Click the Approve All button, check Approve and send messages, then click OK. The system will now start sending these emails.
FAQ
Q: How do I urgently abort an ongoing email sending process?
A: First disable your email accounts in Email Account Manager, the system will stop sending messages using these accounts. Next delete unsent email records inside the Outbox, then re-enable your email accounts in Email Account Manager. For detailed steps, refer to How to urgently abort an ongoing email sending process.