- 1. Overview
- 2. Backing Up SQLMessenger Data
- 3. Restoring Data from a Backup File
- 4. Migrating SQLMessenger to a New Computer
- 5. Q&A
- 6. Technical Support
1. Overview
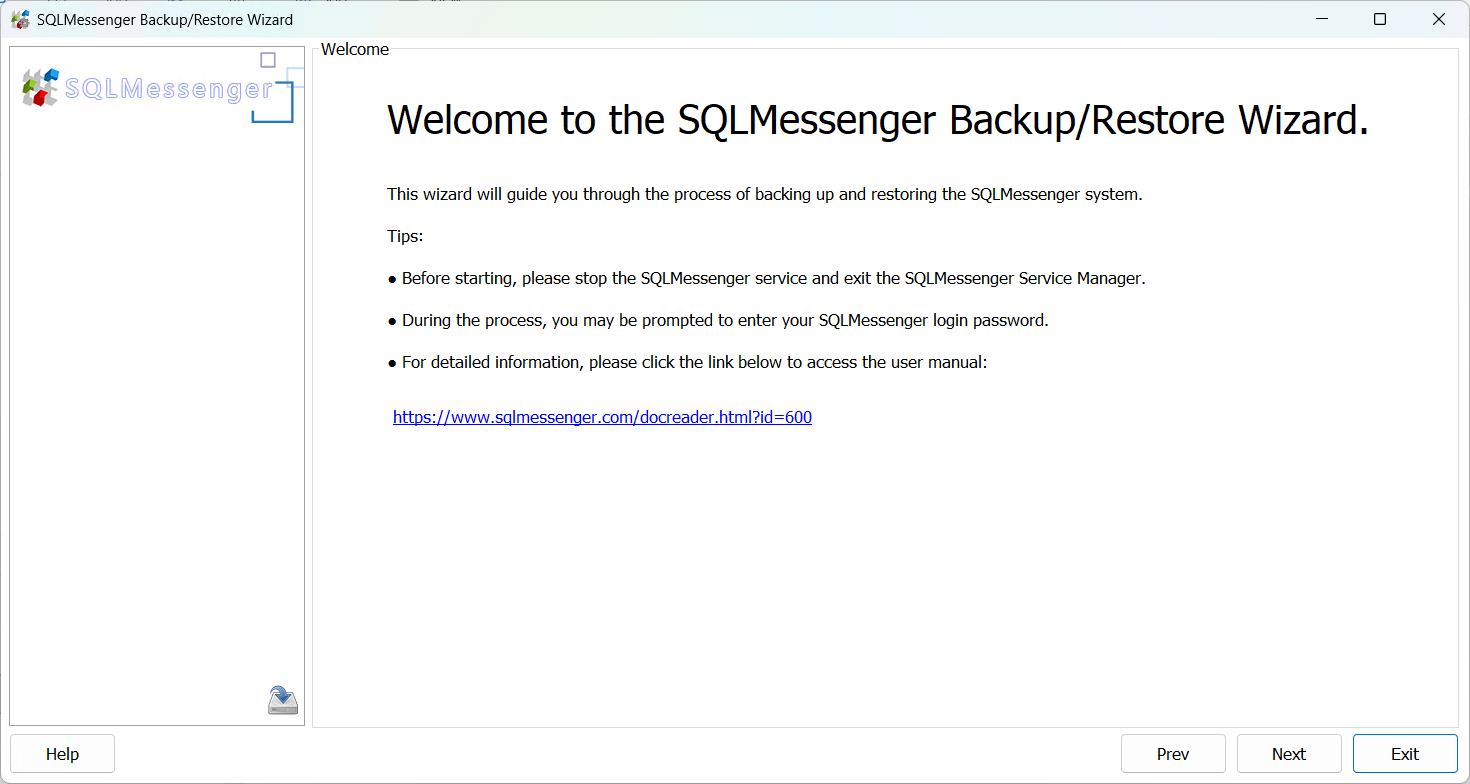
Starting from version 2.3.0004, SQLMessenger provides a backup/restore utility. You can also use this utility to migrate SQLMessenger data to a new computer when needed. This document introduces the usage and precautions of the backup utility.
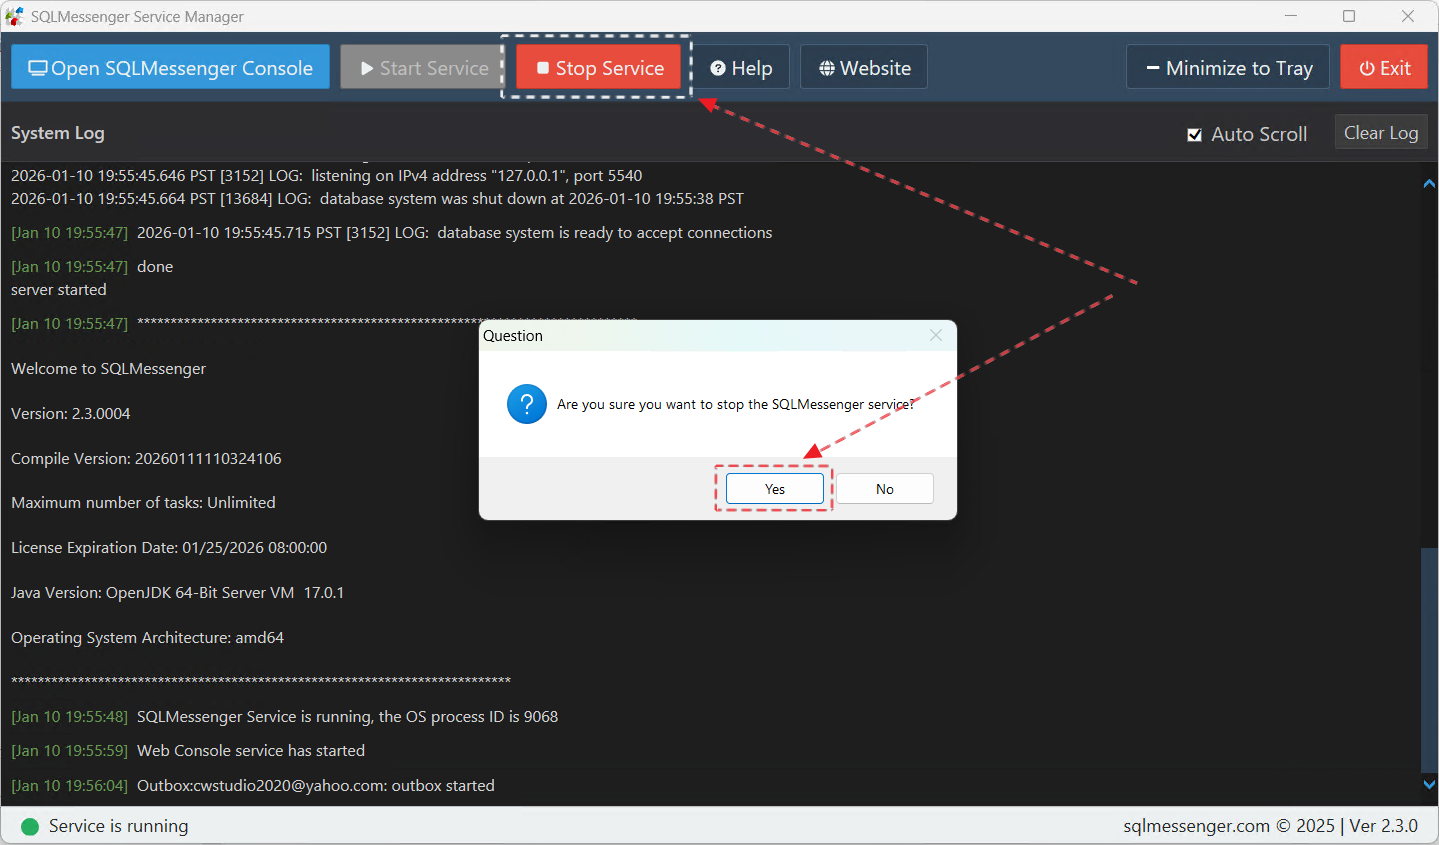
Note: Before starting any backup or restore operation, you must stop the SQLMessenger service.
2. Backing Up SQLMessenger Data
Step 1: Run SQLMessengerBackupWizard.exe located in the bin folder under the SQLMessenger installation directory.
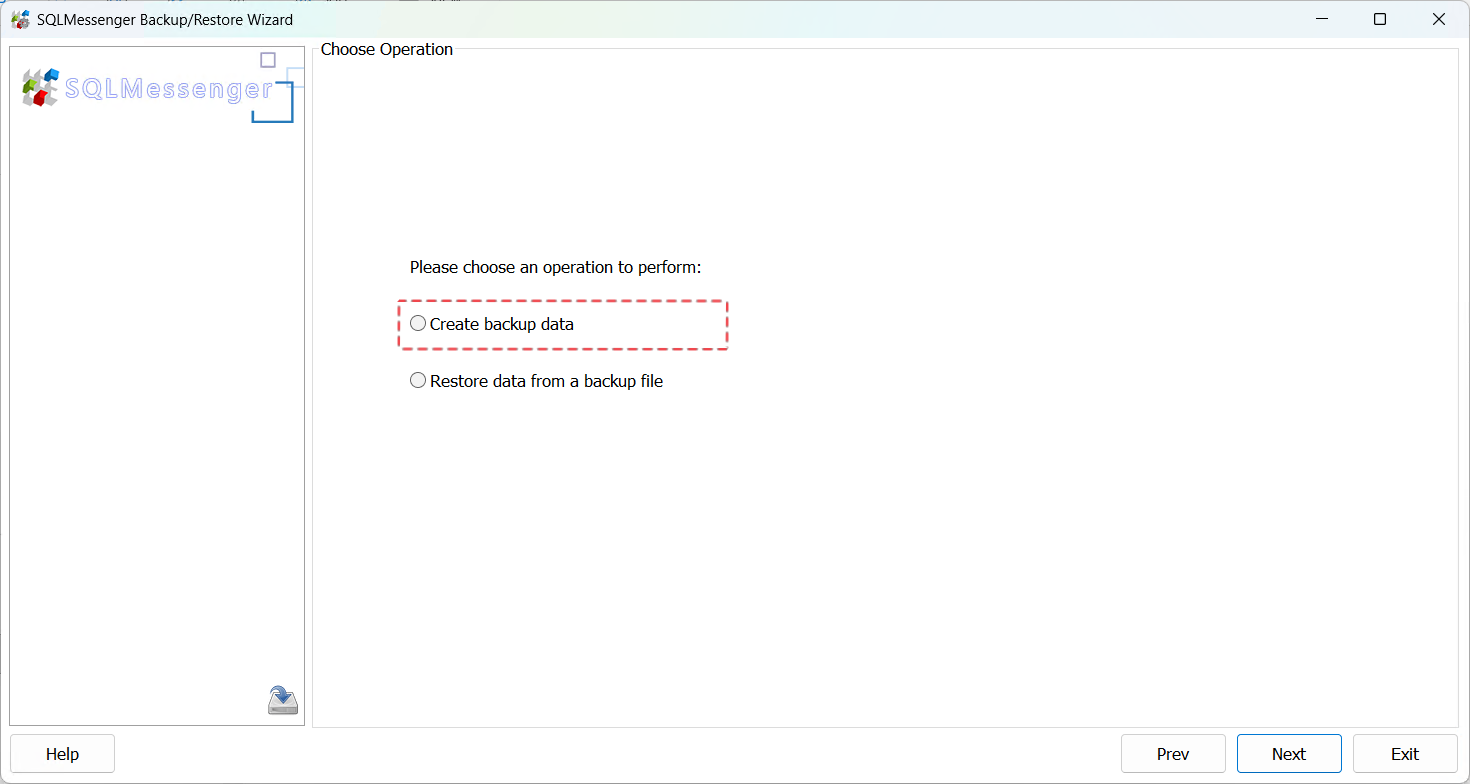
Step 2: On the "Choose Operation" panel, select the operation to perform. Here, choose "Create Backup Data".
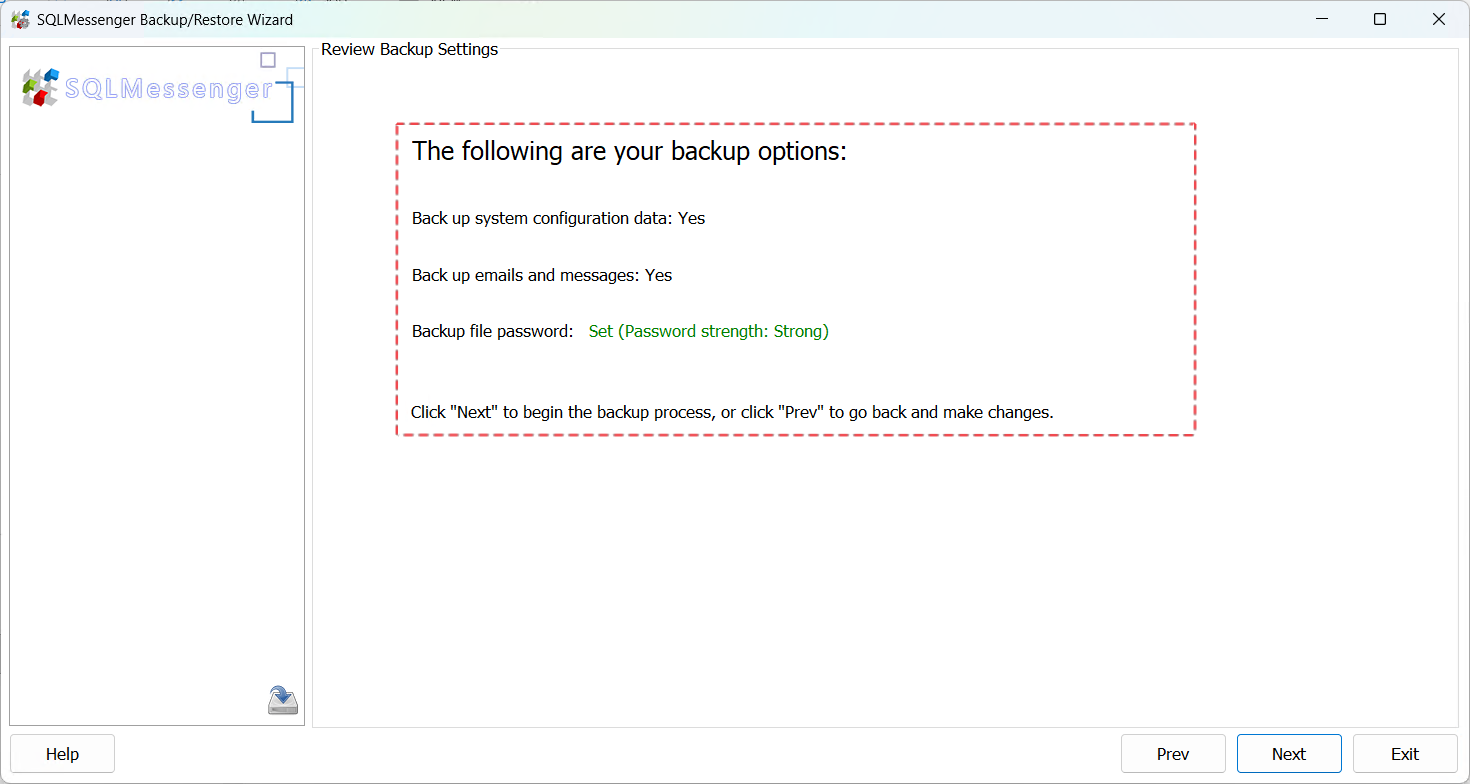
Step 3: Set a password for the backup file. You will need to enter this password when restoring data from this backup file later.
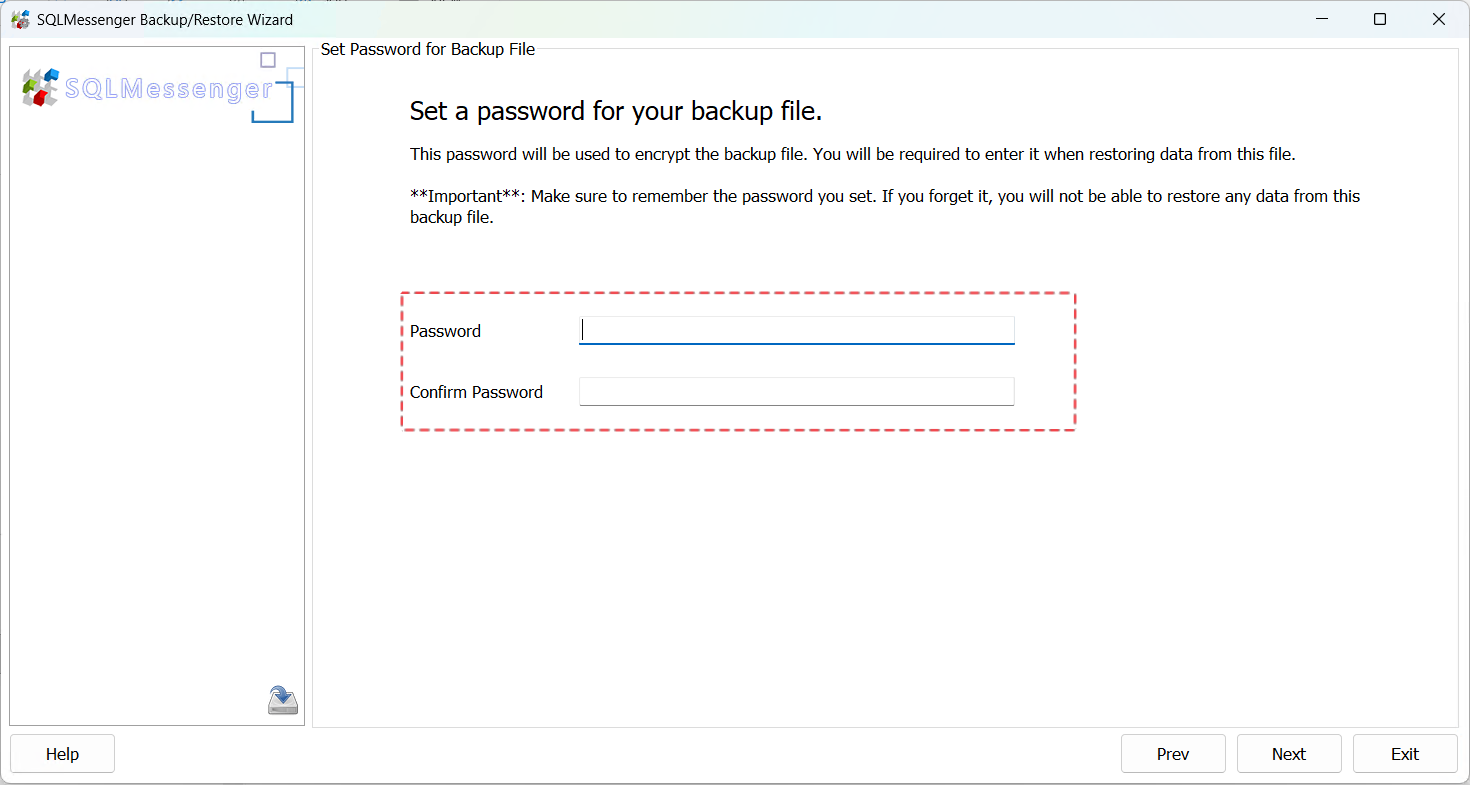
Important: Please remember the password you set. If the password is lost, you will not be able to restore data from this backup file.
Step 4: Review your backup options. Click "Next" after confirmation.
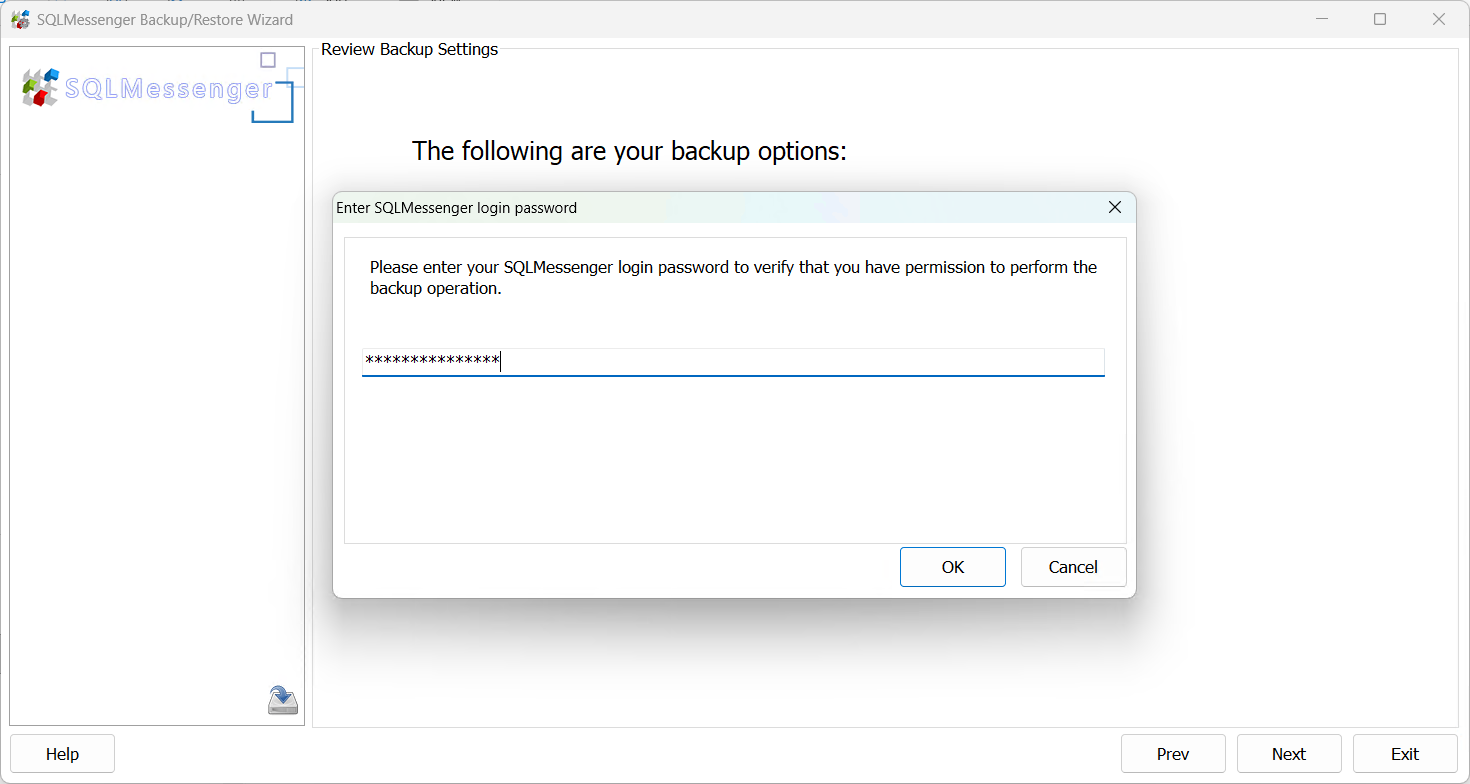
Step 5: Enter your SQLMessenger login password, then click "OK". The backup utility will start the backup operation.
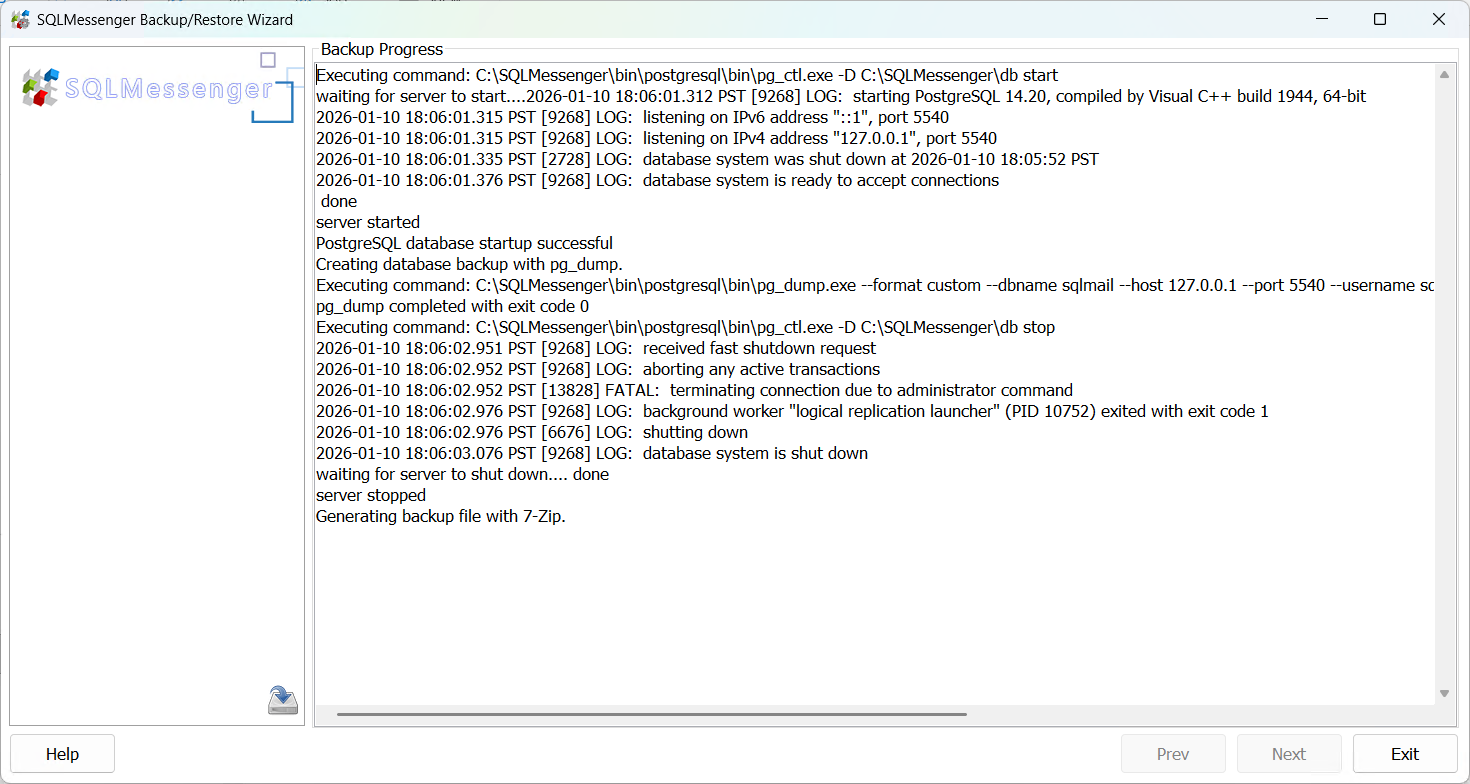
Step 6: You can see the backup progress on the interface. The backup duration mainly depends on your total data volume. It will take longer if the email data and PostgreSQL database files are large.
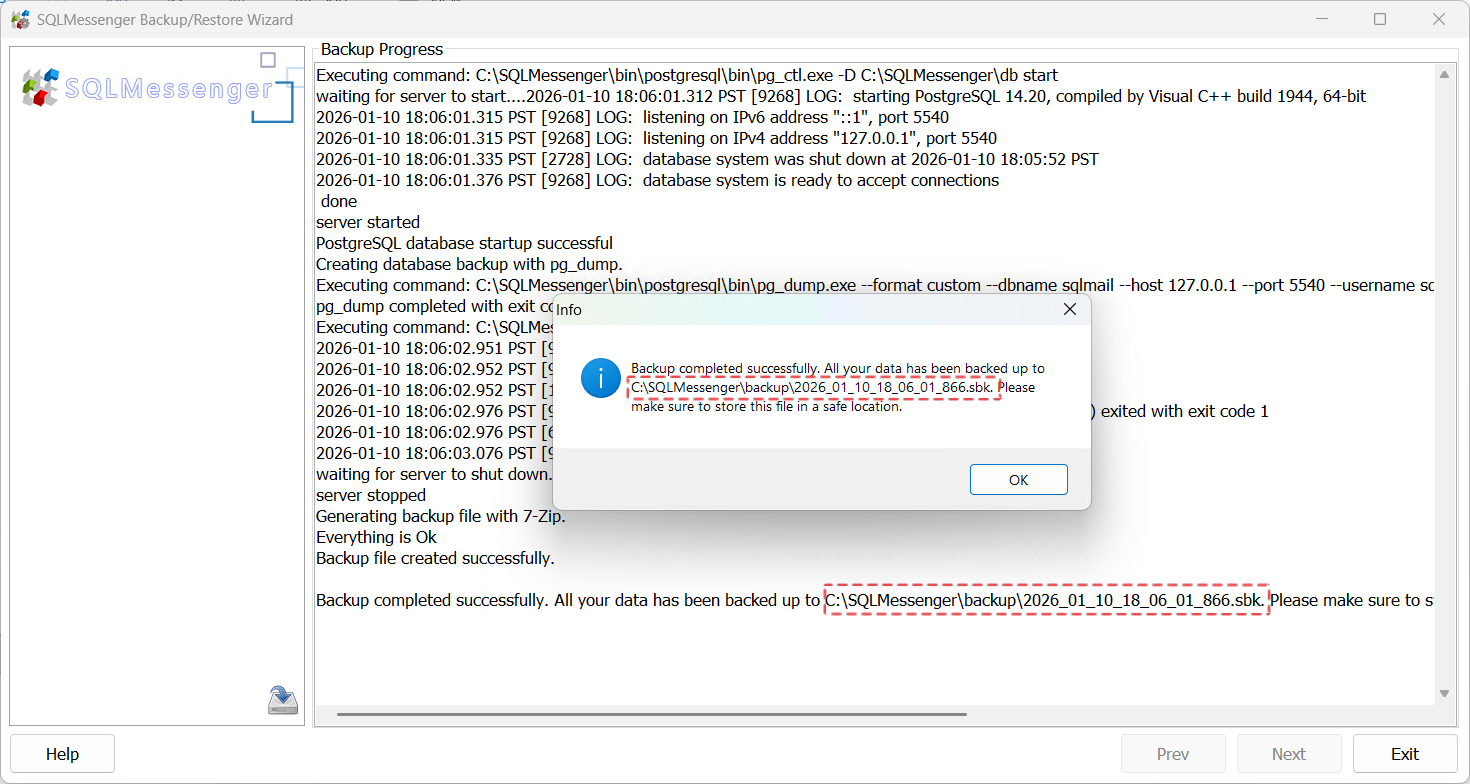
Step 7: After the backup is complete, the utility will display the name of the generated backup file. The backup file is located in the "backup" folder under the SQLMessenger installation directory. You can move this backup file to a safe location for storage.

Note: The backup file contains all your SQLMessenger configuration information and email data. Please store it securely to prevent information leakage.
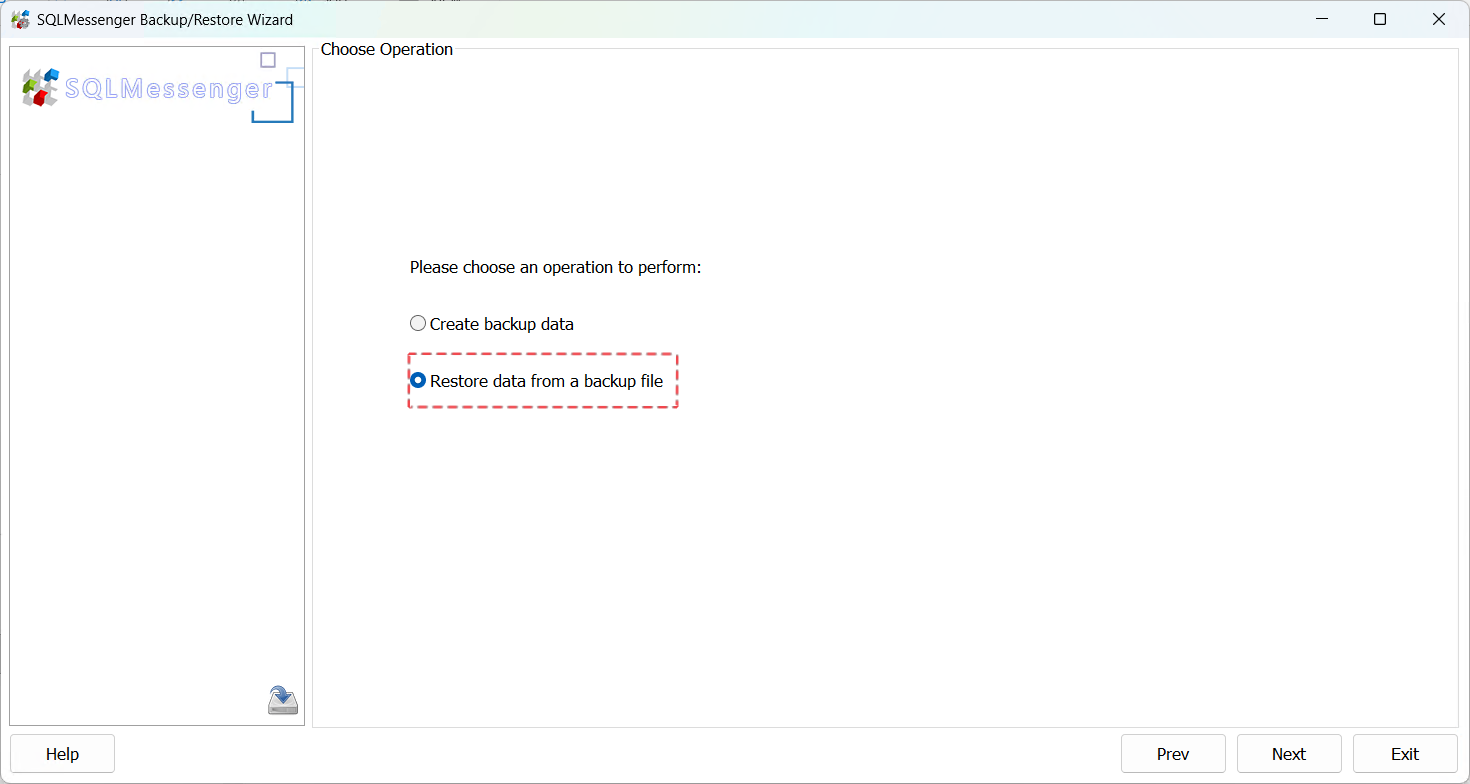
3. Restoring Data from a Backup File
Step 1: Run SQLMessengerBackupWizard.exe located in the bin folder under the SQLMessenger installation directory.
Step 2: On the "Choose Operation" panel, select the operation to perform. Here, choose "Restore data from a backup file".
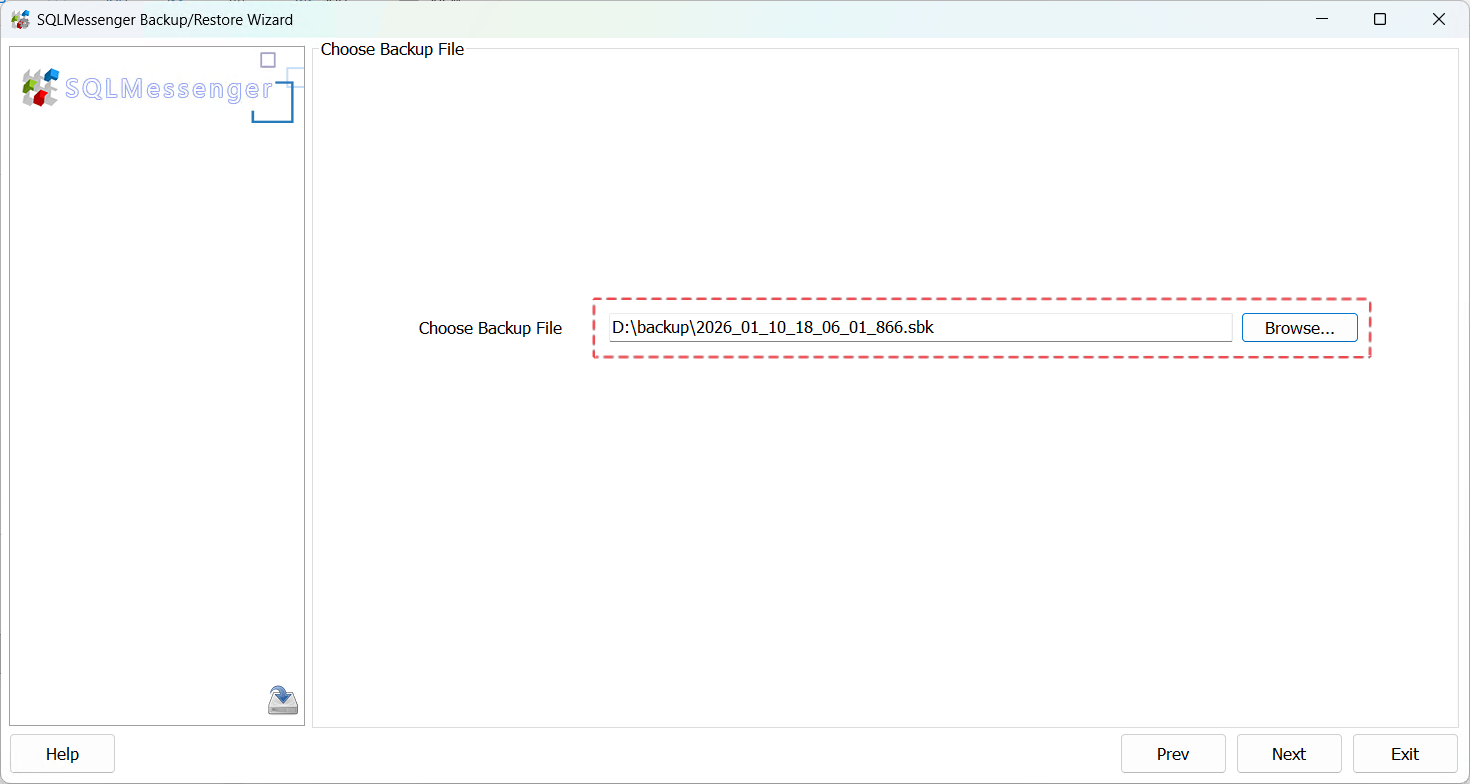
Step 3: Select a backup file. The backup utility will restore SQLMessenger data from this file.
Step 4: Enter the password you set for this backup file when it was created.
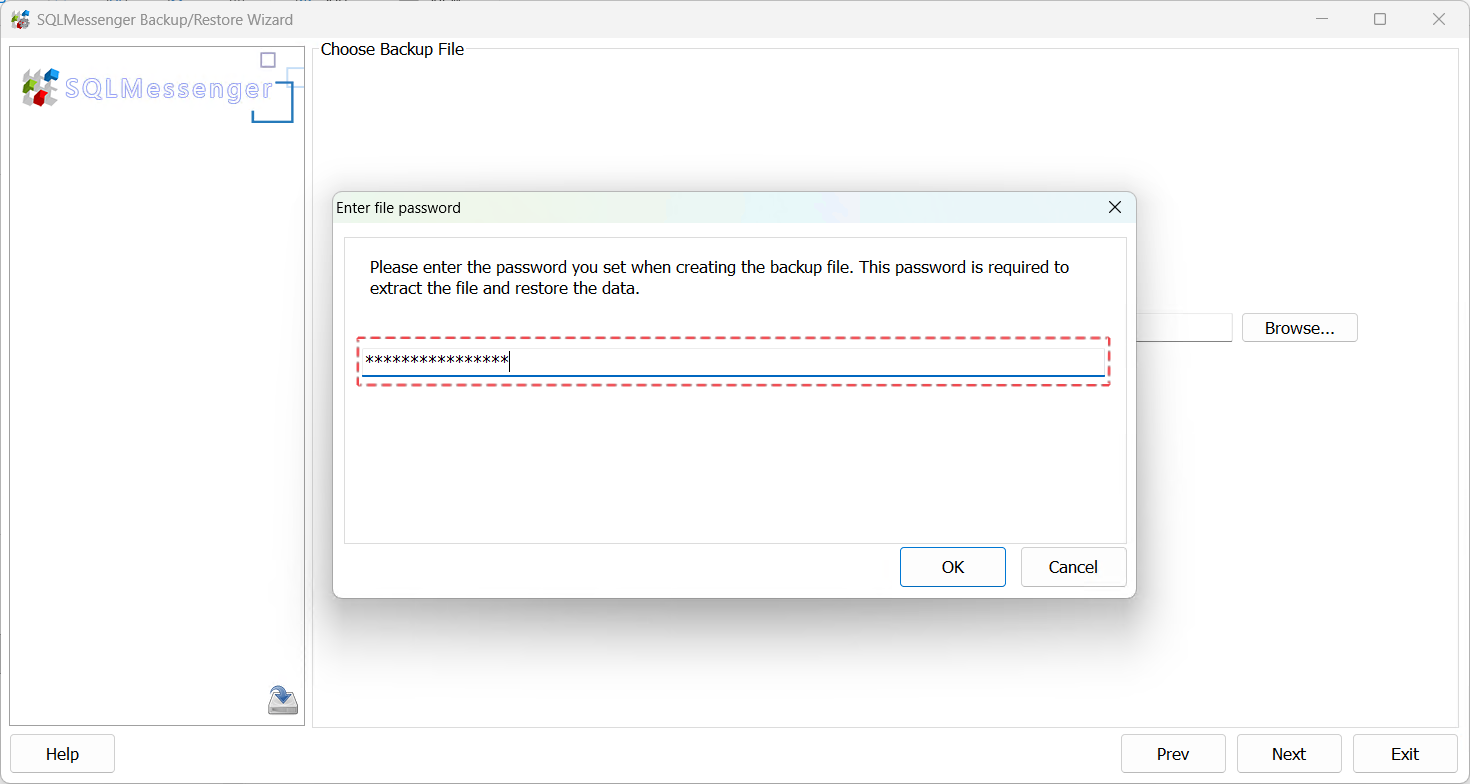
Important: If you have forgotten the backup file password, you will not be able to restore data from this file.
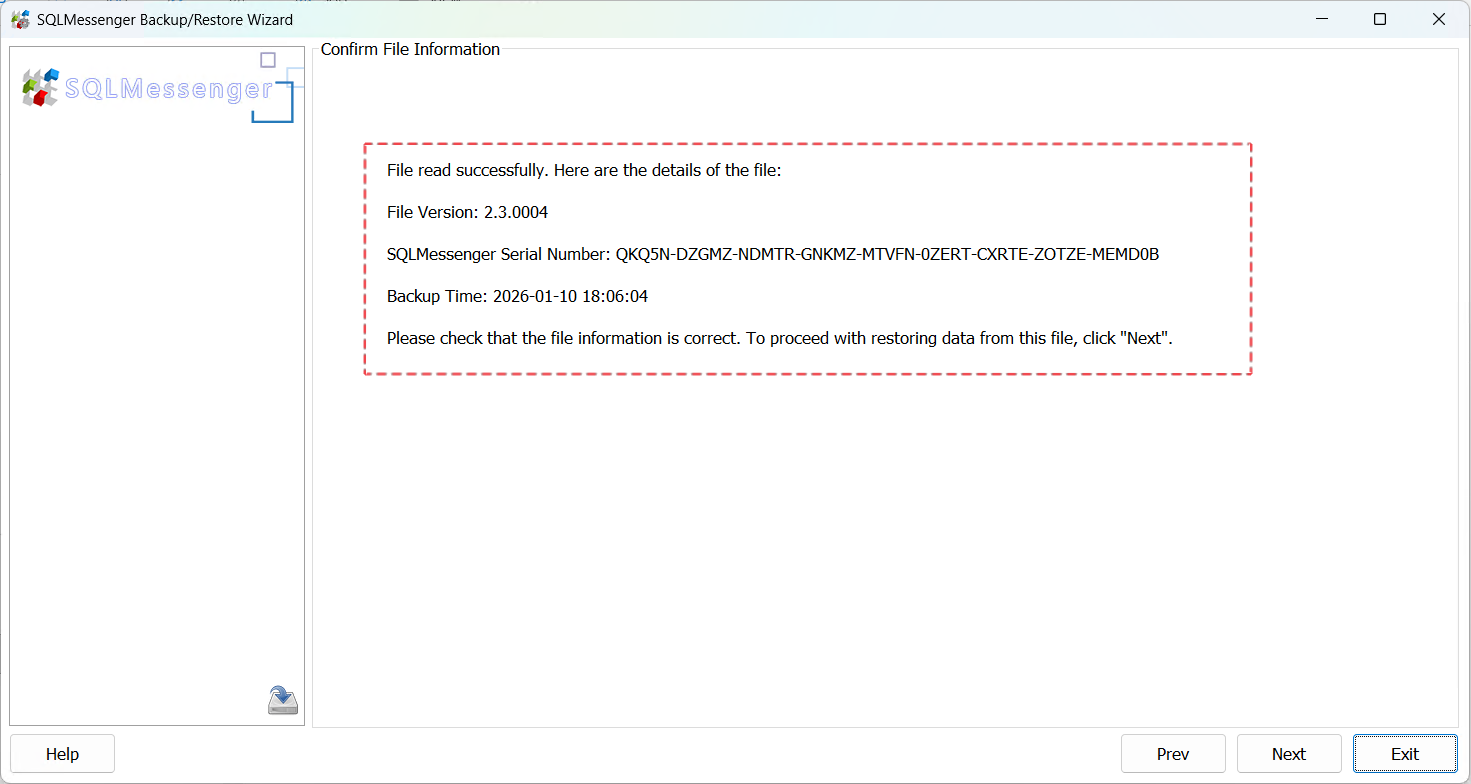
Step 5: After clicking "OK", the system will read and display the information of your selected backup file. After confirming it's correct, click "Next" to start the data restoration process.
Step 6: After data restoration is complete, the system will display the result.
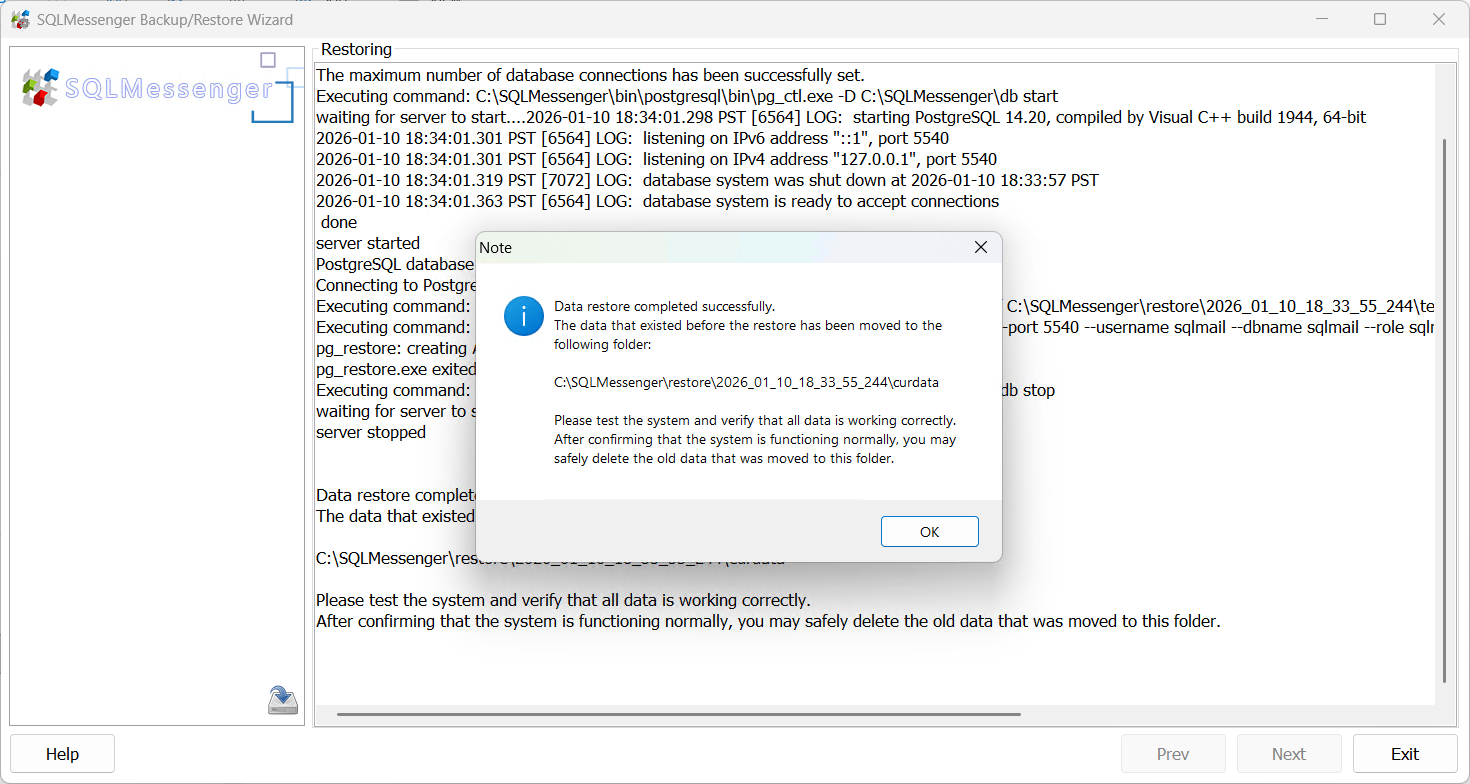
After data restoration is complete, you can exit the backup utility, start the SQLMessenger service, and check if all tasks are running normally.
4. Migrating SQLMessenger to a New Computer
If you need to migrate SQLMessenger to a new computer, follow these steps:
Step 1: Install SQLMessenger on the new computer. After installation, start the SQLMessenger service and log in once to complete system initialization. Note: The version of the newly installed SQLMessenger must not be lower than the version on your original computer.
Step 2: On the original computer, back up SQLMessenger configuration data as described in Part 2 of this document.
Step 3: Copy the backup data file to the new computer, then restore the data as described in Part 3 of this document.
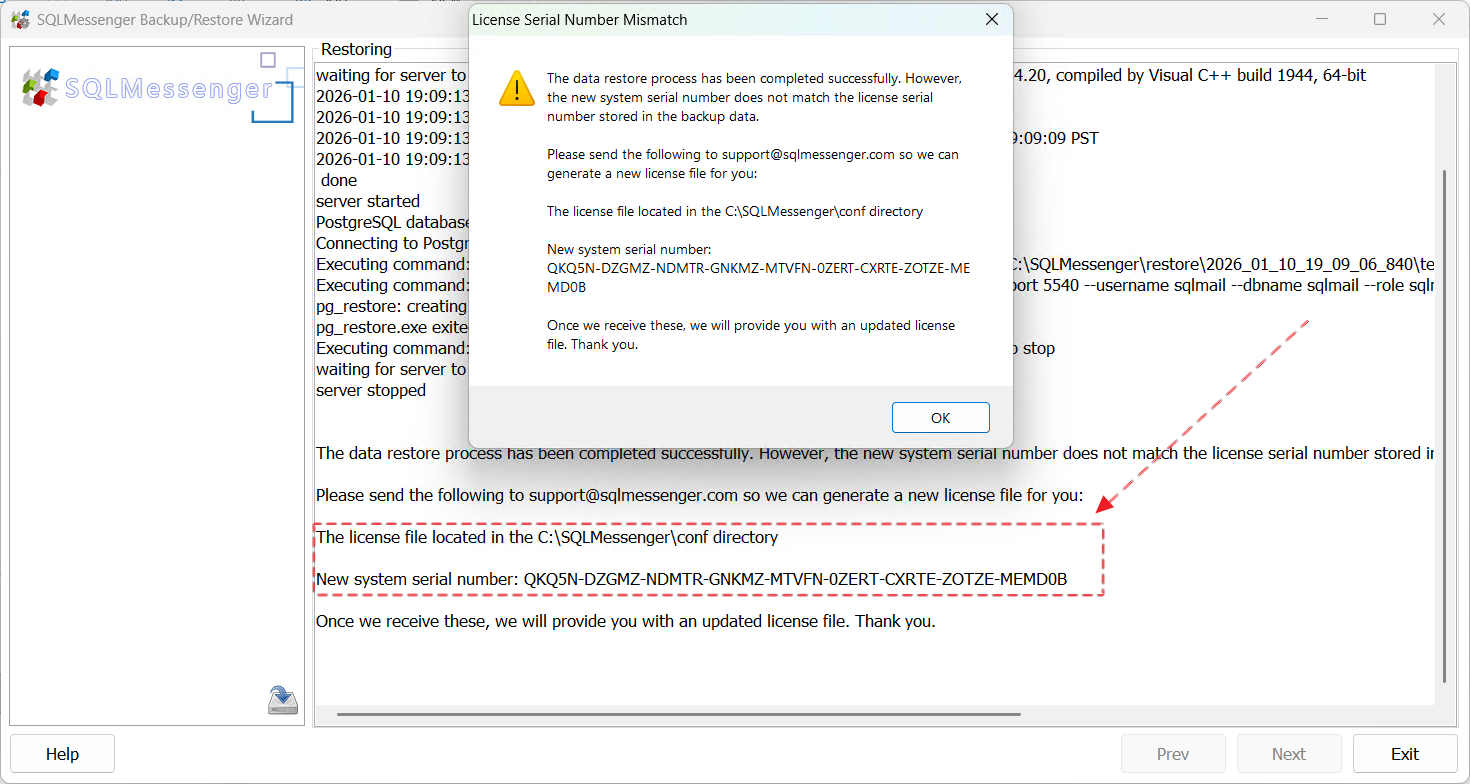
Step 4: When the data restoration is complete, the SQLMessenger serial number for the new computer will be displayed. Send this serial number and the license file located in the conf folder under the SQLMessenger installation directory to support@sqlmessenger.com. We will create a new license file for your new computer and assist you in completing the system migration.
5. Q&A
Q: An error occurred during data restoration, or I selected a wrong backup file for restoration. What should I do?
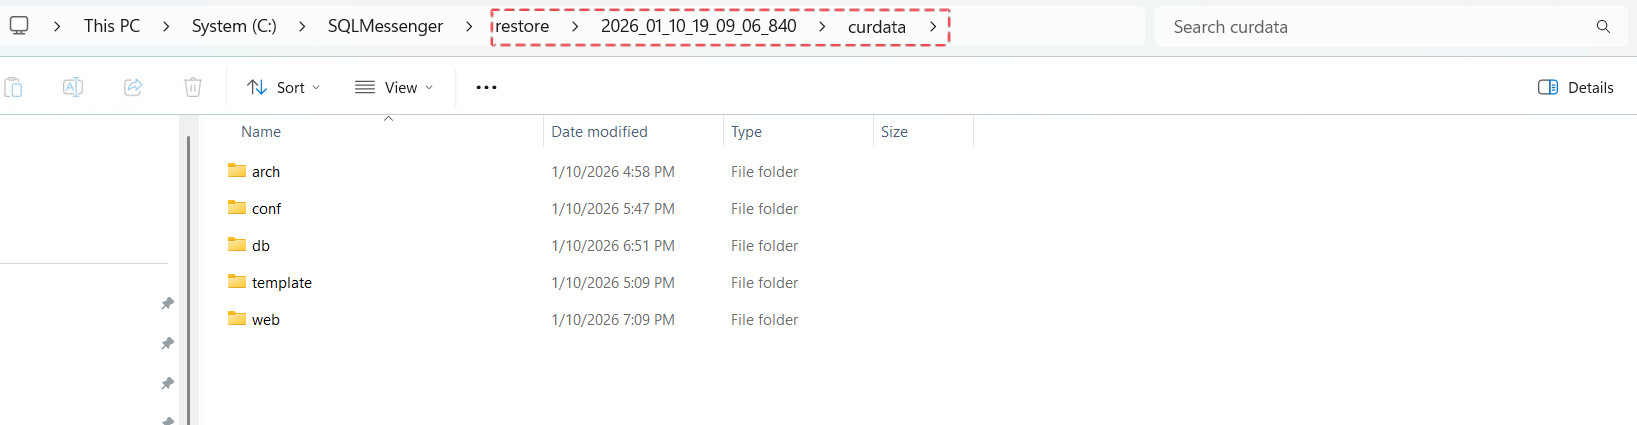
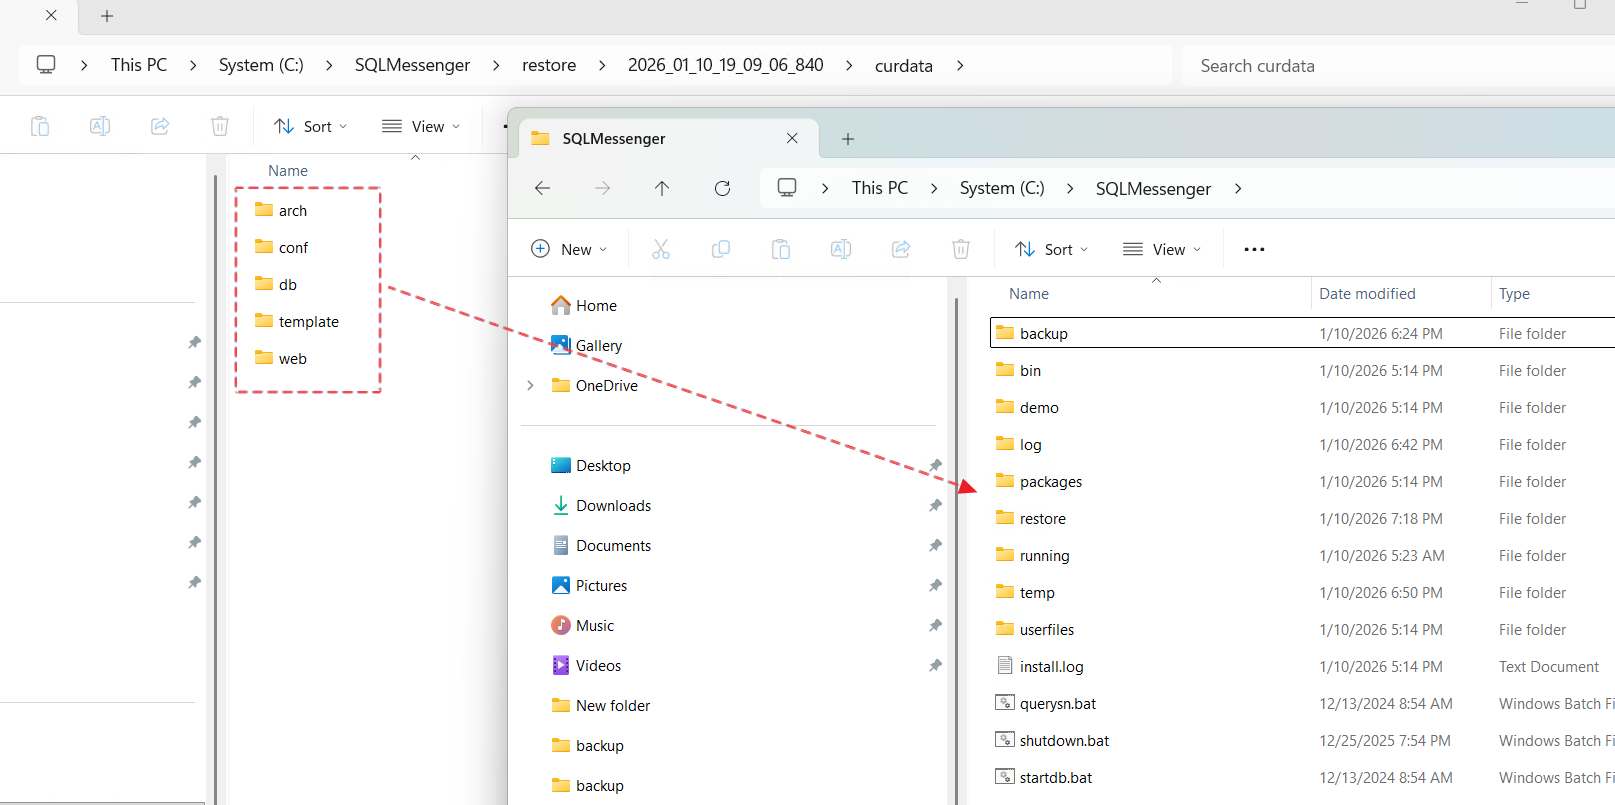
A: When restoring SQLMessenger data, the system backs up the current data to the "restore" folder under the SQLMessenger installation directory. For example, if you performed a data restoration at 2026-01-10 19:09:06.840 (ISO 8601 format), the data before restoration will be saved in SQLMessenger\restore\2026_01_10_19_09_06_840\curdata.
To roll back to the data before restoration, please follow these steps:
Step 1: Stop the SQLMessenger service.
Step 2: Find the corresponding curdata folder in the restore directory and check which folders are inside curdata.
Step 3: In the SQLMessenger installation directory, delete folders with the same names as those found in curdata.
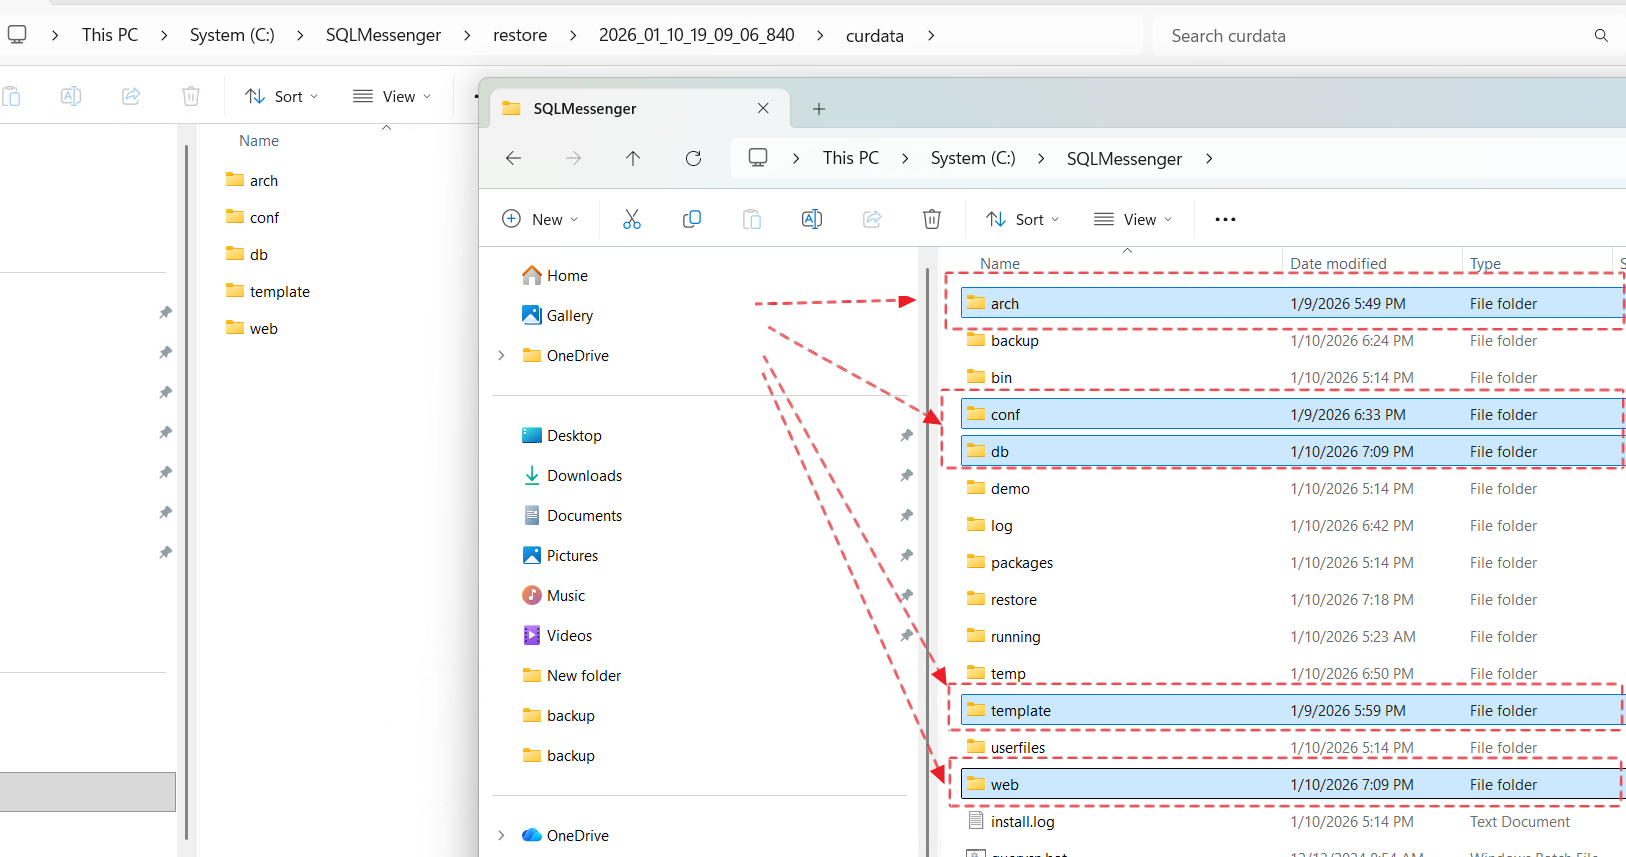
Step 4: Copy the corresponding folders from curdata to the SQLMessenger installation directory.
After copying, you can start the SQLMessenger service again or rerun the backup utility and select the correct data file for restoration.
6. Technical Support
If you encounter any issues while using the backup and restore features, please contact us for technical support.