- Overview
- 1. Design the Excel Template Spreadsheet
- 2. Create a Report Task in SQLMessenger and Attach a Custom Excel Template to the Task
Overview
The Simple Table feature of SQLMessenger enables users to quickly convert SQL query results into Excel spreadsheets. However, Simple Table offers limited formatting options and cannot generate complex report layouts.
For example, if you need to display a field value in currency format within Excel (e.g., show 123.45 as €123.45), Simple Table cannot fulfill this requirement.
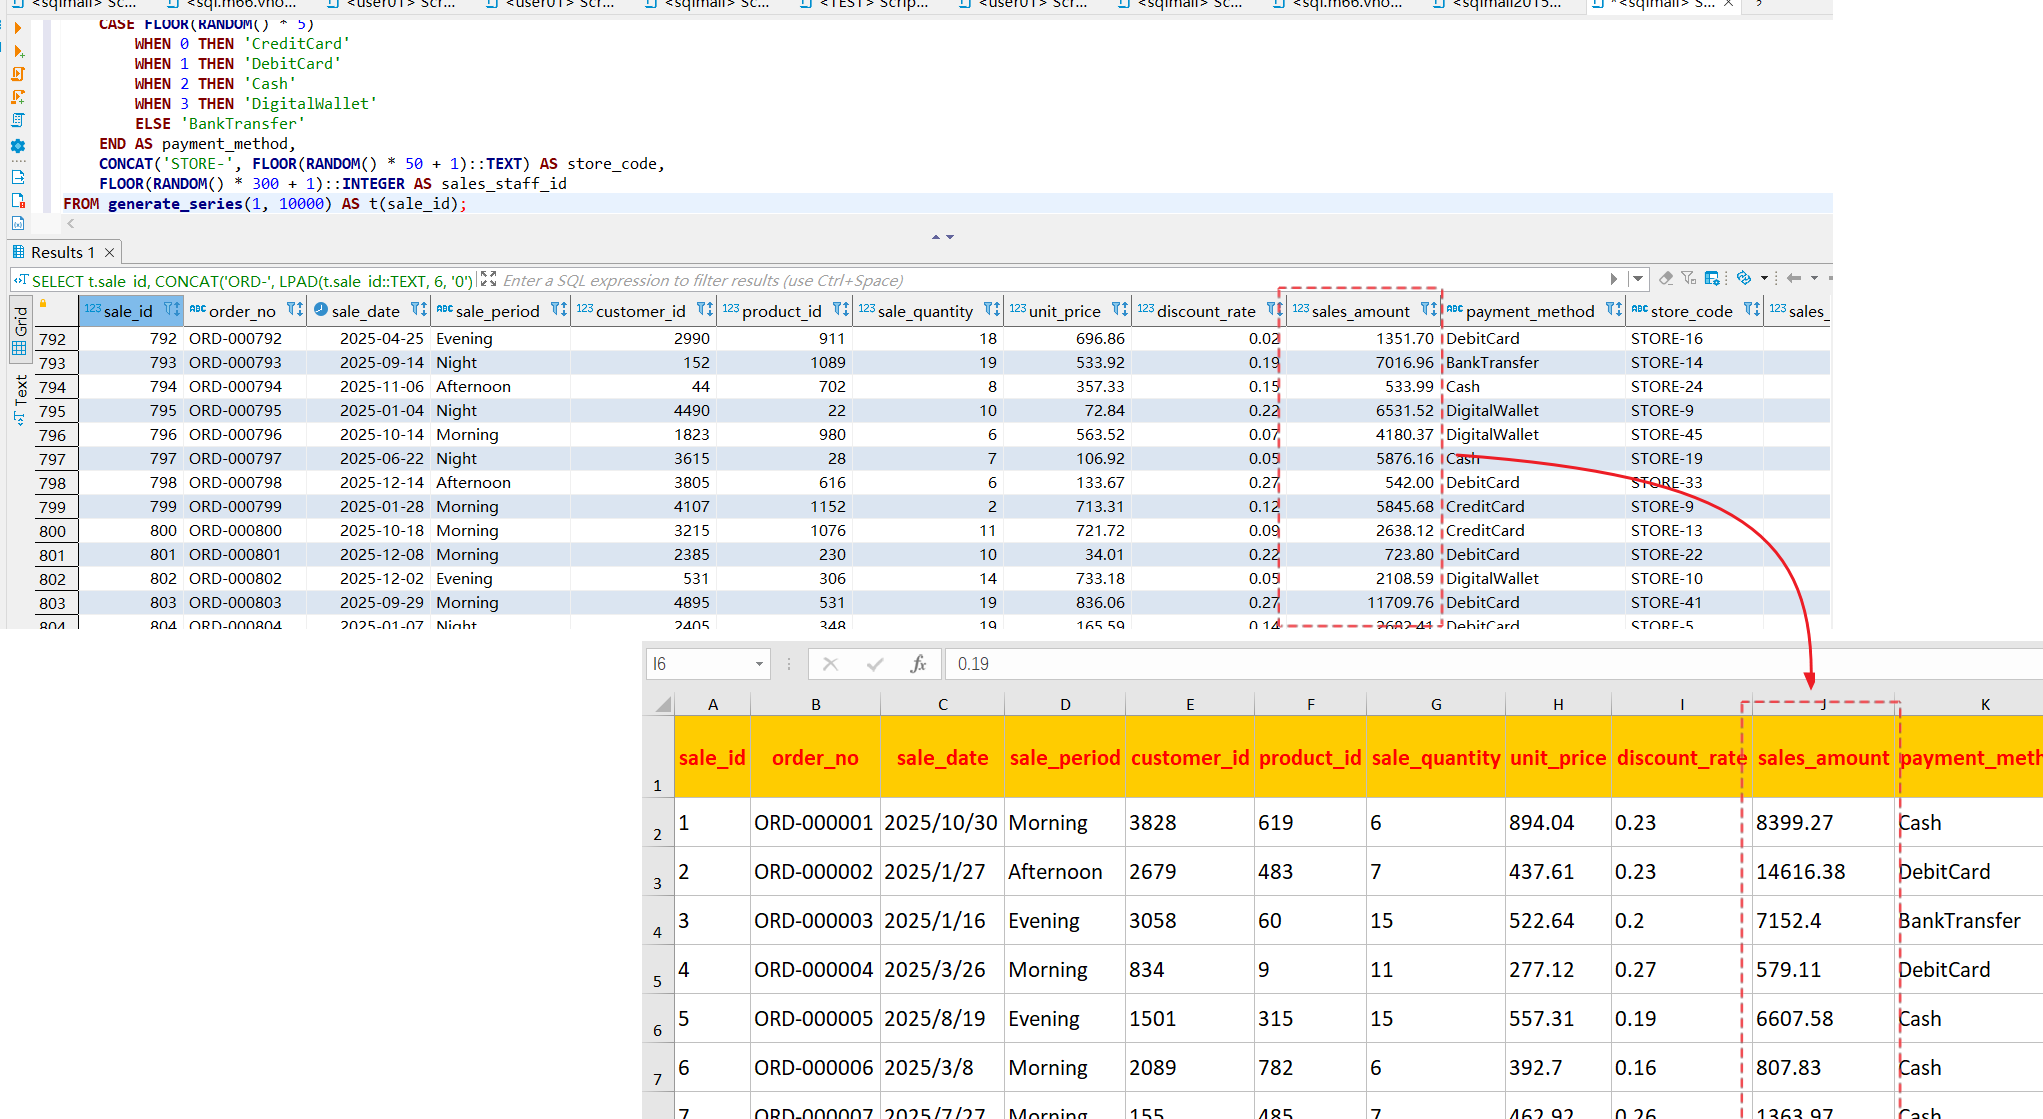
Convert SQL query results to Excel via Simple Table; the sales_amount field is shown as plain numeric values
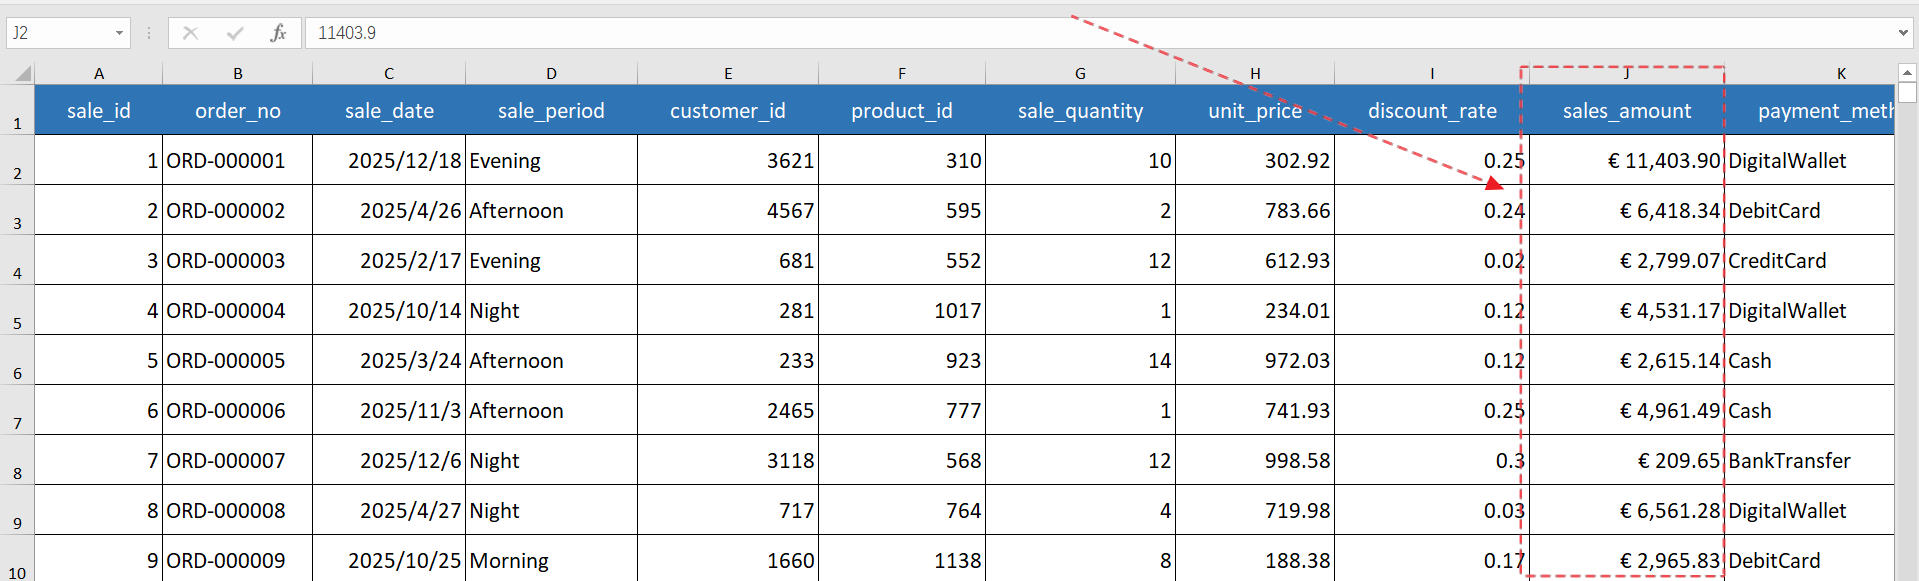
In such cases, you can use the Custom Excel Template provided by SQLMessenger to format the sales_amount field as currency, as demonstrated below:
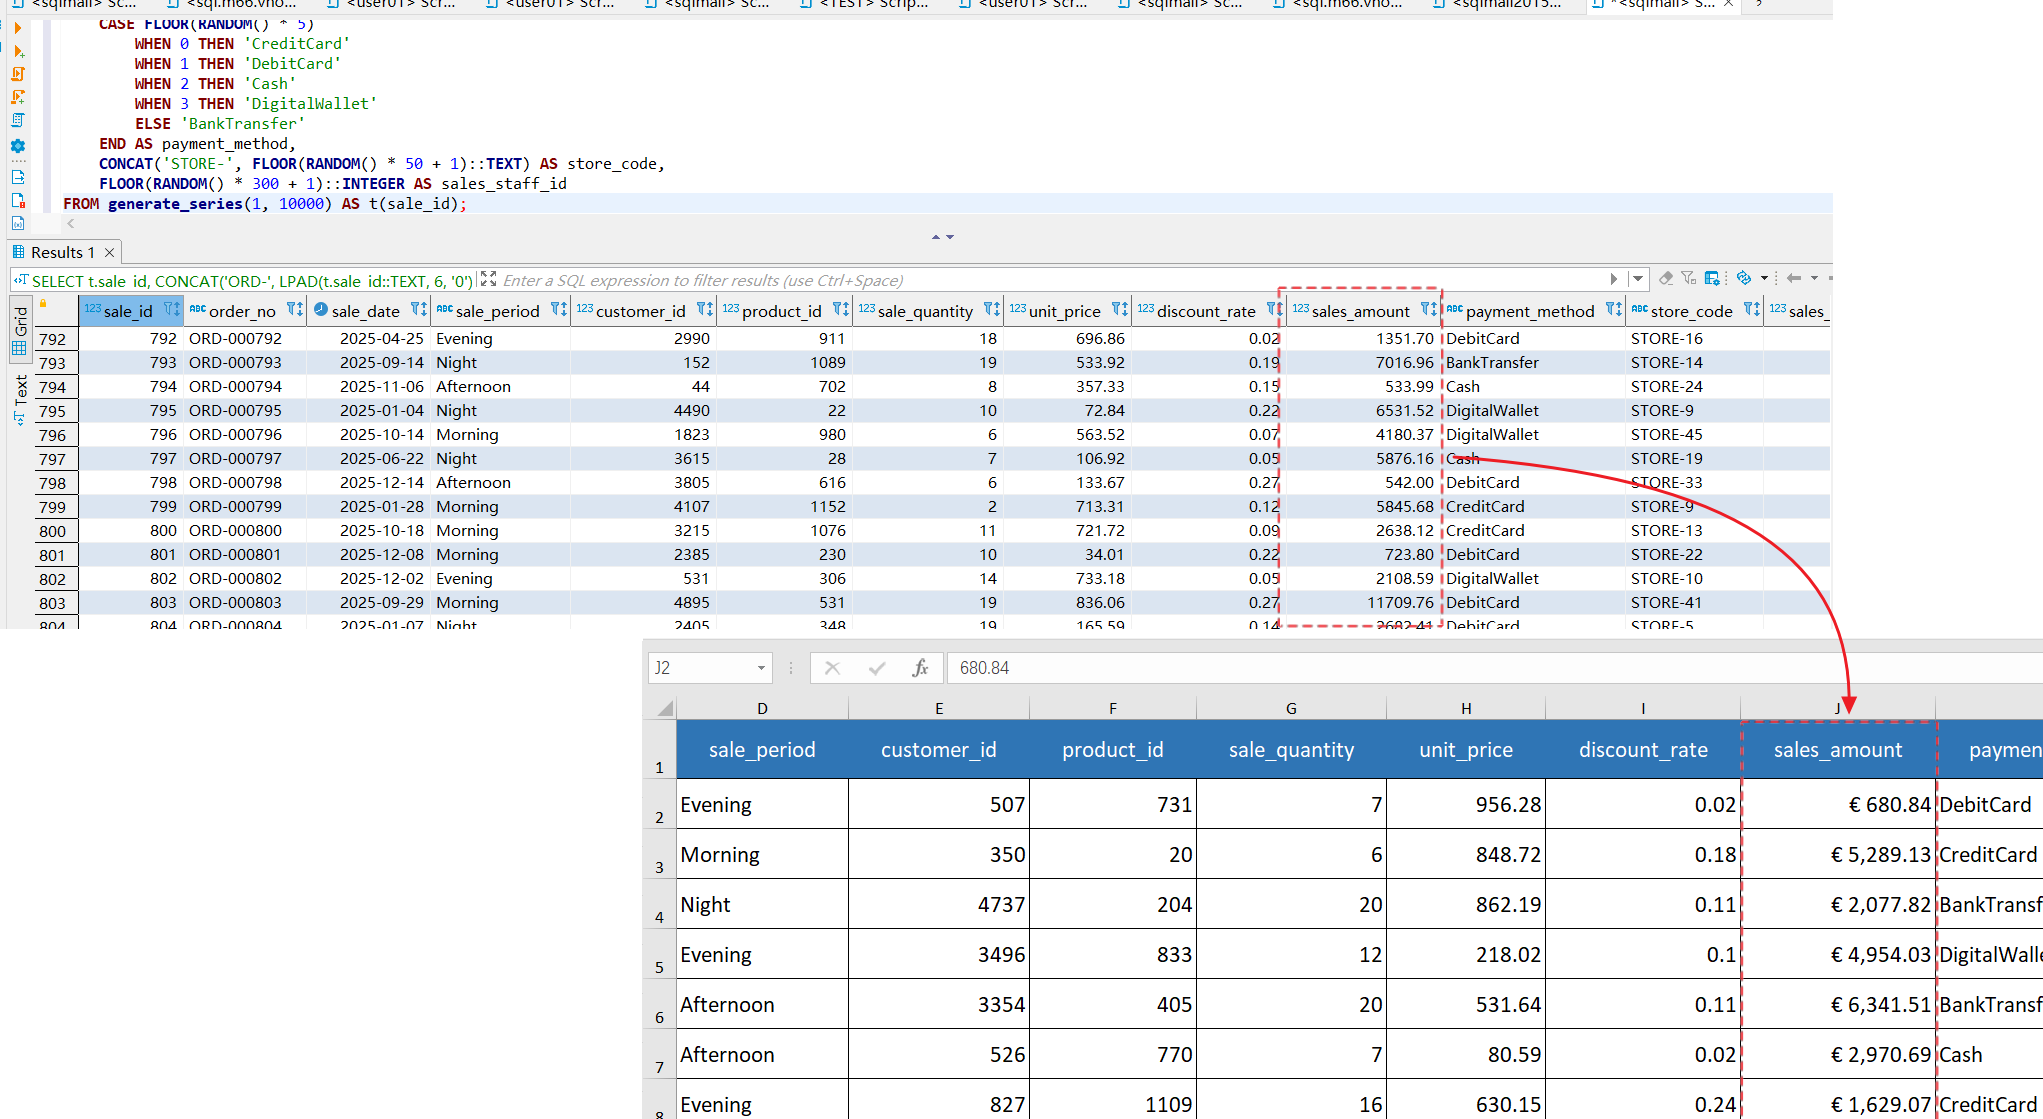
Format the sales_amount field as currency with Custom Excel Template
This document walks you through the specific configuration steps.
1. Design the Excel Template Spreadsheet
First, design a template spreadsheet in Excel. Add data cell markers to cells that will populate SQL query results, such as <%sales_amount%>.
Note: To simplify subsequent configuration, the names of data cells should ideally match the field names returned by your SQL query.
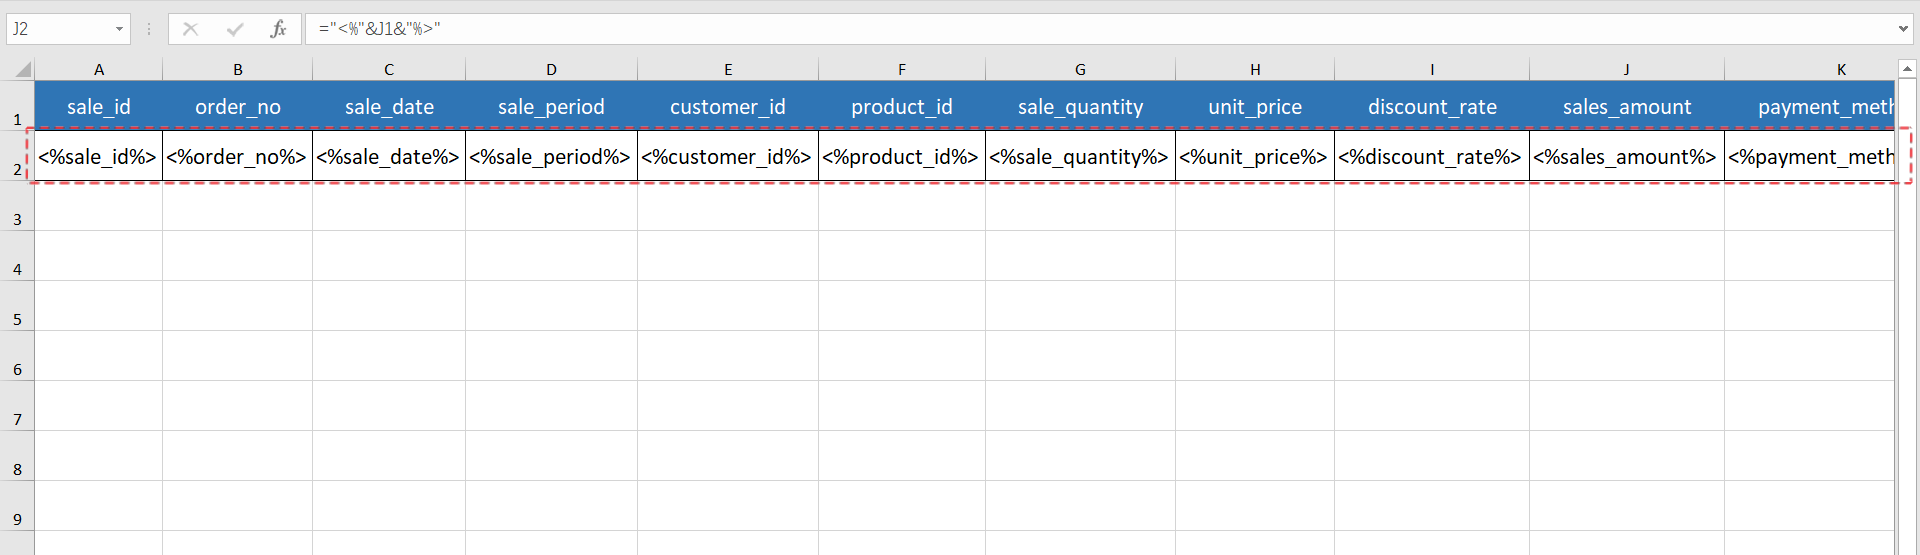
Design the Excel template spreadsheet and insert data cell markers
Tip: You can use Excel formulas to quickly generate data cell markers, e.g., ="<%"&A1&"%>"
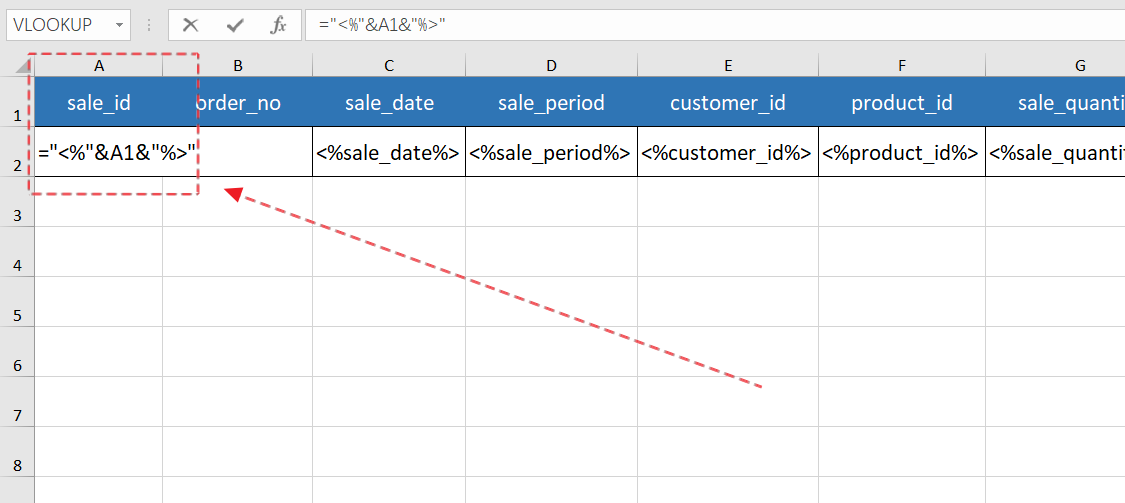
Generate data cell markers quickly using formulas
While designing the Excel template, set the target cells requiring currency formatting (e.g., cell J2 for sales_amount) to the currency cell format.
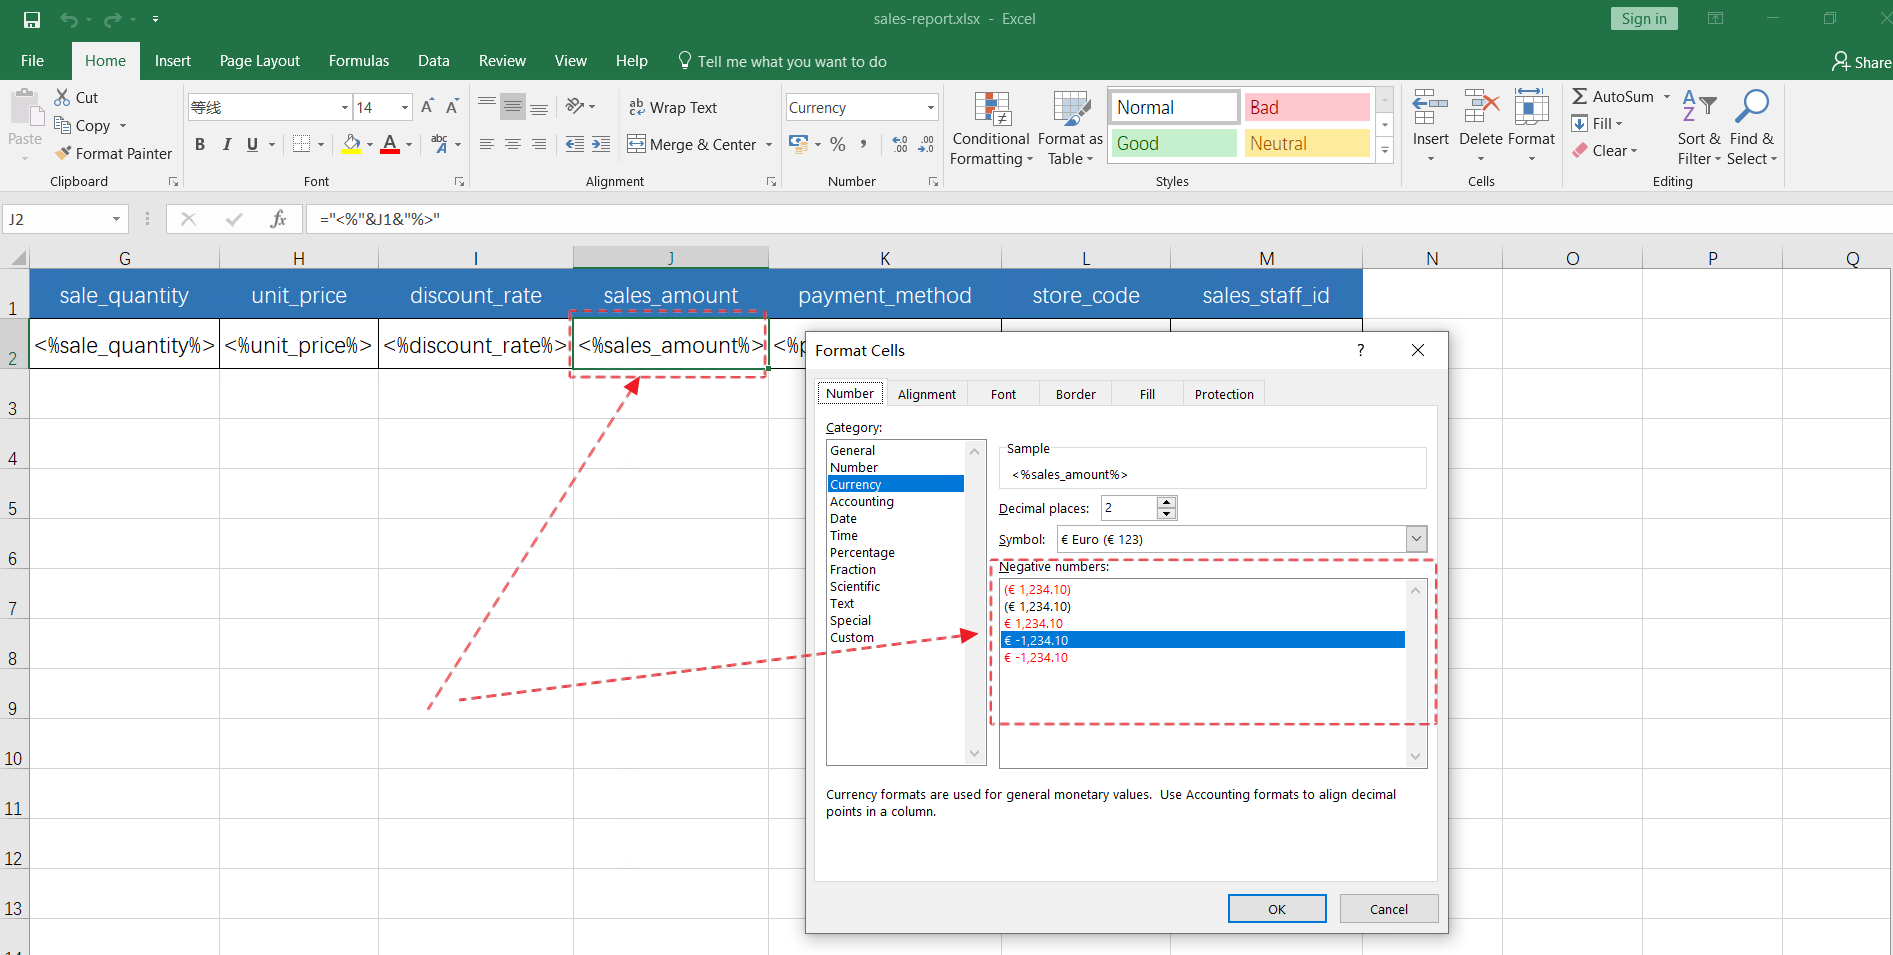
Set cell formatting properties
Once template design is complete, save the spreadsheet as an Excel file, for example sales-report-template.xlsx.
2. Create a Report Task in SQLMessenger and Attach a Custom Excel Template to the Task
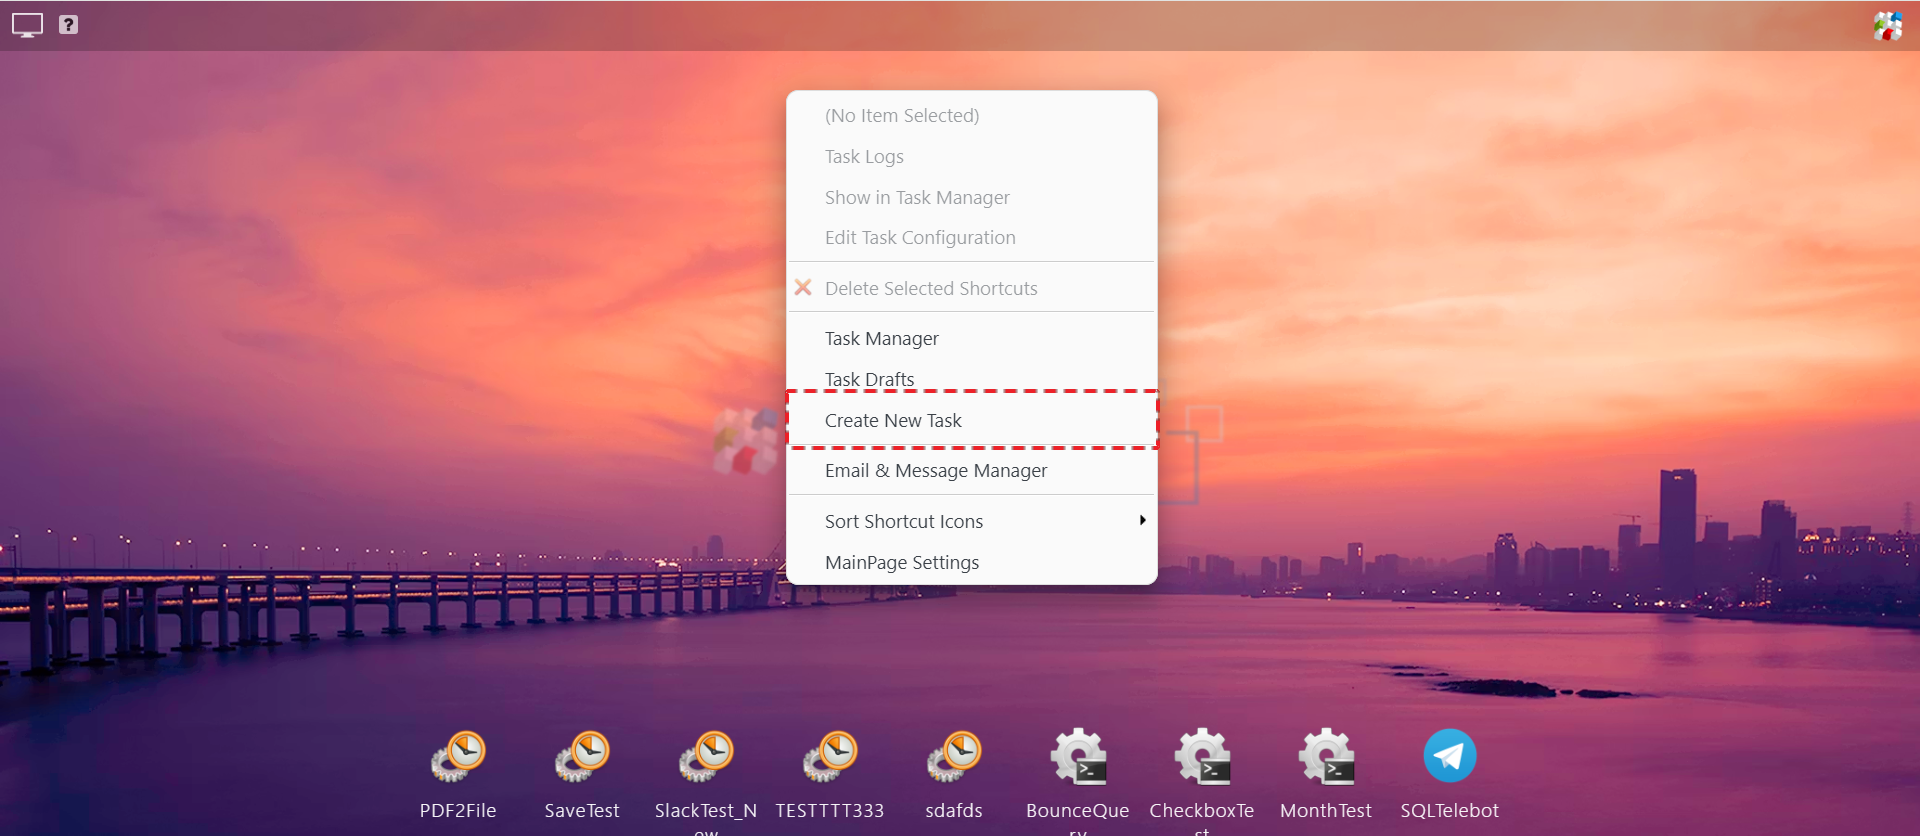
Step 1: Create a report task within SQLMessenger.
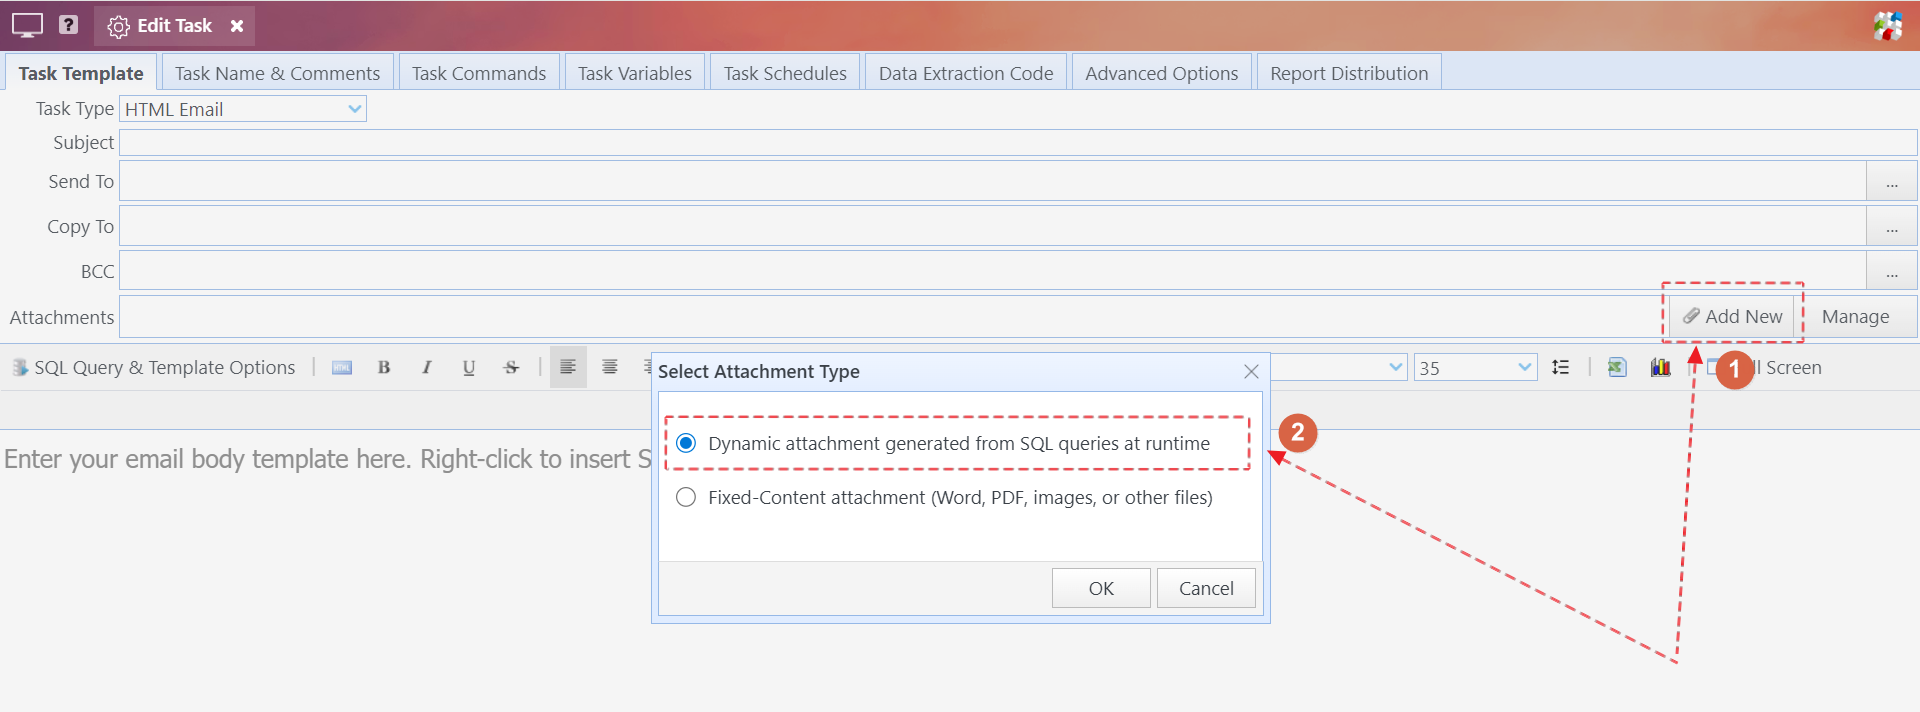
Step 2: Add a Custom Excel Template attachment to the task.
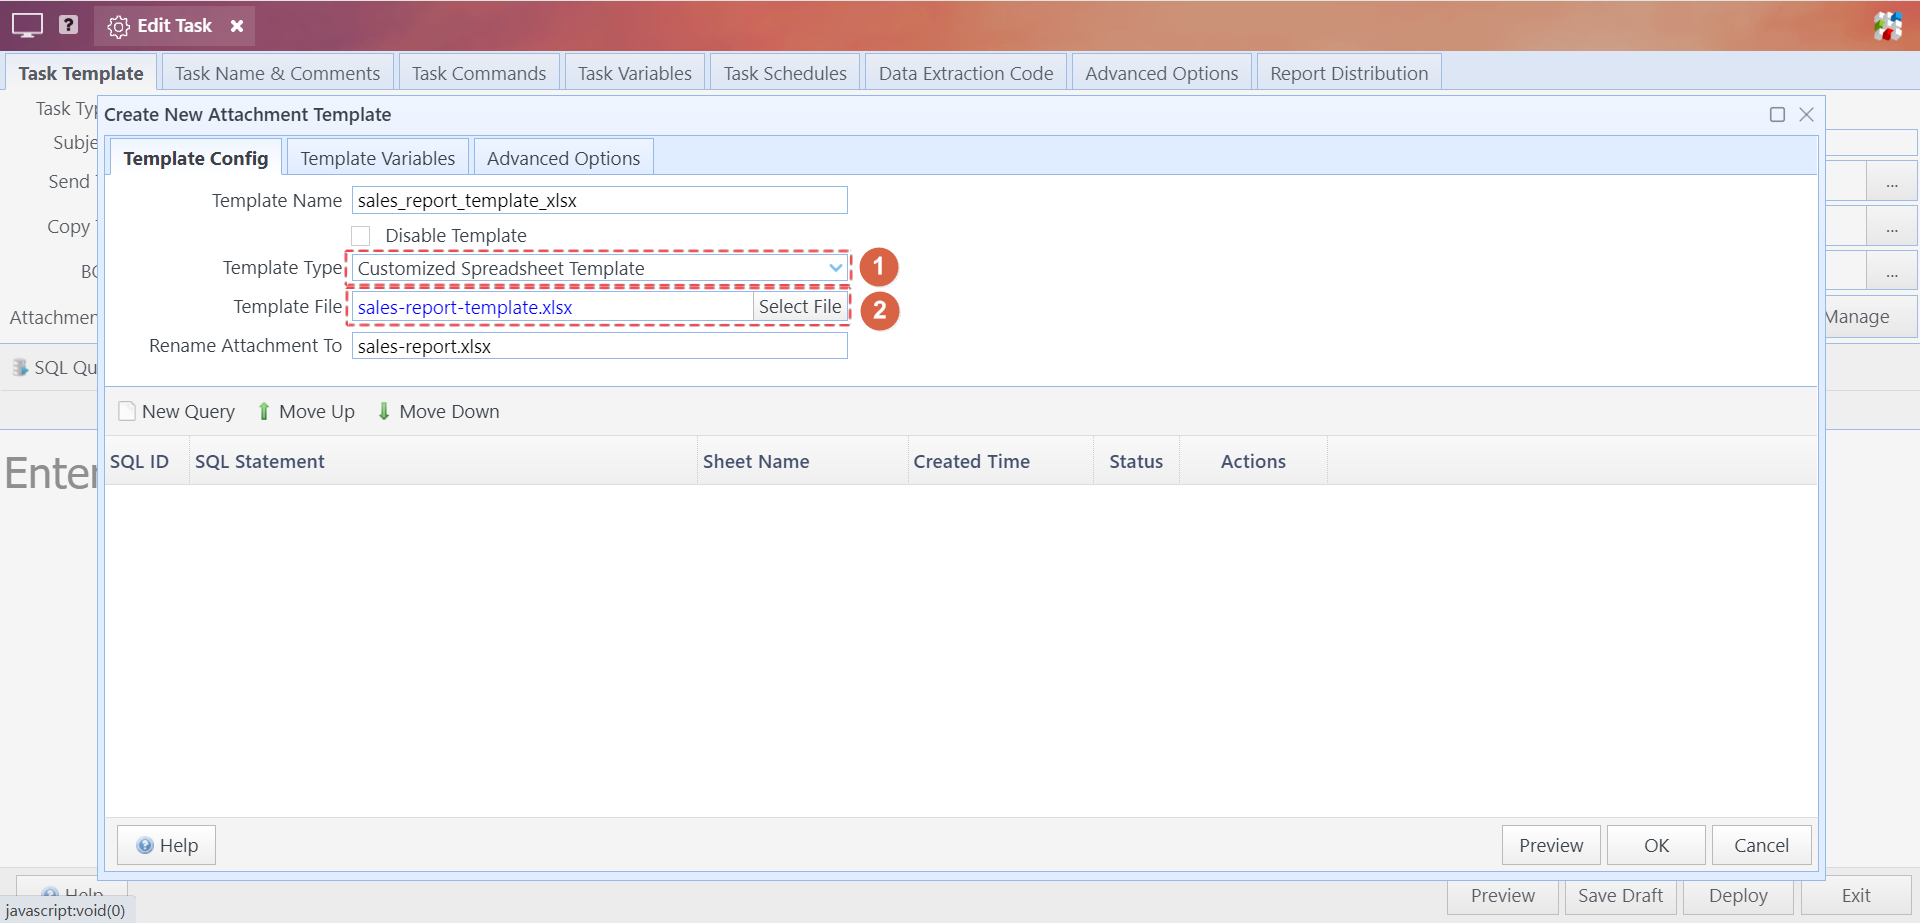
Step 3: Select Customized Spreadsheet Template as the attachment Template Type, then upload the pre-designed Excel template file to the system.
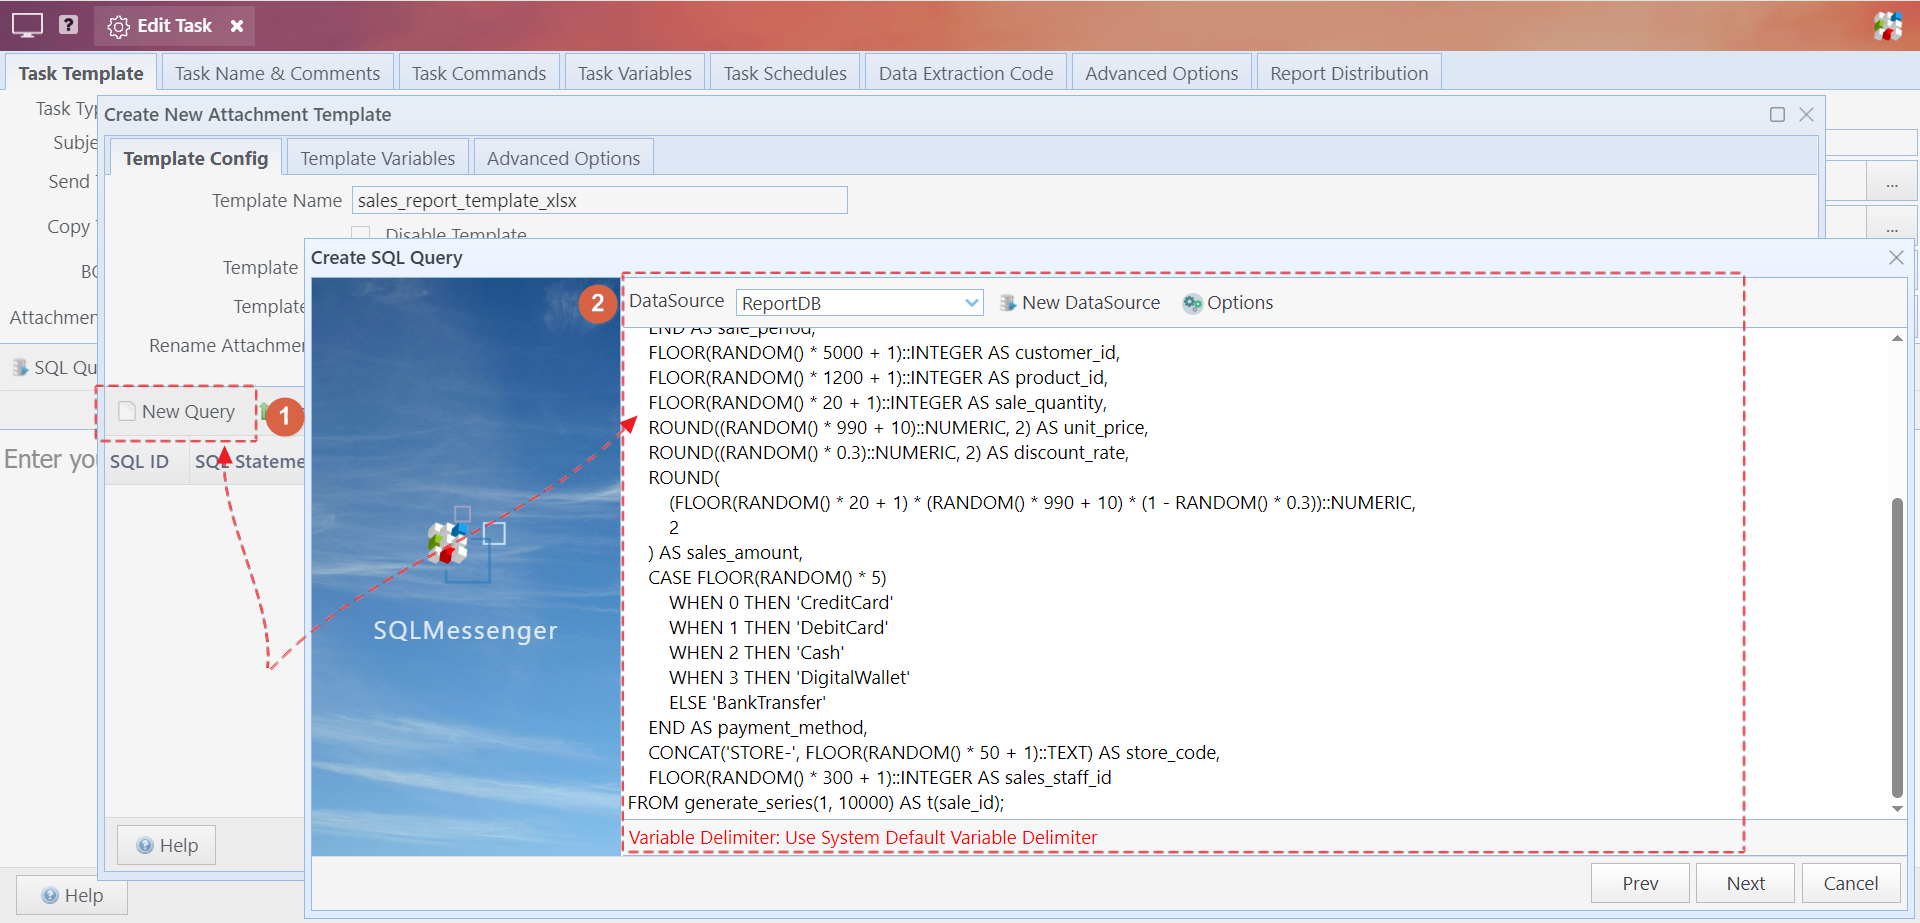
Step 4: Attach an SQL query to the template attachment.
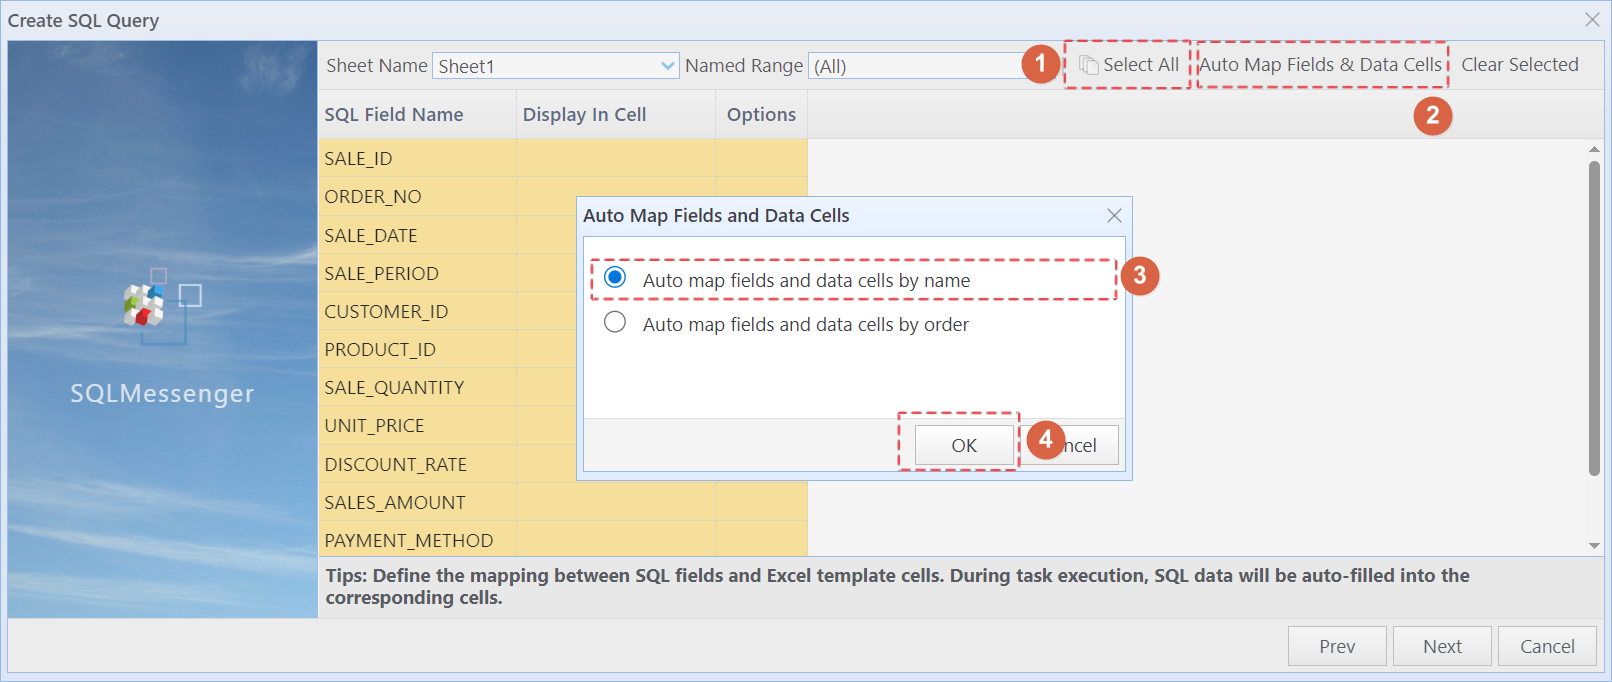
Step 5: Click the Select All button in the wizard to select all fields, then click Auto Map Fields & Data Cells. In the Auto Map Fields and Data Cells popup, select Auto map fields and data cells by name and click OK. The system will automatically map SQL fields to data cells with matching names.
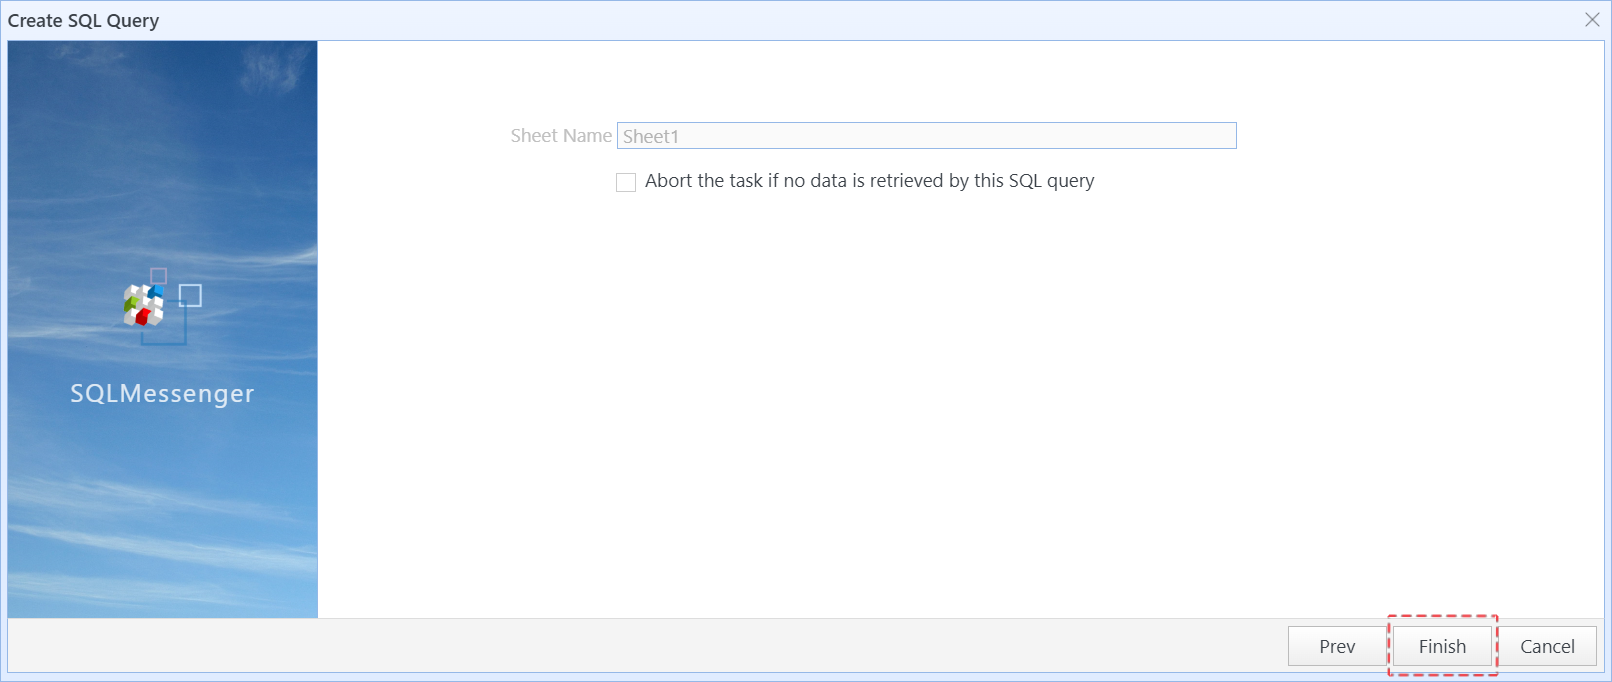
Step 6: Click Next, then click Finish to exit the wizard.
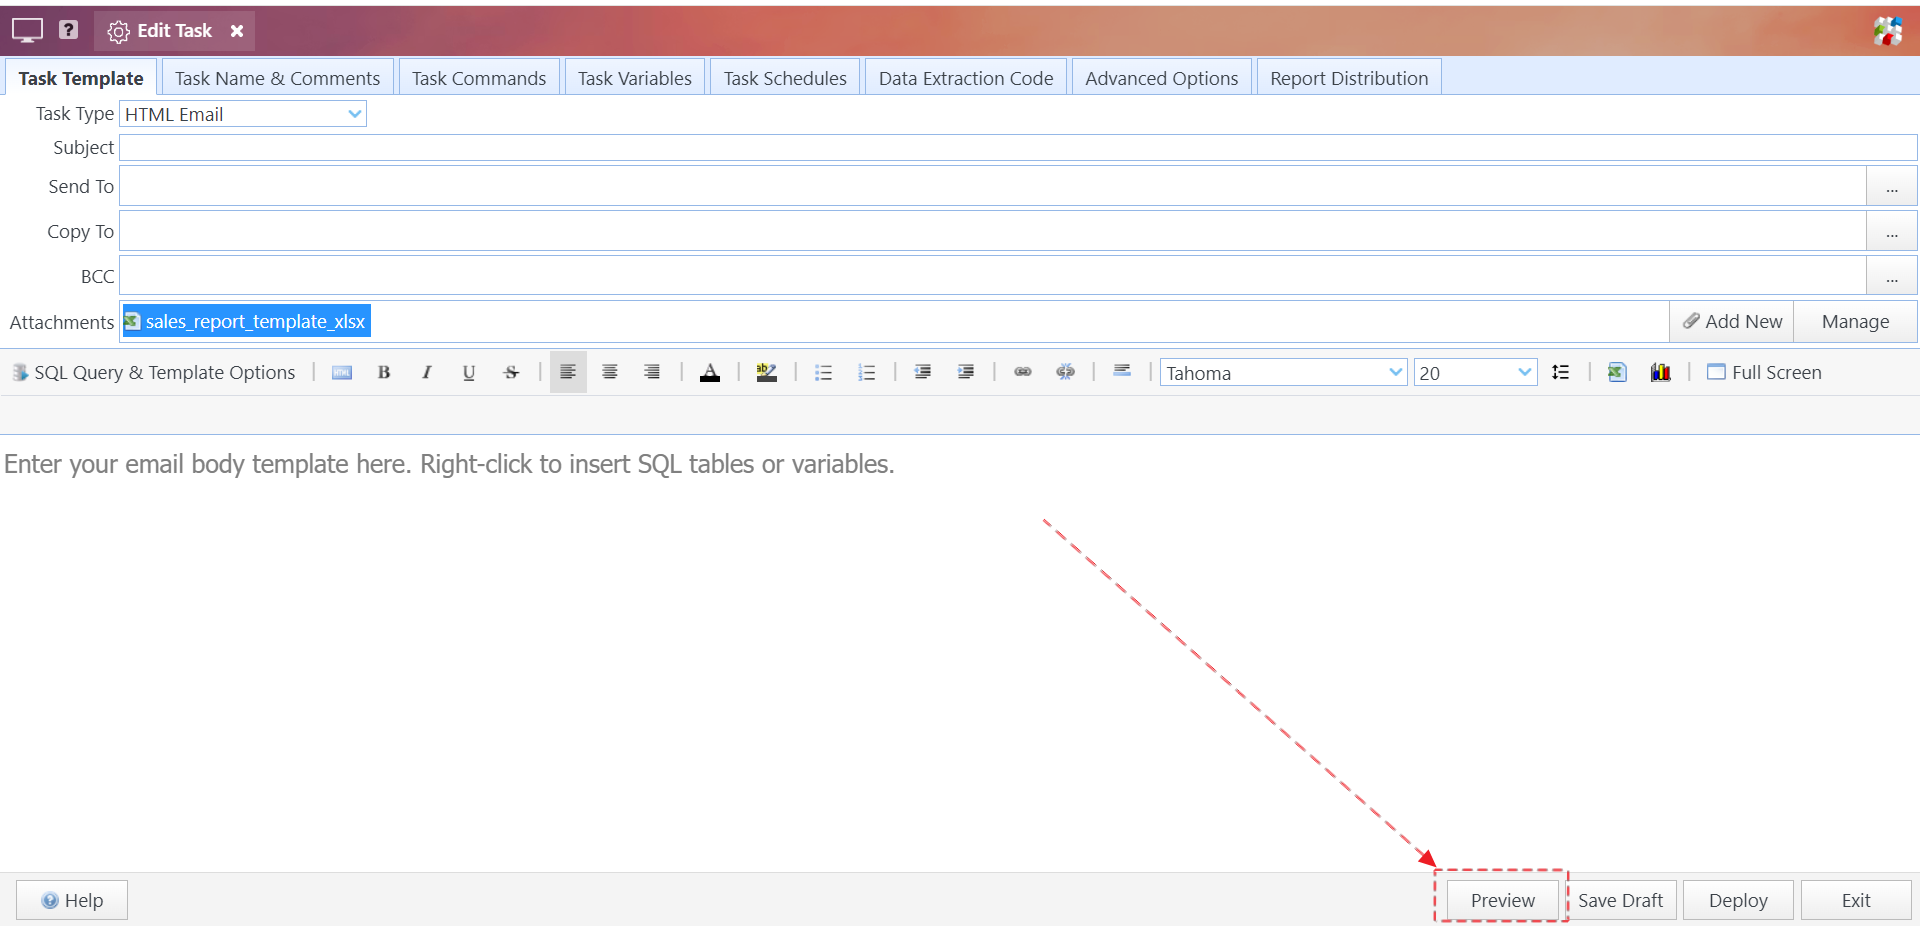
Step 7: Click OK to close the attachment template configuration dialog, then click Preview to test the task output.
After task execution completes, open the generated Excel file. You will see the sales_amount field rendered in currency format as configured.
With Custom Excel Template, you can leverage Excel’s full formatting capabilities to customize table styles, data formatting, and build sophisticated reports containing charts, native Excel formulas, and other advanced elements.
For more details on the Custom Excel Template, visit https://www.sqlmessenger.com/manual/31.1.8.htm.