SQLMessenger User Manual - Using Custom Excel Templates
- 1 What is a Custom Excel Template
- 2 Designing Custom Excel Templates
- 2.1 Using Data Cells
- 2.2 Using "Named Range" in Formulas
- 2.3 Using "Named Range" for the Data Source in Charts
- 2.4 Use "Named Range" to Expand Cell Blocks
1 What is a Custom Excel Template
In SQLMessenger, if the Simple Table cannot meet your requirements, you can design an Excel table according to your needs. SQLMessenger can then populate the SQL query results into the specified locations in the table. You can use formulas, charts, and other content in the table.
Custom Excel template
The Excel attachment generated by the task
Note:
Custom Excel templates do not support variables. Content such as "#VariableName#" will be retained as-is and will not be processed.
If a custom Excel template contains pivot tables, you need to install Microsoft Excel 2010 or a later version to refresh the pivot table content correctly.
2 Designing Custom Excel Templates
When designing an Excel template file, you can first create a table file using Excel. In the table, add a "Data Cell" label to the cells where you want to populate SQL query results, and configure formulas, charts, and other content for the table. Then, in the SQLMessenger task editor, create an attachment template, select "Custom Spreadsheet Template" as the template type, and import your designed template file to SQLMessenger. After that, configure the SQL statement corresponding to the template and set up the mapping between the SQL fields and the data cells in the template.
Step 1: Create an Excel template and insert Data Cell markers in the target cells.
Step 2: Create an attachment template in the task.
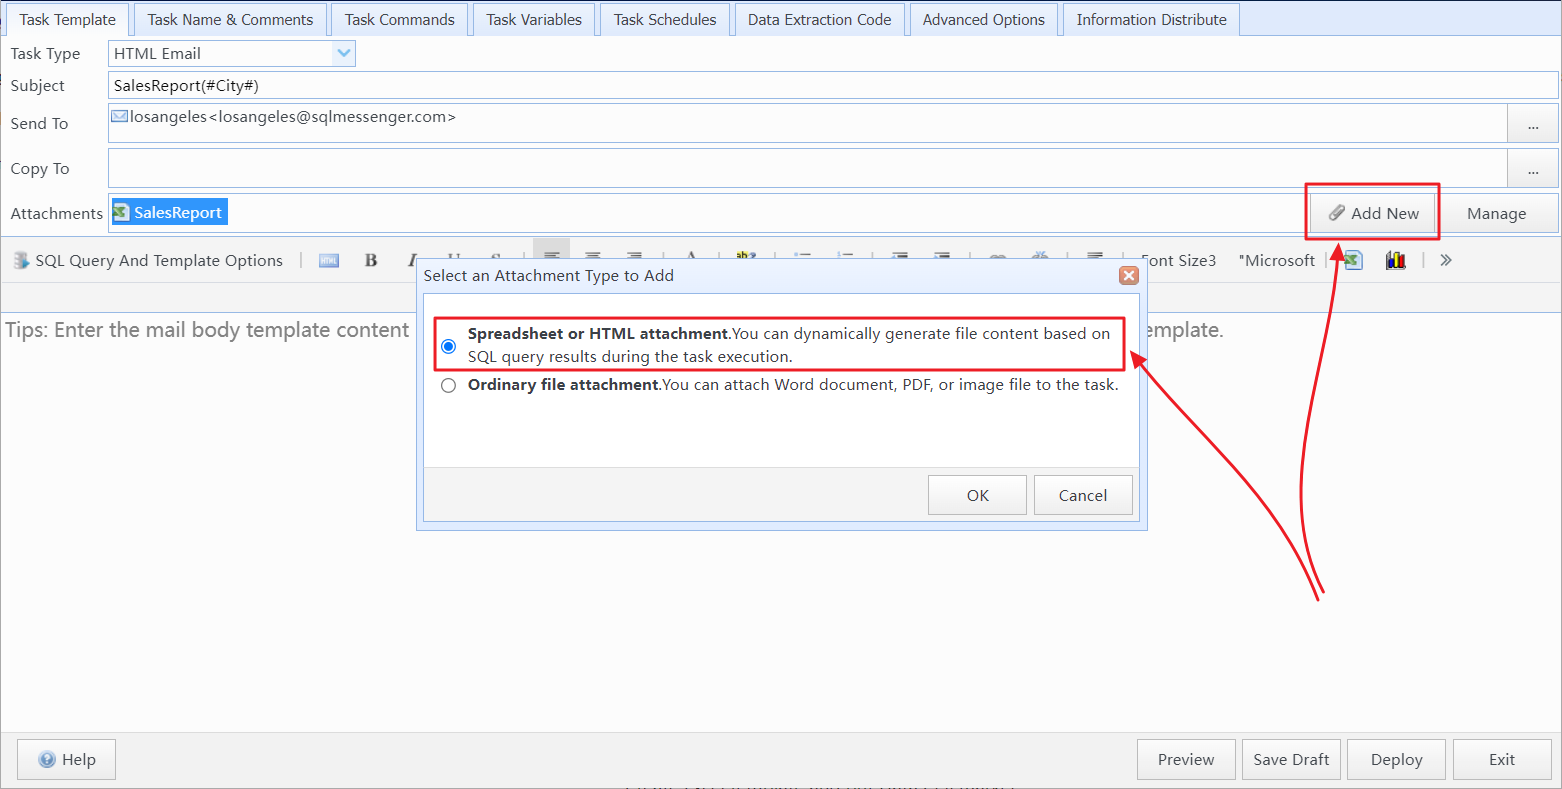
Step 3: Import the designed template file and add SQL query statements.
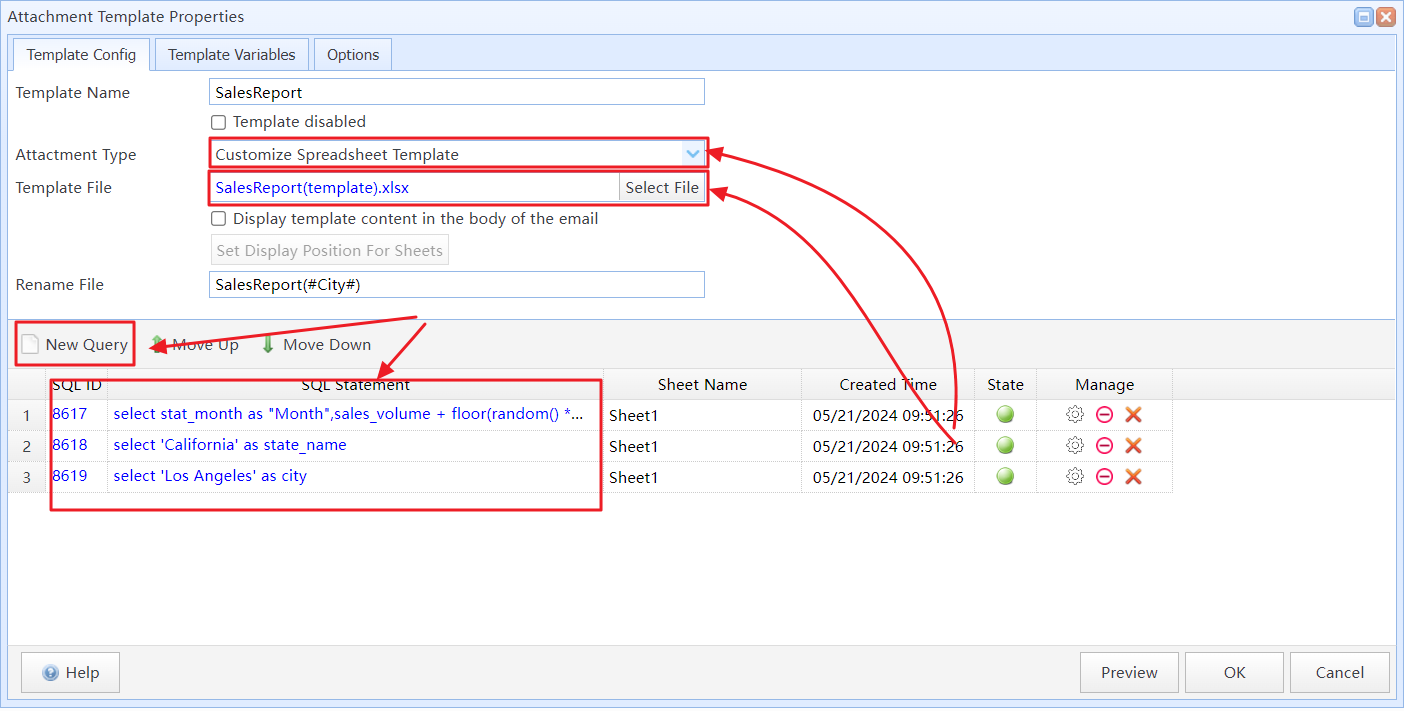
Step 4: Map SQL fields to corresponding data cells.
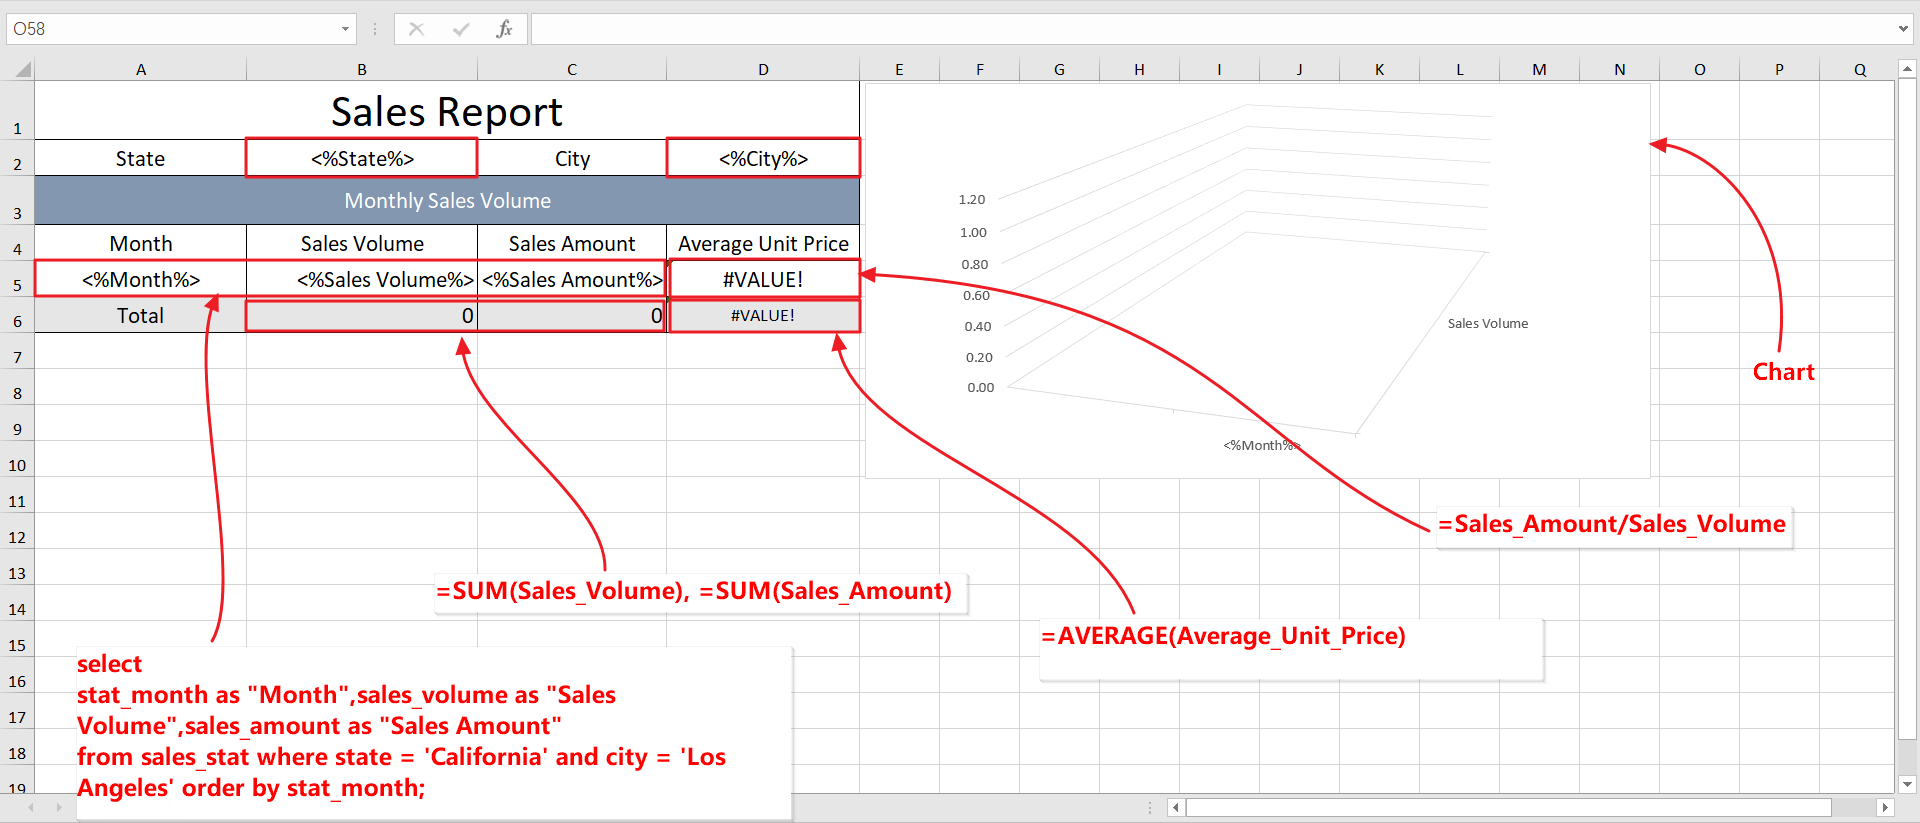
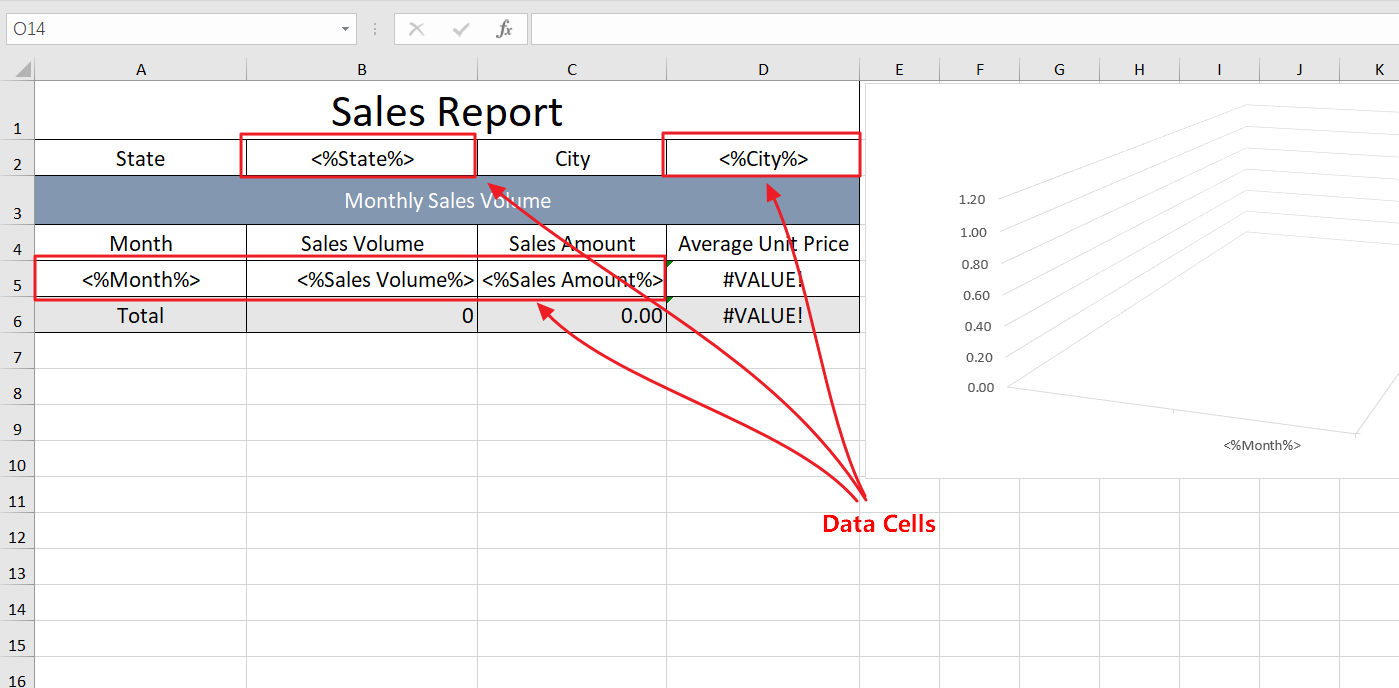
2.1 Using Data Cells
You can add Data Cell markers to the cells in your Excel template where you need to populate SQL query result data.
The format of a Data Cell marker is <%DataCellName%>.
In this marker, "<%" and "%>" are the delimiters for the Data Cell. DataCellName is the name of the Data Cell.

The Data Cells in the Excel template
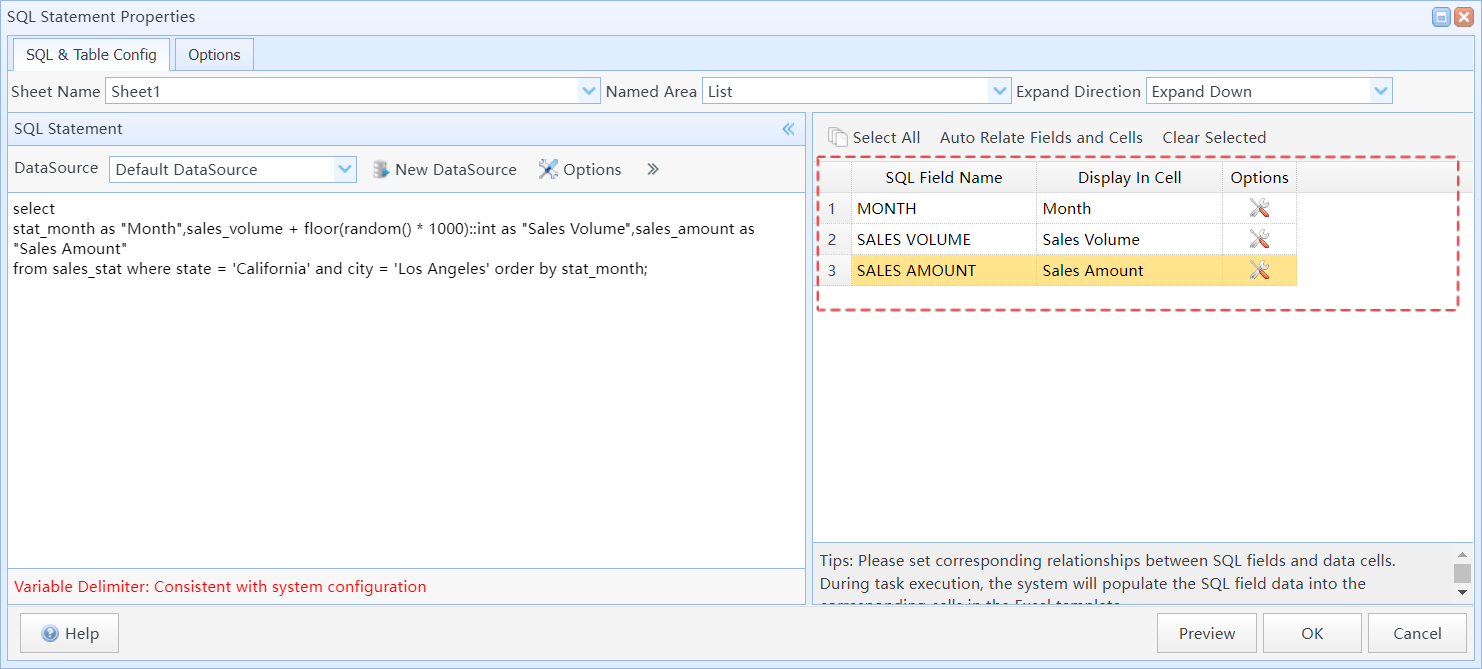
After importing this template in the task configuration, SQLMessenger will identify these Data Cells in the template, and then you can set the corresponding SQL fields for these Data Cells.
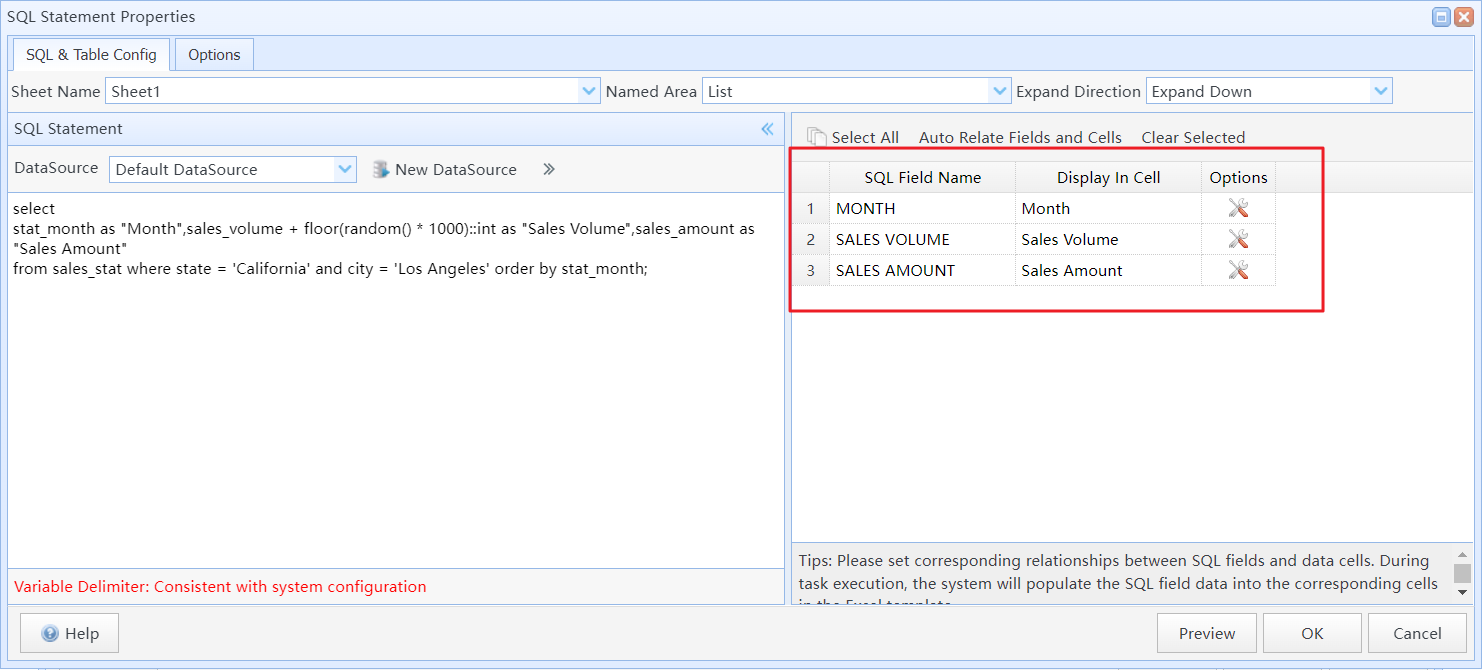
Set the corresponding SQL fields for the Data Cells
After the task is executed, the system will populate the corresponding Data Cells with data from the SQL query result fields.
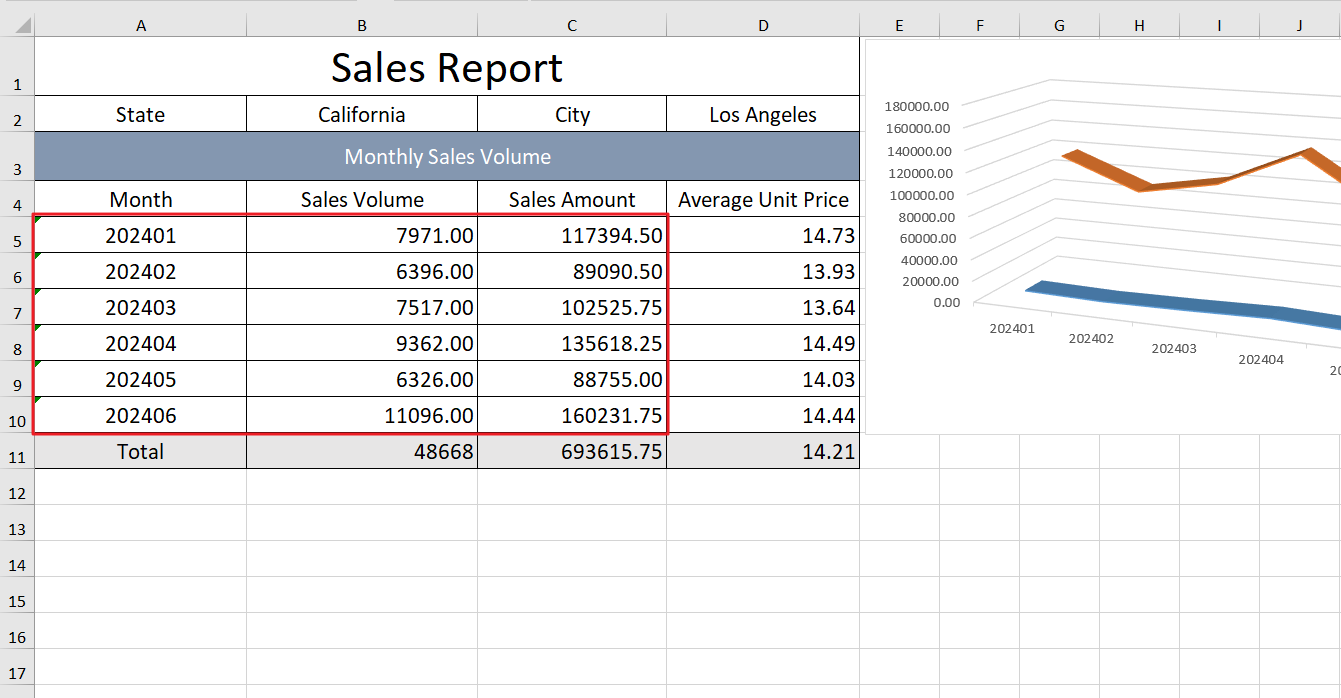
The query result data is populated into the corresponding Data Cells
2.2 Using "Named Range" in Formulas
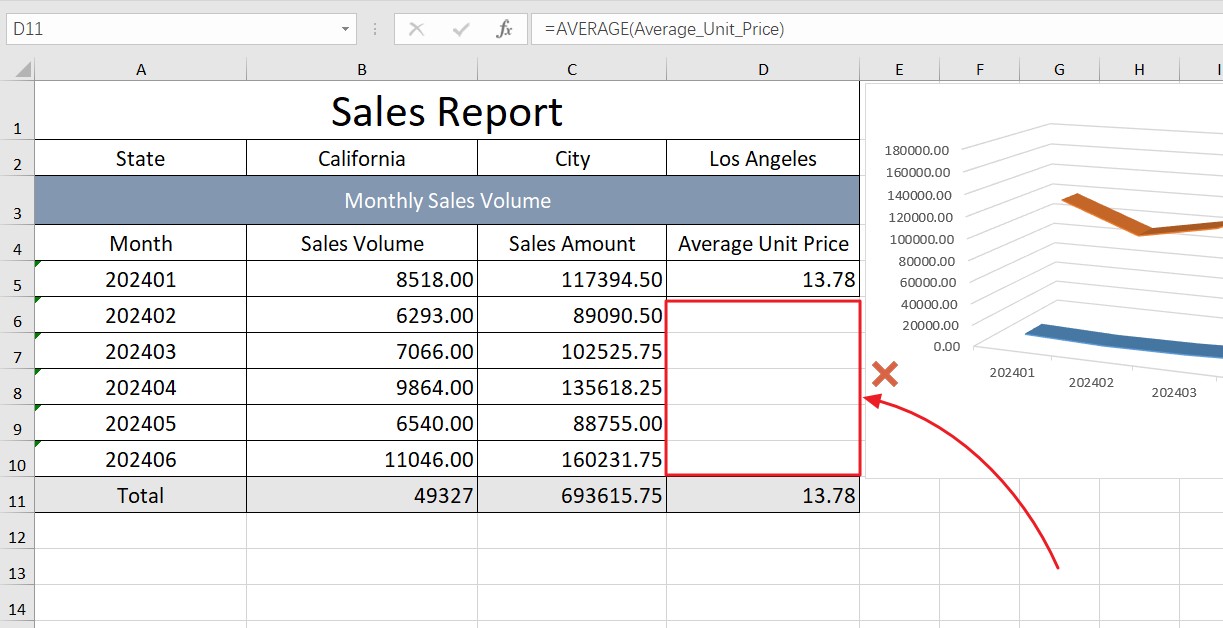
In SQLMessenger, if your Excel template's formulas reference Data Cells mapped to SQL statements that return multiple rows of data, you need to modify the formula parameters to ensure the accuracy of the calculation results.
For example, cell B6 in the table uses the "SUM(B5)" formula to calculate the total "Sales Volume". After the task is executed, the result of the SUM formula in cell B6 may not match the expected outcome.
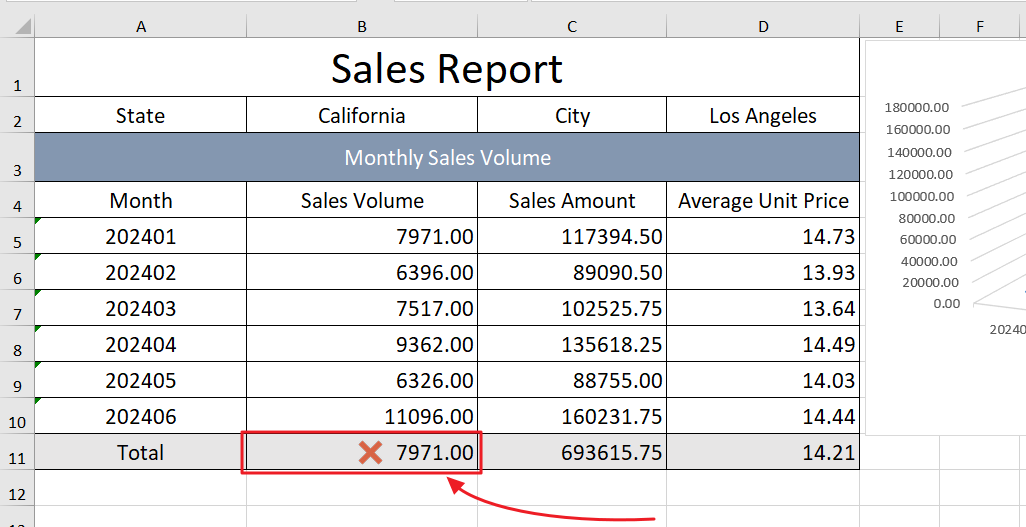
The result of the formula calculation is incorrect
To rectify this issue, you can create a Named Range "Sales_Volume" for cell B5 in the template file. Then, modify the formula in cell B6 to "SUM(Sales_Volume)".
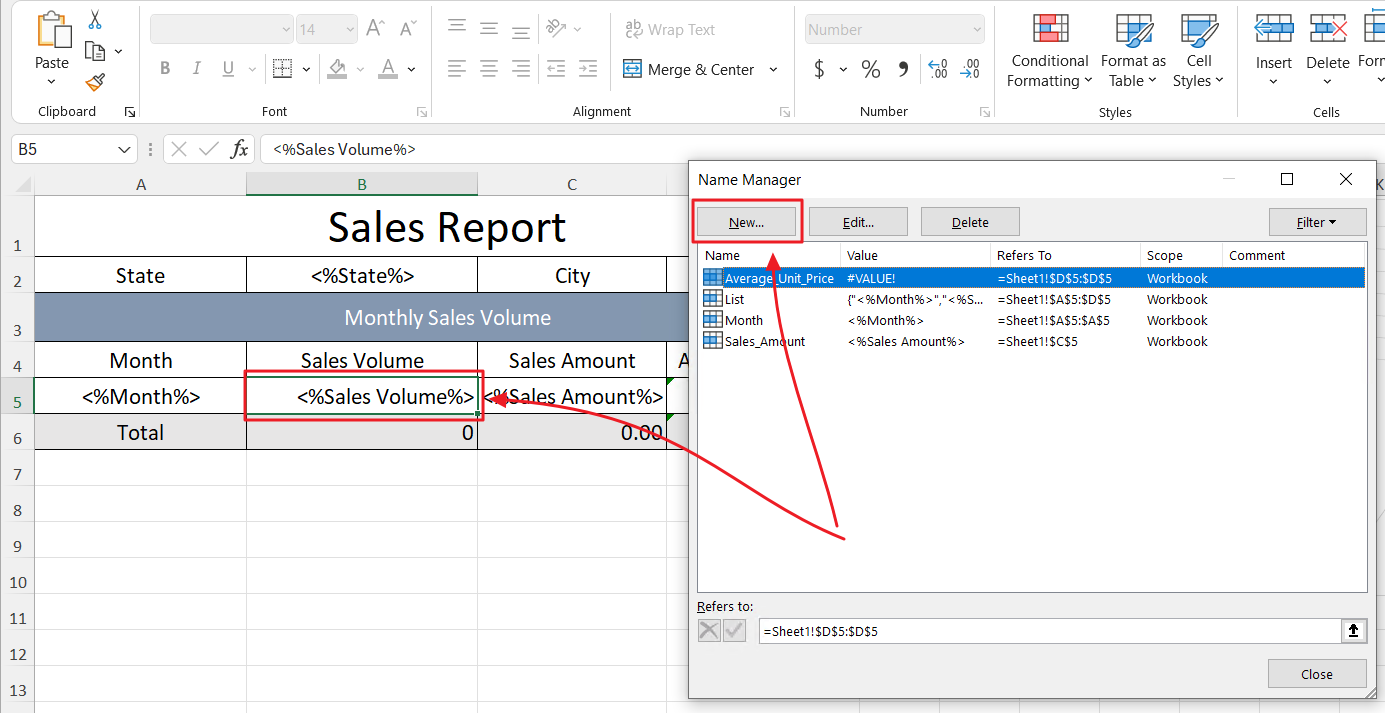
Select cell B5, press Ctrl+F3 to open the "Name Manager" dialog box and click the "New" button
In the "New Name" dialog box, enter "Sales_Volume" in the "Name" text box, and set the "Refers To" field to "=Sheet1!$B$5".
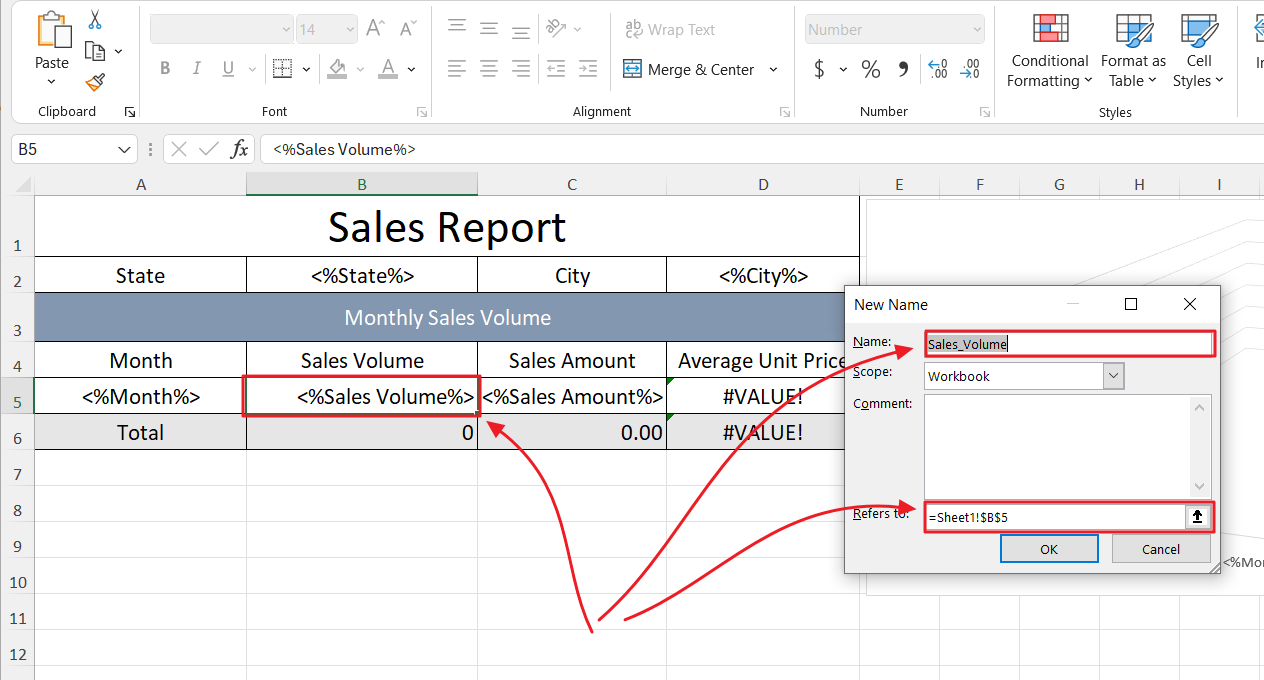
Set the corresponding range for the Named Range
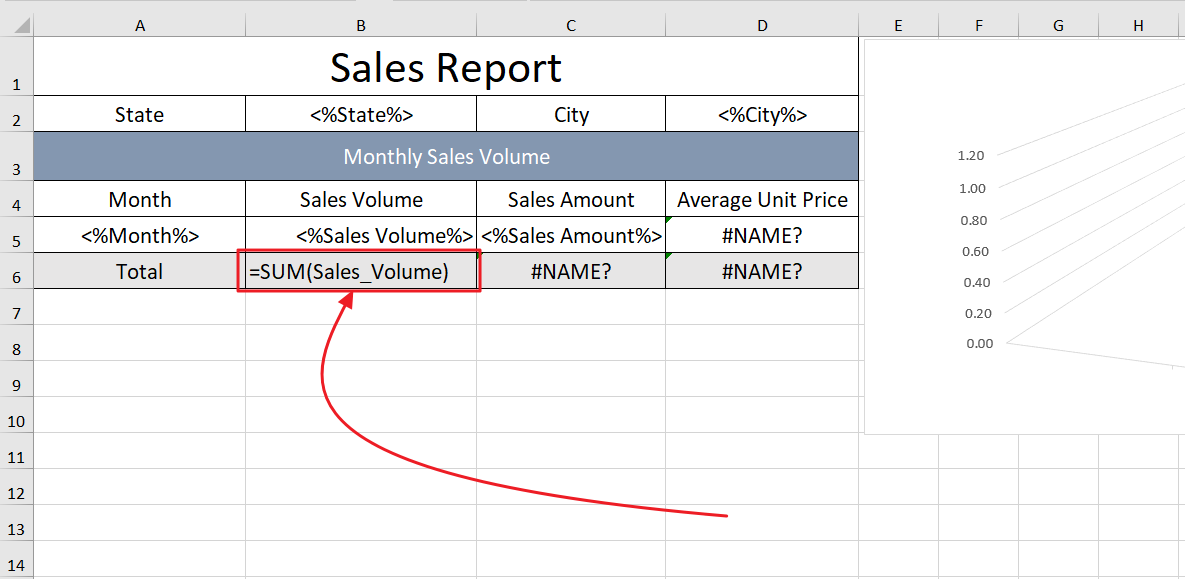
Modify the formula in cell B6 to "SUM(Sales_Volume)"
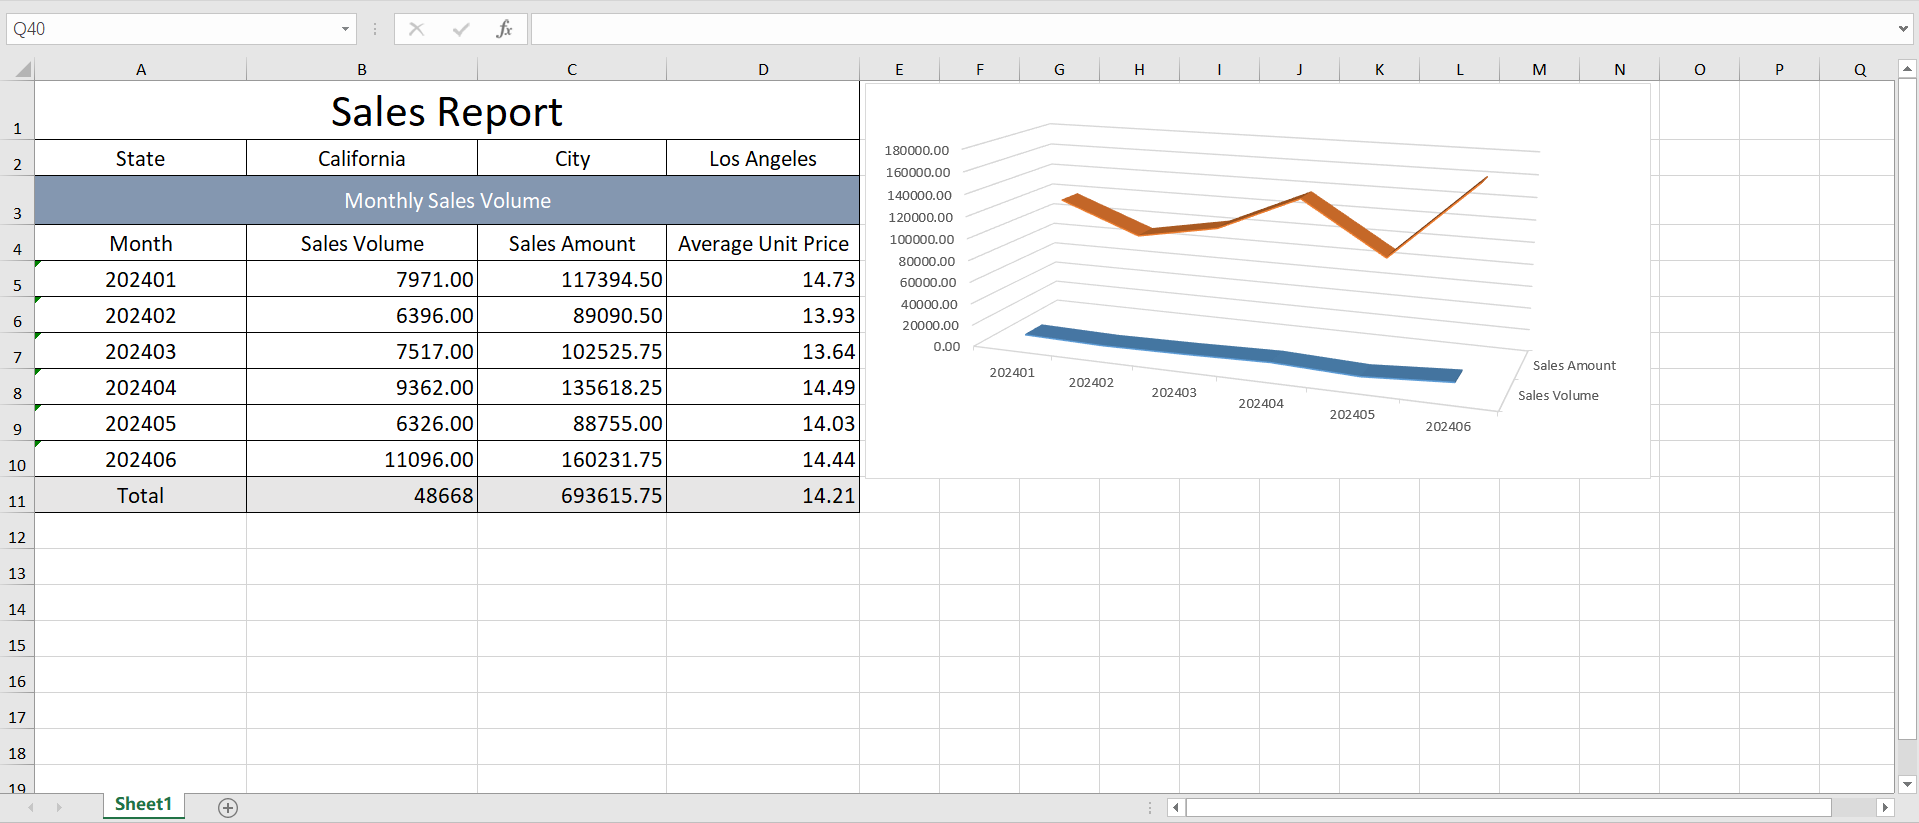
After making the changes, import the updated template and re-run the task. You will then see that the calculation result of the formula is now correct.
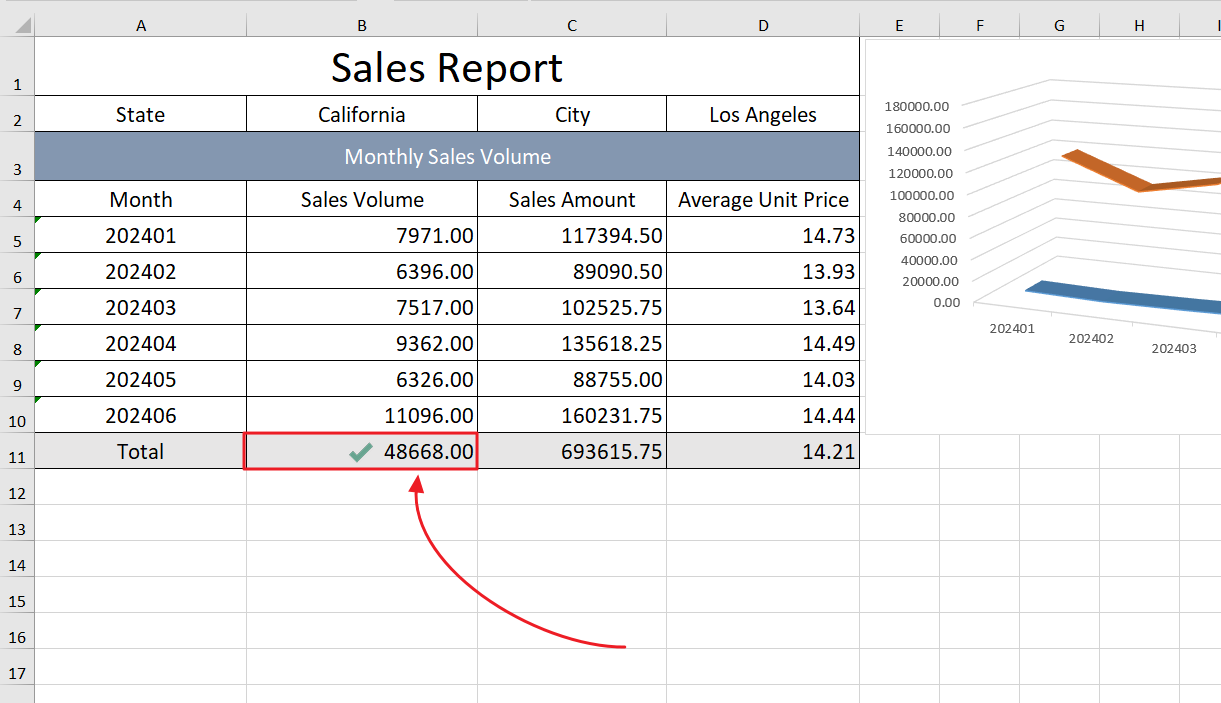
The result after re-running the task
2.3 Using "Named Range" for the Data Source in Charts
Similar to formulas, when charts are used in a template, the data source of the chart also needs to be set to a Named Range.
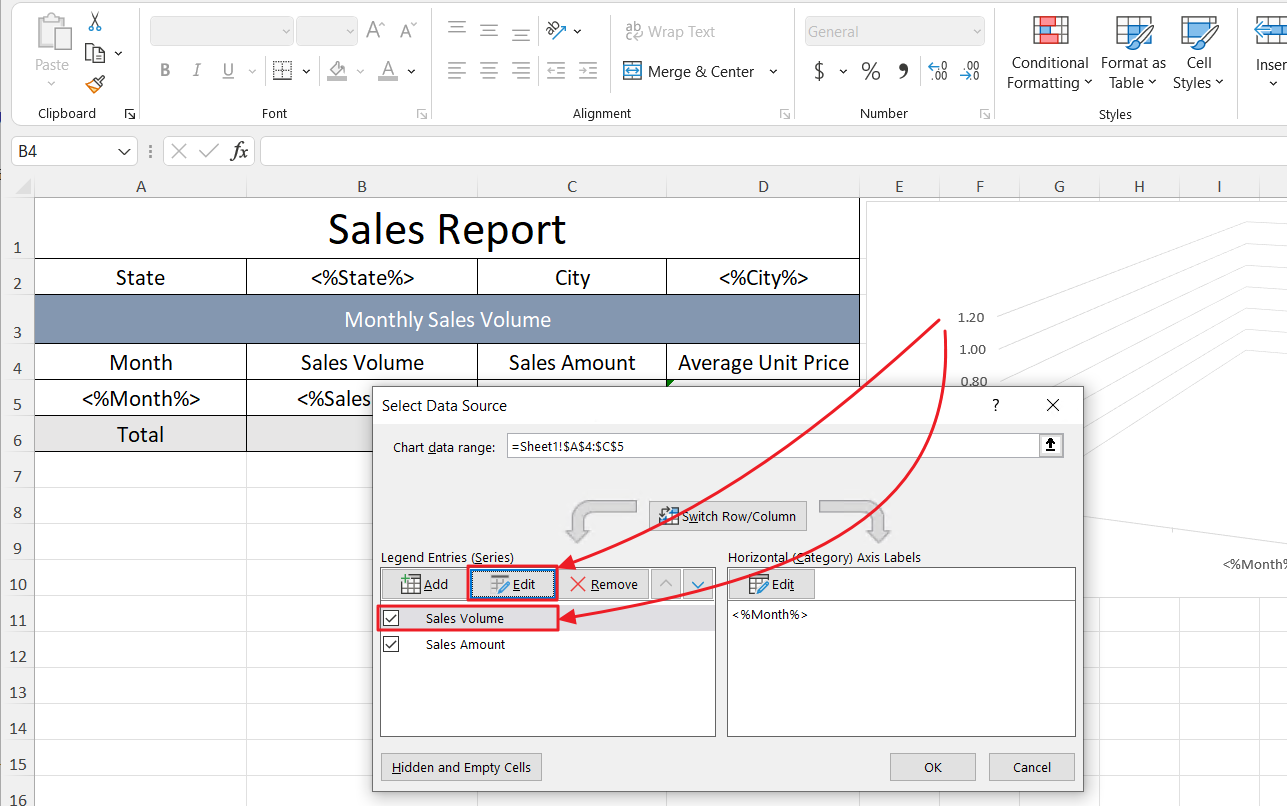
Edit the data source for the chart
Here, the "Series Values" of the selected series should be set to ='SalesReport(template).xlsx'!Sales_Volume. The format of "Series Values" is Template file name.xlsx!Named Range.

Set "Series Values" for the selected series
2.4 Use "Named Range" to Expand Cell Blocks
If not all cells in a row are populated with SQL field data, the cells may not be copied in full, leading to incorrect table formatting.
The cells were not fully copied to the new area, and the table format is incorrect
To address this, you can create a Named Range in the template, include the data field cells and adjacent cells in that Named Range, and then assign the newly created Named Range as the Named Area for the SQL statement. When the system processes this SQL statement, it will treat the entire Named Range's cells as a whole for copying, ensuring the table format remains correct.
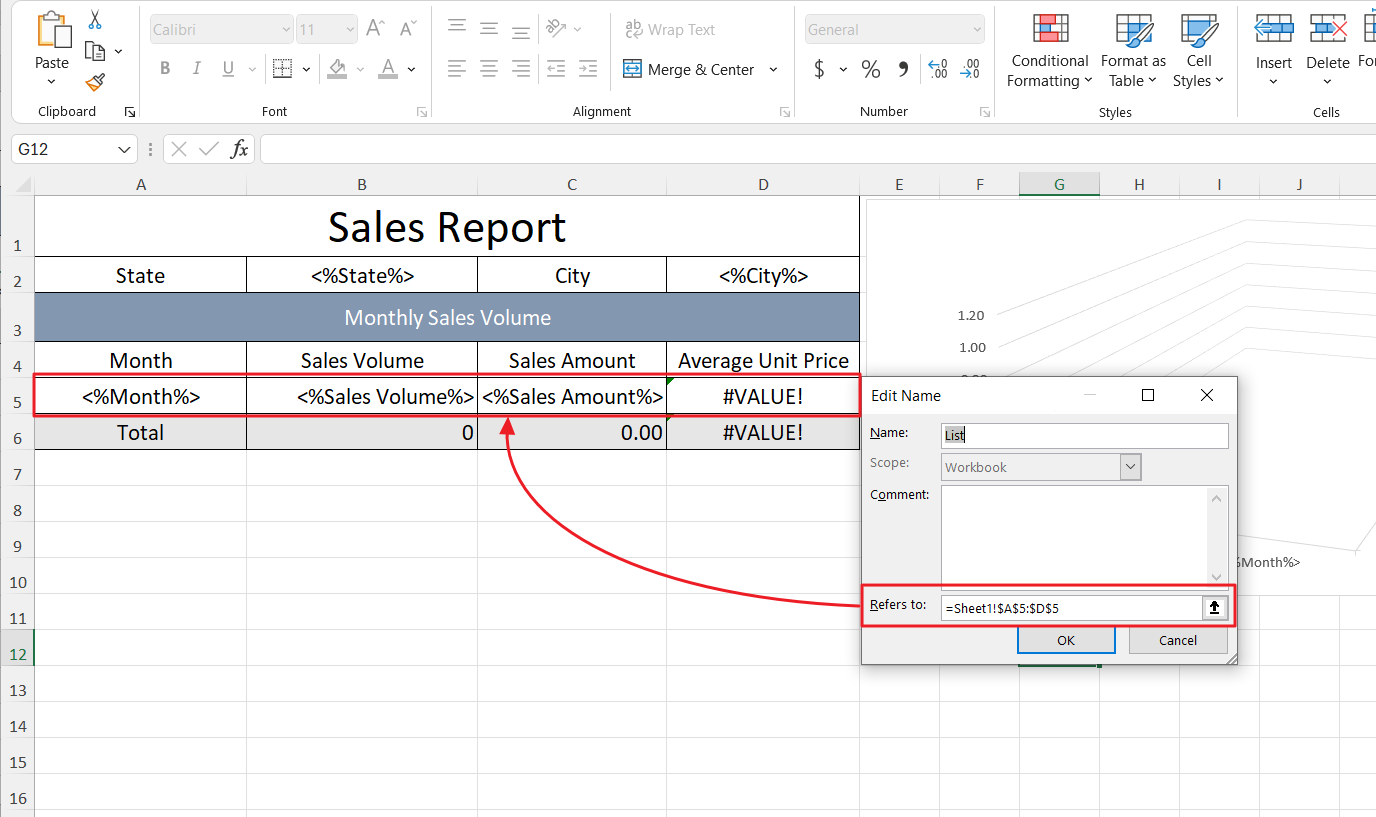
Create a Named Range for "Sheet1!$A$5:$D$5"
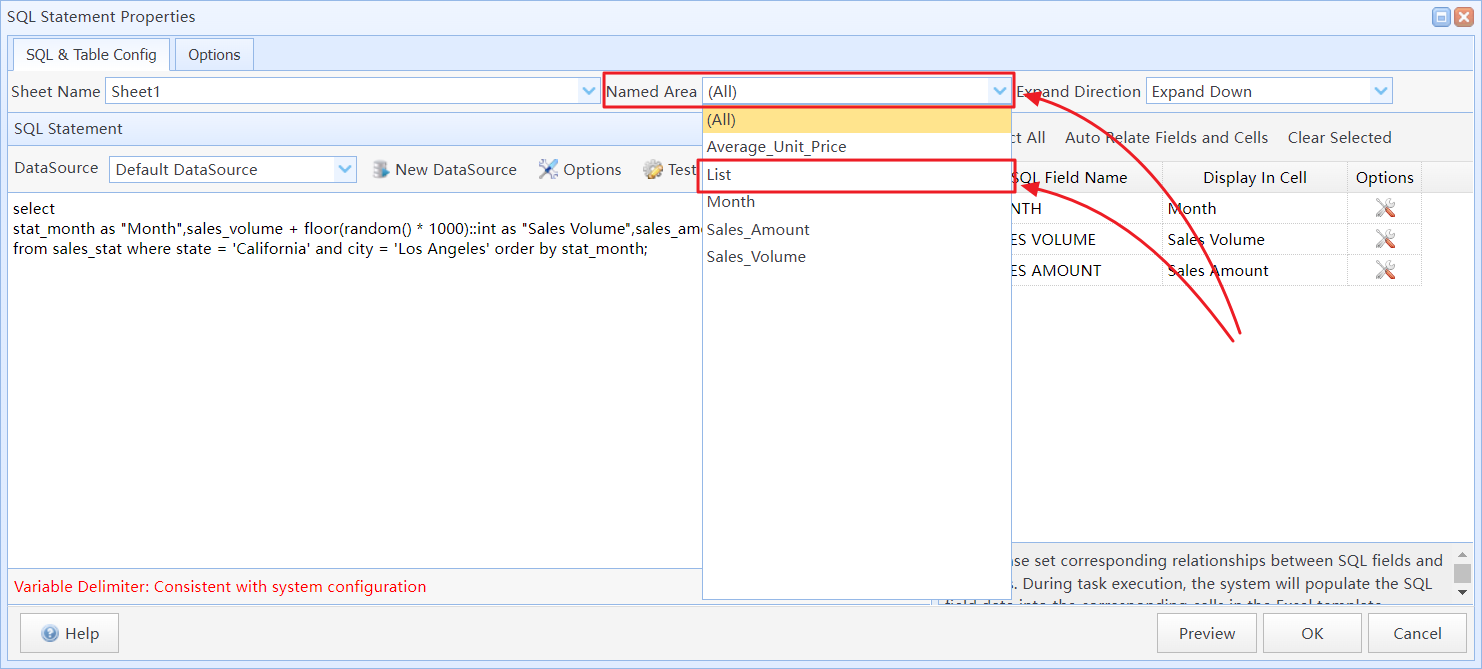
In the task editor, re-import the template file and select the newly created Named Area ("List") for the SQL statement
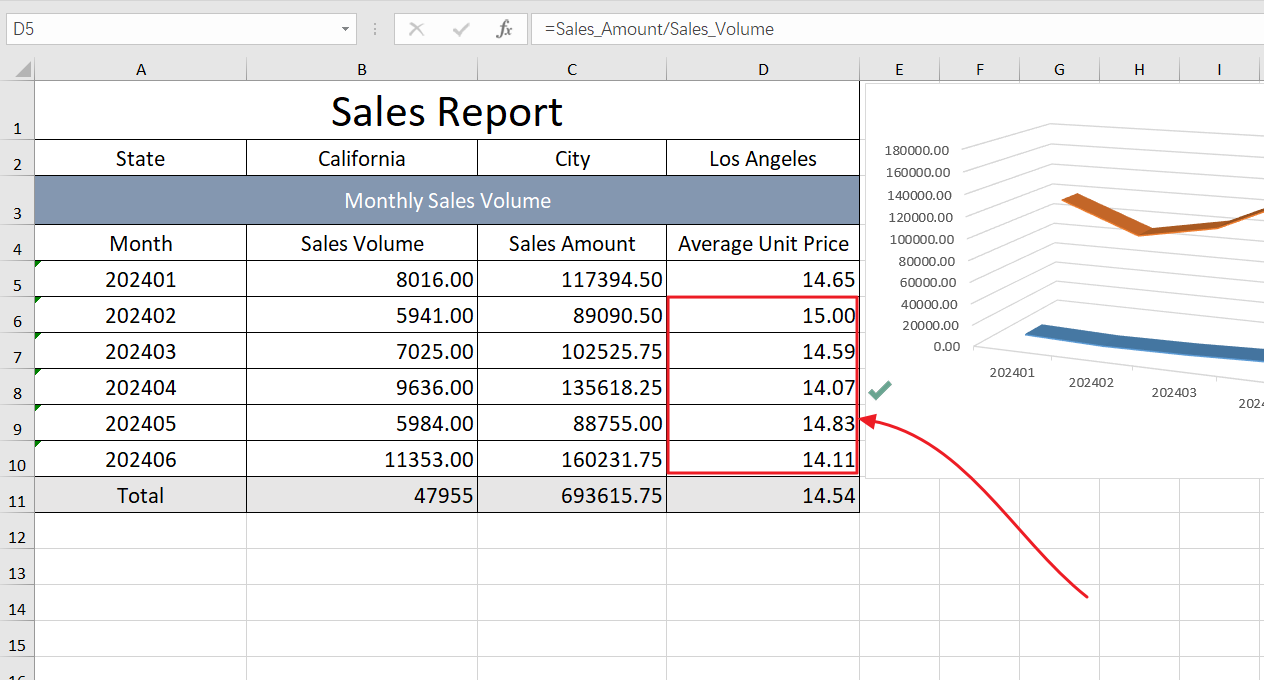
The result after re-running the task