SQLMessenger User Manual - Using Simple Tables
- 1 What is a Simple Table?
- 2 The Structure of Simple Tables
- 3 Converting Query Results into an Excel Spreadsheet
- 4 Converting Query Results into an HTML Table
- 5 Using the Simple Table Style Designer
1 What is a Simple Table?
In SQLMessenger, you can easily convert the results of an SQL query into a table that can be sent as an attachment in an email, or convert the query results into an HTML table to display in the body of an email. This kind of table is referred to as a Simple Table.
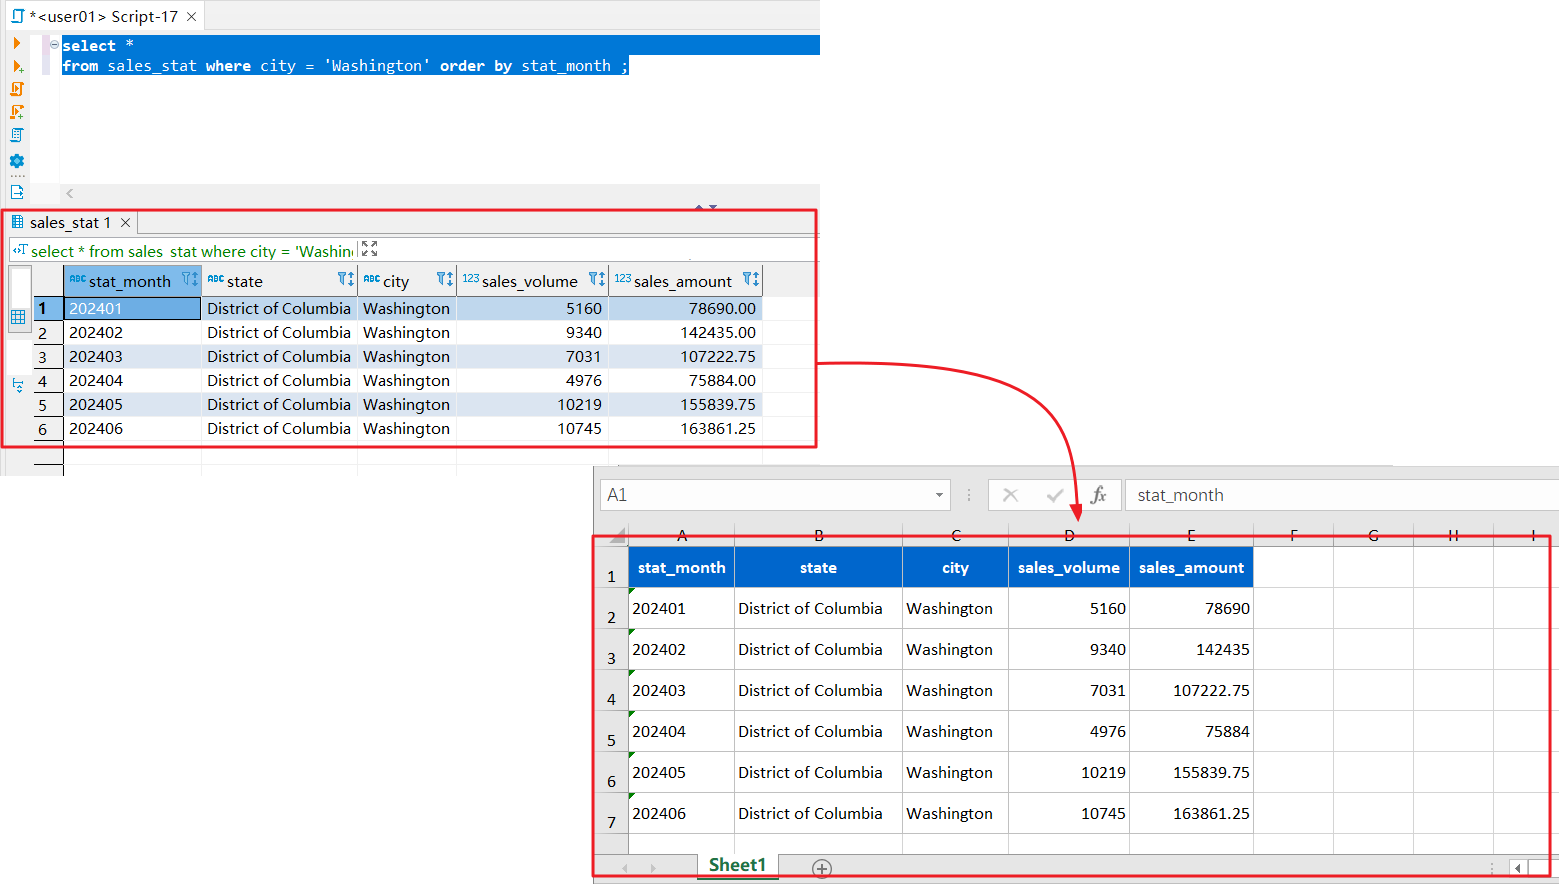
Convert the results of an SQL query into a simple Excel table.
2 The Structure of Simple Tables
The first row of the Simple Table is the header row, and the second row and subsequent rows are data rows.
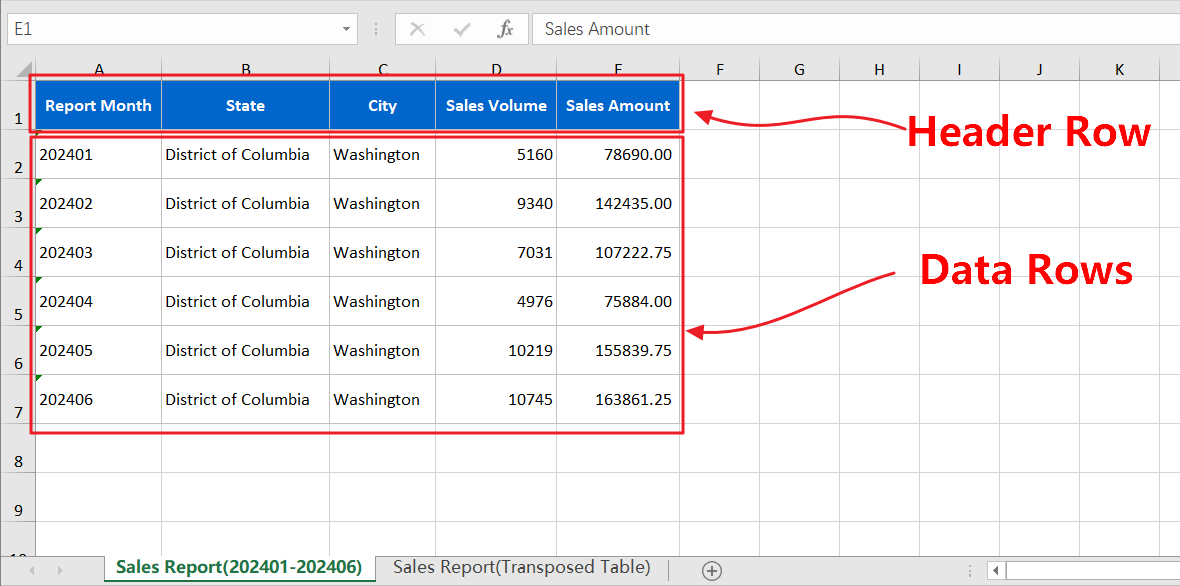
The structure of the Simple Table.
3 Converting Query Results into an Excel Spreadsheet
In SQLMessenger, you can convert the results of an SQL query into a Simple Table in Excel format.
You can add multiple SQL queries to a single attachment, with the results of each query placed in a separate Sheet.
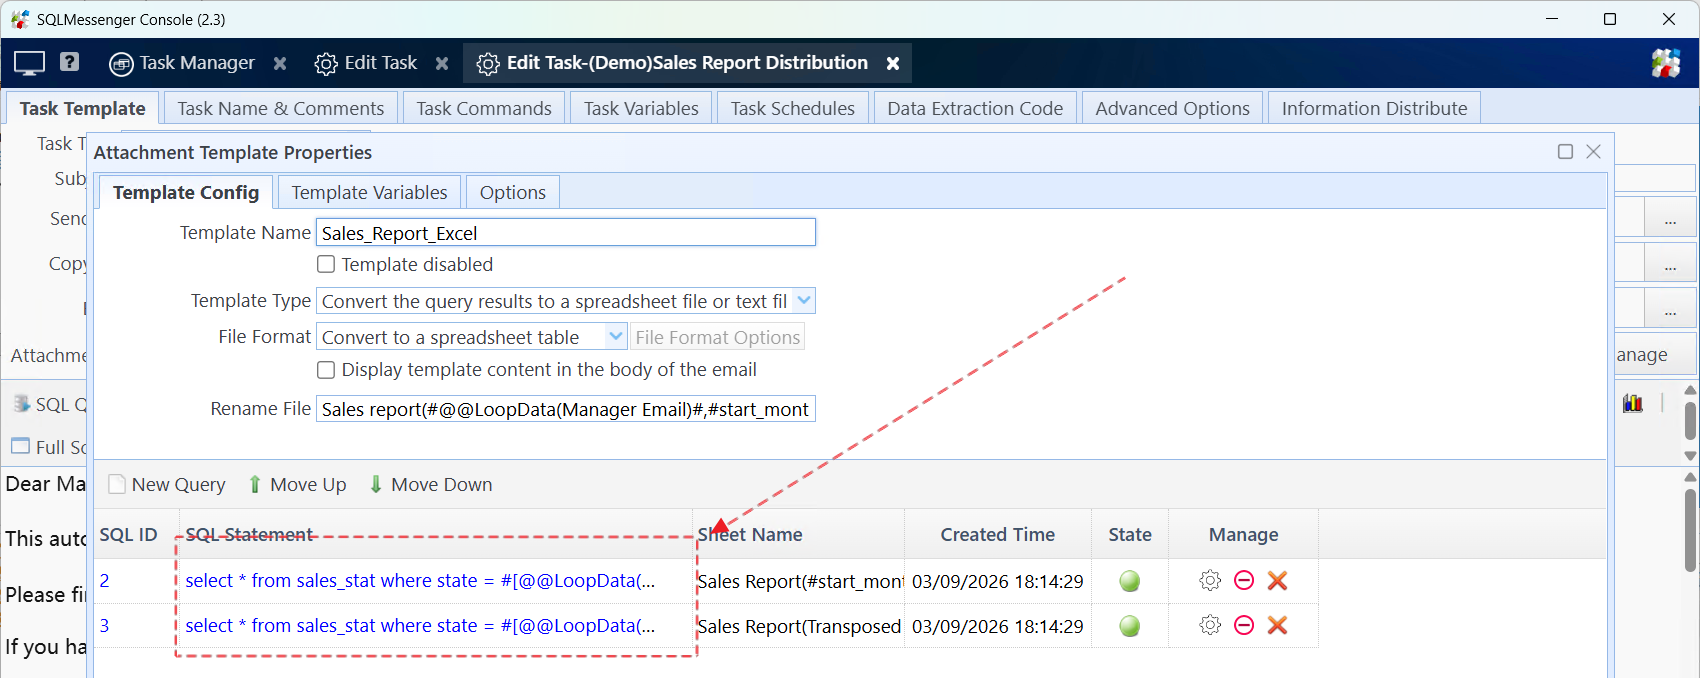
Multiple queries in one Excel attachment.
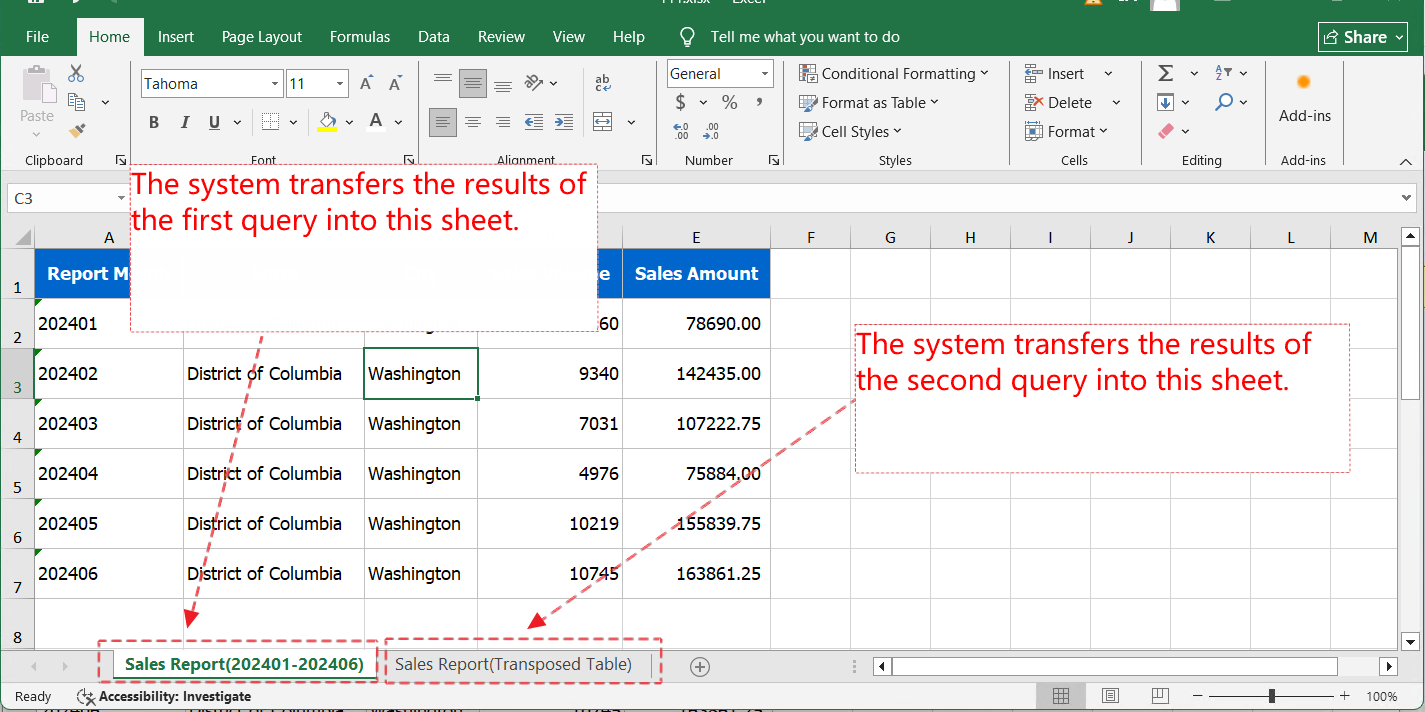
The spreadsheet file generated after the task execution.
Below are the steps for creating a simple table in the attachment:
Step 1: Create an attachment template in the task.
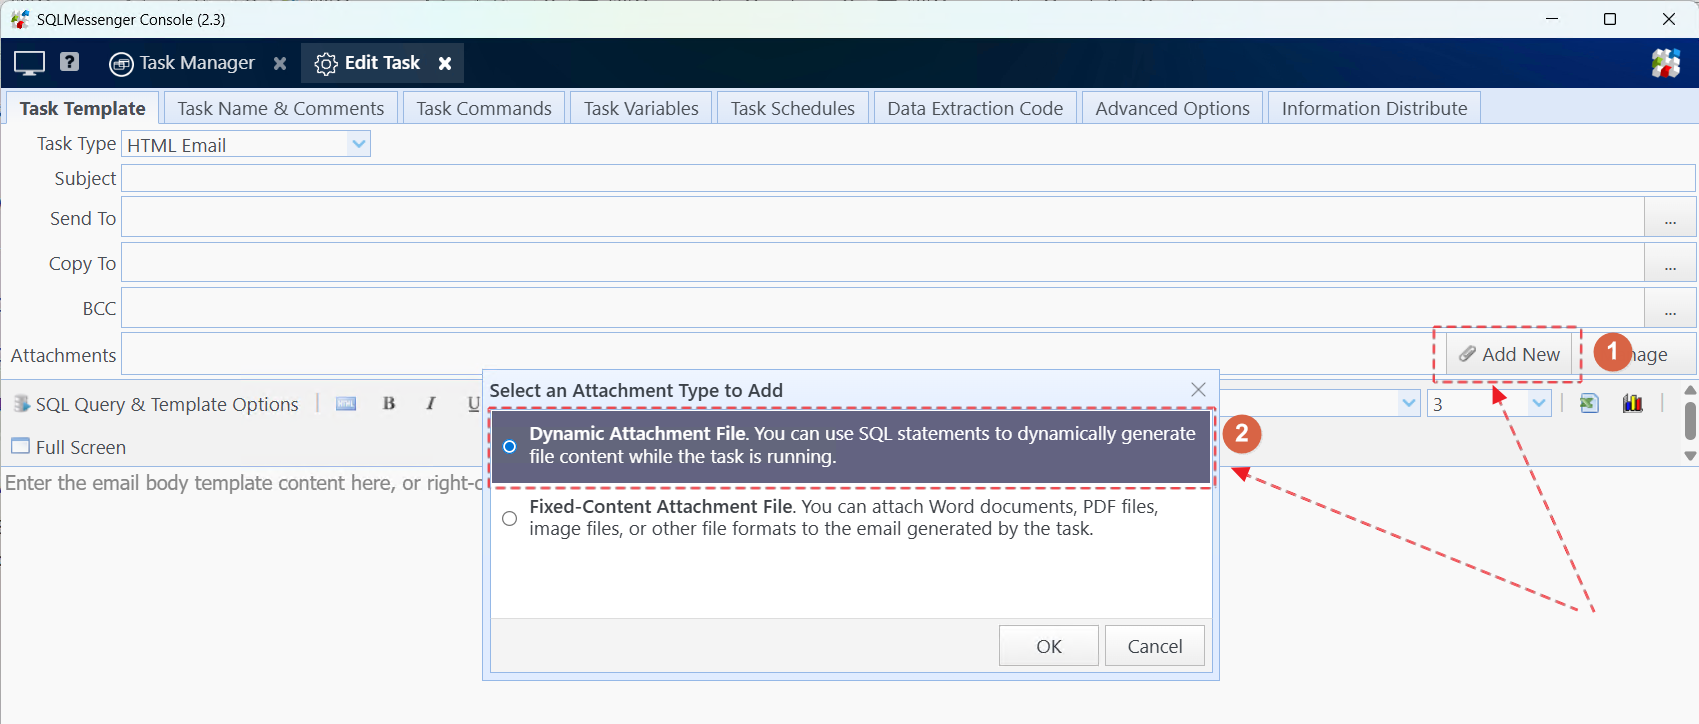
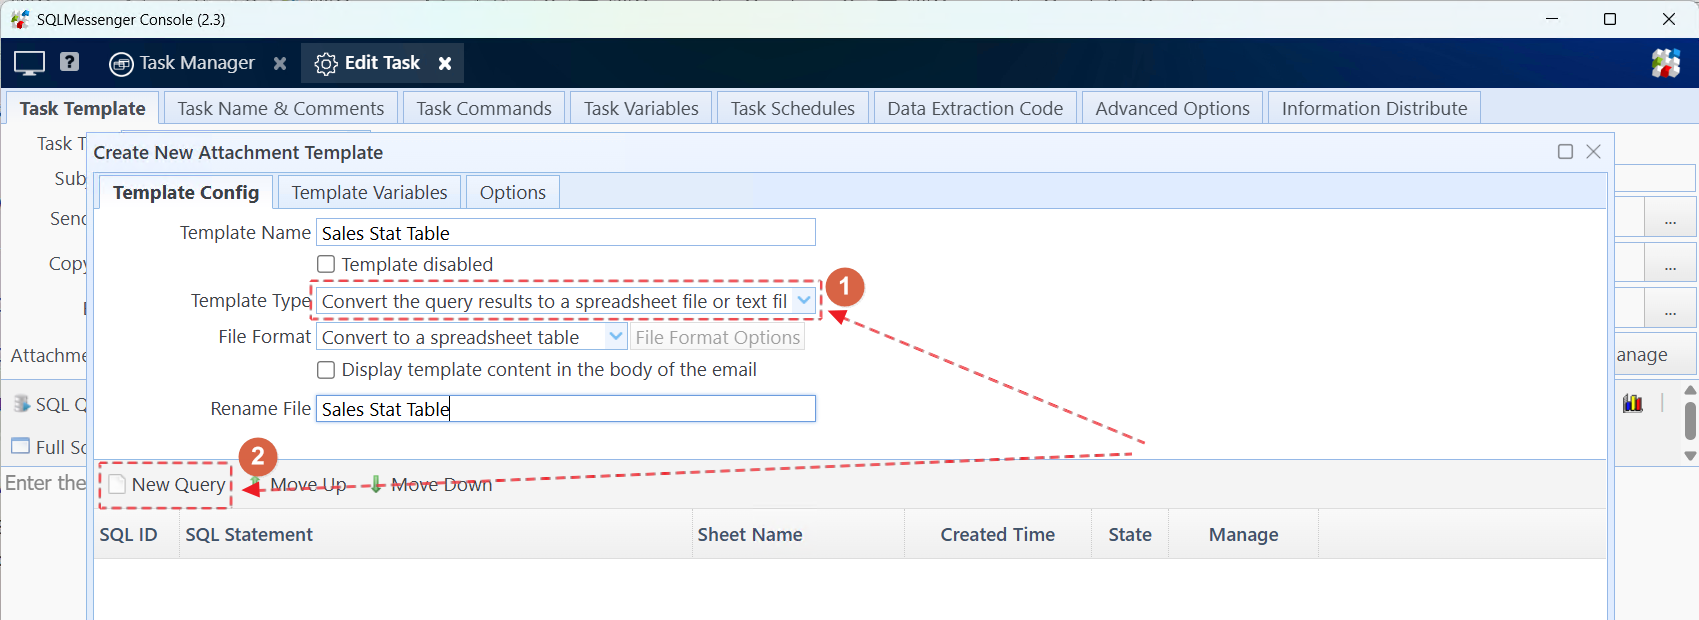
Step 2: Select "Convert the query results to a spreadsheet file or text file" for "Template Type", then click "New Query" to add a query statement.
Step 3: Select the data source and enter the query statement.

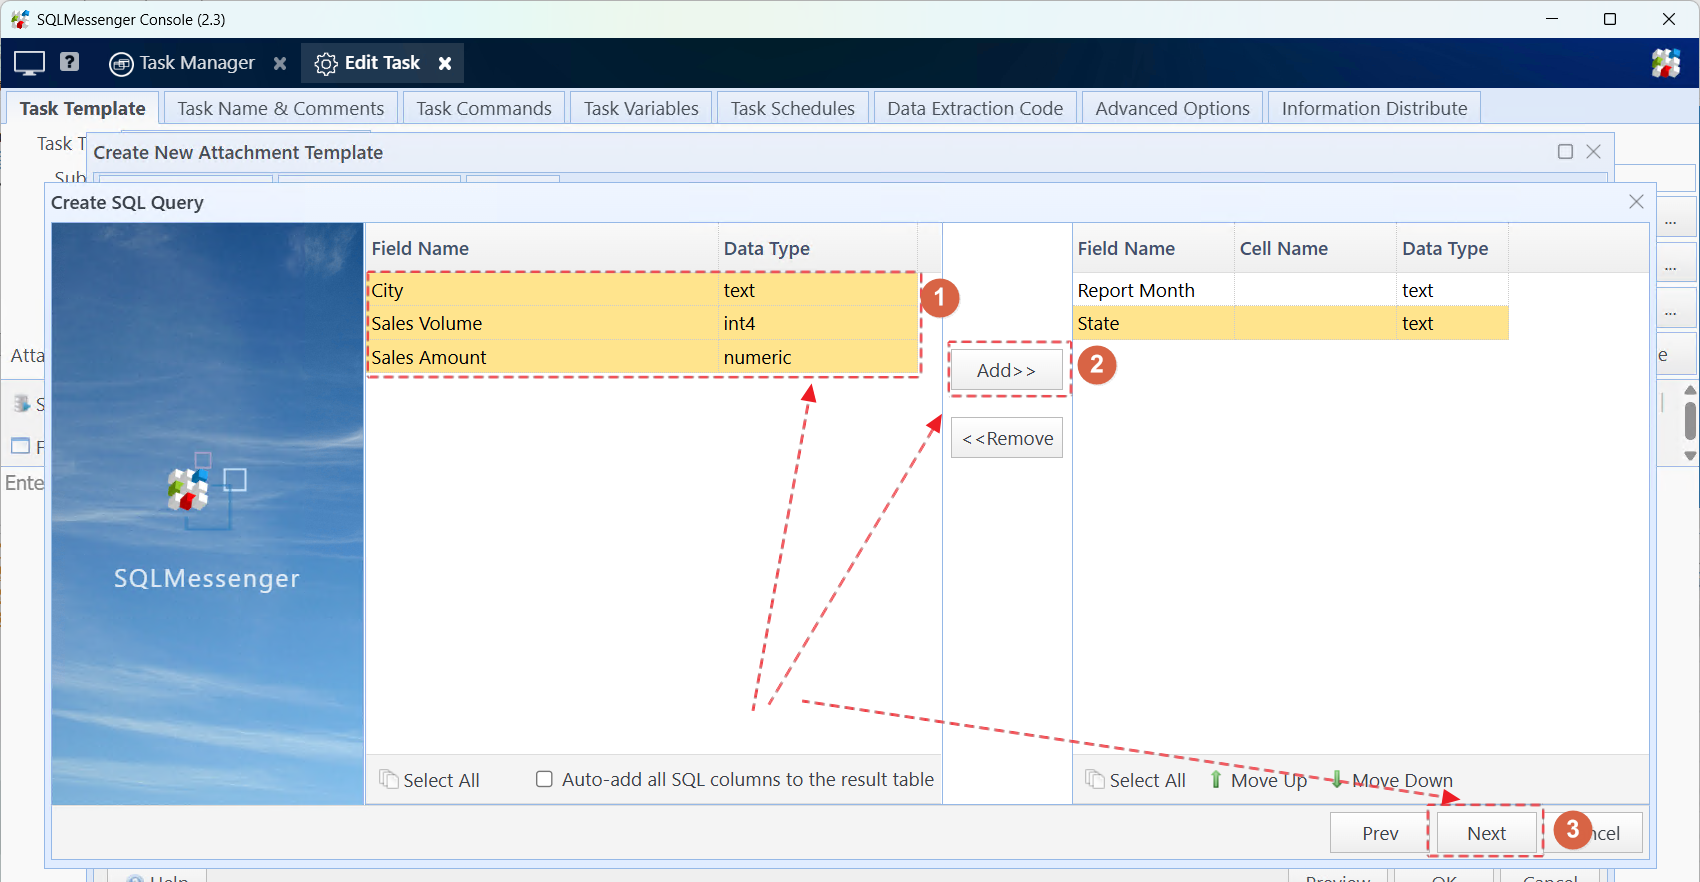
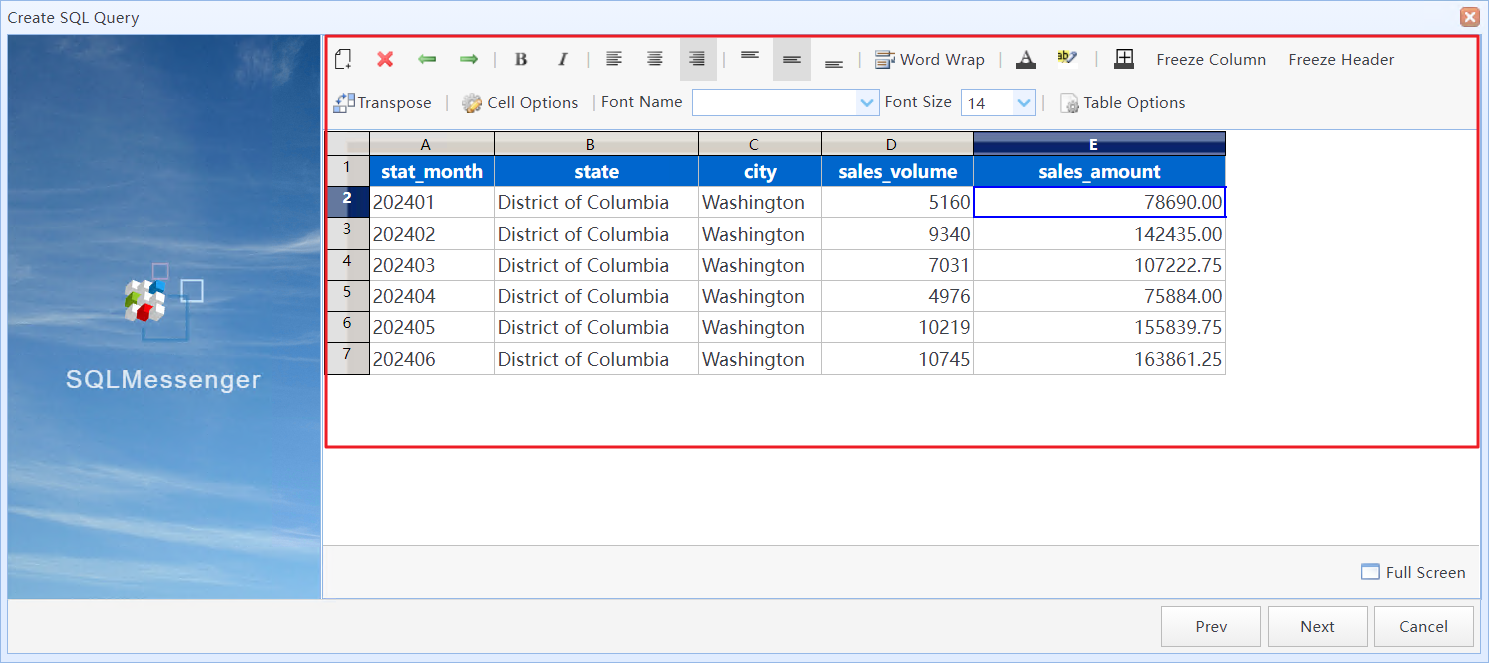
Step 4: Click "Next Step". The system will execute the SQL statement and display the field list of the query results. Select the fields to be displayed in the table from the left list, then add them to the right list. After adding, click "Next Step".
Step 5: Set the display style of the data in the table designer. Then click "Next Step".

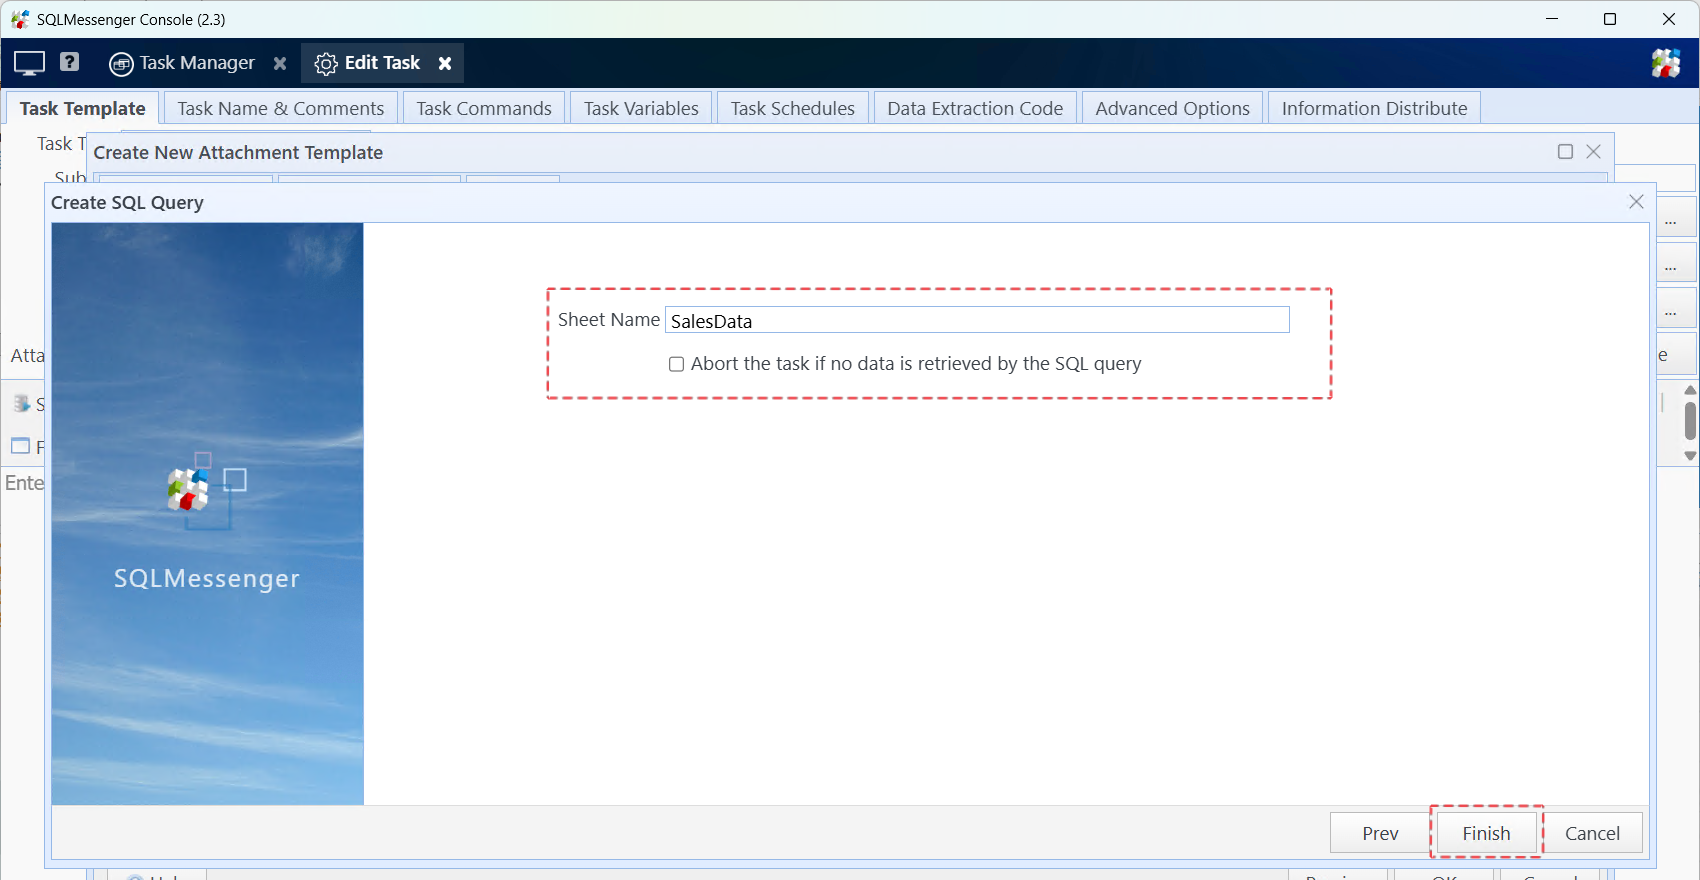
Step 6: Set the Sheet Name for the table (optional). Then click "Finish".
4 Converting Query Results into an HTML Table
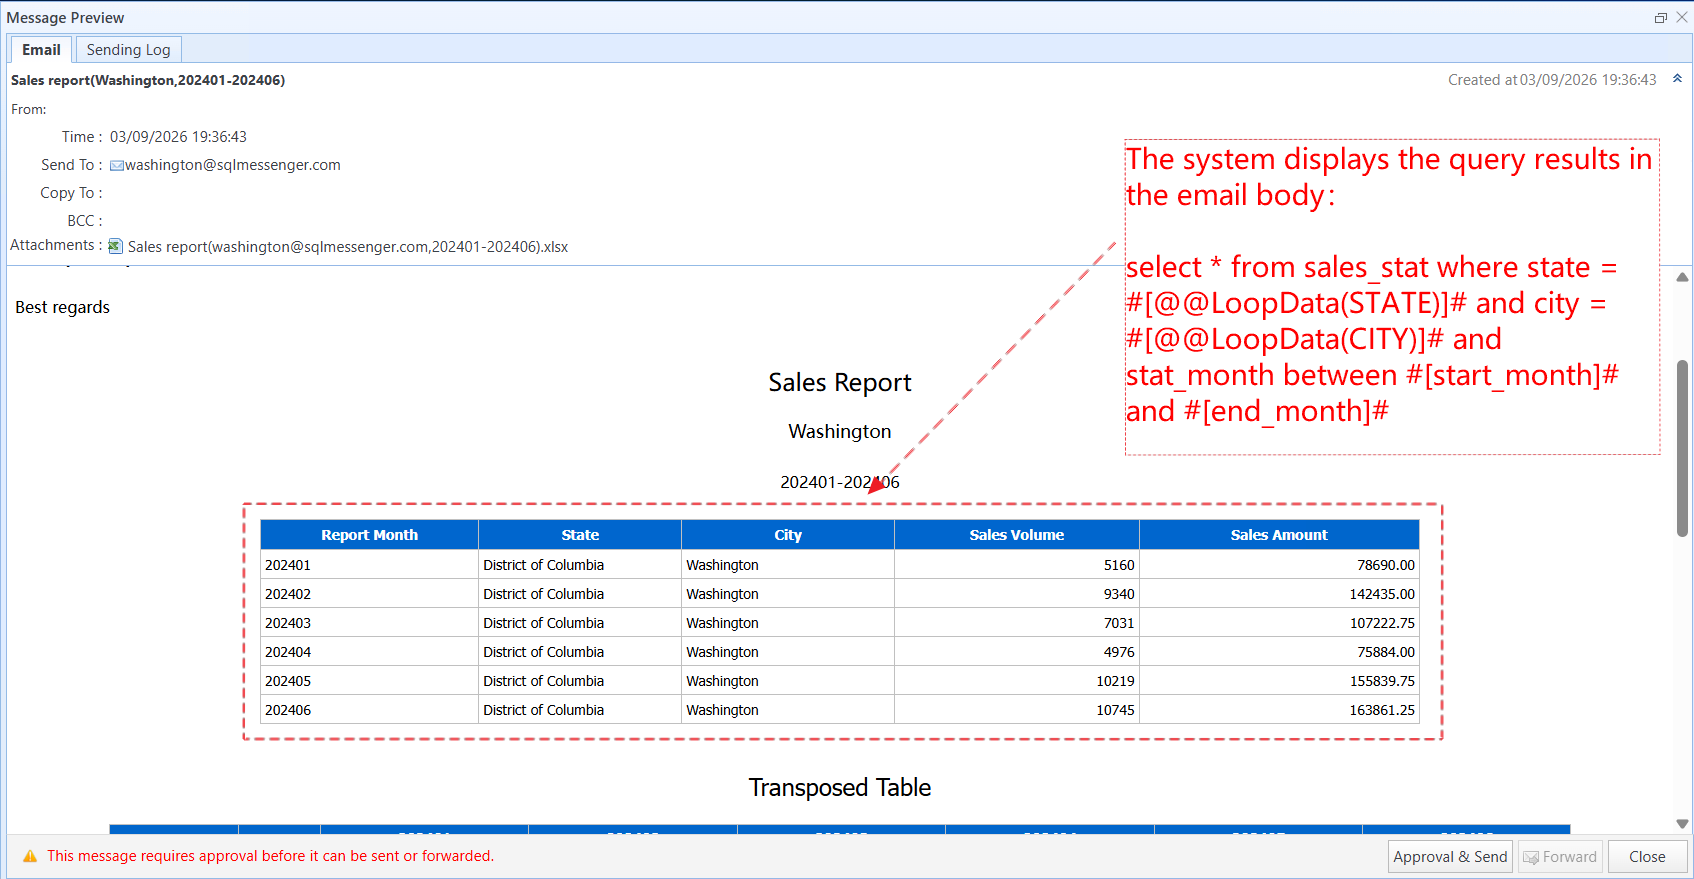
In SQLMessenger, you can convert the results of an SQL query into an HTML table and display it in the email body generated by a task.
Below are the steps for creating a simple table in the email body template:
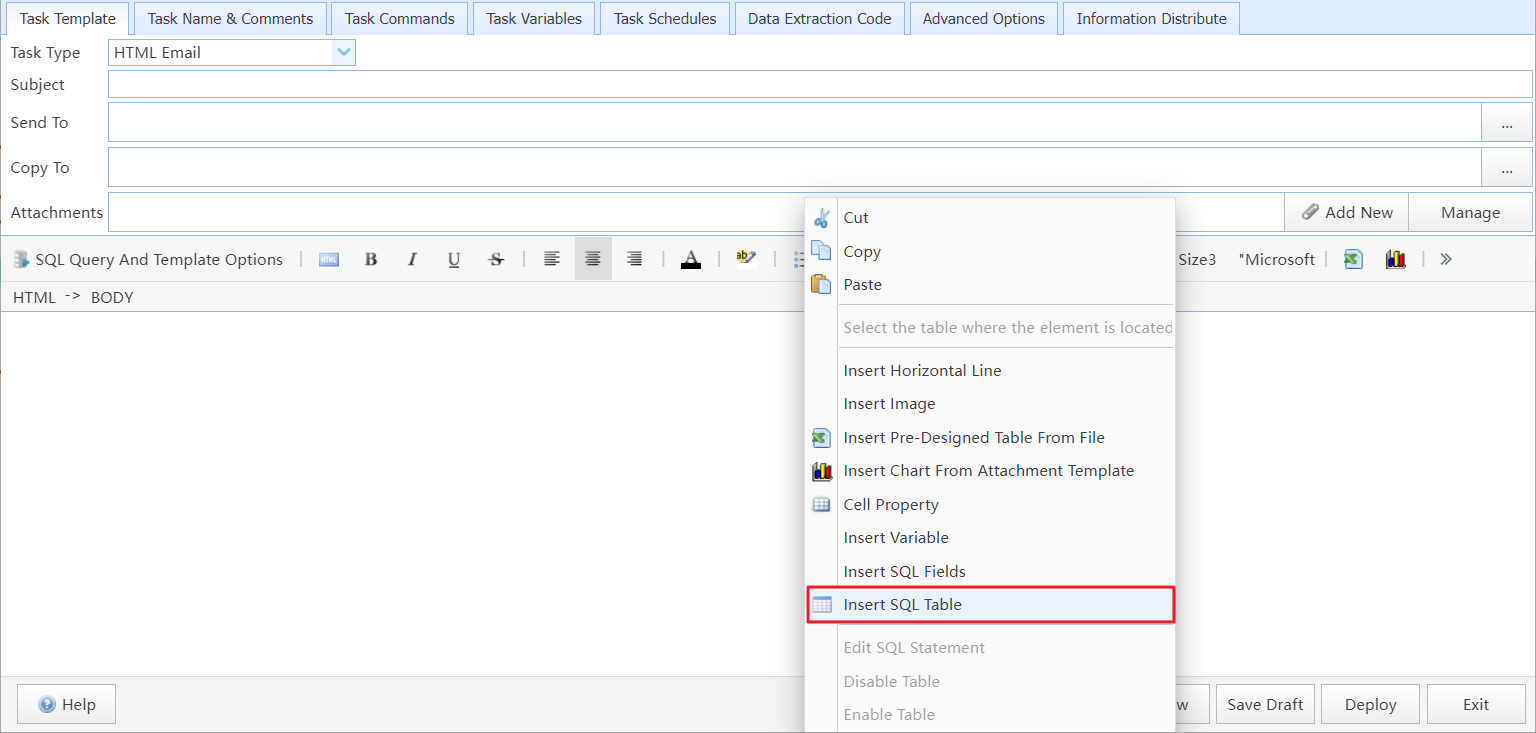
Step 1: Click the "Insert SQL Table" menu item in the context menu of the body template.
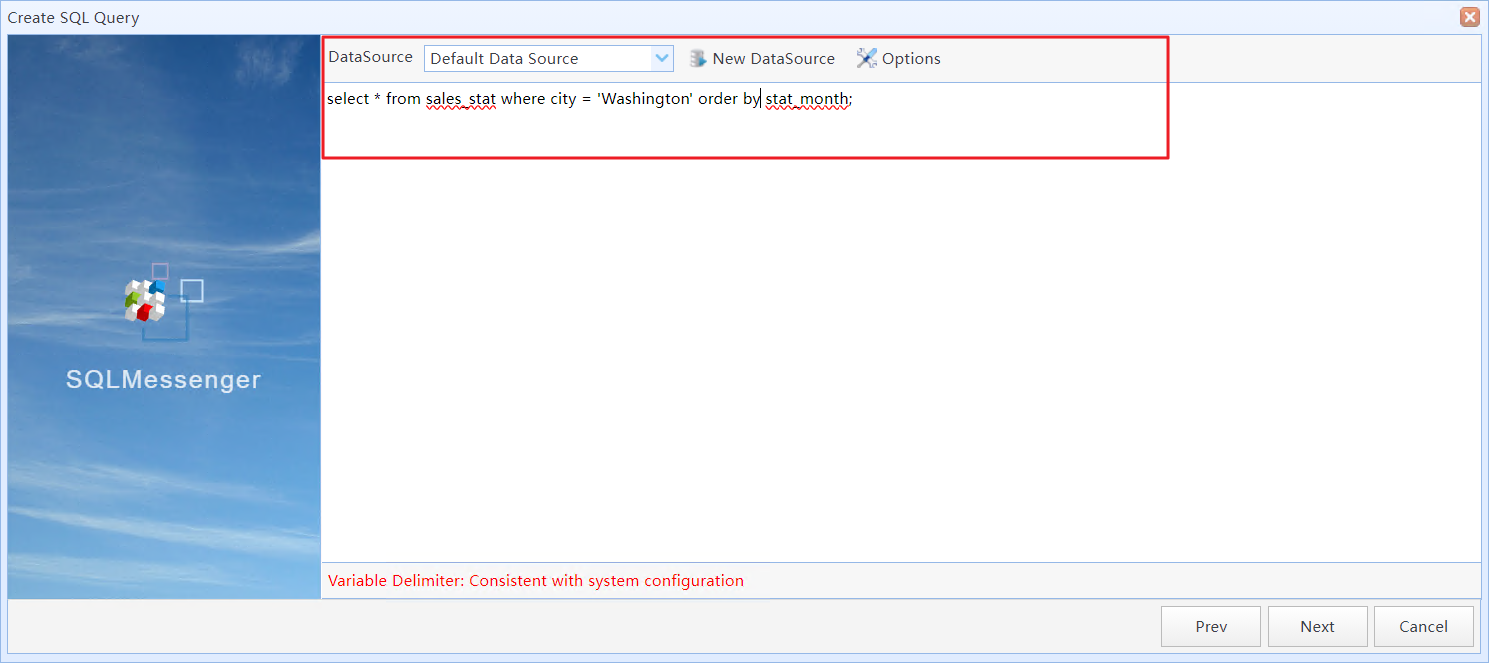
Step 2: Enter SQL query statements.
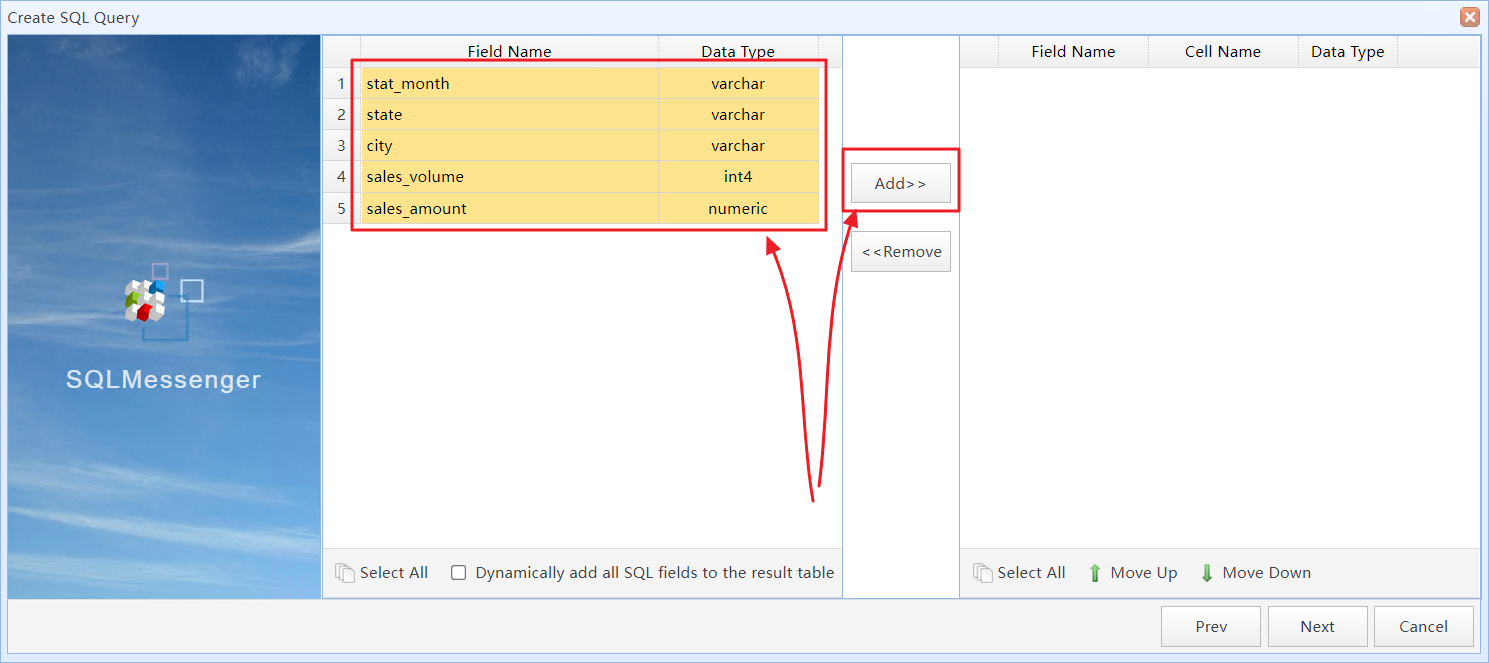
Step 3: Select the fields to convert into the HTML table.
Step 4: Set the display format for the table and fields.
The converted HTML table.
5 Using the Simple Table Style Designer
You can use the "Table Style Designer" to modify the style of a Simple Table, such as column width, row height, color, font, and other styles.
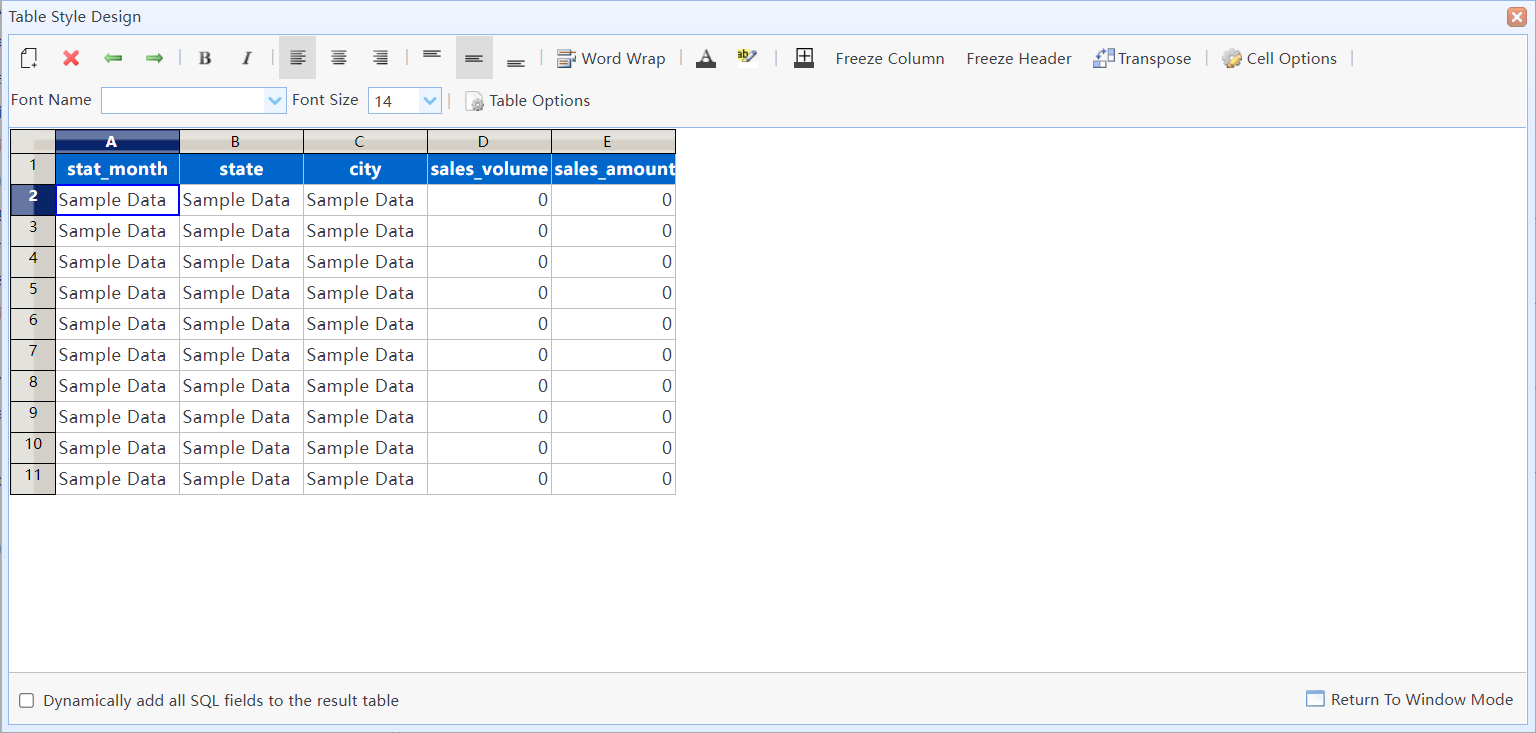
Simple Table Style Designer.
In this dialog box:
|
Add or remove SQL fields from the Simple Table. |
|
Remove fields from the Simple Table. |
|
Move the selected field to the left or right. |
|
When converting the query results into an Excel table, you can click this button to freeze the selected columns. |
|
When converting the query results into an Excel table, you can click this button to freeze the header row. |
|
Display the SQL query results in transposed format. |
|
Set the format for the selected cells. |
|
Set the table width (HTML only), along with other options. |
Dynamically add all SQL fields to the result table |
If this option is selected, the system will add all fields returned by the SQL query to the Simple Table. You can use this feature to dynamically add all columns to the Simple Table. |