1. About the Bulk Telegram Messaging Feature
2. Preparing the Message List File
2.1 Send Messages to a Channel
3. Create a Bulk Messaging Job in SQLTelebot
4. Monitoring Message Sending Progress
5. Abort a Bulk Message Sending Job
1. About the Bulk Telegram Messaging Feature
SQLTelebot provides a bulk messaging feature that enables you to prepare your messages in an Excel spreadsheet and send them to specific contacts, groups, or channels through SQLTelebot.
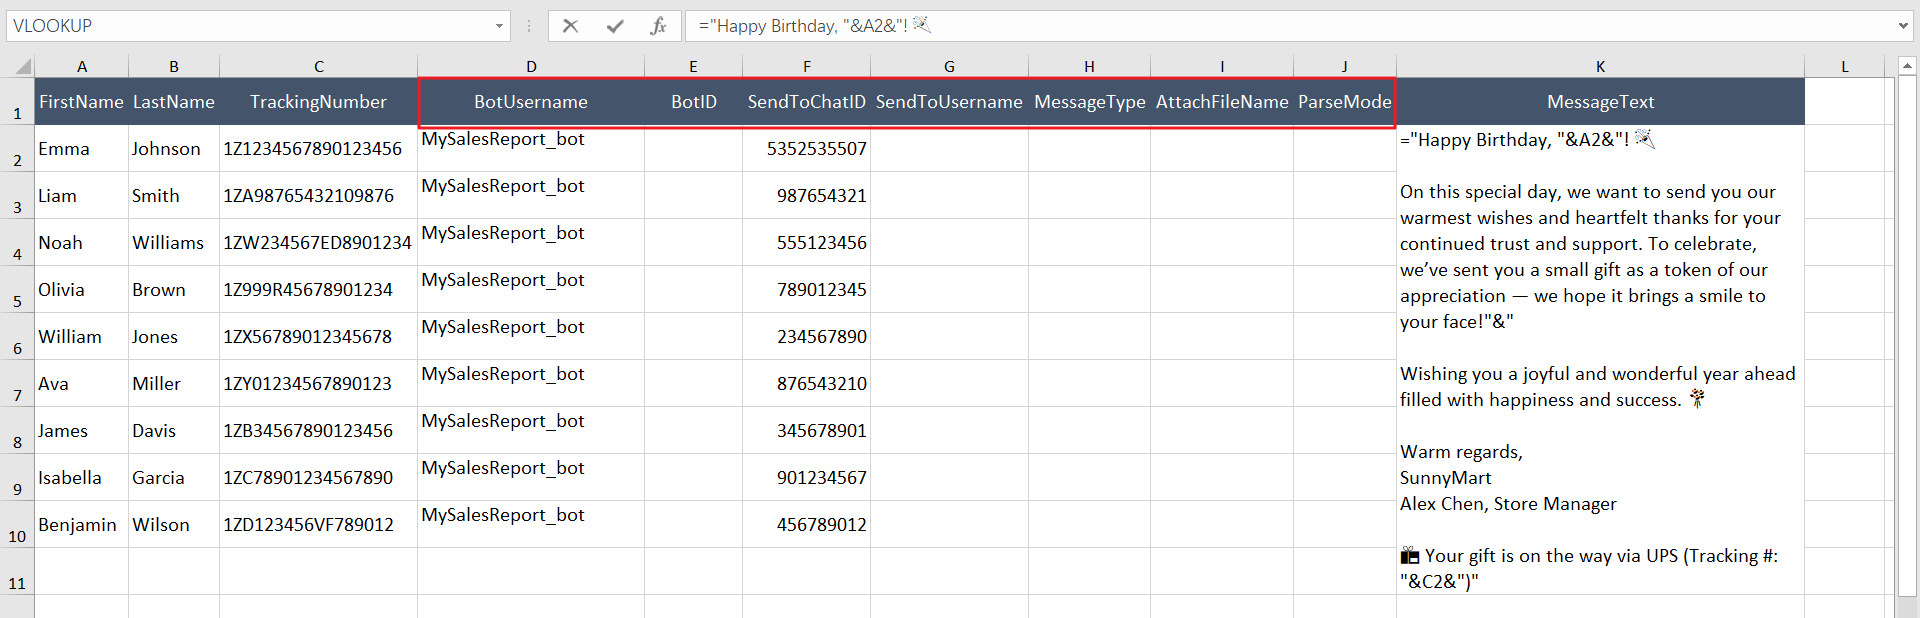
You can also use formulas in the Excel sheet to personalize each message. Below is an example of sending each customer's points for the month individually via Telegram.
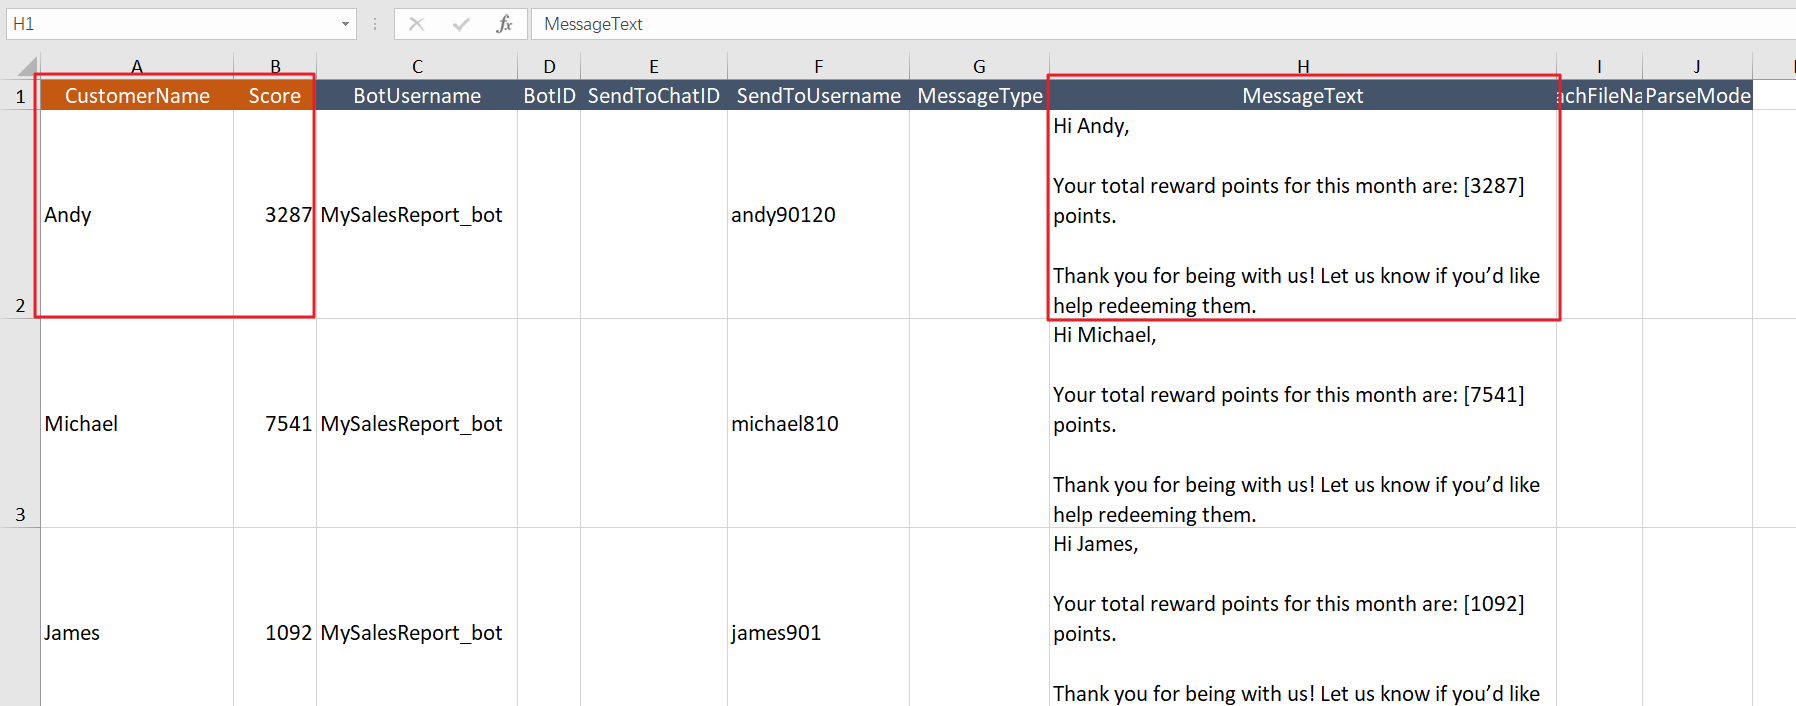
In this example, the following formula is used in column H (MessageText) to generate personalized messages for each customer:
="Hi "&A2&",
Your total reward points for this month are: ["&B2&"] points.
Thank you for being with us! Let us know if you’d like help redeeming them."
Note: Recipients must have added your Telegram bot as a contact and must be willing to receive messages sent through it.
2. Preparing the Message List File
Before sending bulk messages, you first need to prepare a message list spreadsheet that contains the messages to be sent. This spreadsheet is an Excel file. You can click here to download the template.
The message list must be placed on the first sheet of the Excel file. The first row serves as the header row, and the second row and below are the data rows.
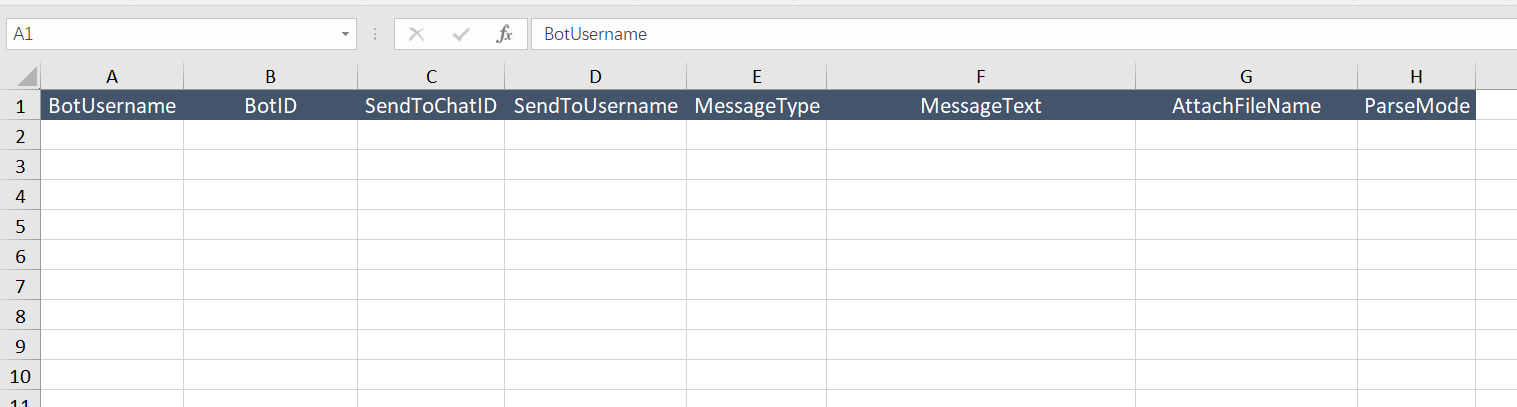
Message List
Below are the required fields and their descriptions for the message list spreadsheet:
BotUsername |
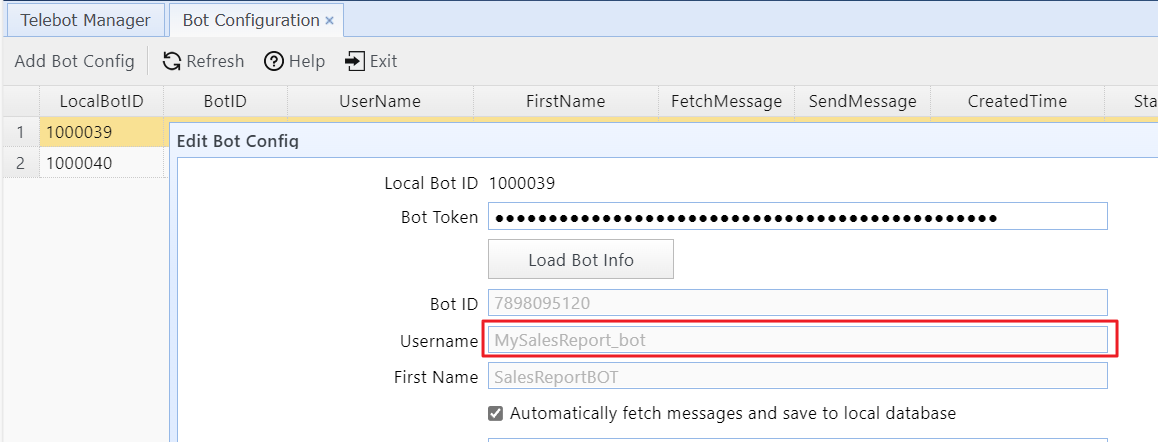
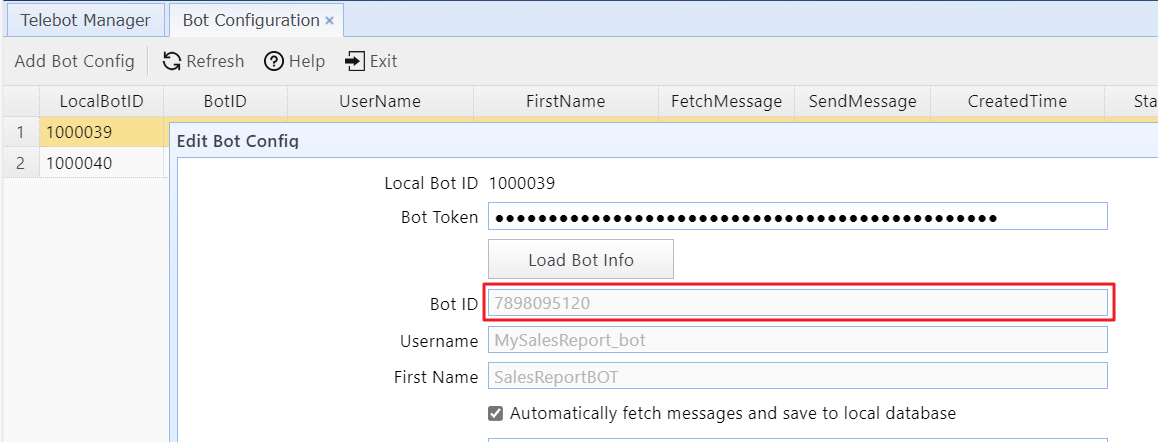
Fill in the Telegram Bot username used to send this message. Note: You only need to fill in either BotUsername or BotID — not both. The bot must already be added in the Bot Configuration section of SQLTelebot. The BotUsername can be found in the "Bot Configuration."
|
BotID |
Fill in the BotID of the Telegram Bot used to send this message. Note: You only need to fill in either "BotUsername" or "BotID." If you have filled in the BotUsername, you do not need to fill in the BotID. The bot must be one that has already been added to the "Bot Configuration" in Telebot. The BotID can be found in the "Bot Configuration."
|
SendToUsername |
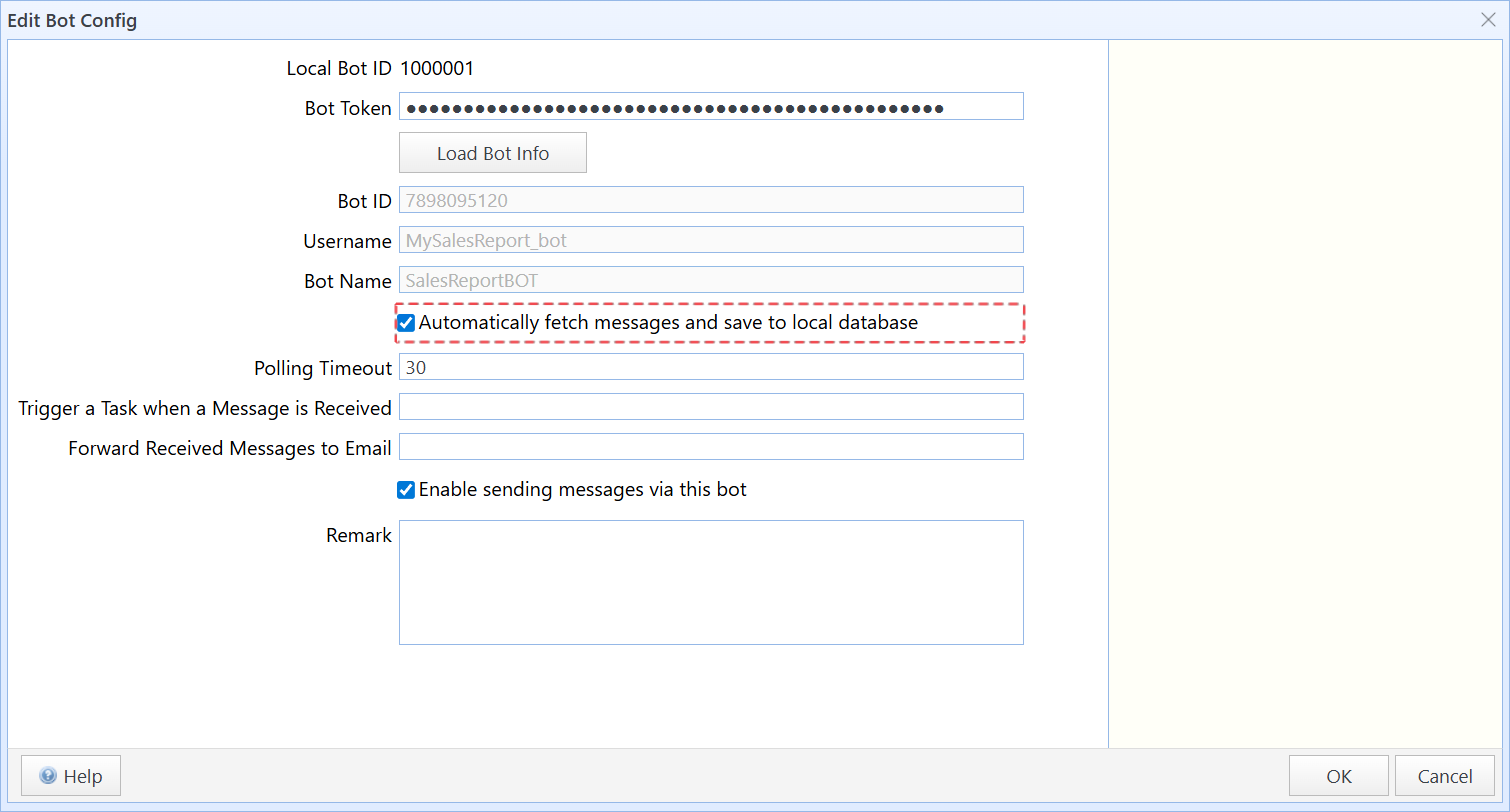
If the message is sent to a "private" type chat (one-on-one chat), you can fill in the recipient's username here (without the "@" symbol before the username). Note: You only need to fill in either SendToChatID or SendToUsername — not both. The username must already exist in the "Chat List." If the username does not exist, ask the recipient to send a message to your bot. You can then find the corresponding ChatID in the Chat List (you need to enable the bot’s Automatically fetch messages and save to local database option).
|
SendToChatID |
Fill in the ChatID of the chat where the message will be sent. If you want to send the message to a Channel, you can directly fill in "'@channel_username" in the "SendToChatID" field (note the single quotation mark before the @). Click here for detailed instructions. Note: If you want to send a message to a group, fill in the group’s ChatID in the "SendToChatID" field. If you want to send a message to a channel, fill in the channel's ChatID or "'@channel_username" (note the single quotation mark before the @) in the "SendToChatID" field. When sending a message to a private chat, fill in either SendToChatID or SendToUsername — not both. If you are not sure about the contact’s ChatID, click here to see “How to obtain the ChatID.” |
MessageType |
Optional. Specify the message type. It can be: text: Send a text message. The content of the message is set in the "MessageText" field. document: Send a document message. The file to be sent is specified in the "AttachFileName" field. You can also add some description for the file in the "MessageText" field. photo: Send a photo message. The image file to be sent is specified in the "AttachFileName" field. You can also add some description for the file in the "MessageText" field. If this field is empty, the system will treat the message as a text type. |
MessageText |
Specifies the text content of the message to be sent. The Telegram API requires that the length of this field cannot exceed 4096 characters. Note: For "text" messages, this field is mandatory. For "document" and "photo" type messages, this field is optional and will be sent as the caption for the file. |
AttachFileName |
If the message type is "document" or "photo," specify the name of the file to be sent here. Note that you need to provide the full path of the file. For example: C:\Users\andy\Desktop\New Folder\invoice-andy.pdf |
ParseMode |
Optional. Specify how Telegram should display the text in MessageText. It can be "text", "MarkdownV2" or "HTML." For detailed explanations, please refer to the Telegram API documentation: Formatting options |
2.1 Send Messages to a Channel
1). If you want to send a message to a channel, you can fill in the SendToChatID field with the channel’s username (for example, "@channel_username").
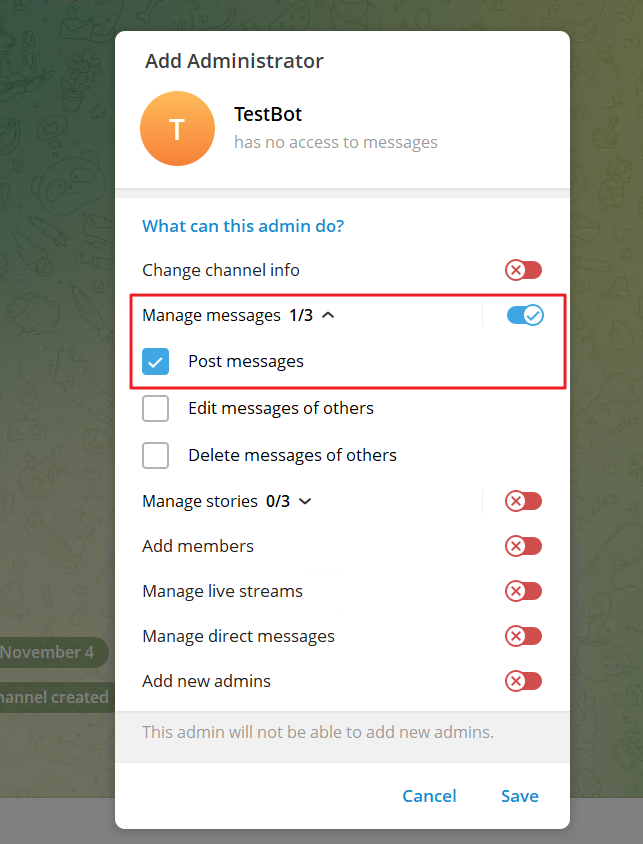
2). The bot used to send the message must be added as an administrator of the channel (it only needs the “Manage Messages” → “Post Messages” permission).
3). You can find the channel’s username by following these steps:
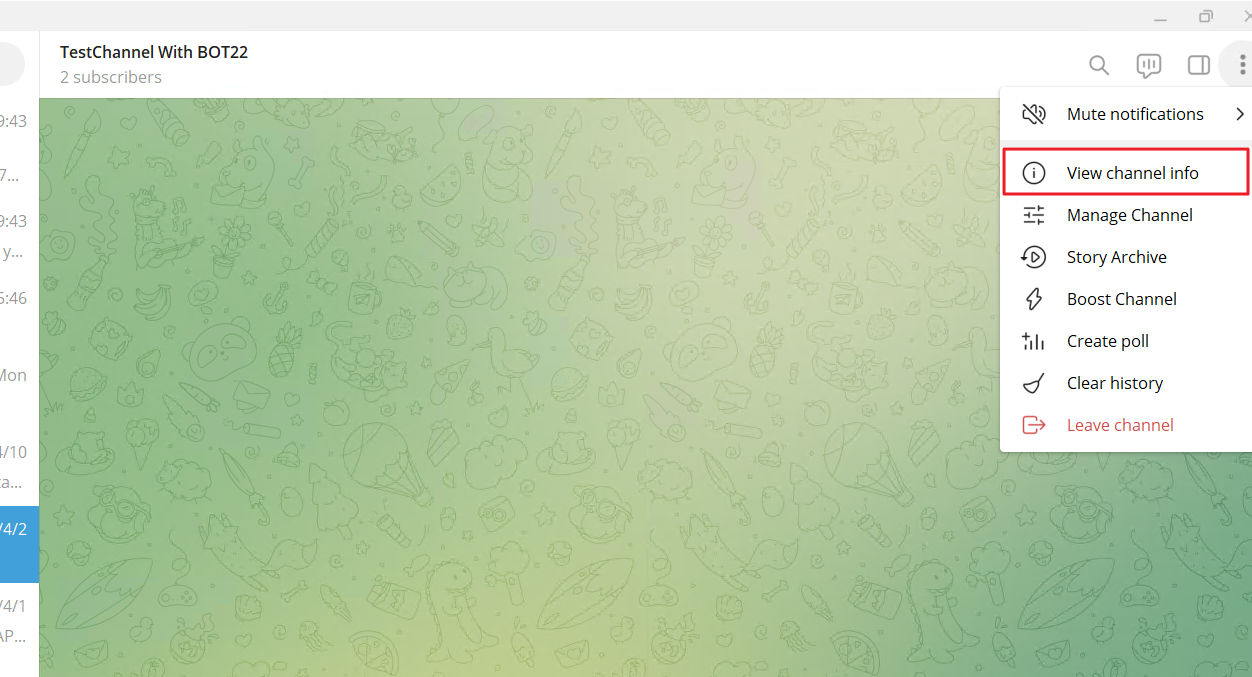
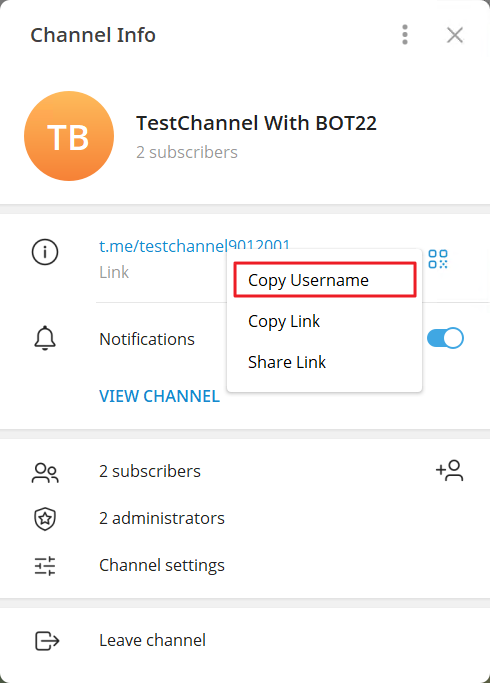
Step 1: In Telegram, click the "View Channel Info" menu item:
Step 2: In the "Channel Info," right-click the "link" and click "Copy username":
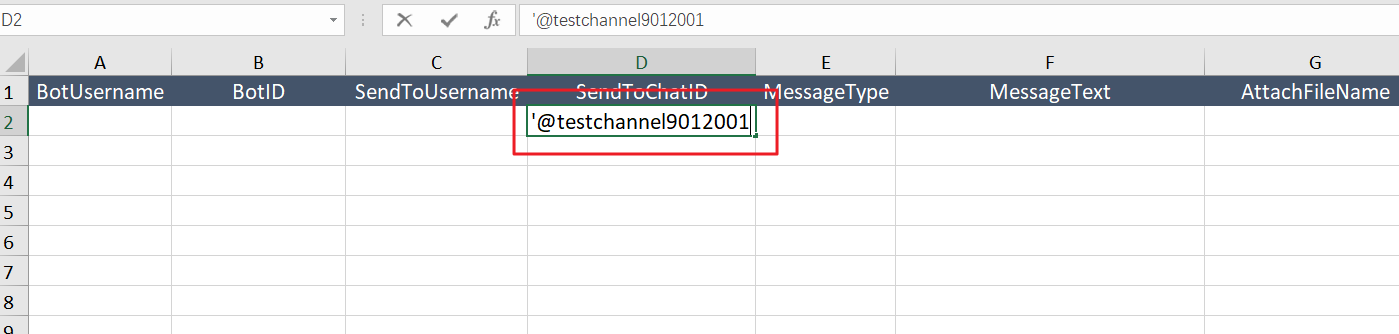
Step 3: In the message list table, paste the copied username into the "SendToChatID" cell, preceded by a single quote ('):
3 Create a Bulk Messaging Job in SQLTelebot
After the message spreadsheet is ready, follow the steps below to create a bulk messaging job in SQLTelebot.
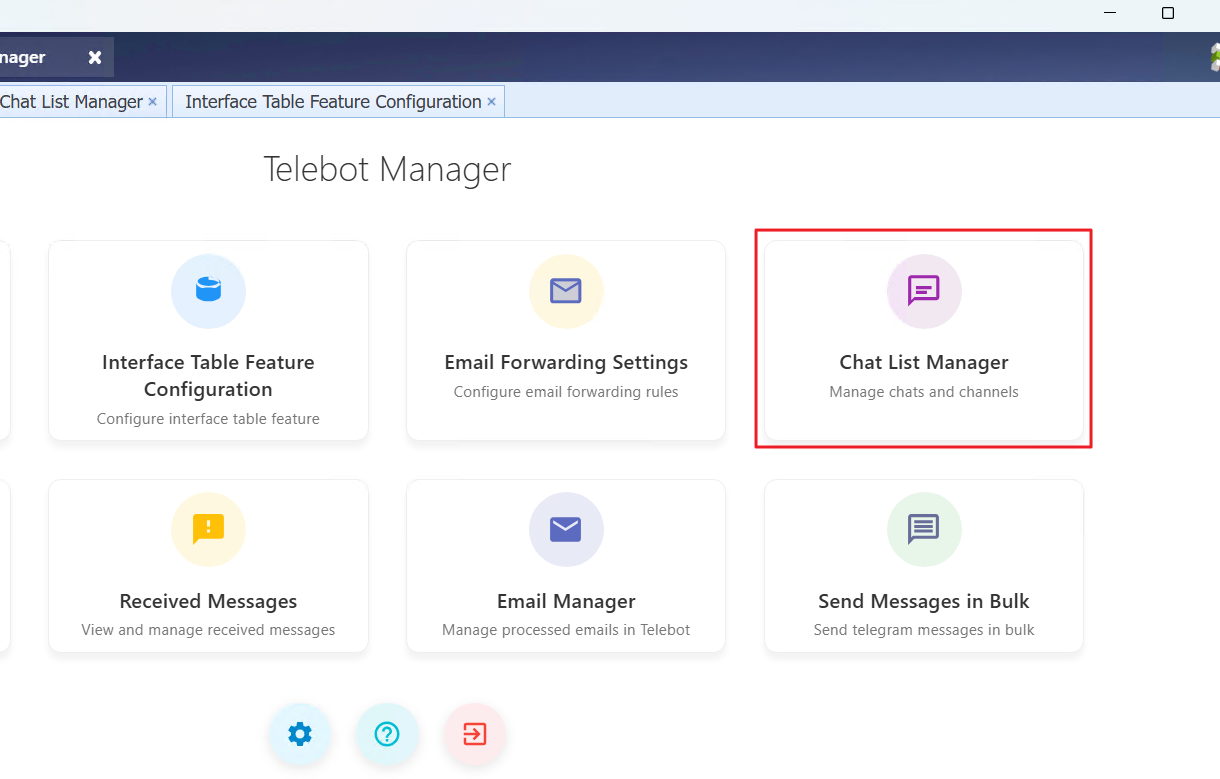
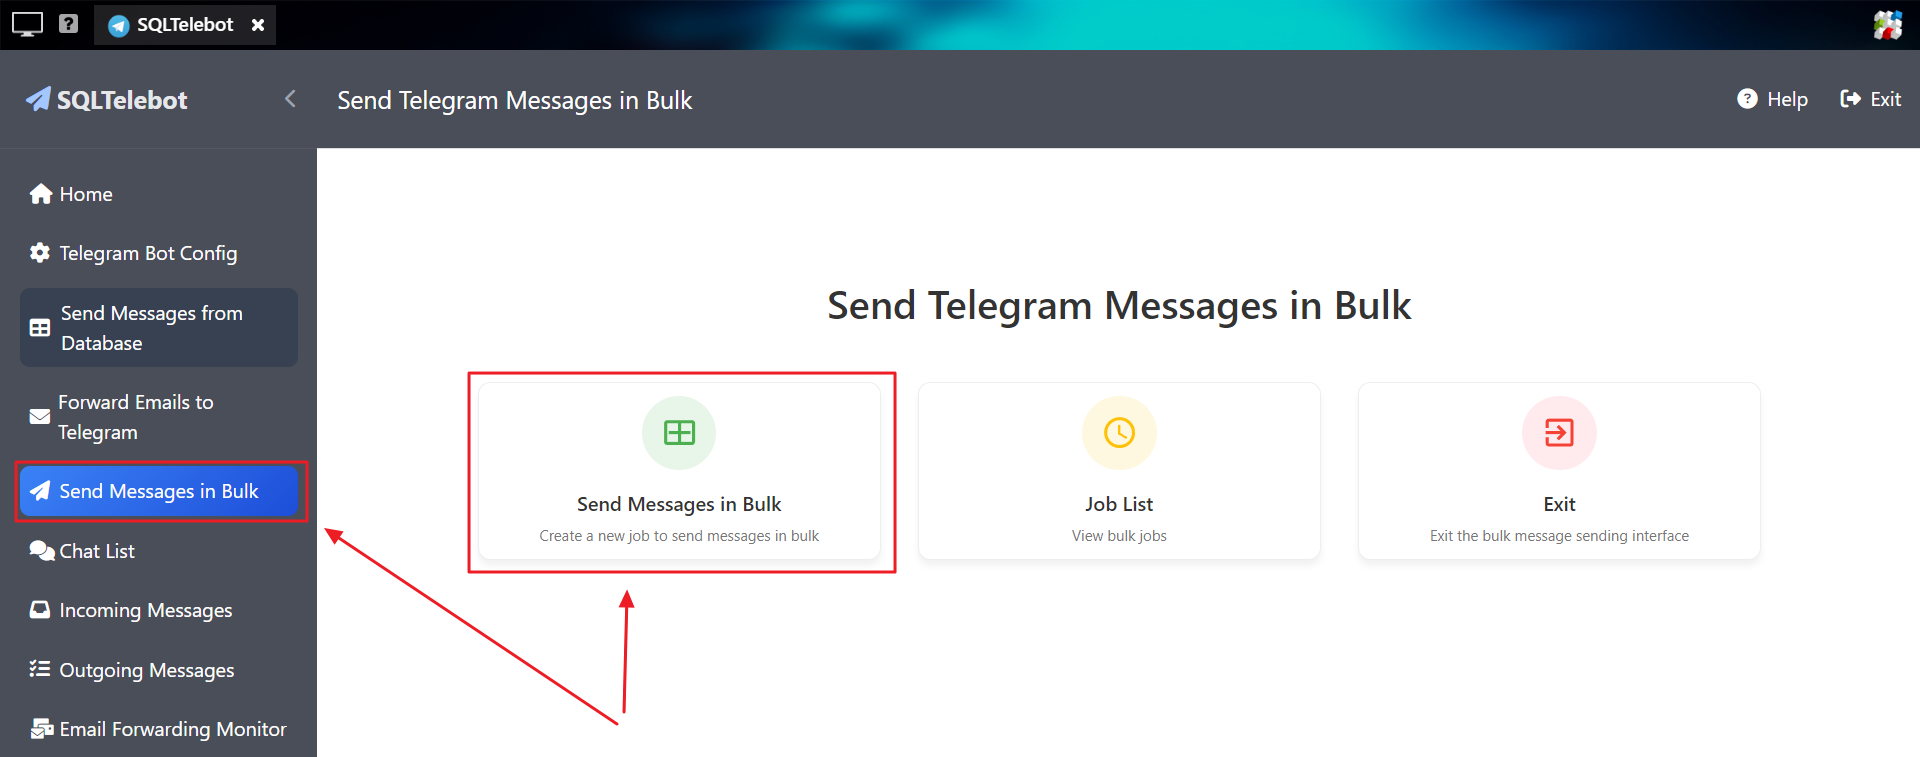
Step 1: Click the "Send Messages in Bulk" button in SQLTelebot. Then click "Send Messages in Bulk."
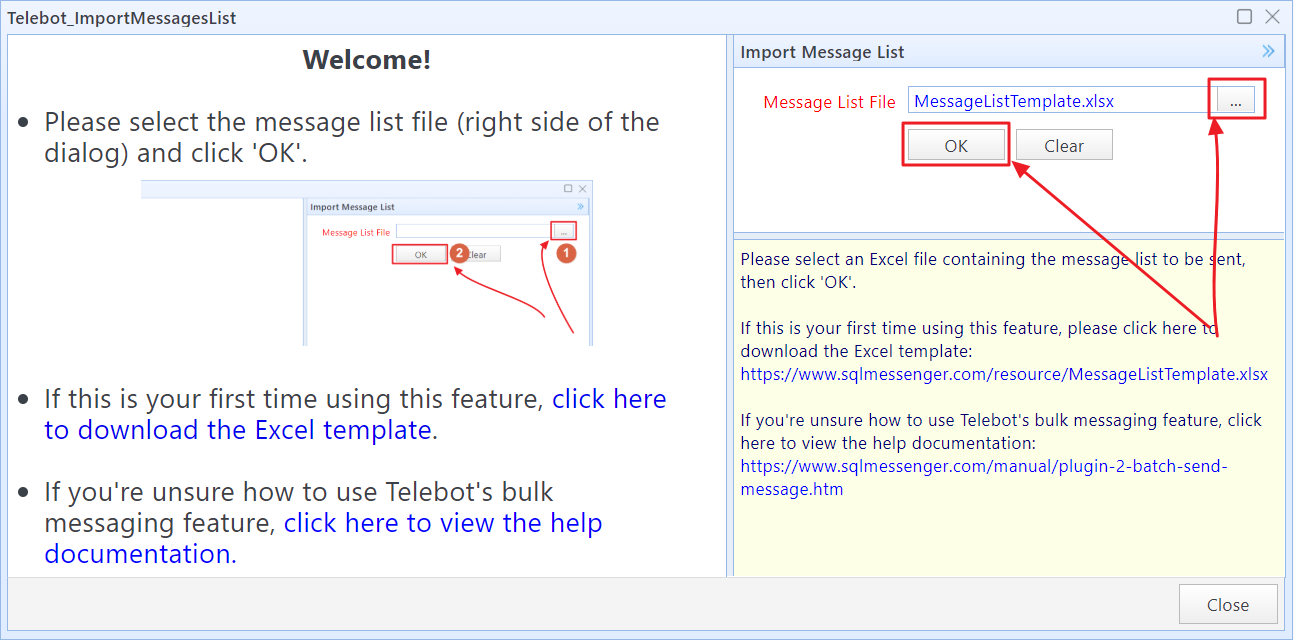
Step 2: Click the “...” button next to Message List File, select the message list file you prepared, and then click OK.
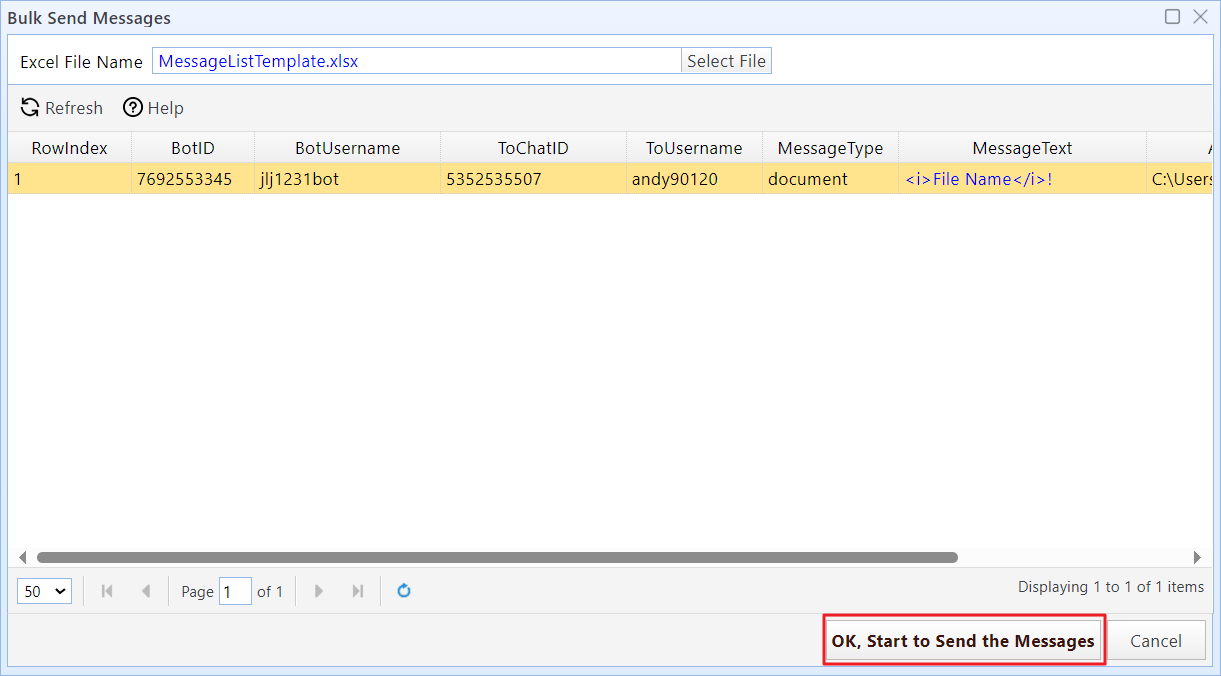
Step 3: At this point, SQLTelebot will check the data in the spreadsheet and import it into the message queue. You can view the list of messages to be sent on the interface. After confirming that the messages are correct, click “Start Sending Messages”, and the system will begin sending them.
4 Monitoring Message Sending Progress
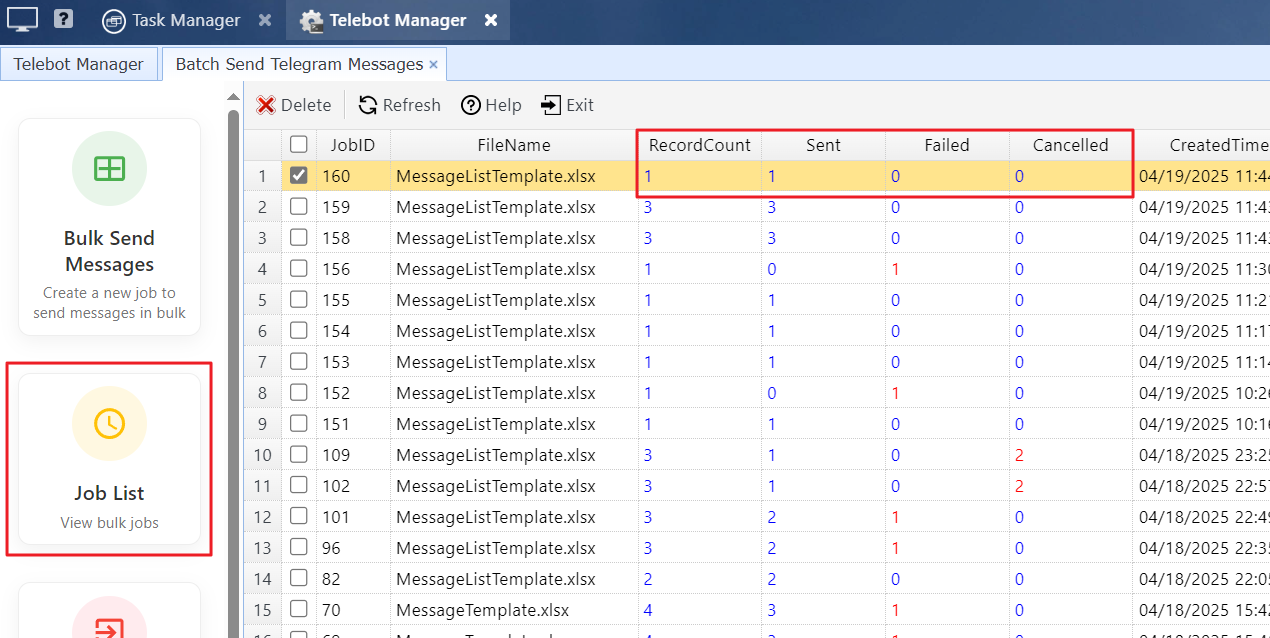
You can monitor the sending progress of each job in Job List.
5 Abort a Bulk Message Sending Job
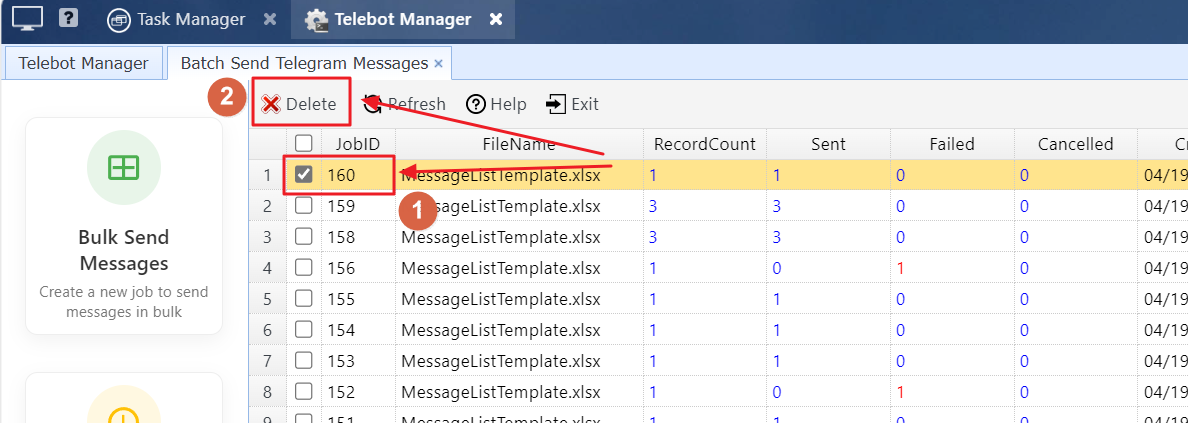
After the message sending starts, you can stop the process by deleting the corresponding job in the Job List. Once the job is deleted, any unsent messages will be canceled.
6 FAQ
Q: Can I add other columns to the message list file?
A: Yes. You can add any additional columns you need to the message list file, and you can use formulas to generate the data in the columns — for example, to generate the message content to be sent. Note that the message list must include the following columns: BotUsername, BotID, SendToChatID, SendToUsername, MessageType, MessageText, AttachFileName, ParseMode.
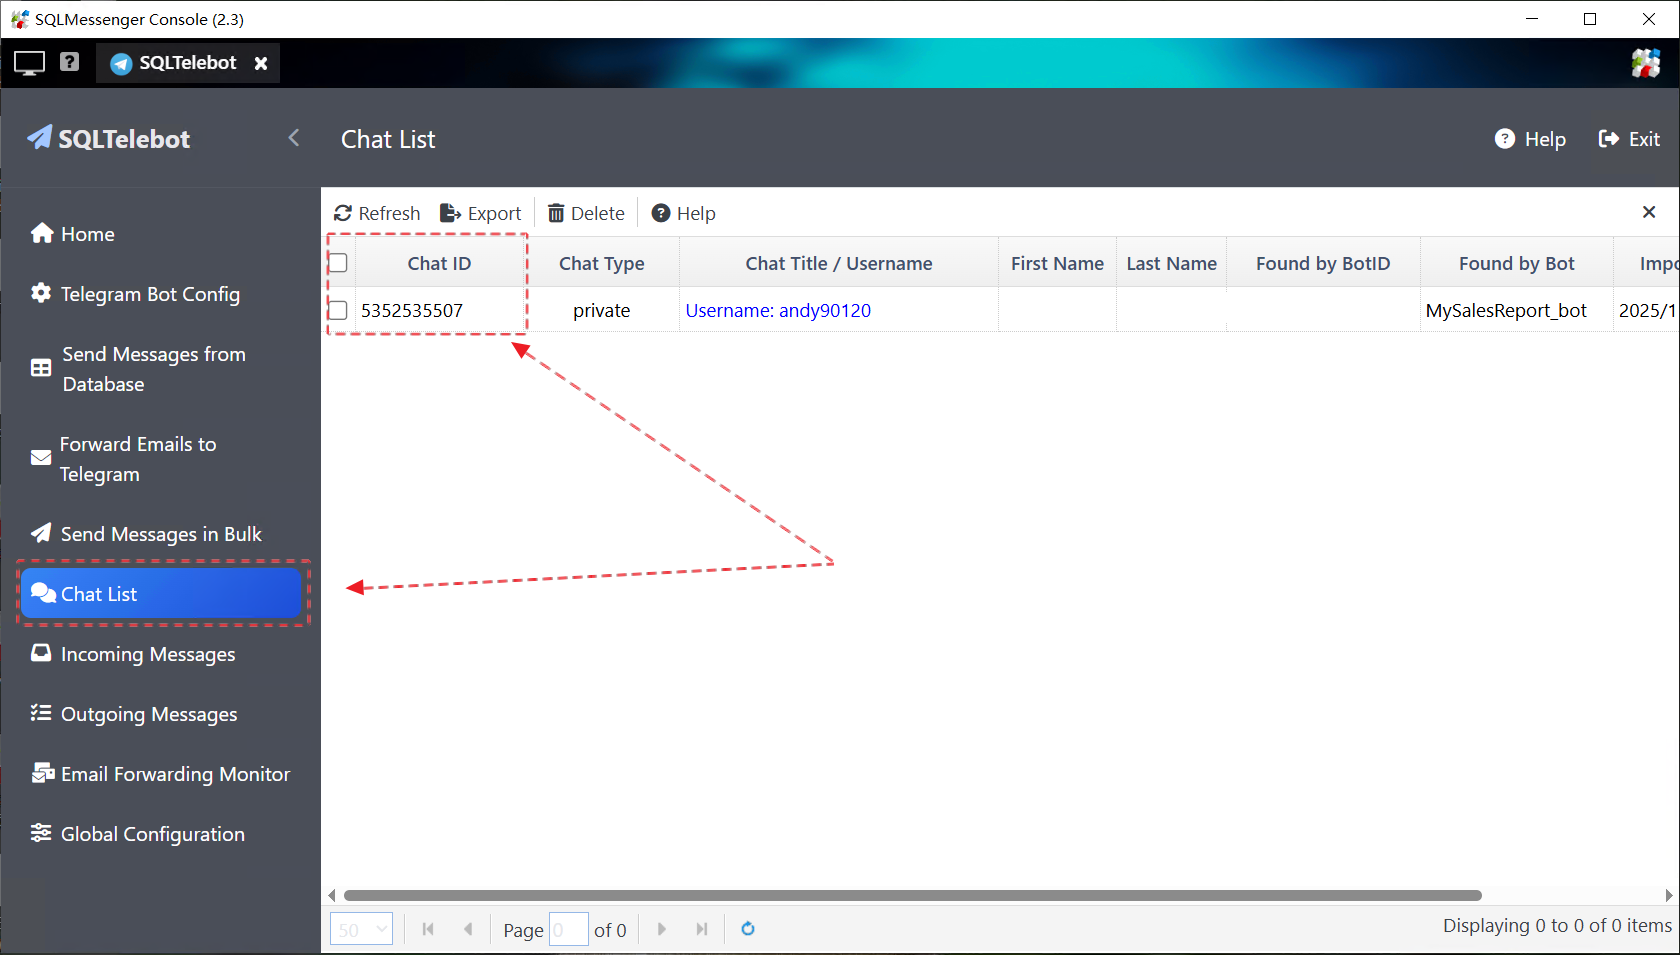
Q: How do I obtain the ChatID?
A: You can retrieve a contact’s ChatID by following the steps below.
Step 1: Ensure that the bot option “Automatically fetch messages and save to local database” is enabled.
Step 2: Ask the contact to send a message to your bot via Telegram.
Step 3: After the message is successfully delivered, you can find the contact’s ChatID in the “Chat List” of SQLTelebot.