1. Configuring File Types
Before you start using MailAttachmentBot, it is necessary to configure the File Type in the system. This configuration defines the format of the data files you want to process—for example, the keywords in the file name, the column names in the file, the data type of each column, and the file’s processing method (whether to import it into the database or copy it to a specific folder).
These details are stored in the system’s configuration table.
Based on your configuration, the system will identify the type of each received file and determine how to process it.
Follow the steps below to add a File Type in MailAttachmentBot.
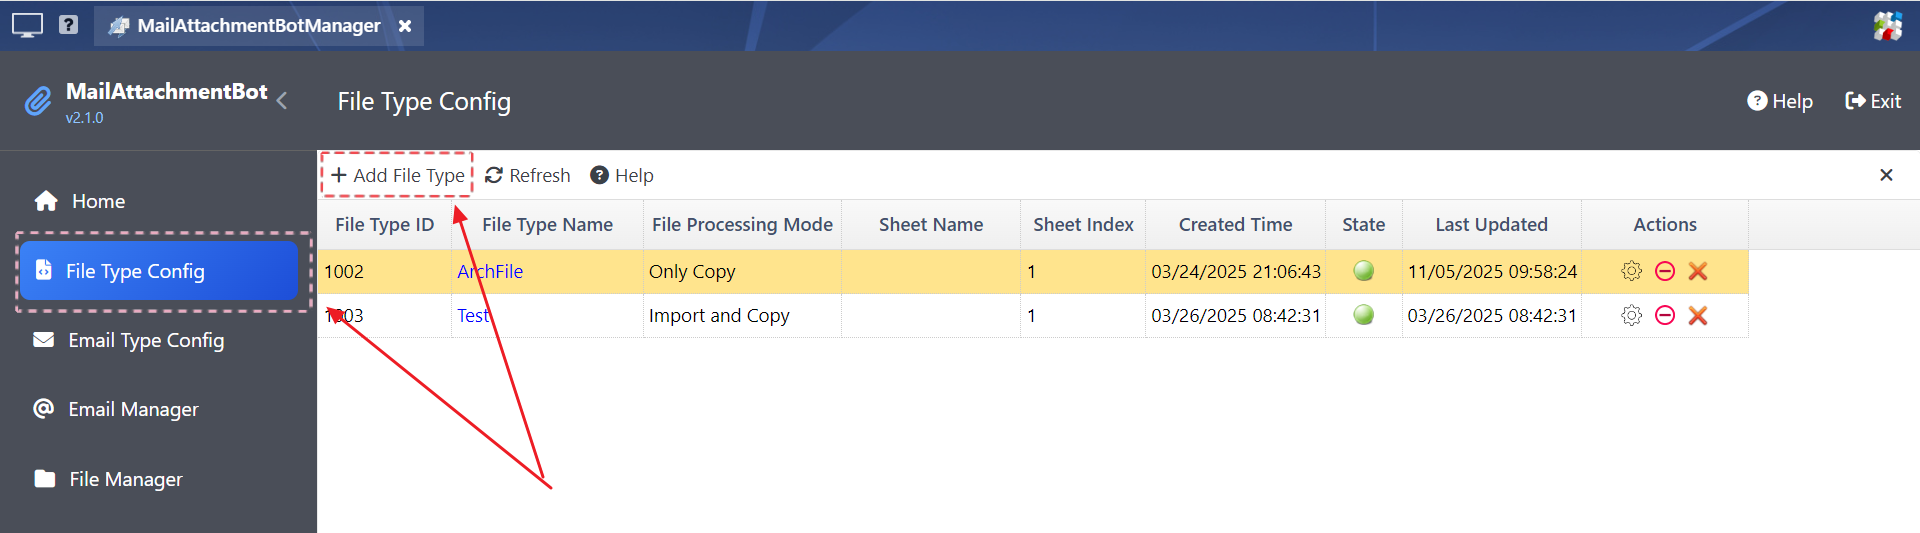
Step 1: In MailAttachmentBot Manager, click the “File Type Config” menu, and then click “Add File Type” to open the “Edit File Type” dialog box.
Step 2: In the Edit File Type dialog box, enter the configuration details such as the file type name and file name keywords.
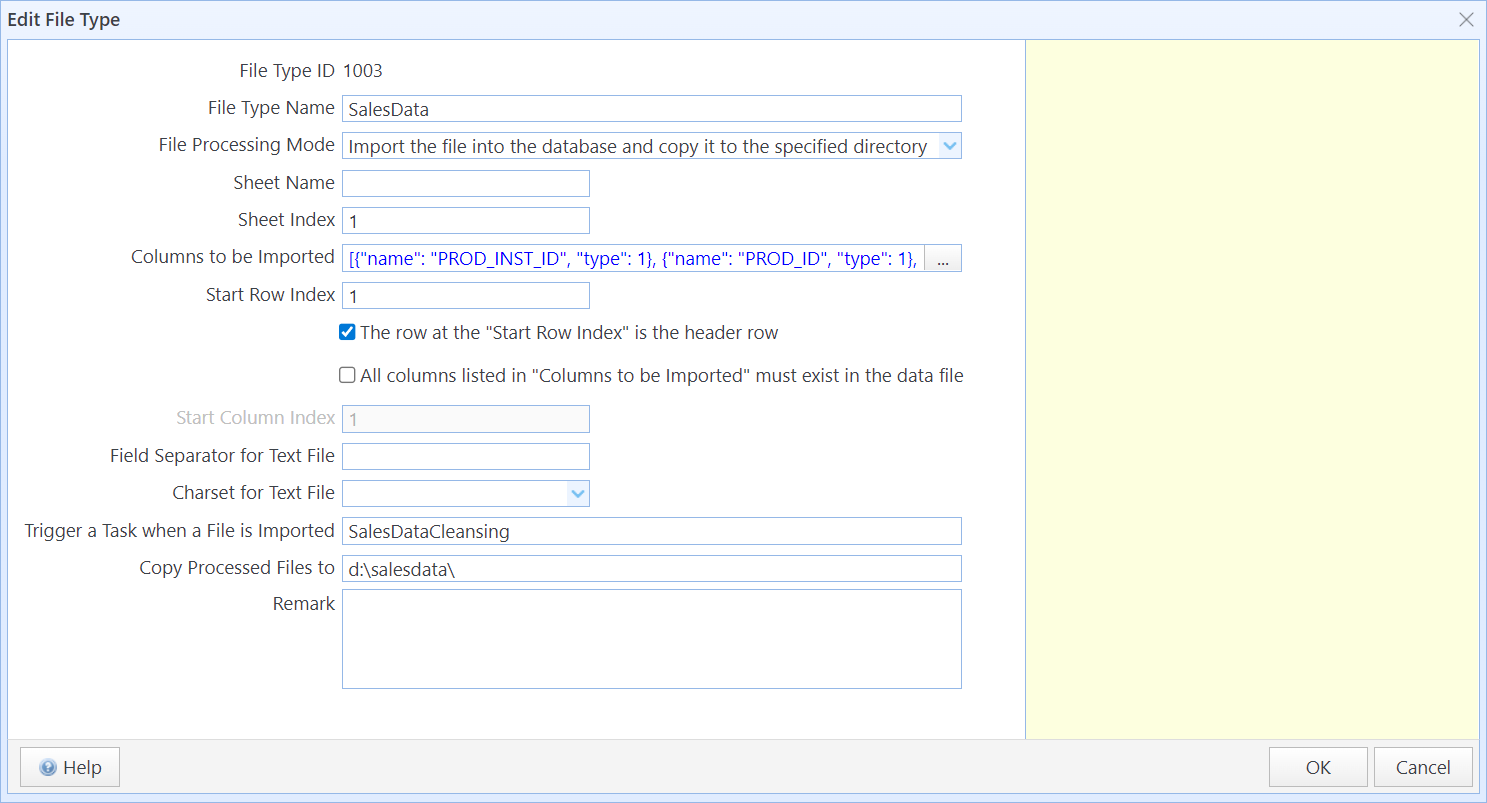
In this dialog box:
File Type Name |
Enter a name for the file type. The file type name is case-insensitive and must be unique. |
File Processing Mode |
Choose a file processing mode. The system will process the files according to the method you specify. File Processing Mode includes the following options: "Import the file into the database and copy it to the specified directory": The system will import the file into the PostgreSQL database and copy the file to the directory specified in "Copy Processed Files To". "Only import the file into the database": The system will only import the file data into the PostgreSQL database for storage. "Only copy the file to the specified directory": The system will only copy the file to the directory specified in "Copy Processed Files To." Note: The "Import the file into the database" option is only valid for text files and spreadsheet files (*.xlsx and *.xlsm). Other types of files cannot be imported into the database. The imported data will be stored in SQLMessenger's database, which is a PostgreSQL database installed on your local machine. The database is automatically installed when you install SQLMessenger, and SQLMessenger uses this database to store data. |
Sheet Name |
Enter the name of the sheet be imported into database. The sheet name is case-insensitive and must be unique within the same file. You only need to set either the sheet name or the sheet index. If both the sheet name and sheet index are set, the sheet same will take precedence. If neither the sheet name nor the sheet index is set, the system will import data from the first sheet of the file. This option is not valid for text files. |
Sheet Index |
Enter the 1-based index number of the sheet in the spreadsheet to be imported into the database. You only need to set either the sheet name or the sheet index. If both the sheet name and sheet index are set, the sheet same will take precedence. If neither the sheet name nor the sheet index is set, the system will import data from the first sheet of the file. This option is not valid for text files. |
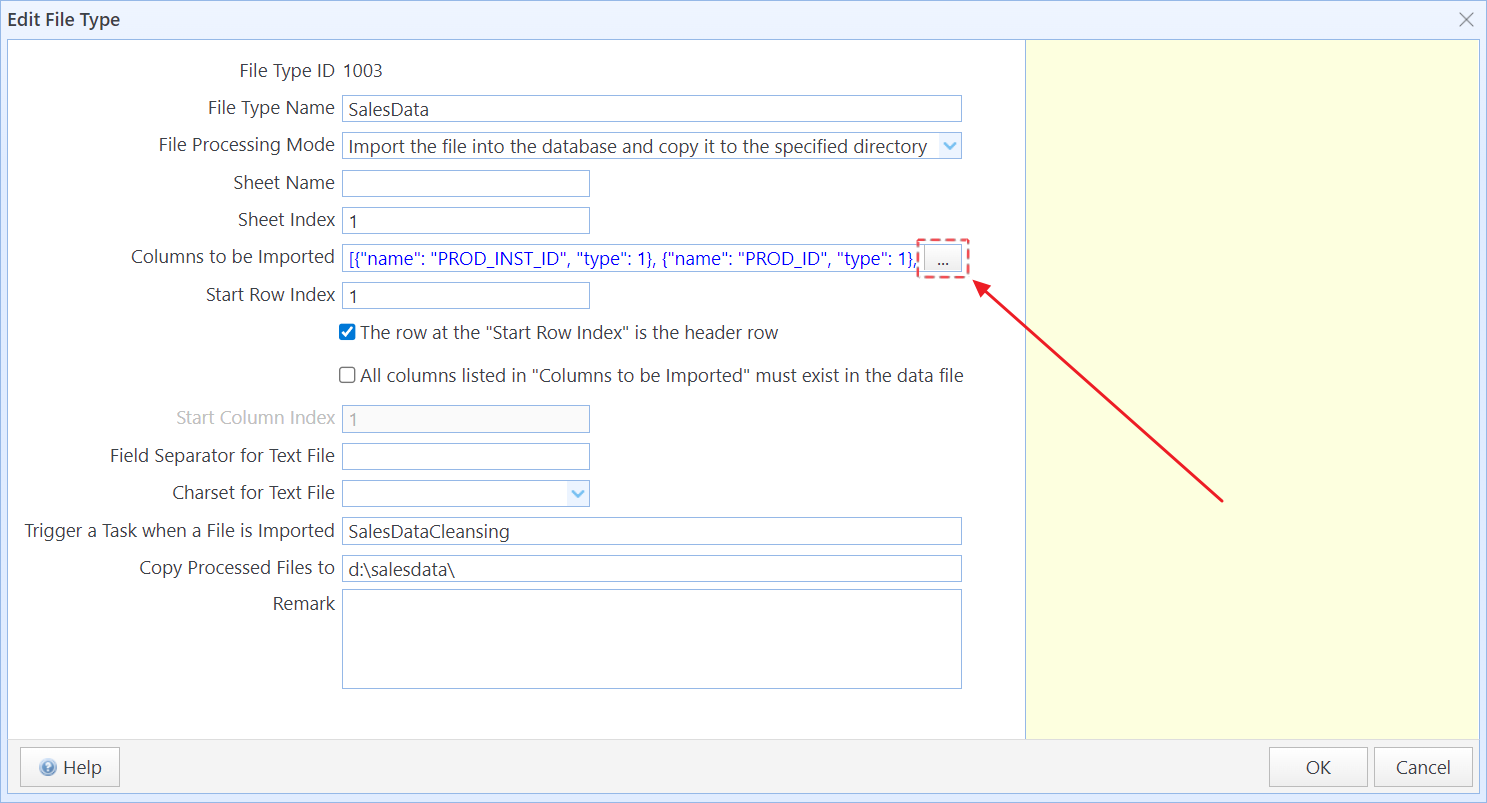
Columns to be Imported |
Click the button on the right side of the text box to configure the column names in the file. Column names are case-insensitive. For detailed configuration instructions, click here. If the “Columns to be Imported” list is defined and both “The row at the ‘Start Row Index’ is the header row” and “Require all columns to be present in the data file” options are checked, the system will verify that all column names listed in “Columns to be Imported” exist in the file when processing this type of file. If any column names are missing, the system will stop processing the file and display an error. You can specify the data type for each column as Text, DateTime, or Numeric. The system will apply different conversions based on the specified data type during file processing. If the “Columns to be Imported” list is not defined, the system will import all data starting from the column indicated by Start Column Index in the row indicated by Start Row Index, treating the first row of the sheet as the column names. |
Start Row Index |
Specifies the starting row for reading data, using a 1-based index. The system will begin reading data from this row in the file. If this field is left blank, the system will start reading from the first row. |
The row at the "Start Row Index" is the header row |
Specifies whether the row at the Start Row Index in the file is a header row. If this option is checked, the system will skip the row at the Start Row Index and begin reading data from the next row. If this option is checked and the Columns to be Imported field is left blank, the system will use the contents of the cells in the Start Row Index row as column headers. If the Columns to be Imported field is set and this option is checked, the Start Column Index field will be ignored. The system will use the index of the first column in Columns to be Imported as the Start Column Index and read data from this column onward. |
All columns listed in "Columns to be Imported" must exist in the data file |
If this option is checked, the system will verify that all columns listed in Columns to be Imported are present in the data file before importing. If any columns are missing, the system will stop the import process and display an error. |
Start Column Index |
Specifies the starting column for reading data, using a 1-based index. The system will begin reading data from this column. If this field is left blank, the system will start reading from the first column. If the Columns to be Imported field is set and the “The row at the ‘Start Row Index’ is the header row” option is checked, the system will ignore this field. Instead, it will use the index of the first column in Columns to be Imported as the starting column and read data from there onward. |
Field Separator for Text File |
Specifies the field separator for text files. This setting applies only to text files. The field separator must be a single character and cannot be a double quotation mark ("). If this field is left blank, the system will use a comma (,) as the field separator. |
Charset for Text File |
Specifies the character set for text files. This setting applies only to text files. If this field is left blank, the system will use UTF-8 encoding to process the text file. |
Trigger a Task when a File is Imported |
Specifies the name of the task to be executed after a file is successfully imported into the database. Task names are case-insensitive. When the system initiates this task, it will pass the file's file_id as a parameter to the task. If this field is left blank, no task will be executed after the file is imported. |
Copy Processed Files To |
Specifies a directory where the system will copy and store files of this type after processing (e.g., D:\MyData). If this field is left blank, files will not be copied. If the specified directory does not exist, the system will automatically create it. |
2. Setting Up Columns to be Imported(Column List)
You can configure the list of columns that will appear in the file in File Type Config. The system will use this column list to determine which columns are imported into the database.
You can also specify the data type for each column. When exporting data to a spreadsheet, the system will export the file data according to the data types you set.
Click the button next to the Columns to be Imported text box to open the Edit Columns dialog box.
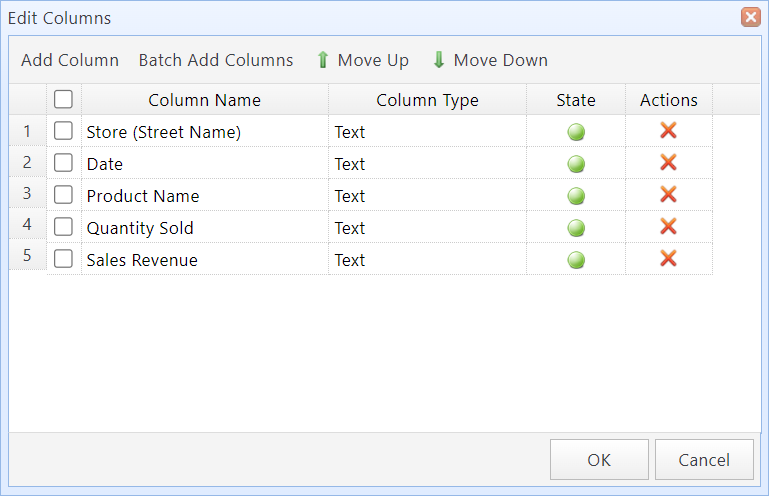
Edit Columns dialog box
2.1 Batch Add Columns to the Column List
If you need to add multiple columns, you can use the "Batch Add Columns" feature to add columns in bulk.
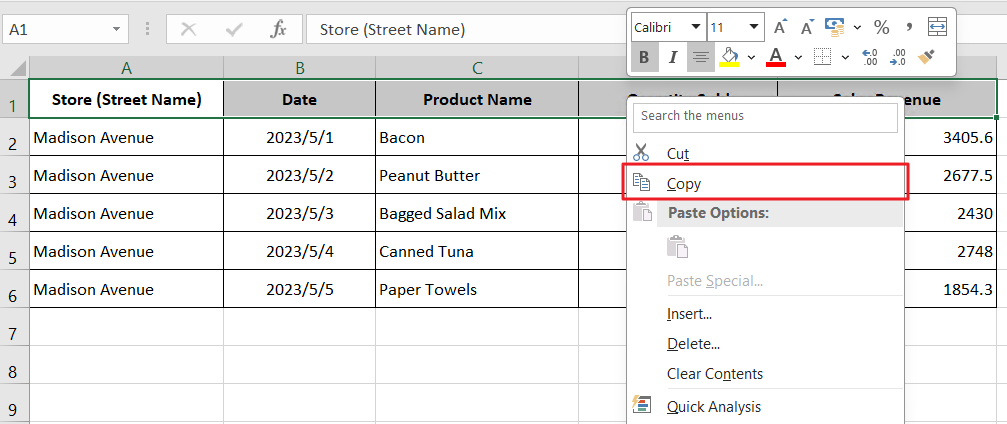
Step 1: Select the columns to add from your template file (e.g., a spreadsheet or text file), then click "Copy".
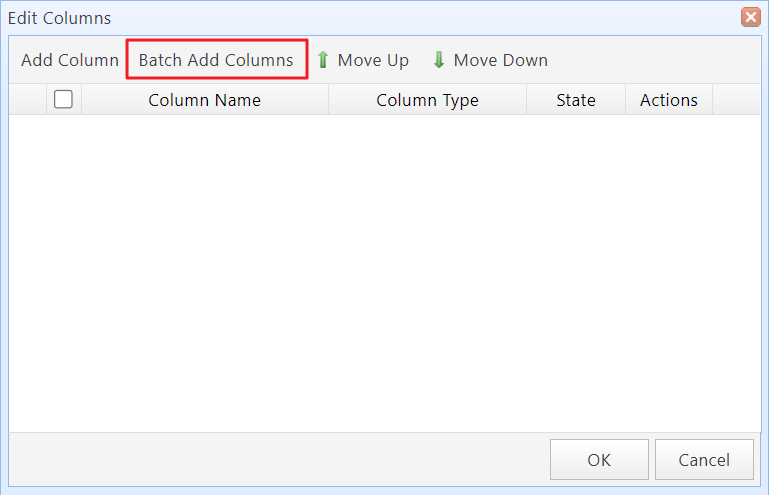
Step 2: In the "Edit Columns" dialog box, click the "Batch Add Columns" button.
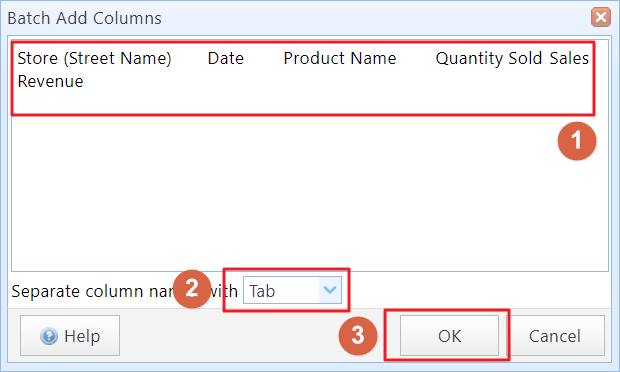
Step 3: In the text box, press Ctrl+V to paste the column information, and select a field delimiter (Tab). For columns copied from Excel, you can use the default delimiter. Then click "OK".
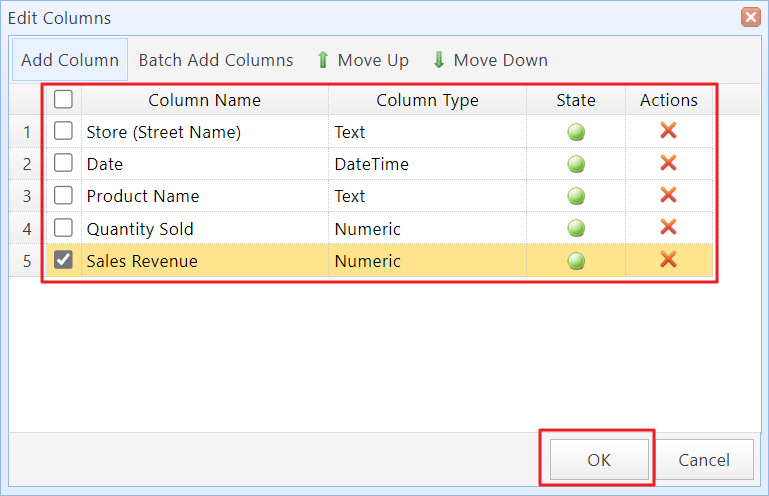
Step 4:The system will add these columns to the Column List. You can set the data type for each column. Then click "OK".
2.2 Set Data Type for Columns
You can set the data type for each column in the file to be imported into the database. When you export the file data from the File Manager, the system will export the data according to the data type you set. Setting the correct data type is important for processing this data later in spreadsheets.
The system supports the following data types:
Text |
Exports data as text. This is the default processing method. |
Numeric |
Exports data as numbers in the spreadsheet. If the data contains non-numeric content, the export will fail. |
DateTime |
Exports data as date and time in the spreadsheet. If the data contains non-date-time content, the export will fail. |